- Home
- Beginner Quilt Blocks
- Corner Beam Quilt Block
Make a Corner Beam Quilt Block Without a Specialty Ruler ~ You CAN do it!
7 everyday sizes to choose from!
This post contains affiliate links, for which I receive compensation.
Are you tired of buying expensive rulers for every quilt block?
The Corner Beam Ruler by Studio 180 is a terrific tool for making this basic, essential block. However, if you're making only one quilt or worse yet one block, you might want a less-costly alternative—and no extra ruler to store.
In this tutorial, you'll learn a cost-effective and straightforward method for creating the Corner Beam block using paper piecing.

There are 3 BIG reasons why this is my go-to method:
- You can eliminate the inconvenience of buying and storing a ruler with an unusual shape.
- As long as you sew on the line and can make a straight cut with your ruler, it's as accurate as it gets with no fuss.
- There's no new technique to learn or memorize when you make more Corner Beams for a quilt three years in the future—once you can paper piece, you can paper piece.
For those who love a good gadget, be sure to check out our review of the Corner Beam ruler by Deb Tucker from Studio 180 Designs.
If you're a gadget-gal, this is an expertly designed tool that gets the job done!
 Kind of reminds you of a Matryoshka doll—a Russian stacking doll—don't they?!!
In this tutorial, you'll find these helpful resources that make piecing a Corner Beam quick, easy, and accurate:
- Instructions for cutting so that straight of grain is on the outside edges for block stability - this includes a cutting chart to download, too
Cut. Sew. Press. It's time to turn fabric into MAGIC!
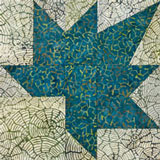
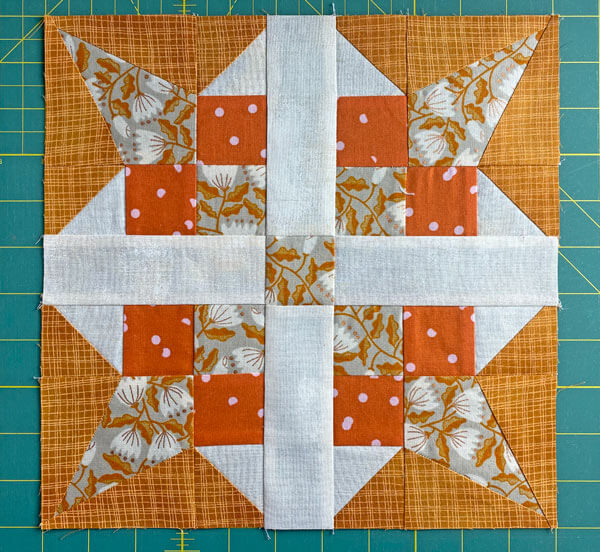
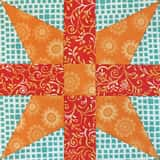
Quilt blocks that use the Corner Beam
While not the most popular block in the quilting world, it does lend an interesting angle to our block designs.
Obviously, you want those pointy-points in the right place and sharp.
As long as you can sew on the line, you'll get that with paper piecing. You can see this in the King David's Crown and Autumn Leaf blocks below—a nice point at the outside edge.


In more complex block designs, like Lasting Blossom or Bouquet, achieving accurate piecing becomes even more critical—there's simply more places where you want a good match between angles and points like the Bouquet or Lasting Blossom blocks.
As a quilter, you know that the accuracy of your piecing can make or break a project. It also determines how much fun the block is to assemble.
Seriously. If the block is grueling to make, what chance does the quilt have of being finished?
That's right!
When your pieces fit together perfectly, there's nothing quite like the feeling of satisfaction that comes with creating something beautiful.
Paper piecing gets the job done...painlessly. :D
General Instructions
Several abbreviations are used on this page. They are:
- SA - seam allowance
- RST - right sides together
- WST - wrong sides together
The Corner Beam is another of those units that GREATLY benefits when you starch your fabrics before cutting.
I prefer a 50/50 mix of water and StaFlo Liquid Starch Concentrate. The starch helps tame the bias edges and stabilize that skinny point regardless of the piecing method you choose.
Learn more about starching your quilt fabric here.
Pressing instructions are highlighted in yellow throughout this tutorial to make them easy to spot.
When instructed to press, first press the patches in the closed position just as they came off your sewing machine. This sets the seam, melding the fibers of the threads into the fibers of the fabric.
Then press the patch away from the Beam.
Download and print paper piecing patterns and templates
To download the pattern, use the most current version of Adobe.
For accurate results, on Adobe's Print Menu page, under 'Page Size and Handling' set 'Custom Scale' to 100%. Then print.
Click here to see what it looks like on the Print Menu page.
Choose a finished block size from the table.
Find the # of copies and print that many pattern pages (middle column). Then print the 1 of the corresponding template page. You need both a template and a paper piecing pattern to piece each Corner Beam.
I've kept them as separate printouts as there's no need to print additional templates to make the same sized Corner Beam quilt block.
Print Corner Beam | ||
|---|---|---|
| Pattern | Templates Print 1 copy | |
| Copies to (4 blocks) | Finished Size | |
| 1 | 1½" | 1½", 2", 2½", and 3" |
| 1 | 2" | |
| 1 | 2½" | |
| 1 | 3" | |
| 2 | 4" | 4" and 5" |
| 4 | 5" | |
| 4 | 6" | 6" |

After printing, use the 1" square graphic on the printed page(s) to double-check that your patterns printed at the correct size.

Not sure which paper to use?
Take a look at my review of several of the most popular brands available to us quilters on the market.
You want a super-easy paper to tear away—less stress on the stitches.
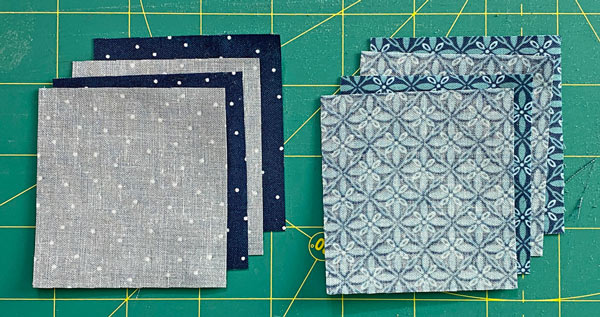
New quilt fabrics to tickle your fancy...
Click the images below to see the full collection. We share any commercial and/or free patterns that showcase them, too. (For inspiration, of course!)


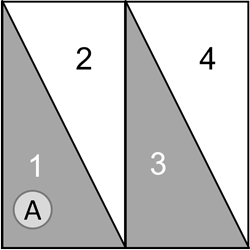
Cutting patches for a Corner Beam quilt block
 and pattern (right)") When you turn the sewn unit from the paper to the fabric side, the Corners switch spots. This doesn't affect your sewing, unless those two patches are different fabrics.
When you turn the sewn unit from the paper to the fabric side, the Corners switch spots. This doesn't affect your sewing, unless those two patches are different fabrics.Sample Size: 4" finished / 4½" unfinished
Grid: 2x2
Design Type: Basic quilt block
I have only ever seen one block that requires less than 4 Corner Beam units and that is the Autumn Leaf quilt block—there's a tutorial on this site for it. :)
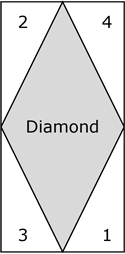
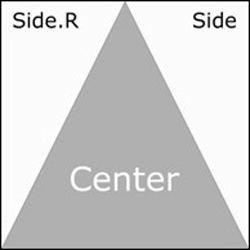
Notice the corners change position as you flip the block from the front to the back side. The Corners are mirror images of each other—that's what the '.R' stands for.
Based on how we cut these mirror image patches, it makes sense to cut pairs of blocks/units at one time.
In this tutorial, we'll cut and make four Corner Beam units at a time, just like you'd do for most of the blocks in which this unit appears.
We want that thin pointy-point to show after all the effort and care we put into our piecing and cutting.
To insure all that pointy-goodness, choose fabrics with good contrast.
To print a copy of the block design with a cutting chart, click here.
 | Cutting Chart for a~ Paper Piecing ~ | ||||||||
|---|---|---|---|---|---|---|---|---|---|
| Patch | Fabric | Qty | Finished Block Size | ||||||
| 1½" | 2" | 2½" | 3" | 4" | 5" | 6" | |||
| Beam | A | 4 | 2¼''x2¼'' | 2¾''x2¾'' | 3¼''x3¼'' | 3¾''x3¾'' | 4¾''x4¾'' | 5¾"x5¾" | 6¾"x6¾" |
| Corner, Corner.R | B | 4 | 2⅝''x2¾'' | 2⅞''x3¼'' | 3⅛''x3¾'' | 3⅜''x4¼'' | 3⅞''x5¼'' | 4⅜"x6¼" | 4⅞" 7¼" |
| Unfinished Block Size | 2" | 2½" | 3" | 3½" | 4½" | 5½" | 6½" | ||
| Grid Size | ¾" | 1" | 1¼" | 1½" | 2" | 2½" | 3" | ||
With just three patches to cut, there's not much to a Corner Beam quilt block. All we really need to be is mindful of cutting with straight of grain on the outside edges. We'll do that next.
Preparing the template and subcutting
To prepare your template (and make them easier to use) trim away the excess paper exactly on the two pairs of lines that form the corners on your Beam patch (upper left and lower right below).
A rough cut on the two longest edges is good enough.
 Trim the upper left and lower right corners on the line. The sides are good to go with a rough cut.
To cut your patches for the Beams, layer your four Beam squares, edges even on your rotary mat, lining up the corners of your templates and cut patches.
These patches can be RST or WST or all the same side up or down. It doesn't matter for the Beam patch.
Those template edges we trimmed should be even with the upper left and lower right corners for quick and easy (and accurate) placement.
 These patches are all right sides up
Once everything's lined up just so, align the edge of your ruler with one of the solid cutting lines and cut through the four layers.
Carefully lift your ruler to align it with the second cutting line, lining up all the cut edges as needed before making this cut.

Now for the Corner and Corner.R patches.
Since these patches are not symmetrical, we MUST LAYER OUR Corner rectangles in PAIRS either RST or WST.
NEVER EVER should these patches be ALL right sides up or ALL wrong sides up.
Again, layer in PAIRS or RST or WST to create the mirror image patches.
With a marker (I like a mechanical pencil for its consistent line) make a mark 5/8" in from the left on the upper edge and 5/8" in from the right on the bottom edge. (red arrows)
 Under the ruler are two pairs of RST squares. They must be in pairs RST to get the mirror image patches we need.
Align your ruler with these marks at the edges and cut the rectangle in half on the diagonal through all four layers.

I've arranged all four cut patches to show the results of our efforts to position the patches correctly before cutting.
Perfect!
 Our patches are laid out in as they will be stitched. See how the show edge of the Corners will be stitched to the point of the Beam patch?
Piecing a Corner Beam quilt block
Time to sew!
With a teeny dab of Elmer's Washable Glue stick, position and stick the Beam patch to the unprinted side of the paper pattern. Use the dashed guidelines for quick and easy positioning.
 The small corner of the Beam (red arrow) should be even with the outside dashed lines. No need for any overhang here, the Corner patches provide that.
With the small ends of each patch on the same side, position a Corner's long bias edge with the perfectly positioned Beam patch.
Helpful Tip
If you're new to making a Corner Beam quilt block, while holding on to the Corner patch, flip it open to make sure it's positioned correctly. It can feel bass-ackwards the first few times.
Since our Corners are lighter than the Beam, I nudge the Corner a few threads past the edge of the Beam. (red arrow) No need to worry about the darker fabric shadowing through the light one.
When the patch is in position, there is overhang on both sides (blue arrows).

From the paper side start stitching outside the dashed line surrounding the unit and straight onto the solid line. End your stitching past the outside dashed line.
There's no need for back stitching. Just as in traditional piecing, there'll be a line of stitches that eventually crosses the end of the seam to secure it.
Press.
With RST, position the second Corner.R with the other long edge of the Beam, lining up the cut edges.
 You'll have equal sided triangles appear at both ends of the patch. A big one on the big edge side, and a small one at the sharp point of the Beam.
Here's that big equal-sided triangle from the pattern side.
 My apologies for this photo being a bit fuzzy. My bad.
Stitch as before.
You can see in the photo below how my stitches extend well past the outside dashed lines. Yours should look similar.

Press.
All that's left is to trim to perfection.
At your cutting mat, position the 1/4" on your ruler with the solid line at the edge of the unit. Double check. Trim away the excess. (1st trim below)
Continue on in this manner for all four sides.

Below left is the hot mess after stitching.
Below right is the perfection we get with paper piecing.
 vs trimmed (right) Corner Beams") Untrimmed (left) vs trimmed (right) Corner Beams
Untrimmed (left) vs trimmed (right) Corner BeamsAll four are ready to be used in a quilt block.
The pointy-point is exactly 1/4" in from the edges. Accurate blocks—the exact size with the angles and points right where they should be—make block assembly a breeze.
All this quilty-goodness...and you didn't have to shoot the lock off the old wallet for a specialty ruler that just won't get a whole lotta use.

All that's left is to remove the paper pattern. Our edges are all on the straight of grain, so the paper has served its purpose.
And frankly, it's a pain in the you-know-where to remove once it's sewn into a block with a 1/4" seam.
Some musings on quilt design
One of the tried and true guidelines of quilt design is to repeat elements in your design that occur in the blocks. The repeated shapes help to pull the design together and give it a cohesiveness.
While you might not see the Beam shape very often in blocks, the two Corners are really triangles that are twice as tall as they are wide.
THAT shape we HAVE seen before...in Half Rectangle Triangles and Triangle in a Square, and Diamond in a Rectangle (as in a Storm at Sea block). Consider adding them when designed with a Corner Beam quilt block.
The Basic Building Blocks of Quilting

Click here for instructions for more beginner-friendly quilt blocks and units in our basic building blocks of quilting series.
You'll find multiple methods for all of these basic units:
Rail Fence, Half Square Triangles, Quarter Square Triangles, 4-Patch, 9-Patch, Square in a Square, Triangle in a Square, Corner Beams, Half Rectangle Triangles, and Flying Geese.
Choose the technique that works best for your skill set and your project.
For even MORE blocks to make… 🧩🎨
...visit our Free Quilt Block Pattern Library, with over 260+ blocks to choose from in multiple sizes.
Free downloads are included in all sizes for any blocks require paper piecing patterns or templates.
What about a different quilt block?
For a list of all the 260+ quilt block patterns on this site, start here.
If you know the name of the block, shorten your search by using these links:
Click here if you're looking for blocks with at least some paper piecing.
Click here if you're looking for the basic building blocks of quilting, i.e., Flying Geese, half square triangles, quarter square triangles, etc., along with several techniques to make each.
And finally, use these links to find blocks in these finished sizes:
- Home
- Beginner Quilt Blocks
- Corner Beam Quilt Block


Yummy fabrics
to drool over
Click any image below to see the full collection and find pricing and ordering information.


By Julie Baird
Copyright © 2008-2026 Generation Quilt Patterns, LLC
All Rights Reserved
Generations-quilt-patterns.com does not sell any personal information. (See Privacy Policy)