Why and How to Starch Quilt Fabric
It's the great 'Equalizer'!
This post contains affiliate links, for which I receive compensation.
Starch quilt fabric to make cutting, piecing, applique and quilting easier.
Learn how to mix and apply your own homemade spray starch. With a squirt and a press, you can tame even the most persnickety fabric.
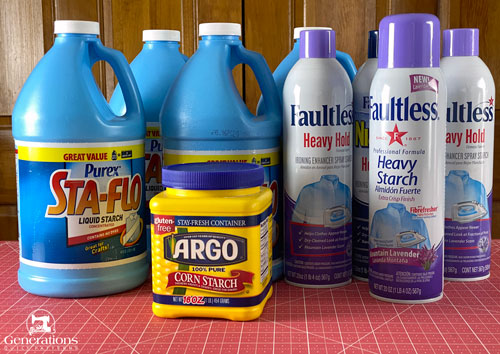
 Starch Stash—Yeah! It's a thing.
On this page you also learn some of the reasons to take this extra step and what the difference is between 'starch' and 'sizing' so that you can make the best choice for your project and pocketbook.
Next, it's onto making your own starch mixtures—from a bottle or a box—how to apply it and then remove any excess from your iron.
Finally, we wrap up with thoughts on Mary Ellen's Best Press vs starch and even share a homemade recipe to make your own.
Let's get started.
Why Bother? It's Extra Work...
You're right. It's an extra step.
But let's see if any of these reasons are a good enough reason for YOU to choose to spend the extra time.
- Sharper points, crisper creases.
- Use an edge stitching foot for piecing? The raw edges ride beautifully next to the flange of the foot.
- Starching tames the bias edge beast.
- Starch makes fabrics equal. Homespun will behave just like a batik, once it is starched.
- Starch quilt fabric for more control as you stitch.
- Starched quilt fabric doesn't shift as you rotary cut.
- Appliques turn easier with a crisper fold.
- Finger pressing seams is a dream.
- It makes it easy to make perfect appliqued circles.
Quilting is full of opinions. Each quilt is different; each quilter, too. To starch or not is for YOU to decide.
Starch or Sizing?
Starch quilt fabric to give it a ‘very crisp’ hand.
It is made from organic products, either corn, rice or wheat. As such, it can attract critters like silverfish.
What to do?
Wash the finished project to remove it. Simple!
Sizing adds more of a ‘crispness’ or ‘hand’.
It can be made from either an organic- or plastic-based solution.
Frequently it is a mix of starch and a plastic-based sizing agent. This is to get the starch to stick better to man-made fibers like polyester. With the addition of this “glue”, the sizing is then able to stiffen the synthetic fabric.
So 'starch or sizing?'—Whichever you prefer.
Mix It Up...Spray It On
Starch quilt fabric just before using it.
Mix your own starch from concentrate to get just the desired stiffness in your fabric. It is also more economical than store-bought spray starch.
Even more economical, but more work, is mixing your own from cornstarch and water, then cooking it on the stove.
 Use a liquid concentrate to mix your preferred spray starch strength.
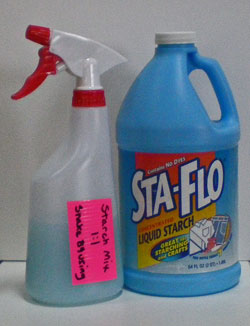
For a crisp finish, dilute with one part Sta Flo liquid starch to one part water. (You may have another brand available to you locally.) Feel free to change the ratio to get the stiffness YOU want.
You can also make your own homemade spray starch with Argo and water. To do so,
- Mix 1/4 c. Argo corn starch into 1/2 c. cold water
- Stir in 4 c. of boiling water
- Mix and cool
Put either mixture into a spray bottle labeled with your recipe and ”Shake before using!” so that you don't forget.
Both mixtures can ‘gunk up’ the nozzle. Use hot water to clean it.
To extend the life of either starch mixture, refrigerate what you're not using.
For each process below, remember that all the fabric should be wet with the starch mixture, BUT NOT DRIPPING. No need to make more work for yourself.
Let the starched fabric dry a bit so that it's damp to damp-dry. When starch soaks into the fibers, there's less flaking. It takes less time to iron dry.
Be neat. If the fabric dries completely with wrinkles in it, it takes longer to iron. Use steam and a squirt bottle to 'loosen' it.
For Pieces Up to One Yard...
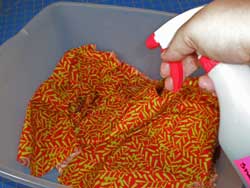
Accordion fold the fabric into a dish pan and squirt until saturated. The
dishpan helps to keep the work area neat.
 Use a plastic dishpan to control over-spray when you starch quilt fabric.
Continue spraying and turning the fabric until the piece is completely saturated.
Let the fabric damp dry by opening each piece and spreading it out on your ironing board.
Preparing lots of fabric?
Put a pole over two chair backs for instant hanging space. Just make sure the post won't rust. (My pole is the handle of my broom.)
Once the fabric is damp dry, press with a cotton setting and steam to crisp up the fabric.
For Pieces Over One Yard...
For borders, backings or other large pieces of fabric I accordion fold the fabric (for better starch penetration), put it in a large Sterilite box and pour equal amounts of StaFlo and water over it.
Let it soak until it's fully saturated.
Then I dump the whole thing into my washing machine. There is a drain and spin cycle (no water is used) that removes the excess from the fabric.
Next hang it over my 'pole' with plastic underneath to protect the floor from any unexpected drips.
Let the fabric damp dry. Iron on a cotton setting with steam.
Spritz with water to loosen things up if it dries completely.
Extra work?...Definitely.
But totally worth the time if you've got intricate piecing or quilting to do.
Tips for Pressing with Starch
C A U T I O N
Starch can burn.
Holding the iron in one place too long leaves scorch marks you can't remove.
Keep that iron moving!
- Press (don't iron) in an up-and-down motion to keep your pieces from being pulled out of shape.
- Spritz with a diluted recipe during the piecing process. It makes the fabric extra crisp.
- Cover your ironing board (even your Cut 'n Press board) with muslin or scrap fabric. I use flannel—leftover from making my design wall—because it 'grabs' the patch I'm pressing. We tend to iron in the same spot. A brown spot will develop from the heat. You can wash or replace your scrap fabric with ease but not so your ironing board cover.
- Starch just before using the fabric. Don't store starched fabrics because starch is actually a food product. It can attract critters.
- Iron from the back to avoid flecks on the front.
Iron Build Up Removed
When you starch quilt fabric, you get buildup on the iron.
To remove it, dampen a soft cloth with vinegar and iron over the cloth with a hot iron. It'll clear out your nostrils, but you'll have a clean sole plate.
For a fume-free clean, use a wet Mr. Clean Magic Eraser on your cold iron. It works beautifully to remove the starch buildup.
Best Press vs. Home-Mixed Starch
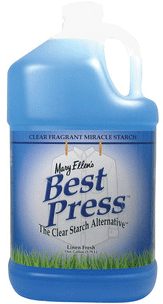
This product sprung onto the scene a couple of years ago. Lots of my friends raved about it and bought it by the gallon.
So I bought a small bottle of it to try.
Loved the aroma,
Didn't like the price.
And personally, if I'm going to take the time to starch, I really do like my fabrics stiffer than Best Press makes them.
Did you know can make a homemade version of Best Press?
In a 32 ounce bottle, combine:
- A few drops of essential oil (real essential oils are terribly potent and you'll need just a bit--adjust for your own sense of smell)
- 3 ounces of vodka. Cheap is good. Actually cheap is BEST.
- 24 ounces of distilled water
Label and store in a large spray bottle. Shake well before using.
A reader wrote in to share her recipe for a Best Press alternative. It is:
- 1 1/2 Tablespoons Corn Starch
- 3 1/2 cup cool water
- 2 drops Lavender essential oil
She recommends putting the water in the spray bottle first, then adding the corn starch and essential oil.
Shake.
Make sure to shake every time you use. :)
What you prefer?
To starch quilt fabric?
Size it?
Best Press it? Or...?
Please share your thoughts in the Facebook comments section below.
Thank you!
Go to 100% Cotton Quilting Fabric and learn why it's the best choice for quilters


