- Home
- Quilting Tools/Supplies
- Paper Piecing Paper
Does it really matter which paper piecing paper you use?
This post contains affiliate links, for which I receive compensation.
Confusing, isn't it?
You have several kinds of paper piecing paper on the market to choose from. Newsprint. Vellum. Freezer papers. Water soluble stabilizers.
Then there's those non-woven something-or-others.
Are they really all that different?
What about just using the paper that's already in your trusty home printer?
On this page we discuss:
- Provide you the chance to see if you can tell the difference between blocks stitched on the 6 different papers/products—because if you can't tell the difference in the finished product, is it really worth the extra $$$ to you
After everything is said and done, the best one is the one that best fits YOUR needs.
My aim is to help you be an educated consumer so you can make the most out of your quilting budget.
Let's get started.
What to look for in a good paper piecing paper
These are the basic qualities to look for in a good foundation choice.
- Easy to tear away. You don't mess up your work when you remove the pattern.
- Readily available. Can you find it when you need it...even at midnight or under a deadline?
- Cost-effective. Originally, I had written 'cheap', but cheap is a relative term. What is cost-effective for 5 copies might be a budget-breaker for 100.
- Printer-friendly. Does it work in the printer you already own?
Pretty simple list, right?
Let's review some of our options based on these characteristics.
Your Options
All of these products are easy to stitch through and have most or all of the desired characteristics.
They are broken down into six categories:
You can click the categories above to skip to only those you're interested in or simply read on for all the dirt.
Newsprint
What's not to love?
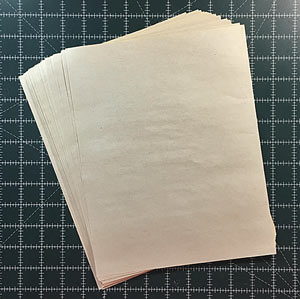
These newsprint options are light-weight and opaque. Easy to remove, readily available, relatively cheap and printable—usually.
All the qualities we're looking for.
Carol Doak's Foundation Paper
This is my personal go-to favorite whenever foundation piecing is on the agenda.
Most of the quilt shops in the area stock it. It comes in two sizes:
Since I design in Electric Quilt 8 I can choose either size to print on, depending on the project on my design board.
It runs through both my laser and inkjet printers equally well without any particular jamming problems.
I use the paper tray and simply hit 'Print' for the 8-1/2" x 11" size.
My printer doesn't have a tray for the legal size, so I feed that through one sheet at a time for the best results.
However, my experience is it does want to curl a bit when it gets humid outside—though the packaging reads 'no curling'.
My solution is to store it flat with something on top to weigh it down during the summer months—a like-sized ream of printer paper does the job—especially if plans don't include using it in the near future.
This is one of the more cost effective (cheaper) products on the market.
A lot of the time, foundation piecing is a substitute for my quilting-brain.
If you've used any of the free quilt block tutorials on this site, you've probably noticed a number of standard foundation pieced units in the patterns.
No matter how tired or distracted I might be, I can always stitch on a line.
Always.
So I use stacks of this product in my piecing which means it needs to be cheap.
I tend to buy 4-5 at a time from Amazon to keep on hand so I don't run out. (This is my stash right now.)
You can frequently find it with a Prime seller so shipping is included in the price.
I confidently recommend this product to anyone interested in paperpiecing.
Paper for Foundation Piecing
If I run out of Carol Doak's foundation, I'll happily use this newsprint alternative instead.
It, too, is available in 100 sheet packages.
It's usually a bit more expensive than Carol Doak's and not usually available at my local quilt stores.
That's why it's my second 'go-to'.
Newsprint by the ream
Many quilters report having good luck using this economical alternative to the specialty foundations already discussed here—as we all know, if you put 'quilting' on the label the price goes up!
So I tried it back in 2015.
Most of the reviews on Amazon had indicated it would feed through both laser and inkjet printers with good results.
I wish I could whole-heartedly recommend this product—especially because it's so darned cheap in comparison with the other alternatives.
Unfortunately, I didn't have any luck putting it through either of my printers. Not.Ever.
It would jam and end up folded like an accordion. No matter if I put it in the paper tray for automatic feeding or fed it through sheet by sheet.
If you're budget conscious, though, I'd give it a try. If it works for you, you'll save a lot of dough.
If it doesn't, then you could re-purpose it as either:
- Cheap coloring paper for your kids, grandkids, students, or
- Cheap paper for string piecing projects
For the purposes of the test below, I had my girlfriend try to get it through her printer.
Wouldn't you know it!
It worked.
The first time.
She's got an HP 5055 Envy. I'd hate to have to go buy another printer to use this.
Vellum
This is a translucent product is made from cellulose fibers.
Did you know that it's the absence of air between the fibers that makes it semi-transparent?
I didn't.
If money were no object, this would be my top choice. Hands down.
You can see through it, making it quite easy to position patches.
No problems putting it through either of my printers.
Tears like a dream...the best/easiest tearing of all the papers I've used.
Simple Foundations Translucent Foundation Papers
I love this stuff!
It feels like a crisp tracing paper...and since tracing paper and vellum are made the same way, it's no surprise.
It can be used in your photocopier, inkjet or laser printer.
The manufacturer recommends a dry iron and press cloth to avoid any ink or toner transfer to your fabrics or ironing board.
At the time of this writing, it runs about 37¢ a sheet. If I need 100 sheets for a project—and that's not out of the ordinary—it's just too stinkin' expensive for my blood.
While it's a bit easier to use (because of the semi-transparency and tearaway-ability), the end results are not noticeably better...you'll see further below on this page.
So for my own personal use I can't justify the extra cost. If you only need a few copies and HATE to tear-away the paper, then this might be the product for you.
With that said, this IS a premium product.
Non-Woven Stabilizer-like
This feels a bit more like a non-woven interfacing if you're familiar with that product.
Perfect Piecing by June Tailor
Another semi-transparent option for quick patch positioning. It feels like a crisp, though thin, non-woven interfacing.
Tears easily—more easily than I expected.
Works in both laser and inkjet printers and copiers.
Generally cheaper than the Simple Foundations above.
The manufacturer recommends a 20 stitches per inch for paper piecing when you intend to tear away the foundation.
You could choose to leave this foundation in your quilt for stabilization (no removal). June Tailor, Inc. then recommends using 10 stitches per inch.
At this time (10-3-18) it's on Amazon with a Prime supplier for about 27¢ per sheet.
Water Soluble Stabilizer
This type of stabilizer literally 'melts away' in water...with a bit of swishing.
Paper Solvy
This stabilizer feels like paper and acts like paper.
So much so, that when you print a page of units, like the Birds in the Air used in the test, if you have any leftovers, mark them so you know they are printed on this stuff.
Newsprint and this stuff feel virtually identical.
The only difference?
It completely dissolves in water.
The manufacturer recommends use with a copier or inkjet or bubble-jet printer. The instructions DO NOT mention laser jet, so I wouldn't try it in one—wouldn't want to mess up my printer.
The instructions also mention using a lighter printer setting to avoid having dark lines show through the fabric.
I agree with this recommendation.
I stitched another sample with lighter fabrics to check and there is a bit of darkness to my white piecing thread that is from the printed line.
Both images are a bit bigger than life-size.
Click here to see it from the front side where it's not noticeable.
Click here to see if from the back side where it is.
Does it actually dissolve in water?
Yes, almost instantly.
The directions do recommend removing the bigger portions (the easy stuff) before immersing, but it literally starts dissolving the nano-second water hits it.
What's not to love?
The price.
At the time of this writing, a 12-sheet package is available on Amazon with Prime shipping for $7.55 which equates to 63¢ a sheet.
Too rich for my pocketbook EVEN if I don't have to tear away the paper.
The other consideration is prewashing or checking for bleeding fabric. Since you get the stabilizer wet to remove all the bits, you'll want to know that your fabric won't bleed when wet.
The most surprising thing?
It was almost as easy as the Simple Foundations vellum paper to tear away and left very few 'bits' in the seams or points of the angles when I tore it away.
There is a bit of discoloration on the 'paper' as you press. This did not cause any problems.
Precut Freezer Paper
One of the most useful tools to have in your quilting studio.
You can use it for templates—to either applique with or machine quilt around—for protecting your ironing board, for stencils to transform your fabrics.
And you can use it for paper piecing.
My first introductions to it were in a couple of patterns by Eileen Sullivan of the The Quilt Designers Workshop fame. In particular, "English Roses" and "Sunflower Quilt".
It's the hardest to tear away of all the options, because:
- It's a heavier weight than all the others
- It has a plastic coating on one side, a blessing and a curse
The best feature of this product is when you press a patch open after stitching, the plastic semi-melts and holds the patch firmly in position.
No patches folded over on themselves during stitching to rip and re-sew. For projects with lots of odd-shaped patches this is a God-send.
You'll be pressing from the plastic side to press your patches open. Don't put your hot iron on the plastic or you'll have a bit of a mess to deal with.
Be mindful that you need to peel the pattern off the ironing board after pressing the first patch into place. That's just how freezer paper works, it won't lose the plastic.
The downside of the plastic coating is you can't print this in a laser printer. NOT EVER. The heat from the laser melts the plastic and messes up your printer. FOR GOOD. Inkjets only!
You'll also want to check to see which side goes up in your printer so that you don't accidentally print on the plastic side...the ink will smear right off of the plastic. (I put a Post-It® note on the top of my printer to remind me.)
While you could buy it on a roll in your local grocery store, you'd then be stuck cutting it to size and then dealing with the curling.
I don't know about you, but I get antsy to start my new projects. The extra messing around would be painful.
The good news is that it comes in pre-cut packages. Because the prep work is done for you, it is more expensive than the newsprint alternatives shared above.
C&T Publishing Quilter's Freezer Paper Sheets
Again, because of the plastic coating on one side, this product can be used ONLY in an inkjet printer.
The heat from your laser printer or copier can melt the plastic, gumming up the inner workings of the machine.
On 10/4/18 this was available from a Prime shipper at about 33¢/sheet.
C. Jenkins Freezer Paper Sheets
This is the one I have on hand and used for the samples below.
It's nice not having to mess with the curly paper when you cut your own sheets.
It is about 23¢/page.
Copy or Printer Papers
There is nothing wrong with using the paper from your printer for paperpiecing. Nothing.
It's readily available, cheap and reliable and easy to print on.
It's short-coming is that it's generally not as easy to tear away from your stitches. At least not without running the risk of damaging them.
If you're piecing simple units like the pairs of Flying Geese in an Arrowhead quilt block or Square in a Square (click each to find links to print either of those patches), removing the paper should be pretty straight forward.
Tweezers may come in handy getting those little leftover bits out of the inside points of sharper angles.
Other than that there should be no real problems.
However, if your planned project has lots of tiny (acute) angles then one of the other newsprint or vellum options would make better use of your valuable quilting time.
Don't use a premium, heavy weight version...get the lightest weight (it's measured in 'lbs') to make it easier to tear away.
The proof is in the pudding...
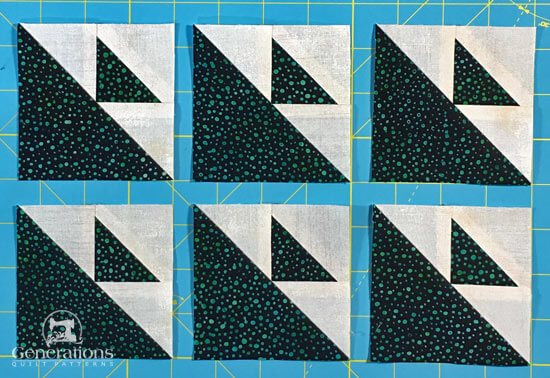
Each of the paperpieced Birds in the Air units below were stitched by me in the same sitting with the same fabrics, a 50 wt Aurifil thread (needle and bobbin) with an 80/12 needle and a stitch length of 1.4.
There is no backstitching at the edges on any of the blocks.
From the front, can you tell which product was used?
The light background fabric is one of my favorites—Grunge by Moda—and it varies a bit across the patches.
 Top row, L to R: Carol Doak's Foundation, Simple Foundations, Perfect Piecing
Bottom row, L to R: Newsprint, Solvy, Freezer Paper
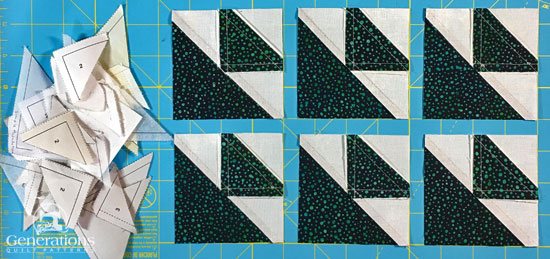
What about from the back?
 Top row, L=>R): Carol Doak's Foundation, Simple Foundations and Perfect Piecing.
Bottom row, (L=>R): Newsprint, Solvy, Freezer Paper
Top row, L=>R): Carol Doak's Foundation, Simple Foundations and Perfect Piecing.
Bottom row, (L=>R): Newsprint, Solvy, Freezer PaperSee anything that looks not-good-enough?
Here's your chance to look even closer.
To speed up the loading time of this page, below are separate links to each single block, close to life-size on a desktop or laptop (which is 3-1/2").
I did not use a tweezer to go in and pick out any remaining bits yet.
Those really are pictures of all six samples. Can you tell the difference even up close?
Which paper piecing paper will you choose?
In person, there is no difference on the front side of any of the sample blocks. Once the paper was removed there is no way to tell them apart.
With that information in mind, it comes down to the combination of characteristics we discussed at the beginning.
If money were no object, I'd choose Simple Foundations—the vellum product. But since I do quilt on a budget and use a ton of it, my go-to choice is Carol Doak's Foundation Paper.
When you've chosen the perfect paper piecing paper for YOUR needs, click here to find all the free block patterns from this site that use paperpiecing.
Download with my compliments.


