- Home
- Free Quilt Block Patterns
- King David's Crown Quilt Block
King David's Crown Quilt Block Tutorial: 5", 7½", 10", 12½" and 15" finished
From our Free Quilt Block Patterns Library
This post contains affiliate links, for which I receive compensation.
Let's dive right into a majestic pattern that'll have you feeling like royalty in no time. We're about to take on the King David's Crown quilt block, a design that might look tricky but is surprisingly simple.
Don't let the name fool you, this design doesn't require a crown on your head or even an ounce of royal blood. With our step-by-step guide, you'll be the ruler of your sewing machine in no time.
Those pointy pinnacles of patchwork perfection are as easy as sewing on a line. I promise.
Let's tackle those triangles of textile triumph together!
Your personal throne room—or rather—quilting studio awaits.

As always, beginner-friendly, illustrated instructions are the backbone of the tutorial. There's more free goodies available for you to download to help you. They are:
- A cutting chart in five sizes with downloads of the chart and block design
- Paper piecing patterns (and cutting template) to download and print
- Pin or bookmark this page for later if there's no time to quilt today.
Cut. Sew. Press. Time to turn fabric into MAGIC!
General Instructions
Several abbreviations are used on this page. They are:
- SA - seam allowance
- RST - right sides together
- CB - Corner Beam units
1/4" SA are used through this tutorial.
Highlighted in yellow, pressing instructions are easy to spot.
To press, first press the patches in the closed position as they came off your sewing machine. This sets the seam, melding the fibers of the threads into the fibers of the fabric.
Then press the SA to the dark unless otherwise noted.
Download and print paper piecing pattern
To download the pattern, use the most current version of Adobe.
For accurate results, on Adobe's Print Menu page, under 'Page Size and Handling' set 'Custom Scale' to 100%. Then print.
Click here to see what it looks like on the Print Menu page.
Choose your finished block size from the chart below. Print the corresponding number of pages for a total of 4 Corner Beam units and 1 copy of the template page.
Print Corner Beam | |||
|---|---|---|---|
| Pattern | Templates Print 1 copy | ||
| King David's Crown Finished Size | # of Copies to | Corner Beam Finished Block Size | |
| 5" | 1 | 2" | 2" and 3" |
| 7½" | 1 | 3" | |
| 10" | 2 | 4" | 4" and 5" |
| 12½" | 4 | 5" | |
| 15" | 4 | 6" | 6" |
After printing, use the 1" square graphic on the printed page(s) to double-check that your patterns printed at the correct size.
Cut the pattern pages into the four Corner Beams, trimming roughly 1/8" to 1/4" past the outside dashed line. No need for perfection here.
The template is a bit different. Cut on the lines for the upper left and lower right corners. The angled sides can be a rough cut.

Not sure which paper to use?
Take a look at my review of several of the most popular brands available to us quilters on the market.
You want a super-easy paper to tear away—less stress on the stitches.
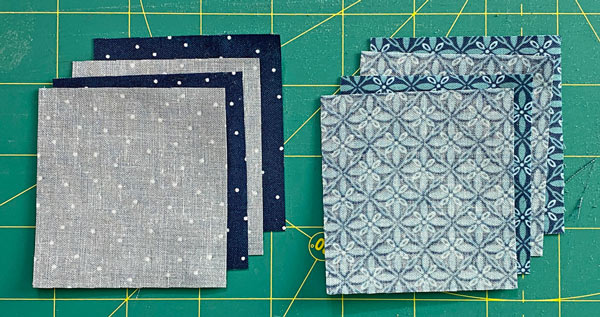
New quilt fabrics to tickle your fancy...
Click the images below to see the full collection. We share any commercial and/or free patterns that showcase them, too. (For inspiration, of course!)


Step 1: Cutting patches for your King David's Crown quilt block
 King David's Crown design
Sample Block Size: 10" finished / 10½" unfinished
Grid: 5x5
Design Type: Star | Uneven 9-patch
Please label all your patches. We refer to their numbers and names in this tutorial.
That fetching turquoise and green is the Spring Wildflower print from Tula Pink's True Colors line. Those fabrics seem to pop up everywhere in my quilting. They're just such happy little things. ;)
To print a copy of the block design and cutting chart to use at your cutting table, click here.
 | Cutting Chart for a~ Paper PLUS Traditional Piecing ~ | |||||||
|---|---|---|---|---|---|---|---|---|
| Patch | Fabric | Qty | Finished Block Size | Sub Cut | ||||
| 5'' | 7½'' | 10'' | 12½'' | 15'' | ||||
| 1 | Bac | 4 | 1½"x2½'' | 2''x3½'' | 2½''x4½'' | 3''x5½'' | 3½''x6½'' | ---- |
| 2 | Med | 1 | 1½''x1½'' | 2''x2'' | 2½''x2½'' | 3''x3'' | 3½''x3½'' | --- |
| Beam | Med | 4 | 2¾''x2¾'' | 3¾''x3¾'' | 4¾''x4¾'' | 5¾''x5¾'' | 6¾''x6¾'' | yes |
| Corner, Corner.R | Bac | 4 | 2⅞"x3¼" | 3⅜''x4¼'' | 3⅞''x5¼'' | 4⅜''x6¼'' | 4⅞''x7¼'' | yes |
| Unfinished Block Size | 5½'' | 8'' | 10½'' | 13'' | 15½'' | na | ||
| Grid Size | 1'' | 1½'' | 2'' | 2½'' | 3'' | na | ||
Subcutting the patches
Stack your Beam patches on top of each other, edges even. It doesn't matter for this shape if the fabrics are right or wrong side up. Either way is fine.
Match the trimmed edges of your template with the upper left and lower right corners of the squares.

Now for those mirror-imaged Corners.
Position your Corner/Corner.R rectangles on your cutting mat with the short edges on the top and bottom.
To get the mirror image patches we need with one cut, layer these rectangles in pairs, each pair RST. (If this is confusing, click here for a picture of the patches layered in this manner.) Then straighten the stack, aligning all the edges.
With a pencil, make a mark 5/8" in from the upper left and 5/8" in from the bottom right.

Line up your ruler with these marks at the EDGE of the rectangles, and cut in half.
These shapes should be virtually the same size and dimension, though a bit of variation is not a problem. They are oversized on purpose. We want to make things easy on ourselves.


To hold the Beam patch in place, I like to use the tiniest bit of Elmer's Washable Glue stick. Stick it to the back side of the pattern using those dashed lines for quick, precise placement.
Yes, your fabric will extend past the outside edge of the pattern in the lower right by roughly 1/4". We want something to trim instead of just squeaking by.

Since our Beam fabric is darker in this sample, I want to make sure the wilder True Colors fabric doesn't show through the light white of my back ground.
The simple way to insure this is to nudge the Corner patch a couple of threads past the long edge of the Beam. (red arrow) The background is a bit brighter at the edge where there's no Corner fabric underneath it.
With the wide edges of the patches are on the same side when properly positioned.
If you're new to making Corner Beams, hold the patches in place with your fingers and flip the Corner back to make sure it's right. Quick and simple. An easy way to avoid having to rip out a misplaced patch.

Gotta love this unit! Since the seam runs from edge to edge, you can chain piece all four to save a bit of time.
You do want to start and stop your stitches past the outside dashed lines on both sides. That's a good paper piecing habit to get into.

Press.
Position the Corner.R just like we did the first one. It's nudged again to prevent shadowing.
 The red arrow points to where I nudged the Corner over a bit.
Sew as before
Here's our Corner Beam in all its untrimmed glory, nice and flat after pressing.

To trim to size, lay the 1/4" line on your ruler directly over one of the outside solid lines.
Trim away the excess.
Turn your block 1/4" turn and repeat until all sides are trimmed.
 Trim one side at a time for the best results
Remove the paper now. Your edges are stable with straight of grain on the outside—just like a traditionally pieced block is.

Is there a time when I wouldn't remove the paper just yet?
Only, perhaps, if I knew I wasn't going to be putting King David's Crown together anytime soon. There'd be less chance I'd crumple the blocks and need to repress them.
Since I rip paper while watching TV, it pretty much gets done within a day of piecing.
Step 3: Assemble your King David's Crown quilt block
Lay out your Corner Beam units with the points in the outside corners, and fill in with rectangles on the sides, a square in the center.
With paper piecing, and the points right where they should be, this block is as simple as a basic nine-patch to assemble. There's only the seams BETWEEN patches to match.

Sew the units in each row together.
I admit. I'm a through-and-through pinner. Even this simple a block I'm going to pin. I really like it when all the edges are nice and even.
But.
You get to choose to pin or not to pin. Choose what works best for you.
After stitching, press the SA AWAY from the Corner Beams.

All that's left is to sew the rows together and give your King David's Cross quilt block a final press.
Those last SAs are pressed AWAY from the Corner Beams again to avoid bulk.

And from the backside, all neat and even.

🔭 Looking for something truly stellar?
You've finished your star quilt block, and you're ready for more!
Browse our collection of 70 stellar star quilt block patterns. All have instructions and cutting charts in multiple sizes. If templates or paper piecing is used in the tutorial, there's a free download for you of those materials.

Eeny. Meenie. Miney. Moe.
Which star quilt block will you sew?
For a star-studded quilting experience, choose from 100+ bedazzling star quilt patterns—for beginners and beyond—click here.
For even MORE blocks to make… 🧩🎨

...visit our Free Quilt Block Pattern Library, with over 260+ blocks to choose from in multiple sizes.
Free downloads are included in all sizes for any blocks require paper piecing patterns or templates.
- Home
- Free Quilt Block Patterns
- King David's Crown Quilt Block


Yummy fabrics
to drool over
Click any image below to see the full collection and find pricing and ordering information.


By Julie Baird
Copyright © 2008-2026 Generation Quilt Patterns, LLC
All Rights Reserved
Generations-quilt-patterns.com does not sell any personal information. (See Privacy Policy)