- Home
- Free Quilt Block Patterns
- State Fair Quilt Block
State Fair Quilt Block made with Traditional Piecing
From our Free Quilt Block Patterns Library
This post contains affiliate links, for which I receive compensation.
Our State Fair quilt block tutorial continues, this time using traditional piecing methods not paperpiecing.
Connector corners are the secret sauce!
In this traditional piecing tutorial you'll find:
- A cutting chart in three sizes with a download of the cutting chart and block design
If you would prefer to paper piece this block, you'll find it here.
It's time to cut up and sew!

📋 General Instructions

Several abbreviations are used on this page. They are:
- SA - seam allowance
- RST - right sides together
- CC - connector corners
- SiaS - Square in a Square
- FG - Flying Geese unit
- BW - Brave World unit
- Bac - background fabric
1/4" SAs are used through this tutorial.
Pressing instructions are highlighted in yellow throughout this tutorial to make them easy for you to spot.
When instructed to press, first press the patches in the closed position just as they came off your sewing machine. This sets the seam, melding the fibers of the threads into the fibers of the fabric.
SAs are pressed to the dark unless otherwise noted.
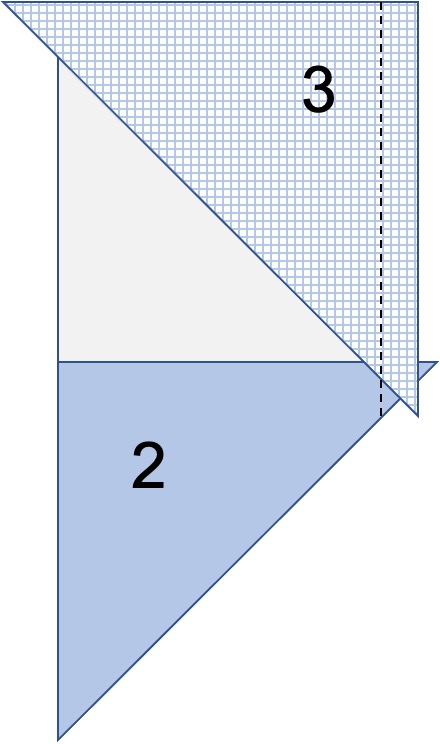
When stitching a bias edge (like the #2, #3, and #4 patches below) starched fabric helps you control any stretch.
Learn more about how and why to starch quilt fabric here.
 Open toe foot
Install you favorite 1/4" presser foot for piecing and, if you have one, use an open toe applique foot for the Connector Corners technique—it makes it easier to see the marked stitching lines.
Take a quick Sewing Test to check the accuracy of your SAs before beginning.
Last, but not least, Connector Corners can sometimes be a bit lumpy.
To tame the lumpiness try my favorite pressing technique. It's surprisingly simple and provides truly amazing results.
New quilt fabrics to tickle your fancy...
Click the images below to see the full collection. We share any commercial and/or free patterns that showcase them, too. (For inspiration, of course!)


Step 1: Cutting patches for a State Fair block
 State Fair design
Sample Block Size: 9" finished / 9½" unfinished
Grid: 6x6, 9-patch construction
Design attributed to: Nancy Cabot
Please label your patches. We refer to their numbers throughout this tutorial.
To print a copy of just the block design and cutting chart to use at your cutting table, click here.
Remember to subcut the patches as indicated in the far right column.
 | Cutting Chart for a~ Traditional Piecing with Connector Corners ~ | ||||||
|---|---|---|---|---|---|---|---|
| Patch | Fabric | Qty | Finished Block Size | Sub Cut | |||
| 6'' | 9'' | 12'' | |||||
| 1 | Bac | 4 | 1½'' x 1½'' | 2'' x 2'' | 2½'' x 2½'' | --- | |
| 2, 3 | Dark | 4 | 1⅞'' x 1⅞'' | 2⅜'' x 2⅜'' | 2⅞'' x 2⅞'' | | |
| 4 | Bac | 2 | 2⅞'' x 2⅞'' | 3⅞'' x 3⅞'' | 4⅞'' x 4⅞'' | | |
| 5 | Bac | 4 | 1½'' x 2½'' | 2'' x 3½'' | 2½'' x 4½'' | --- | |
| Goose | Dark | 4 | 1½'' x 2½'' | 2'' x 3½'' | 2½'' x 4½'' | --- | |
| Sky | Bac | 8 | 1½'' x 1½'' | 2'' x 2'' | 2½'' x 2½'' | --- | |
| Center | Dark | 1 | 2½'' x 2½'' | 3½'' x 3½'' | 4½'' x 4½'' | --- | |
| C.2, C.3, C.4, C.5 | Bac | 4 | 1½'' x 1½'' | 2'' x 2'' | 2½'' x 2½'' | --- | |
| Unfinished Block Size | 6 1/2'' | 9 1/2'' | 12 1/2'' | na | |||
| Grid Size | 1'' | 1 1/2'' | 2'' | na | |||

Step 2: Assemble the units for your State Fair block

In the tutorial, we use the representations shown here to represent the two different fabrics.
Note the right, front or 'pretty' side is the solid, while the wrong or back side is patterned to help you interpret the illustrations that follow.
As you complete each of the units—SiaS, FG Sides and BWs—in the block, check for accuracy using the chart below.
Unit Dimensions After Sewing | |
|---|---|
| Finished Block Size | Edge-to-edge Measurement |
| 6" | 2½" x 2½" |
| 9" | 3½" x 3½" |
| 12" | 4½" x 4½" |
SiaS Unit
Make 1

We'll be using the Connector Corners technique for the SiaS and FG units.
Time to attach that open toe applique foot if you have one.

On the back side of C.2, C.3, C.4 and C.5 draw a diagonal line from corner to corner.
This marking need only be as dark as YOU need to see it.

With RST, align two edges of both C.2 and C.3 with the edges of opposite corners of the larger Center square.
Stitch on the markings.
If your square is large enough (9" or 12" finished block sizes) you can add C.2 and C.3 at the same time as shown here.

To reduce bulk, cut away the excess C.2 and C.3. Leave a 1/4" SA closest to the corners.
Some quilters remove the excess from the Center square, too.
If the stitching is perfect (you'll know this only after flipping open the C.2 and C.3 and pressing) and those edges align exactly then, and only then, do I trim both. (Mine are rarely perfect.)
Otherwise keeping the Center patch whole ensures the SiaS is accurate.

Press C.2 and C.3 towards the outside edges.
Repeat the process for C.4 and C.5—lining up two edges, sewing on the lines, trimming the seam allowance and pressing to the outside.
After the last press, use the chart above to check for accuracy. Make any necessary adjustments now.
Here's our completed SiaS...

FG Side Units

Make 4
Continue using your open toe applique foot for this next batch of CC.

On the back side of the Skys draw a diagonal line, again, just dark enough for you to see.
I use a mechanical pencil for this only as dark as I need to see it.

With RST, layer a Goose and a marked Sky, matching the edges on three sides.
The marking runs from the bottom corner to the middle of the top on the long edge of the Goose.
Stitch on the drawn line.

To reduce bulk, trim away all but a 1/4" SA on the Sky closest to the corner.
Press the trimmed patch towards the corner.

Repeat for the opposite side.
Matching the three edges, stitching on the line and trimming away the excess to create 1/4" SAs.
After pressing the patch to the outside corner, add a #5 to the bottom of the Goose (photo below). It's helpful to sew with the Goose on top to avoid flipping a SA.
Press this seam toward the Goose.
Your finished side units look like this...

We're finished with the CC technique. It's time to install your favorite 1/4" presser foot.
BW Units

Make 4
With RST, layer #1 and #2 as shown below.

You'll want to stitch with #1 on top in order to feed the straight edge of the patches into your sewing machine first.
That way you don't chew up the pointy-point.
It might seem like there's some excess #2 at the point—it doesn't match exactly with your 1/4" seam.
This is correct. The illustration is drafted with the actual patch sizes so your pair will look about like this.

The SA is pressed toward #2.
You can see the excess #2 at the seam.
With RST, align a short edge of #3 with the right side of #1.
Stitch, again starting at the straight edge to avoid chewing up the points.
This time your 1/4" seam should fall right in the valley of where #2 and #3 meet at the bottom points.
Press the SA towards #3.

At this point, if your 1/4" seam is accurate the #1/#2/#3 unit will be the same size as the #4 patch.
The lower right corner of #1 is 1/4" away from the cut edges of #2 and #3.

With RST, sew #1/#2/#3 to #4.
Sewing with #1/#2/#3 on top means you can keep an eye on the SAs as you sew to avoid one of them flipping over.
Press the SA towards #4 to avoid bulk.
After stitching your Brave World units look like this.

All that's left is to stitch our State Fair together!
Step 3: Assemble your State Fair quilt block
Regardless of whether you used paper or traditional piecing to construct all the units, block assembly is the same for both.
Arrange all your stitched units into the State Fair quilt block design.

With RST, sew the units in each row together.
If you've followed the pressing instructions, the SA between the FGs and BWs nest which makes getting a good match easier. I did pin before sewing.
SA are pressed away from the FG units in each row.

Finally, sew your rows together. Again, your SAs nest. Pin as needed.
I use a 'perpendicular pin' method for matching the points of the FG and the SIAS. Find a refresher on this helpful technique here.
These final two seams are pressed away from the center row.

From the backside you get a better view of how pressing helps all the patches fit together smoothly in your State Fair quilt block.
 The backside of our State Fair quilt block
What about a different quilt block?
For a list of all the 260+ quilt block patterns on this site, start here.
If you know the name of the block, shorten your search by using these links:
Click here if you're looking for blocks with at least some paper piecing.
Click here if you're looking for the basic building blocks of quilting, i.e., Flying Geese, half square triangles, quarter square triangles, etc., along with several techniques to make each.
And finally, use these links to find blocks in these finished sizes:


By Julie Baird
Copyright © 2008-2026 Generation Quilt Patterns, LLC
All Rights Reserved
Generations-quilt-patterns.com does not sell any personal information. (See Privacy Policy)