Find YOUR
Perfect Quarter Inch Seam Allowance
Quilt Instructions for the Beginning Quilter
This post contains affiliate links, for which I receive compensation.
The 1/4" seam allowance (it's not uncommon to see it abbreviated in quilt patterns as SA) is standard for all types of
quilting.
It's big enough to hold the patches together. Small enough to reduce bulk and save fabric.
Sewing an accurate, reliable 1/4" seam is the first step to enjoyable quilting.
With it our blocks fit together easily and finish up square. Quilting is a pleasure because they lay flat.
All because of an accurate seam allowance.
Seam Allowance - Shmeam Allowance!
Why is it so important?
When your 1/4" is off, your blocks will never be accurate.
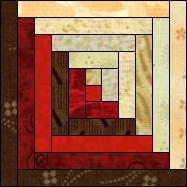 10 seams top to bottom and left to right
Example: The log cabin block to the right with 1" wide logs should be 11-1/2" before it is sewn into a quilt. It has 10 seams top to bottom and left to right.
If every seam stitched is off by a mere 1/16", your block would be off by...
10 seams X 1/16" = 5/8"
You block would measure either 10-7/8" if the seam allowance was too big or 12-1/8" if it was too small. That's a lot to be off for a block.
Now if each of those blocks is sewn to a pre-cut sashing strip that is 11-1/2" long, you can see where inaccurate seam allowances makes your efforts more of a pain than a joy.
Stitch as accurately as you can.
When a Quarter Inch Isn't 1/4"
When quilters refer to the 1/4" seam allowance they are really talking about a "scant" 1/4".
In quilting, the seam is stitched, then pressed closed to set it and meddle the fibers of the thread into the fabric.
Finally it is opened and pressed with the seam generally towards the darker fabric.
A wee bit of the block fabric is "lost" in the "turn of the cloth" or where the fabric folds back on itself when the patches are opened.
With thicker fabrics (think flannel) more fabric is lost in this "turn of the cloth". Use an even thicker or heavier thread for stitching and even more fabric is lost.
To make up for this loss, quilters set their machines for a "scant" quarter inch seam.
Now we have to find it!
Tools for Stitching a Good Scant Quarter Inch
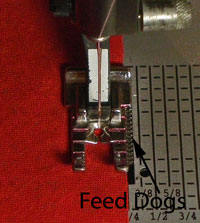
There are several handy tools and gizmos available to help you sew a perfect 1/4" seam allowance.
Quarter Inch Foot
The edge of this specialty foot is a quarter inch away from the needle.
It is a good option for machines where you can't adjust the needle position (generally think older machine).
Notice in the photo how the feed dogs are exposed on the right side.
Some
quilters believe they don't get enough traction with this foot because
of it.
There are several quarter inch presser feet on the market.
The "Little Foot" (shown here) is a generic clear version.
To choose the correct one for your machine, you need to know what type of shank it has.
Edge Stitching Foot
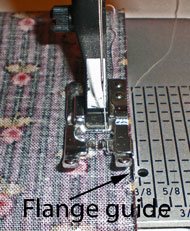
My personal favorite.
This one looks like your standard presser foot but with a flange on the right side as you sit facing your machine. The raw edges of your patches ride along this flange as you stitch. Starch your fabric to make it even easier.
NOTE: You must be able to adjust your needle position to use it properly.
Make Your Own Seam Guide...
Use masking tape, moleskin or Post-It-Notes to create your personal quarter inch seam guide. Here's how.
 Seam guide made with masking tape
- Grab the same ruler you use to cut your patches.
- Place it under the presser foot and hand lower your needle until it is touching the right side of quarter inch line. (Remember, we're looking for a "scant" 1/4".)
- Making sure that your ruler is squared up with the lines of your sewing machine, lower the presser foot to hold the ruler in place.
- Butt a piece of masking tape straight up against the ruler and position it in place.
- Remove the ruler and complete a sewing test with the fabrics you'll use in your piecing. Adjust the masking tape as needed.
As long as your presser foot doesn't extend beyond this quarter inch line, either moleskin or a short stack of Post-It-Notes can be used instead of the tape. Either one will create a higher fence or guide.
For machines with a drop-in bobbin, this method may be more trouble than it's worth. You'll need to re-tape every time you replace your bobbin.
...Or Purchase One
If you find you are having trouble getting your ruler lined up properly to apply the moleskin or tape above, you might want to try the Perkins Dry Goods' Perfect Seam Guide.
Simply put it under your presser foot, then lower your needle into the hole on the guide.
Lower your presser foot onto the guide to hold it in place.
Add your tape or moleskin along the right side just as you did above.
Presto!
UPDATE: Bonnie Hunter's new Essential Triangle Tool ruler includes a separate perfect seam guide ruler with it.
Check Your Accuracy with a Sewing Test
Regardless of what you use for a seam
guide, you'll need to do a simple "sewing test" to check for accuracy.
It's easy to do.
(For even more accuracy on blocks with many seams, refer to the Ultimate Sewing Test.)
Step 1
Cut three strips of fabric each 1-1/2" wide by about 4 inches.
Sew two strips together along the 4" side.
Sew the remaining strip to a 4" side.
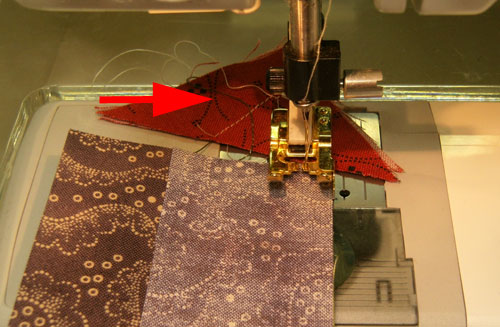 The arrow points to the anchor cloth that I stitch onto before sewing any
seams. This prevents my machine from 'eating' the edge of the first piece.
The arrow points to the anchor cloth that I stitch onto before sewing any
seams. This prevents my machine from 'eating' the edge of the first piece.Step 2
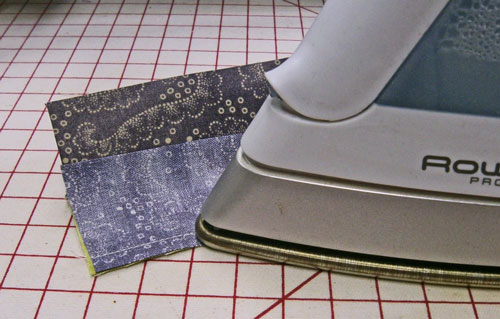
Press the sewn unit flat to set the seam.
Step 3
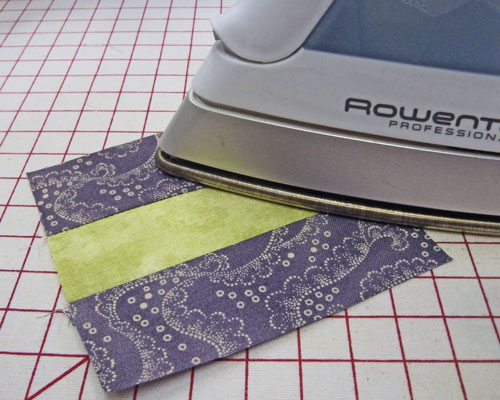
Now press the patch open, with all your seam allowances pressed towards the darker fabric.
Step 4
Measure the finished block with your usual rotary ruler.
 Perfection! - This time.
It should measure exactly 3-1/2" wide by about 4" long. The two outside sewn strips should measure exactly 1-1/4" wide, each, and the center strip should measure exactly 1".
If the strips are too wide, your seam allowance is too small, increase it.
If the strips are too narrow, your seam allowance is too big, reduce it.
It is crucial to having a happy and satisfying quilting experience that your seam allowance is accurate.
There is nothing more frustrating than finally having the time to work at your machine, only to find that your seam allowance was off and ALL of your stitching must be ripped out in order for things to fit together. ARGGGHHH!
One final point...
Your perfect quarter inch seam allowance will change for different fabric and thread combinations. Flannel is a thicker fabric. You may need to use an even "scanter" seam allowance.
The only way you'll know for certain is to do a quick test.
Do take the time to retest for each new project. The few minutes you spend to test your seam allowance can save you hours of frustration from trying to piece patchwork that just won't go together.


