The Best Darn Technique for Pressing Quilt Blocks
Simple. Easy. Fantastic Results!
This post contains affiliate links, for which I receive compensation.
Stitching a quilt together is a dream when you've done a good job pressing your quilt blocks.
This technique is, hands down, the absolute simplest thing in the world to do and the results are AMAZING!
No special tools or products to buy.
Easy.
Cheap.
And terrific results.
What more could a quilter want?!
 Remember to Pin this for later!
The best pressing technique for perfectly pressed quilt blocks starts with...
The Supplies
There's nothing on the list that you won't already have. It's pretty basic:
- Pieced quilt blocks or the units that make up the quilt blocks
- An iron
- Rotary cutting ruler(s) and/or a stack of magazines
OPTIONAL: The Magic Pressing Mat...not essential but it does bring your pressing to the next level! Read my review here.
That's it! Easy-Peasy!
A little background information
In tailoring, shaping is added to wool garments by first steaming the wool around a curved Tailor's ham (also known as a pressing ham) or other such tool.
The wool is then left to cool and dry in place.
Wool fibers
have scales on the outside. These scales mesh together. The combination
of the steam, heat, shaping tool and cooling time create the desired
shape.
But cotton fibers don't have scales. We can't mold them into shape like wool.
Fortunately, that's not really a problem.
What we WANT are flat blocks, not bulky, bumpy-lumpy ones.
So we borrow the idea of heating the fibers and letting them cool in place around a shape. However, in this technique instead of a curved tailor's ham we'll use our flat rulers. Instead of 'around' we use under.
Pretty smart, eh?!!!
The Process
This method of pressing quilt blocks works just as well for paper piecing as traditionally pieced units. I heartily recommend and use it for both.
I also recommend you use it at each step throughout your block's construction. You'll love how flat your finished patchwork lays.
This technique works equally well, in my opinion, whether you use steam or not. I've done it both ways and go back and forth depending on if there's water already in the iron. It just doesn't make a big difference.
The same goes for using starch. If you're a starcher (like me), use it. If Best Press blows your skirt up, use it.
Let's get to it!
Step 1
Press your pieced unit in the closed position to set the seam.
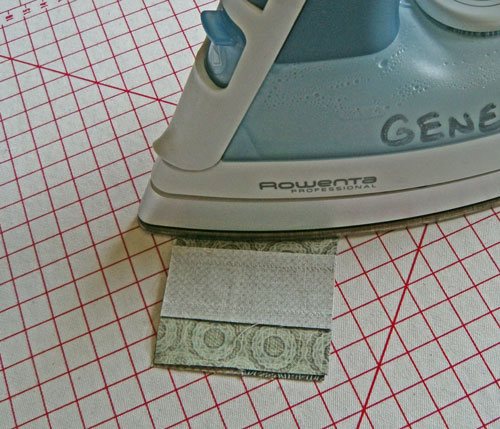
In technical terms, this helps smush the fibers of the thread into the fibers of the fabric.
Step 2
Press your unit open.
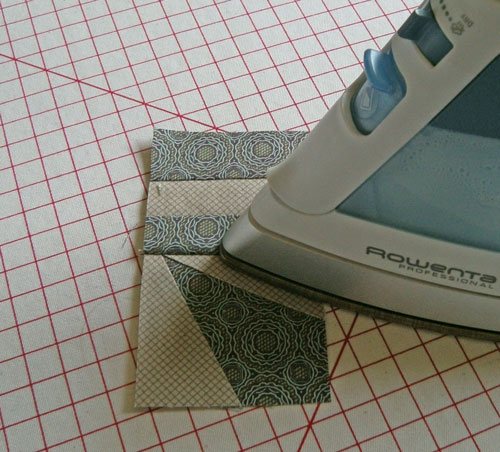
The seam allowance can be pressed:
- To the dark (most common)
- To the light (to reduce bulk--just remember to grade your seam allowances so that the dark fabric doesn't show through the quilt top) or...
- Open (again to reduce bulk or keep dark fabrics from shadowing through the top).
The technique isn't dependent on 'which way' the seam allowances are pressed, just that they ARE pressed. Be careful not to press in any tucks at the seam allowance. I frequently finger press the seam allowance first and that seems to avoid any tucks.
Now don't blink!

Here comes the Magic!
Step 3
After pressing your blocks or units...
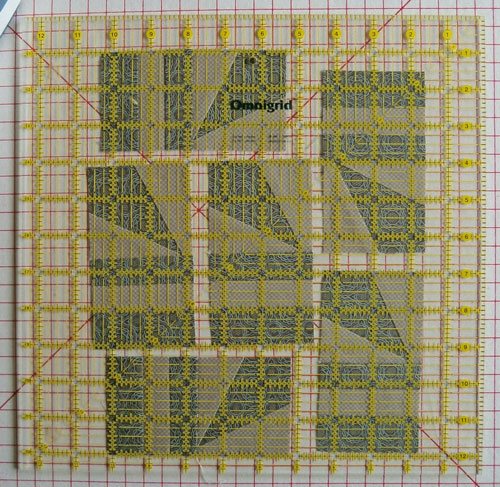
...remember, they're still hot from the iron—lay your rotary ruler on top of them. The ruler might steam up a little, that's OK.
Never, never ever put your iron on top of the ruler.
The residual heat from pressing your blocks is enough.
Step 4

Now for the hard part...
...don't remove the ruler until the block is cool and dry--it's more apt to stretch when it's damp and still warm.
It won't take very long.
But it must cool completely.
Once it is, you're ready to get back to piecing!
That's ALL there is to it!
Surprised???
I certainly was!
But it's that simple to get amazingly flat quilt blocks and units!
What do magazines have to do with pressing quilt blocks?
You probably don't piece just one unit at a time, right?
And there's a limit to how many rulers you have. Right?
That's where the magazines come in.
Keep a stack by your ironing board—we've all got plenty of quilt
magazines!. When you run out of space under your ruler, use the
magazines to weight down the units and flatten them. Keep pressing and
stacking until you've run out of one or the other.
I've been using this technique for several years now and have never had any nasty transfer from the magazine to the fabric.
