- Home
- Free Quilt Block Patterns
- Rocky Mountain Puzzle Quilt Block
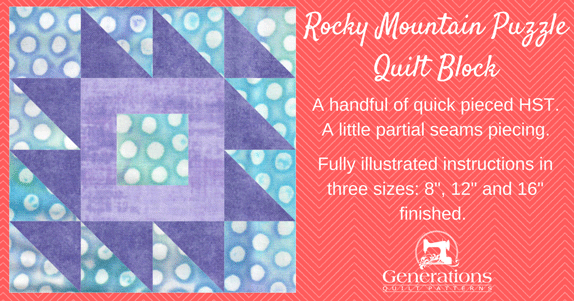
Rocky Mountain Puzzle Quilt Block
From our Free Quilt Block Patterns Library
This post contains affiliate links, for which I receive compensation.
The Rocky Mountain Puzzle quilt block won't be a puzzle for long.
Not after you learn the secret!
Solve the puzzle with quick pieced HST and a bit of partial seam piecing. That's all there is to it.
Time to cut up and sew!
📋 General Instructions
These abbreviations are used on this page:
- SA - seam allowance
- RST - right sides together
- HST - half square triangle
- BAC - background fabric
SA are 1/4" and pressed towards the darker fabric unless noted otherwise.
Starch your quilt fabric before cutting if you like crisp fabric. Learn more about starching here.
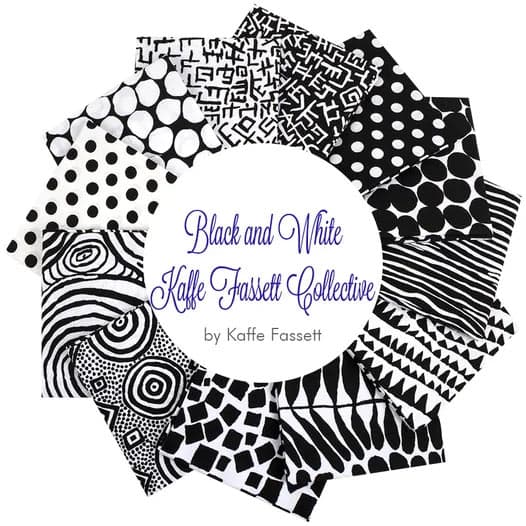
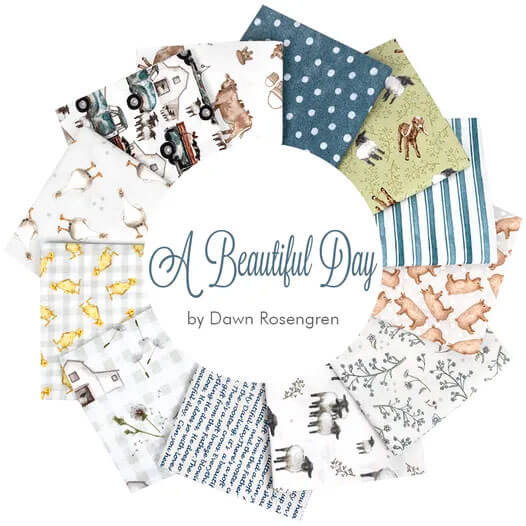
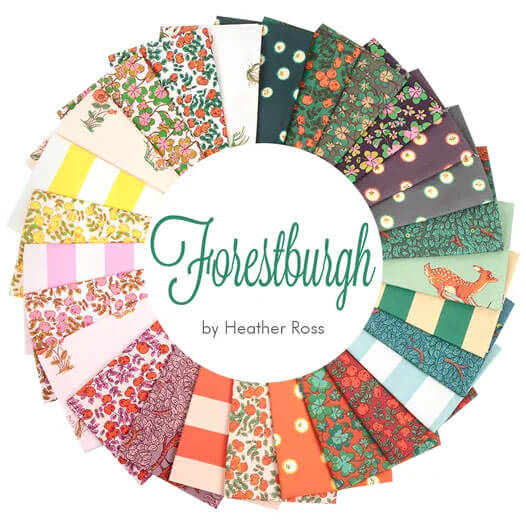
New quilt fabrics to tickle your fancy...
Click the images below to see the full collection. We share any commercial and/or free patterns that showcase them, too. (For inspiration, of course!)
Step 1: Cut patches for a Rocky Mountain Puzzle
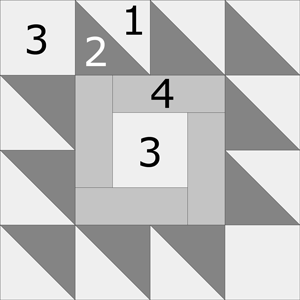 Rocky Mountain Puzzle
Sample Size:
Grid: 4x4
Attribution: Nancy Cabot
The Rocky Mountain Puzzle design needs three fabrics: a background a medium and a dark.
For our sample block employs a medium fabric (purple) as the background.
We chose contrasting fabrics to differentiate between the two medium fabrics—a tone-on-tone solid vs. a polka dot. That's help the piecing stand out.
 | Cutting Chart for a~Traditional Piecing ~ | |||||
|---|---|---|---|---|---|---|
| Patch | Fabric | Qty | Finished Block Size | |||
| 8" | 12" | 16" | ||||
| 1** | BAC | 5 | 2⅞" x 2⅞" | 3⅞" x 3⅞" | 4⅞" x 4⅞" | |
| 2** | Dark | 5 | 2⅞" x 2⅞" | 3⅞" x 3⅞" | 4⅞" x 4⅞" | |
| 3 | Light | 3 | 2½" x 2½" | 3½" x 3½" | 4½" x 4½" | |
| 4 | Med | 3 | 1½" x 3½" | 2" x 5" | 2½" x 6½" | |
| Unfinished Block Size | 8½" | 12½" | 16½" | |||
| Grid Size | 1" | 1½" | 2" | |||
| **I prefer to cut my patches extra large for HST, stitch, and then trim them to size. If you prefer to do the same, add a bit extra to the measurements for Patches #1 and #2 above. There is a chart further down in these instructions where you need it for trimming them to size. | ||||||
Step 2: Assemble the units
HST
Make 10

We use the Quick Pieced method for making our HSTs.
If you plan to make many blocks, you may want to use another HST method like 8-at-a-time or triangle paper.
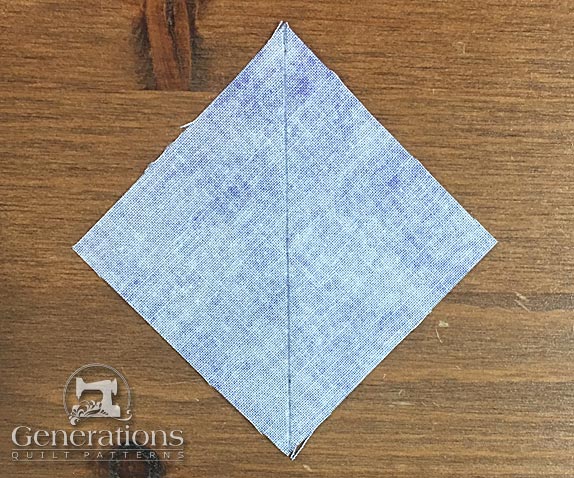
Draw a diagonal line from corner to corner on the back of either all the #1 or #2 squares. Mark whichever one is easier to see the line on. For the sample block, it's easier to see the line on the purple #2 fabric.
Now I stitched this sample with my Sunday Sew-In gals (there's nothing like a day filled with quilting, good company, laughter and never-ending lattes!).
As luck would have it, my quarter inch foot was back at home.
And my Quick Quarter ruler was keeping it company!
Now there's no way I'm going to consistently eyeball a decent 1/4" away from the marked lines on those five pairs. (It's just not in my nature!)
But there's always more than one way to get things done in quilting!
So I simply marked the sewing lines instead—a quarter inch away from that center diagonal of the block.
Very easy to stitch with an open toe applique foot.
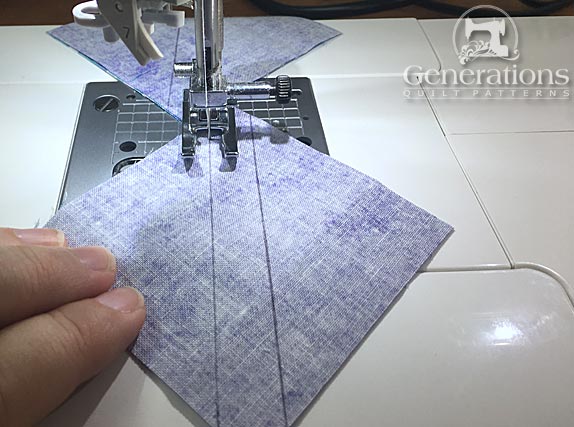 'Love an open toe applique foot for this kind of sewing.
Below you can see a stitched #1/#2 (upper left), cut in half (upper right) and the two resulting HSTs with SA pressed to the dark.
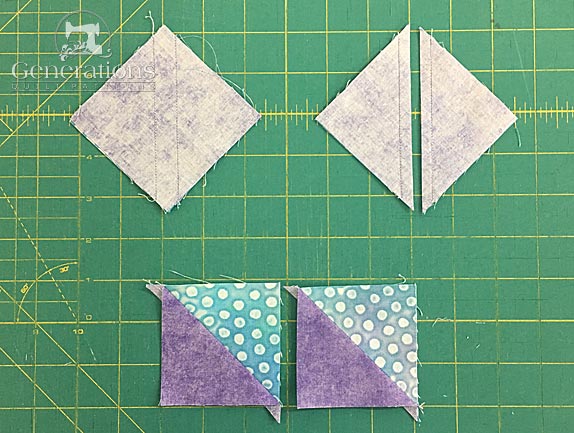
Repeat the process for the remaining pairs of #1/#2 squares.
Now check the accuracy of your stitching using the chart below. Trim as needed.
HST Dimensions | ||
|---|---|---|
| Finished Block Size | Trim HST to… | |
| 8" | 2½" | |
| 12" | 3½" | |
| 16" | 4½" | |
How'd you do?
Because I prefer sewing with oversized patches, trimming is always a necessary step in my piecing.
Borders
With RST, stitch four pairs of HST together as shown below. Press the SA in the direction of the arrow.
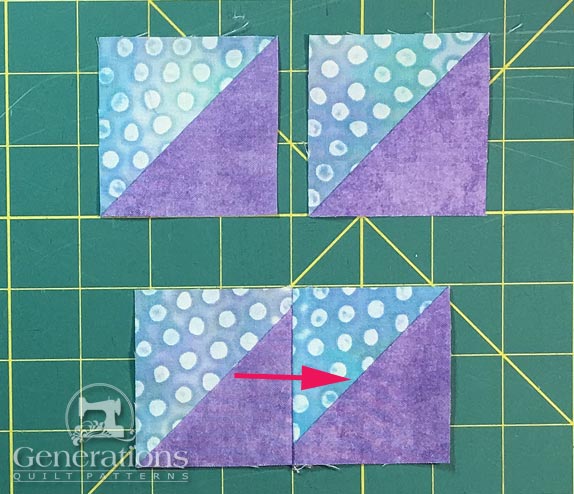 Make 4
Set two pairs aside until Step 3.
With the remaining two pairs, add a #3 square to one side and another HST to the other as shown below.
After stitching the units together, press SAs in the direction of the arrows so that the seams in Step 3 will nest.
 Make 2
Center
Make 1
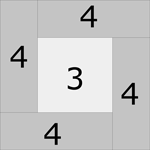
To make the center we use the 'partial seams' or 'puzzle piecing' method where only part of the first seam is sewn.
Add the remaining three #4 patches as you normally would.
Then, and only then, stitch the second half of the first #4.
Arrange your patches.
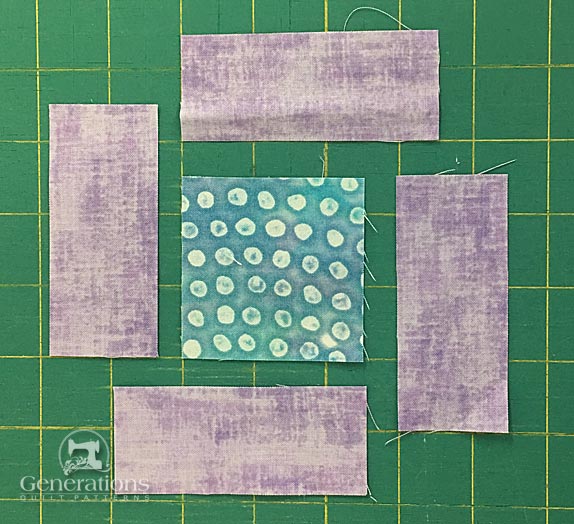
Stitch half of the first #4 to the center #3. Start your sewing from the edge with the #3 and #4 patches aligned.
The pin (red arrow) shows where to stop stitching. I don't usually backstitch here since there's just a bit of stitching. Nothing to put any strain on the individual stitches.
If you feel better taking a backstitch or two...go ahead.
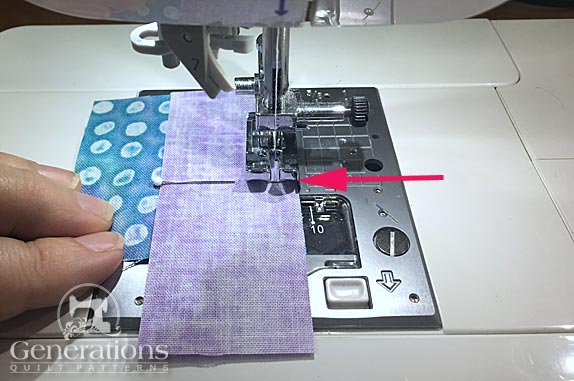
After sewing, you can see it's partially sewn. The arrow points to the end of the stitching line.
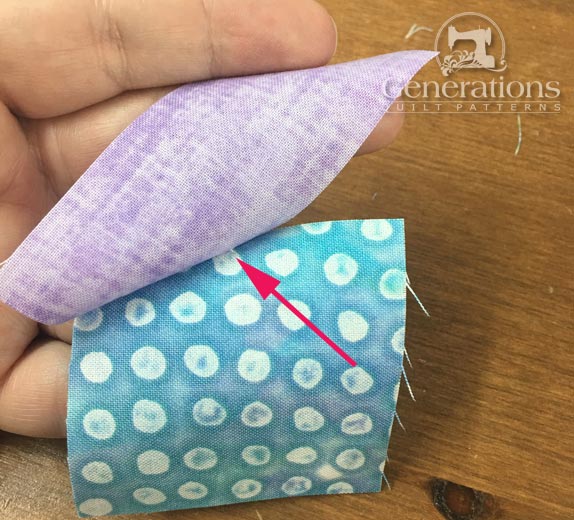
This partial seam is pressed flat first to set the seam, then out towards the #4.
Add the next #4 to the side containing the #3 and #4 patches.
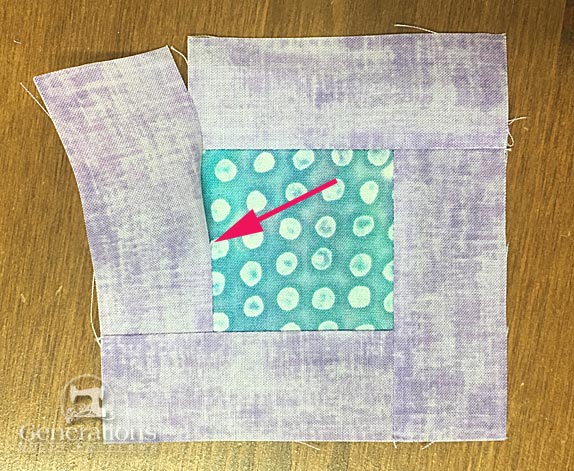
Below the third #4 is added. (The red arrow points to the first partial seam.)
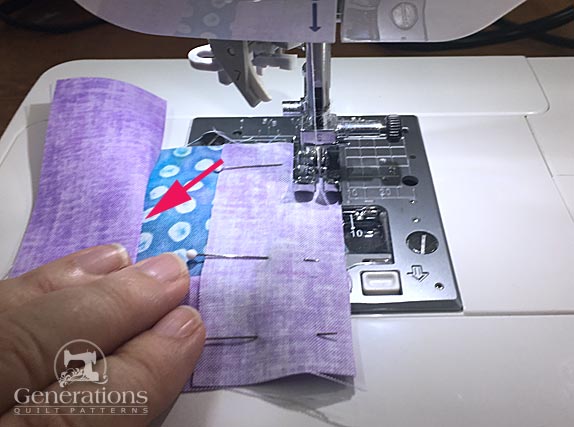
Add the final #4.
All that's left is to finish the second half of the first seam.
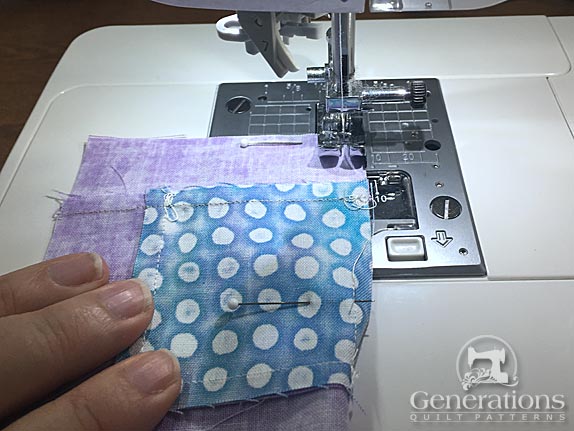
The pin to the right of my fingers shows where this final seam will end.
I do overlap my stitches here to secure the seam.
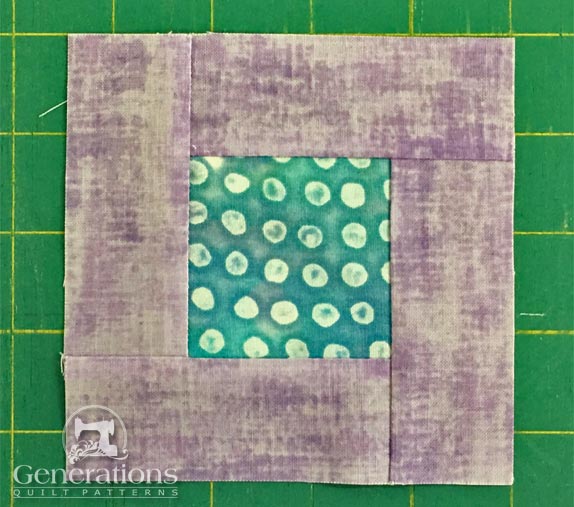
One final pressing and the center of the Rocky Mountain Puzzle looks like this.
Step 3: Assemble your Rocky Mountain Puzzle
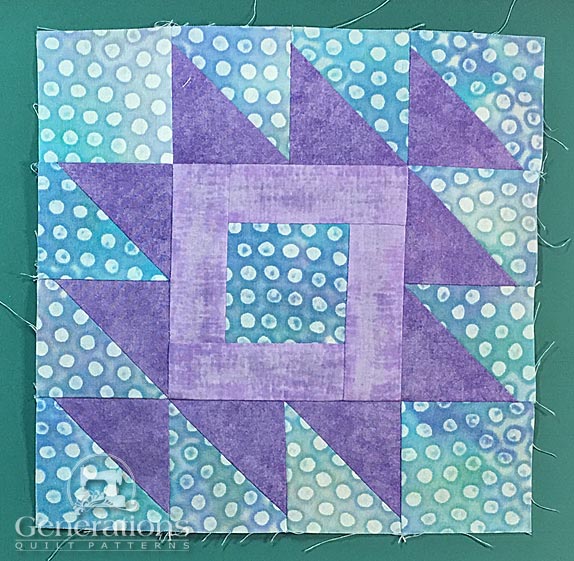
Arrange the units into the design shown below.
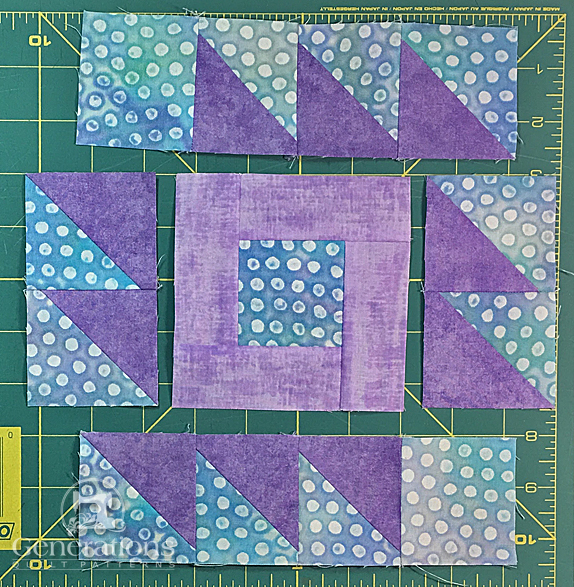
With RST, stitch the units in the center row together. SA are pressed toward the center.
With RST, sew the rows together. Use pins as needed.
Check out 'Perfect Points for Impeccable Patchwork' for help with matching points.
Our Rocky Mountain Puzzle quilt block is complete.
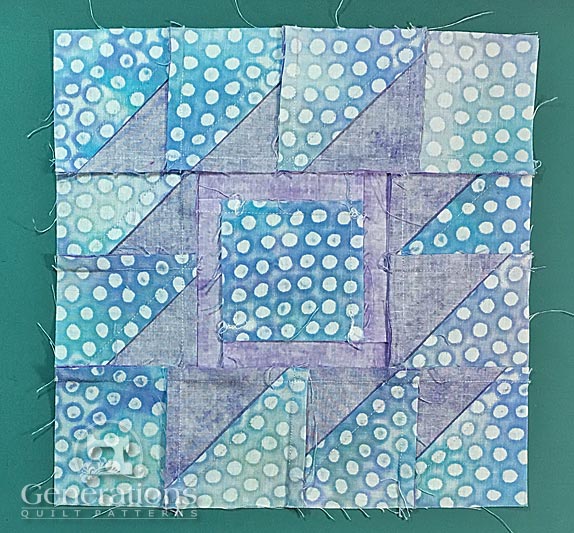
And from the back so you can see how the SA all fit together.
Our Rocky Mountain Puzzle is a puzzle no more!
What about a different quilt block?
For a list of all the 220+ quilt block patterns on this site, start here.
If you know the name of the block, shorten your search by using these links:
Click here if you're looking for blocks with at least some paper piecing.
Click here if you're looking for the basic building blocks of quilting, i.e., Flying Geese, half square triangles, quarter square triangles, etc., along with several techniques to make each.
And finally, use these links to find blocks in these finished sizes:
