- Home
- Beginner Quilt Blocks
- 8-at-a-time HSTs
Whip up 8 Triangle Square Units at one time!
Technique #4
This post contains affiliate links, for which I receive compensation.
Frequently you need WAY more than a single triangle square (also known as a half square triangle) or two for your patchwork project.
This method gets them done FAST.
Really FAST!
How?
By stitching eight at a time.
Pros:
- 8 at once—what's not to like when you've got 100 to make
- No paper to remove
Cons:
- Not as as Scrap Friendly as Techniques #1 because the initial squares are larger and you're making 8 of the same fabric combination at once
- Marking gets trickier as the blocks get larger.
- You may need to pin the larger squares before stitching.
- You must trim of the dog ears.
The Technique
Formula for HSTs 8 at a time
Finished size of your triangle square plus 7/8". (This sum is also our midpoint measurement.)
Multiply the sum by 2.
Cut two squares equal to this final calculation from contrasting fabrics.
Step 1
For 2" finished half square triangles, the calculations are...
2" + 7/8" = 2-7/8"
2-7/8" is our center or midpoint measurement; you'll need it in Step 4.
Multiply the sum by 2...
2-7/8" x 2 = 5-3/4"
Cut one 5-3/4" square from each of two contrasting fabrics.
Mark the two diagonal lines from corner to corner as shown below. I particularly like to use a mechanical pencil to draw these lines because the point of the lead doesn't dull and make a larger, more inaccurate line.
Helpful Hint
I prefer to cut my patches over-sized, stitch and then trim to the perfect size. That suits my personal style best.
Quilting time in my schedule usually happens at the end of the day, when my concentration is at its lowest and my eyes are the most tired.
Trimming down to the perfect size helps me compensate!
The cutting chart at the bottom of the page for you to download includes the sizes of squares that include a bit of fudge factor. You can choose what works best for YOU!
Step 2
With your favorite quarter inch foot installed on your sewing machine, stitch an accurate 1/4" away from both sides of each line.
If you are more comfortable, go ahead and mark the stitching lines, too.
The Quick Quarter ruler is a good tool for this job—you can also use it to mark the center line especially when you've got a lot of lines to draw.
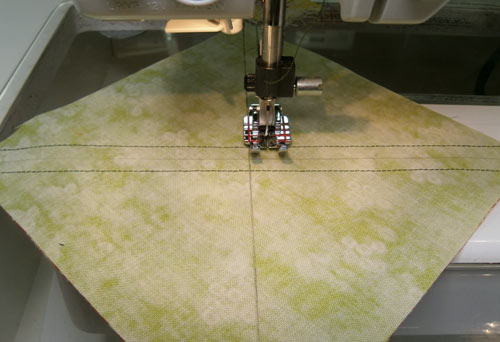 Sew a quarter inch away from each line, on both sides of the line
Step 3
Press the whole thing flat now to set the seams for all 8 half square triangle units at once.
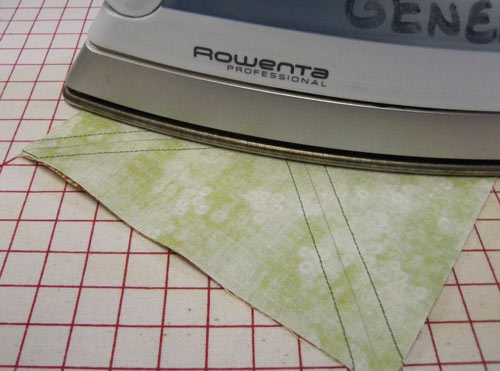 With this pressing, you'll set the seams for all 8 HSTs
Step 4
If you have a small or rotating cutting mat, this is the perfect time to use it.
Cut the unit in half through the 'center or midpoint' measurement computed in Step 1. In this example, the squares are cut in half along the 2-7/8" line.
(This 'center or midpoint' number is computed for you in our downloadable cutting chart.)
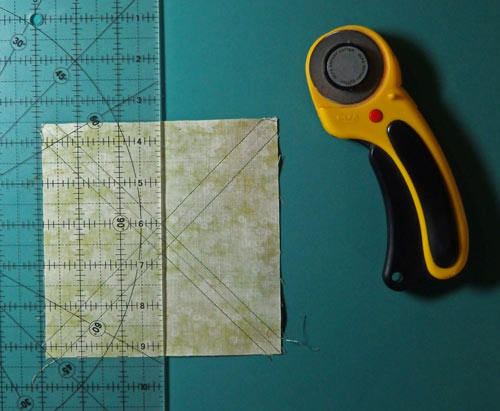 Cut in half through the center
Step 5
Turn the mat a quarter turn. And again cut in half along the 'midpoint' measurement. Be careful not to disturb the alignment of the pieces. A small or rotating mat makes this so much easier.
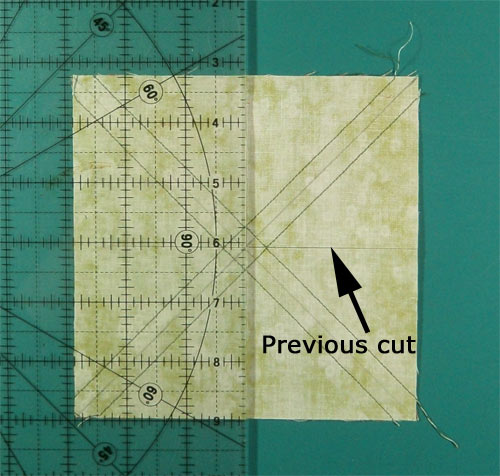 Rotate the small mat a quarter turn and cut in half again through the center
And this is what you have. If you've made triangle squares with Technique #1 this should look very familiar now.
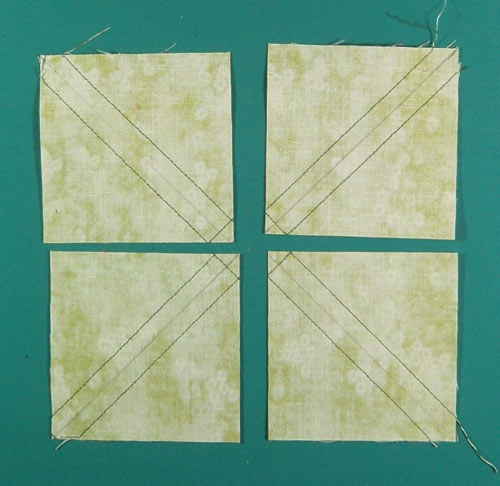 The units are cut in half again...
Step 6
Now cut once on each diagonal line to separate. You can use either scissors or a rotary cutter.
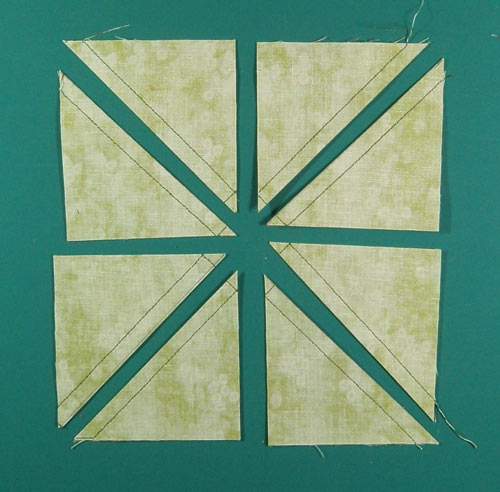 The final two cuts create 8 HSTs
Step 7
Now press the seam allowance to the dark side (traditional), or to the light side (to reduce bulk or aid construction), or open (to reduce bulk, aid construction or avoid shadowing).
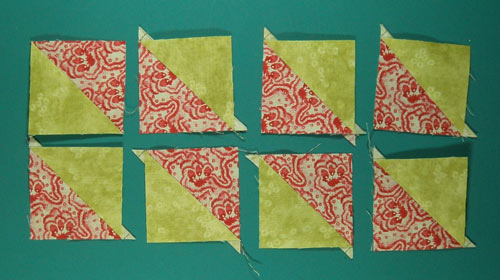 8 half square triangles from just two squares. Dog ears need to be trimmed except for the one in the upper left corner
After the dog ears are trimmed (like the upper left block above) you've got 8 perfect little triangle square units ready for piecing into your block or quilt.
Download the 8-at-a-time Triangle Square cutting chart
To download and print our free cutting chart for this technique in a variety of sizes, click the 'Stamp Out Math' button to the right.
The link will open in a new window. Click the print icon to print a copy to keep by your sewing machine.
The chart contains cutting sizes with exact dimensions, as well as those with some 'fudge factor' built in. I've also included the midpoint measurement for trimming oversized units.
You need Adobe installed on your computer to complete the download.
Click here to go to their website and download if you don't already have it installed.


