- Home
- Free Quilt Block Patterns
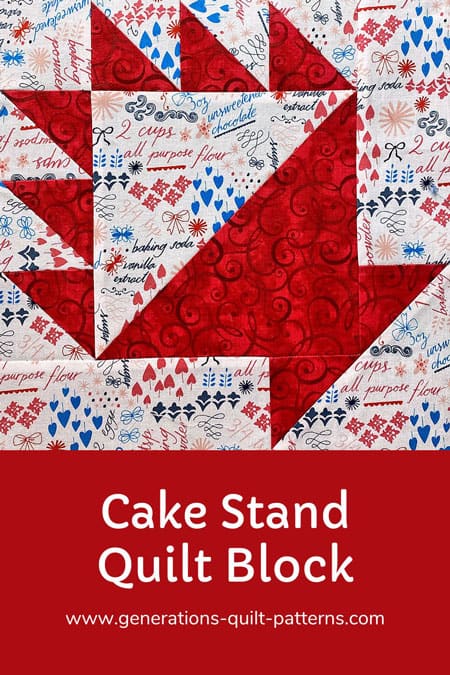
- Cake Stand Quilt Block
Slice of Heaven: Dive into the Delicious Cake
Stand Quilt Block
Whisk your way to quilting bliss! 🧁✂️"
This post contains affiliate links, for which I receive compensation.
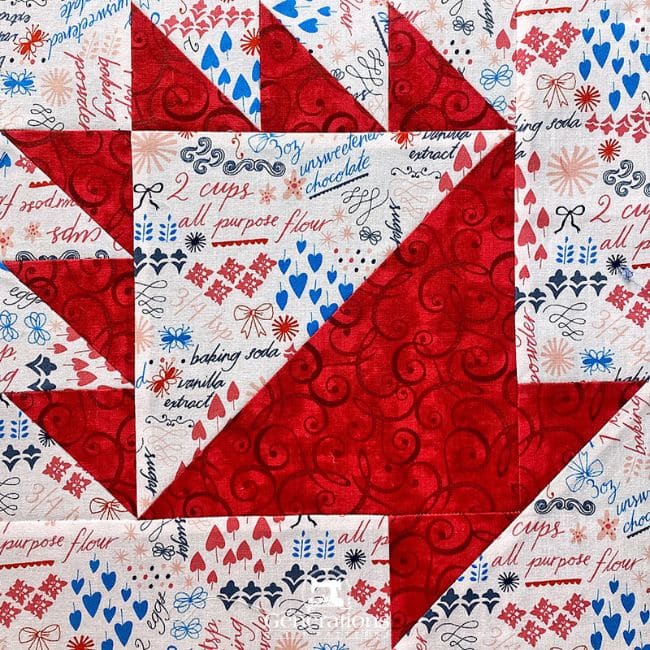
👩🍳 The Cake Stand quilt block is about to take center stage at your crafting party.
This isn't just any old block—it's the showstopper of the quilting world, the crème de la crème of patchwork!
With more layers than a triple-decker wedding cake and twice the charm, this block will have you feeling like the Star Baker of your sewing room. Are you ready to rise to the occasion?
🧭Ready to dive into the delicious details?🍰
🍽️🏊♀️ Here's your menu for quilting success! 📜✨ Click on these handy links to jump straight to the section you're craving: 👆
Cut. Sew. Press. Layer on the quilting goodness!
📋 General Instructions
These abbreviations are used on this page:
- SA - seam allowance
- RST - right sides together
- HST - half square triangles
- Bac - Background fabric
1/4" SA are used through this tutorial.
For designs where exposed bias edges are sewn together(#6 and #8), starched quilt fabrics help tame the bias and hinder its ability to stretch.
I prefer to mix my own using a 50/50 mix of StaFlo Liquid Starch Concentrate to water.
To learn the ins and outs of starching, please read this article.
When instructed to press, first press the patches in the closed position just as they came off your sewing machine. This sets the seam, melding the fibers of the threads into the fibers of the fabric.
Pressing instructions are highlighted in yellow throughout this tutorial to make them easy to spot.
New quilt fabrics to tickle your fancy...
Click the images below to see the full collection. We share any commercial and/or free patterns that showcase them, too. (For inspiration, of course!)
✂️ Cutting patches for a Cake Stand quilt block
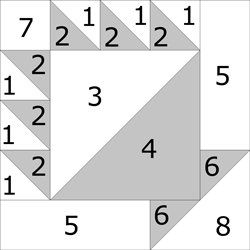 Cake Stand Design
Sample Block Size: 10" finished / 10½" unfinished
Grid: 5x5
Design Type: Basket
Attributed to: Ladies Art Company
AKA: Basket (Hearth & Home), Basket (Old Chelsea Station), Fruit Basket (Household Magazine),
Please label your patches. You'll refer to their numbers throughout this tutorial.
When cutting my patches for the sample Cake Stand, I added an additional 3/8" to the dimensions of the #1-#4 patches only.
The finished half square triangles are trimmed to perfection after the sewing is complete. (Check the note at the bottom of the Cutting Chart).
Remember to subcut the #6 and #8 squares once on the diagonal.
 | Cutting Chart for a~ Traditional Piecing ~ | ||||||
|---|---|---|---|---|---|---|---|
| Patch | Fabric | Qty | Finished Block Size | Sub Cut | |||
| 5'' | 7 1/2'' | 10'' | 15'' | ||||
| 1** | Bac | 3 | 1⅞'' x 1⅞'' | 2⅜'' x 2⅜'' | 2⅞'' x 2⅞'' | 3⅞'' x 3⅞'' | na |
| 2** | Dark | 3 | 1⅞'' x 1⅞'' | 2⅜'' x 2⅜'' | 2⅞'' x 2⅞'' | 3⅞'' x 3⅞'' | na |
| 3** | Bac | 1 | 3⅞'' x 3⅞'' | 5⅜'' x 5⅜'' | 6⅞'' x 6⅞'' | 9⅞'' x 9⅞'' | na |
| 4** | Dark | 1 | 3⅞'' x 3⅞'' | 5⅜'' x 5⅜'' | 6⅞'' x 6⅞'' | 9⅞'' x 9⅞'' | na |
| 5 | Bac | 2 | 1½'' x 3½'' | 2'' x 5'' | 2½'' x 6½'' | 3½'' x 9½'' | na |
| 6 | Dark | 1 | 1⅞'' x 1⅞'' | 2⅜'' x 2⅜'' | 2⅞'' x 2⅞'' | 3⅞'' x 3⅞'' | |
| 7 | Bac | 1 | 1½'' x 1½'' | 2 '' x 2 '' | 2½'' x 2½'' | 3½'' x 3½'' | na |
| 8 | Bac | 1 | 2⅞'' x 2⅞'' | 3⅞'' x 3⅞'' | 4⅞'' x 4⅞'' | 6⅞'' x 6⅞'' | |
| Unfinished Block Size | 5 1/2'' | 8'' | 10 1/2'' | 15 1/2'' | --- | ||
| Grid Size | 1'' | 1 1/2'' | 2'' | 3'' | --- | ||
| **I prefer to cut my patches extra large for HST, stitch, and then trim them to size. If you prefer to do the same, add a bit extra to the measurements for Patches #1-#4 above (I added 3/8" to each dimension for the sample block). There is a chart further down in these instructions where you need it for trimming them to size. DO NOT add any extra to #6 or #8 before subcutting. If you have a perfectly reliable 1/4" seam allowance use the dimensions in the cutting charts for these patches. | |||||||
🪡 Assemble the units for a Cake Stand block
Helpful Hint:
While we use the Quick Pieced method for making HSTs in this tutorial, if you're making a bunch like blocks, consider switching to either the 8-at-a-time method or triangle paper to streamline the process.
Click either link above for a tutorial on each technique, as well as, some complimentary triangle papers for you to download and print if you'd like to test it out the technique for yourself.
Small and Large HSTs
Make 6 with #1/#2 patches
Make 1 with #3/#4 patches
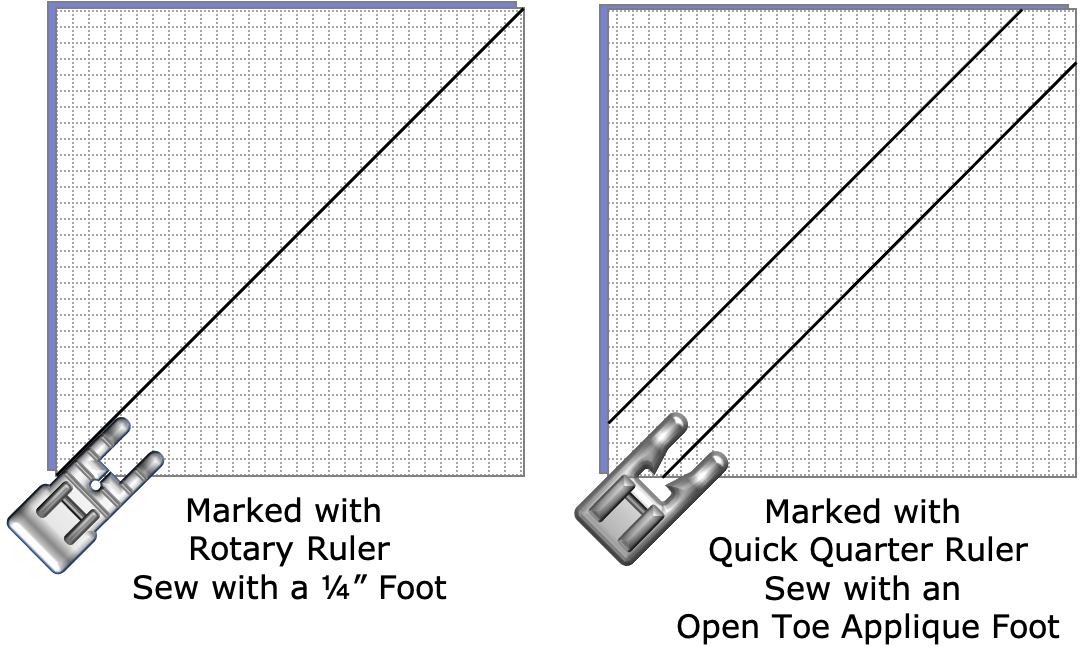
There are two ways to mark you HSTs for this Quick Pieced method.
Which one you choose usually depends on which ruler and presser foot you have handy.
Either:
- Use any ruler and mark a single diagonal line on the wrong side of #1. Stitch a 1/4" away from both sides of the line with your favorite 1/4" presser foot (below left), or
- Use a Quick Quarter ruler and mark two diagonal lines both a 1/4" from the center diagonal of one pair of corners. Stitch directly on the markings with an open toe applique foot—if you have one. It makes it easy to see and stay on the lines (below right).
For each of the sewn pairs (three #1/#2 and one #3/#4), cut them in half between the two lines of stitching.
Press with the SA to the dark.
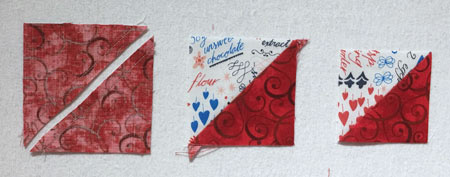 A #1/#2 cut in half after sewing, SA pressed to the dark and trimmed to perfection. You'll repeat this for the #3/#4 unit, too.
Then use the chart below to check the accuracy of your stitching. Or if you started with oversized patches, trim your units to perfection.
Trim HST to this size after stitching | ||
|---|---|---|
| Finished Block Size | #1/#2 | #3/#4 |
| 5" | 1½" | 3½" |
| 7½" | 2" | 5" |
| 10" | 2½" | 6½" |
| 15" | 3½" | 9½" |
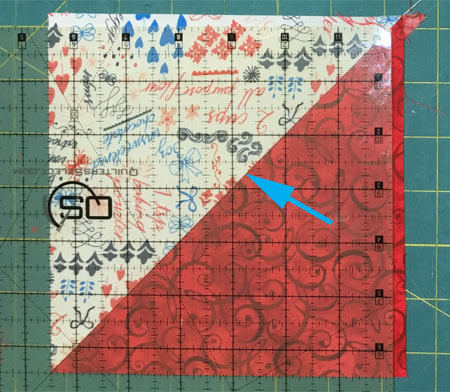
You can use a standard square ruler to trim your units.
Why a square ruler?
Because it reliably has a 45° angle on it that runs from corner to corner. I especially like using a Quilter's Select ruler for this trim-job.
It's got a 'grippy' film on the backside that holds the fabric without sliding around.
In the photo below, the first trim is done, the unit has been flipped 180° to access the remaining two sides.
Align the trim size (from the chart), which for our sample Cake Stand block is 6½" with the left and lower edges, and the 45° line with the seam (blue arrow) and trim to perfection.
If you started with patches cut exactly to size, you'll be simply tidying up your edges.
Basket Handles
Make 1 each, mirror-image
With RST, stitch 3 HST together to form the two different basket handles we need to complete our Cake Stand quilt block (illustrated here).
Press all the SAs toward the dark #2 patches.
 Left handle
 Right handle
To complete this step, with RST sew the #7 square to the #2 triangle on the left side of the right handle.
Finish by pressing this SA toward #7 to avoid any bulk at the seam.
 Right handle plus #7
Basket Legs
Make 1 each, mirror image
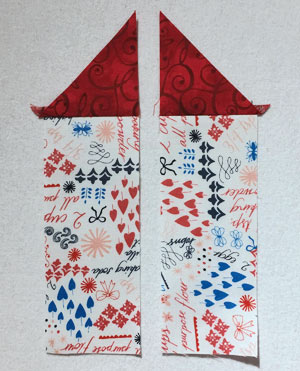 Cake Stand - the basket's legs
To complete each leg, with RST sew a #6 to a #5 as shown in the photo below.
Stitch so that you start at the edge that is square to avoid chewing up those points.
The bottom point of #6 sticks out a bit past the edge of #5 where they meet. This is correct.
🧩 Assemble our Cake Stand quilt block
Arrange your patches for the main part of the basket using our sample block below.
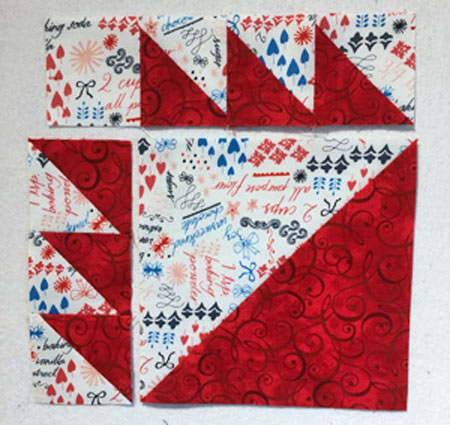
With RST, stitch the left handle to the #3/#4 HST. The seams of the #1/#2 and #3/#4 HSTs nest where they meet. :)
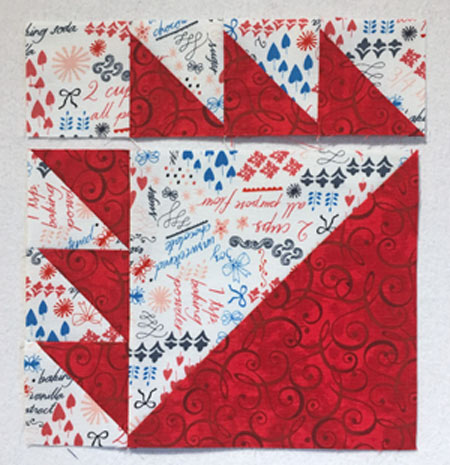
Press the SA toward the large #3 light triangle.
With RST, sew the right Handle plus #7 to the basket (at the top in the picture above).
Again, SAs nest to make matching them so much easier.
Pin as needed.
Press toward the #3/#4 in the center.
With RST, add the legs to their respective sides of the basket—the long dark edge of small #7 is next to the dark large #4 triangle on both sides of the basket.
When you add the first leg, the #7 triangle sticks out a bit extra. This is correct.
Once you add the second leg, a 'V' is formed where the #7s meet.. Your 1/4" seam should go directly through the valley of the 'V' (blue arrow).
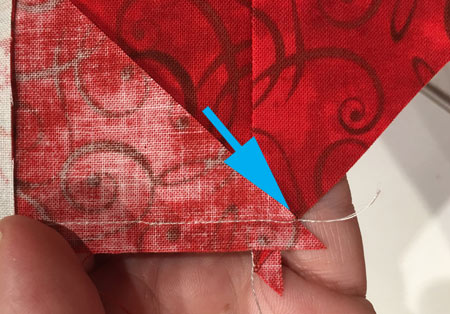
Press these last two seams toward the leg units.
We're almost done with our Cake Stand block...stand up and stretch a bit. Hmmmm. Might need a bit of ice cream with our 'cake' to celebrate!
Fold the long bias edge of #8 in half and fingerpress a crease (blue arrow) to mark the middle.
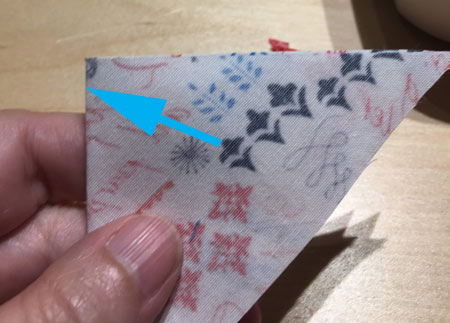
With RST, match this crease with the bottom corner of the large dark #4. Pin to align everything.
With the #8 patch nearest the feed dogs (so you don't mistakenly flip the SA while stitching), sew the seam. It goes right through the point of the 'V' created at the ends of the two sections.
You guessed it!
Press the SA out towards the corner to avoid bulk.
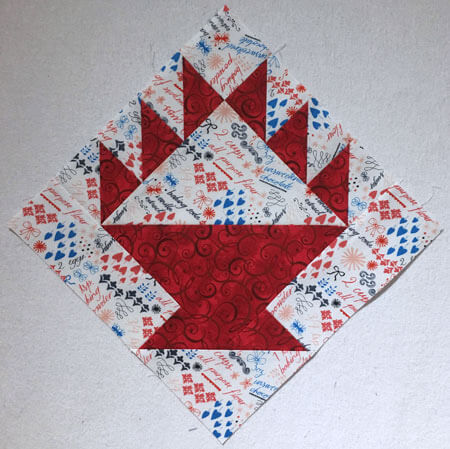
After one last turn at the ironing board (have you tried a wool pressing mat???—they're divine!) our Cake Stand quilt block is finished and ready to be sewn into your quilt!.
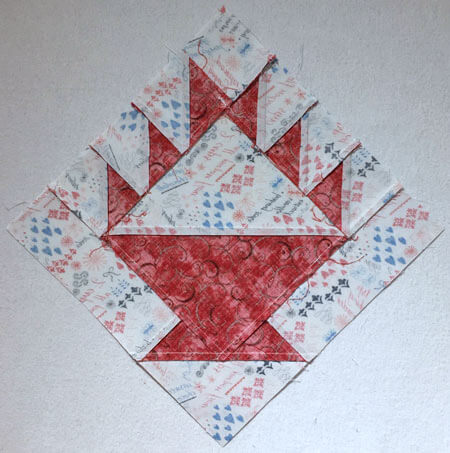
Last, but not least, a view of the backside of the Cake Stand quilt block to see how all our SAs are pressed.
📌Craving some quilting inspiration? 🧁
Pin this sweet treat for later! 🎂
What about a different quilt block?
For a list of all the 220+ quilt block patterns on this site, start here.
If you know the name of the block, shorten your search by using these links:
Click here if you're looking for blocks with at least some paper piecing.
Click here if you're looking for the basic building blocks of quilting, i.e., Flying Geese, half square triangles, quarter square triangles, etc., along with several techniques to make each.
And finally, use these links to find blocks in these finished sizes:
- Home
- Free Quilt Block Patterns
- Cake Stand Quilt Block
