- Home
- Free Quilt Block Patterns
- Arrowhead Quilt Block
Arrowhead Quilt Block Pattern
From our Free Quilt Block Patterns Library
This post contains affiliate links, for which I receive compensation.
Skill Level: Beginner
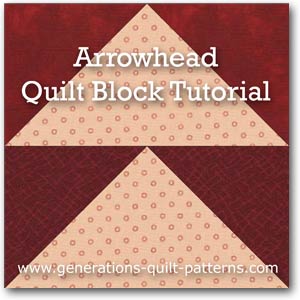
The Arrowhead quilt block is another name for a pair of stacked Flying Geese units.
This tutorial shows you how to paper piece them efficiently so that they are both fast and accurate—all without lopping off the top points of the Geese!
On this page you'll also find downloads for this basic pattern in 5 different sizes along with illustrations of several other blocks that carry the 'Arrowhead' name.
Pairs of Flying Geese such as these are used as units within many other blocks. If the block name is underlined, click it to go to the instructions to make it.
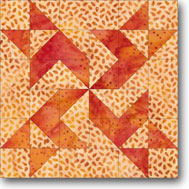
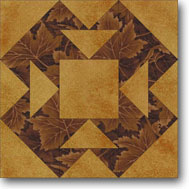
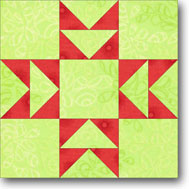
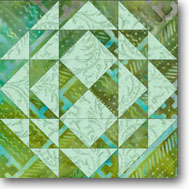 Corn and Beans
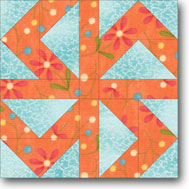 Farmer's Puzzle
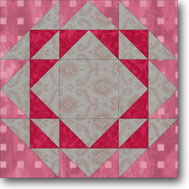 Triangle Quilt
Hate paper piecing?
Click here for alternative methods to construct Flying Geese units.
General Instructions
Install an open toe applique foot for the best view of where your needle pierces the paper.
Shorten your stitch length to 15-18 stitches/inch. If you find it hard to remove the pattern at the end, insert 90/14 needle.
Because I use paper specifically intended for paper piecing (you can find a link to my favorites in the right column on this page), I find that my everyday 80/12 Microtex Sharp works just fine.

When you are instructed to 'Press', first press the pieced unit flat to set the seam. Then open the patch, pressing from the front.
You may want to reduce or eliminate the use of steam for pressing these paper pieced blocks.
Steam tends to curl the paper.I starch all my fabrics before piecing. You can learn why and how by clicking here.
Take a minute to review our favorite technique to make the flattest quilt blocks ever!
It works even with the paper attached.
Now THAT'S sweet!
Step 1: Download the paper piecing pattern
You'll need the most current version of Adobe installed on your computer to download the pattern.
On the Adobe Print Menu page, under 'Page Size and Handling' set 'Custom Scale' to 100% before printing for accurate results. Click here to see what it looks like on the Print Menu page.
After printing, use the 1" square graphic on the printed pages to confirm they are printed accurately.
Download Links for finished block sizes (you'll need just one copy):
New quilt fabrics to tickle your fancy...
Click the images below to see the full collection. We share any commercial and/or free patterns that showcase them, too. (For inspiration, of course!)
Step 2: Cut the fabric patches for your Arrowhead
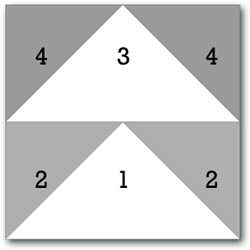 Arrowhead design
Sample Size: 3" finished / 3½" unfinished
Grid: 2x2
Attribution: Old Chelsea Station
AKA: A Victory Quilt (attributed to The Kansas City Star)
These patches are generously sized to make patch placement as foolproof as possible.
Make a couple of blocks. Fine tune the sizes to your needs and note any changes on a pattern and file away for when you need it again.
All the dimensions are for cut squares. For example, for the #1 Patch for our 3" finished block cut one 4-5/8" x 4-5/8" square, then subcut it diagonally twice.
Our block uses two different 'sky' fabrics (Patches 2 and 4). It's perfectly acceptable to use a single fabric instead.
The choice is yours!
 | Cutting Chart for an~Paper Piecing ~ | |||||||
|---|---|---|---|---|---|---|---|---|
| Patch | Fabric | Qty | Finished Block Size | Sub Cut | ||||
| 1½" | 2" | 2½" | 3" | 4" | ||||
| 1, 3 | A | 1 | 3⅛" | 3⅝" | 4⅛" | 4⅝" | 5⅝" | |
| 2 | B | 1 | 2⅛" | 2⅜" | 2⅝" | 2⅞" | 3⅜" | |
| 4 | C | 1 | 2⅛" | 2⅜" | 2⅝" | 2⅞" | 3⅜" | |
| Unfinished Block Size | 2" | 2½" | 3" | 3½" | 4½" | na | ||
| Grid Size | ¾" | 1" | 1¼" | 1½" | 2" | na | ||
Click here to see the cut patches for the Arrowhead quilt block.
Step 3: Assemble the Arrowhead quilt block
General Sewing Machine Setup for Paperpiecing
- Reduce your stitch length to 16–20 stitches per inch (1.3-1.6 mm). This perforates the paper and stabilizes the seam when you remove the pattern. [Learn more about stitch length here.]
- Reduce your machine's speed or just plain slow down. Sew only as fast as you can stay on the stitching lines.
- Install an open toe appliqué foot (sometimes called an 'embroidery' or 'satin stitch' foot) if you have one (it's easier to see where you're stitching with one installed).
- Use a larger needle (90/14) if you have problems removing the pattern.
- If your machine has a needle stop up, use it. The stitching goes faster when you don't have to lift the presser foot with every seam.
- As you stitch each seam, start and stop a generous 1/4” before and after the solid stitching lines. ALWAYS. Future lines of stitching secure the ends.
After adding each patch, press the unit as it was sewn to set the seam and then open. The SA is automatically pressed towards the last patch added.
Before adding the next patch, take a look to make sure the one you just added covers the space plus seam allowance that it is supposed to.
Steam is optional and usually curls the pattern.
If that bothers you, don't use steam. Sometimes I do. Sometimes I don't.
It truly depends on my mood.
Remember, as you follow this paper piecing tutorial, the printed and the fabric sides of this block are mirror-images of each other.
At last!
Let's sew!
Cut one unit from the page you downloaded, cutting just outside the dotted line. Save the others for another project.
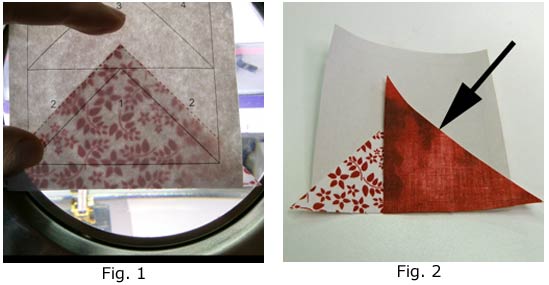
Use a dot (seriously, don't over do) of Elmer's Glue Stick (the one that goes on purple and dries clear) to hold #1 to the unprinted side of the pattern. Use the dashed placement lines to position it. (Fig. 1)
With right sides together, (RST) align the long bias edge of a #2 triangle with one of the short sides of #1 (Fig. 2).
It doesn't matter if you do the left or the right side first, though consistency makes it more efficient feeding the units through your sewing machine.
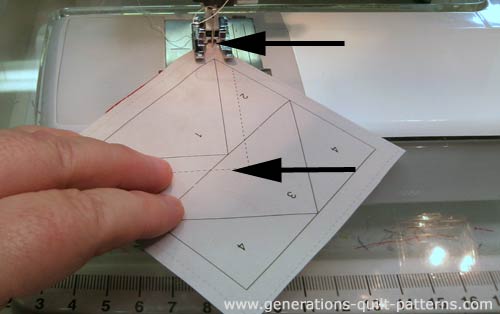
Stitch the seam starting about a 1/4" inch before the line begins and stopping about a 1/4" after the line ends (black arrows).
Press. Since these fabrics were starched before cutting, I am able to fingerpress this small triangle open (Fig. 3) saving a trip to the iron.
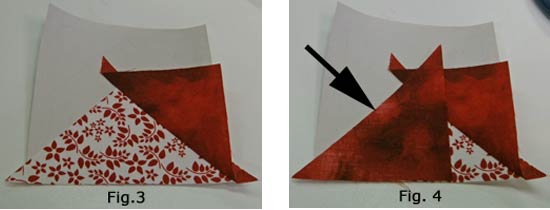
Add the second #2 triangle in the same manner, again matching the bias cut edges (Fig. 4).
To create the placement line for #3, line-up the edge of your ruler with the solid line (at the arrow) in the middle of the block.
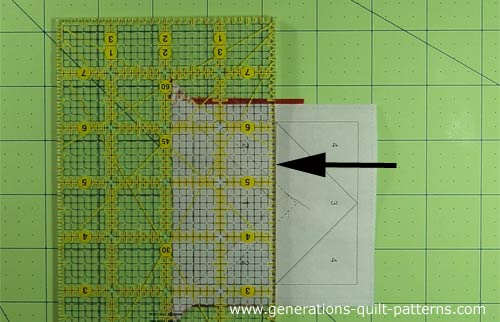
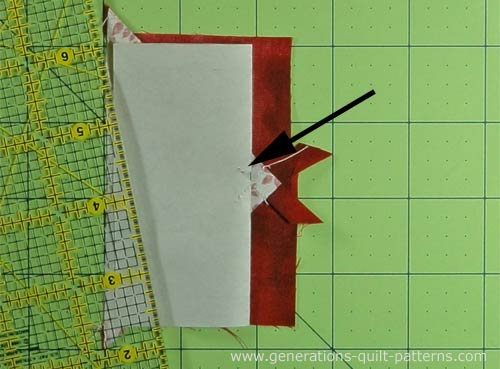
Use your thumbnail to crease the pattern along the ruler's edge. Remove the ruler and fold the pattern back along the crease line.
At the arrow you can just see where the stitches were pulled out of the paper to get it to lay flat. That's exactly how it should be!
Align the ruler's 1/4" mark (at arrow) with the folded edge and cut off the excess fabric with your rotary cutter.
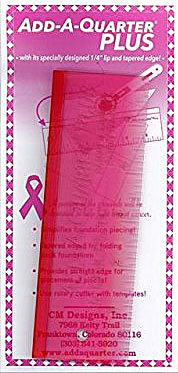
While I learned to paper piece using my everyday ruler—and use it to this day for this step—many quilters prefer to use an Add-A-Quarter Plus ruler.
It comes either 6" or 12" long or in a combo pack.
On one long edge it has a lip which catches the folded paper. You'll never missed trimming to the perfect 1/4" with it. (And yes, I HAVE accidentally cut off the seam allowance a time or two with my standard ruler.)
The Plus version has a tapered edge to fold the paper pattern back over. This is a vast improvement over the original Add-A-Quarter.
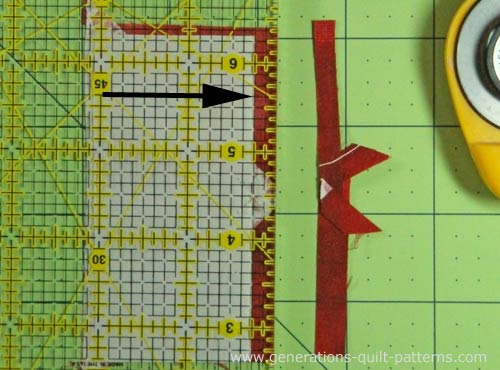
You've just created the placement line for your next patch. Match the long edge of #3 with the cut edge (see arrow below).
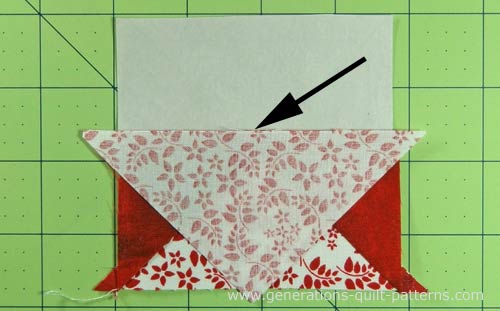
Stitch from the right side, again starting and stopping a 1/4" off the line.
Press.
Again, trim to establish the placement line for each short side of #3. Add both #4 triangles, pressing after each is stitched.
After the sewing is complete, your Arrowhead block looks like this.
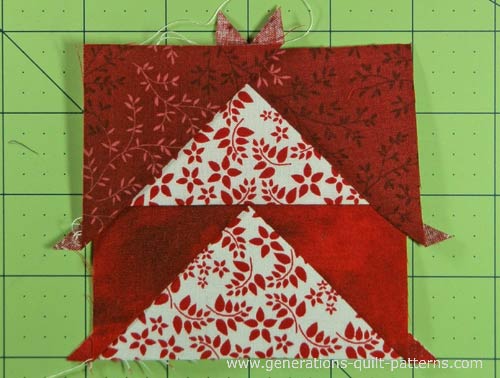
The point at the top of each goose is nice and pointy!
But the block looks pretty scruffy at this point. I don't bother to trim the thread tails at the outside edges until the block is finished unless they are in my way.
To trim the block to size (3-1/2" for our example) match the 1/4" mark on your ruler with the solid black outline of the block and trim with your rotary cutter.
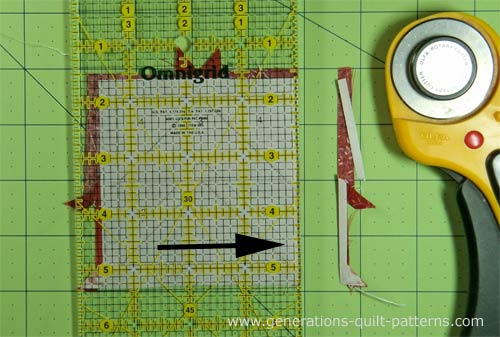
Then repeat for the remaining three sides.
All those stray threads are now gone with no extra effort!
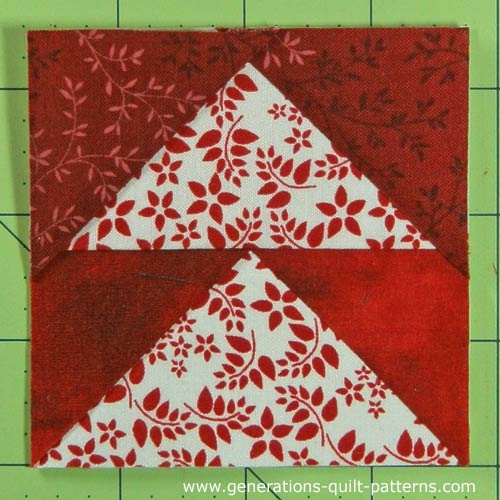
Remove the paper and your finished Arrowhead quilt block looks like this.
Same name, different block...
It's common to have many different blocks use the same name and the Arrowhead quilt block is no different.
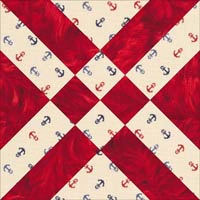
No relationship at all to the block in the tutorial!
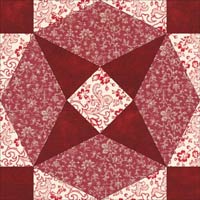
Another completely different block. This one also goes by the names: Her Sparkling Jewels, The Gem Block, Idaho, Sparkling Jewel—much more appropriate names, don't you think!?
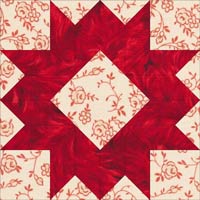
Though it might look like it from the picture, this pointy Arrowhead quilt block is composed of parallelograms, not diamond shapes (as in a LeMoyne Star).
There are several versions of this next variation. The one on the far right is actually called 'Arrowheads' in the plural.
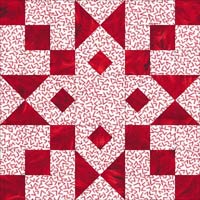


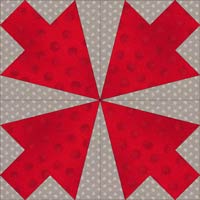
This one looks the most like 'arrowheads'!
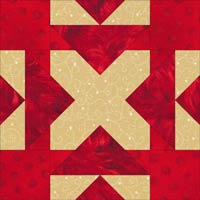
And our final block also goes by the plural, 'Arrowheads'.
Your arrow hit its target!

You've hit the bull's-eye with the Arrowhead quilt block, but there's more blocks to be made!
Click here to find your next one in our Free Quilt Block Patterns Library.
What about a different quilt block?
For a list of all the 220+ quilt block patterns on this site, start here.
If you know the name of the block, shorten your search by using these links:
Click here if you're looking for blocks with at least some paper piecing.
Click here if you're looking for the basic building blocks of quilting, i.e., Flying Geese, half square triangles, quarter square triangles, etc., along with several techniques to make each.
And finally, use these links to find blocks in these finished sizes:
