- Home
- Free Quilt Block Patterns
- Georgia Quilt Block
Georgia Quilt Block
From our Free Quilt Block Patterns Library
This post contains affiliate links for which I receive compensation.
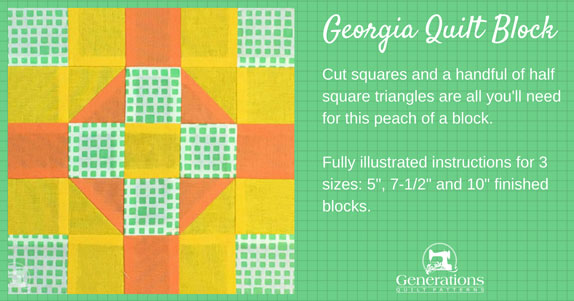
The Georgia quilt block is a peach of a block to make—all you need are cut squares and a handful of half square triangle units per block.
In this tutorial you'll find:
- A cutting chart in 3 sizes that you can also download and print
I've got Georgia on my mind, let's get it on our sewing machine, too!
General Instructions
These abbreviations are used in this tutorial:
- RST - right sides together
- SA - seam allowance
- HST - half square triangle
Seams are all 1/4" and pressed toward the darker fabric unless otherwise noted.
Pressing instructions are highlighted in yellow.
New quilt fabrics to tickle your fancy...
Click the images below to see the full collection. We share any commercial and/or free patterns that showcase them, too. (For inspiration, of course!)
Step 1: Cutting for a Georgia quilt block
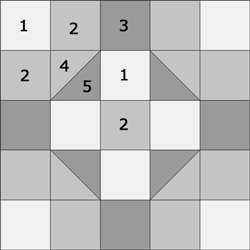 Georgia block design
Sample Size: 7" finished / 7½" unfinished
Grid: 5x5
Design Type: Uneven 9-patch, small center
Attribution: Hearth & Home
AKA: State of Georgia (Workbasket)
Three fabrics—a light, a medium and a dark are needed to make this block.
For the scrap-lover, consider using scraps for your light and medium values and a single fabric for your dark.
Label your patches as you cut. The numbers are used in this tutorial.
Click her to print a copy of the Georgia block design and cutting chart to use at your cutting table.
 | Cutting Chart for a~Traditional Piecing ~ | |||||
|---|---|---|---|---|---|---|
| Patch | Fabric | Qty | Finished Block Size | |||
| 5" | 7½" | 10" | ||||
| 1 | Light | 8 | 1½" x 1½" | 2" x 2" | 2½" x 2½" | |
| 2 | Medium | 9 | 1½" x 1½" | 2" x 2" | 2½" x 2½" | |
| 3 | Dark | 4 | 1½" x 1½" | 2" x 2" | 2½" x 2½" | |
| 4** | Medium | 2 | 1⅞" x 1⅞" | 2⅜" x 2⅜" | 2⅞" x 2⅞" | |
| 5** | Dark | 2 | 1⅞" x 1⅞" | 2⅜" x 2⅜" | 2⅞" x 2⅞" | |
| Unfinished Block Size | 5½" | 8" | 10½" | |||
| Grid Size | 1" | 1½" | 2" | |||
| **I prefer to cut my patches extra large for HST, stitch, and then trim them to size. If you prefer to do the same, add a bit extra to the measurements for Patches #4 and #5 above (I added 3/8" to each dimension for the sample block). There is a chart further down in these instructions where you need it for trimming them to size. If you have a perfectly reliable 1/4" seam allowance use the dimensions in the cutting charts for this patches. | ||||||
Step 2: Assemble the Georgia units
Patch Pairs
4 each
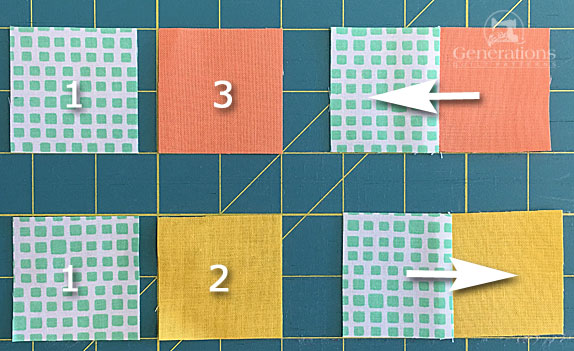
With RST sew a #1 to a #3, repeat for a total of four.
With RST sew a #1 to a #2, again repeating for a total of four.
All the seams are pressed toward:
- #1 in the #1/#3 unit
- #2 in the #1/#2 unit
Half Square Triangles (HST)
Make 4
 Make 4
We use the Quick Pieced method for making our HSTs.
If you plan to make many blocks, you may want to use another HST method like 8-at-a-time or triangle paper.
Mark a single diagonal line on the back of either your #4 or #5 patches—whichever one is easier to see the mark on.
With RST, layer a #4 and #5, marked patch on top.
With your favorite quarter inch foot installed on your sewing machine, stitch a 1/4" away from both sides of the line for both pairs of patches.
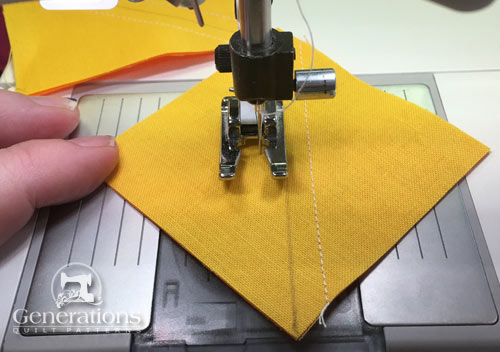 I left my quarter inch foot at home the day I made this sample. So I adjusted my needle position so that it's a 1/4" away from the edge of my open toe applique foot. There's always a way to get things done in quilting. :)
Give your sewn pairs a quick press to set the seam.
Cut each pair in half along the drawn line.
Press with the SA to the dark.
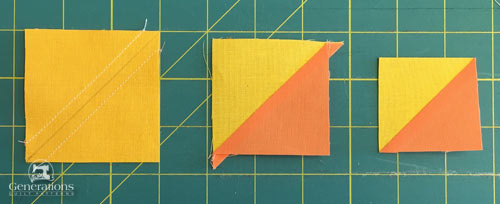 After stitching (left), after cutting in half and pressing (middle) and finally after trimming to size (right).
If you added a bit extra to the #4 and #5 patches when you cut them, it's time to trim them down to size.
Use the measurement from the chart below that corresponds to your chosen Finished Block Size.
If you cut the patches exactly, measure to confirm they are the correct size and trim away the dog ears. Make any necessary adjustments.
| HST Dimensions | ||
|---|---|---|
| Finished Block Size | Trim HST to… | |
| 5" | 1½" x 1½" | |
| 7½" | 2" x 2" | |
| 10" | 2½" x 2½" | |
After trimming your HST should look like the one in the photo above on the far right.
Corner Units
With RST sew a #2 square to the left side of a #4 side of a #4/#5 HST (below left).
Press SA toward #2 to avoid creating bulk.
Repeat for a total of two.
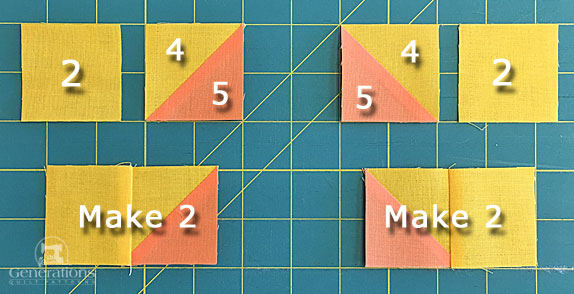
With RST sew a #2 square to the right side of a #4 side of a #4/#5 HST (above right).
Press SA toward #2 to avoid creating bulk.
Repeat for a total of two.
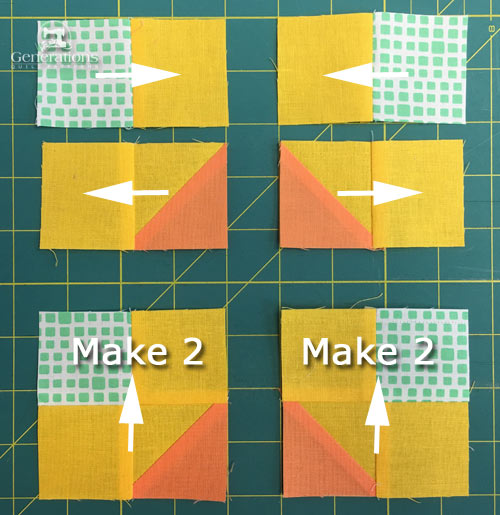
You'll need two different pairs of patches for the right and left hand sides of the block.
Arrange your patches as shown below, making two of each.
The SA that joins these pairs is pressed away from the pair that contains the #4/#5 HST.
Step 3: Assemble the Georgia quilt block
Arrange the corners, sides and center patch to create the Georgia quilt block design.
A light #1 patch is in the outside corners.
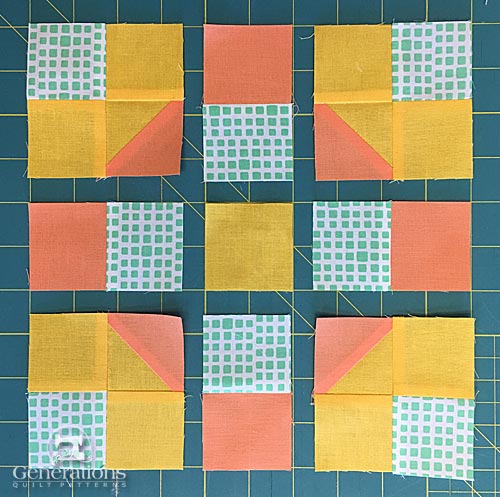 You can see in this picture how the SAs are pressed away from the #4/#5 HSTs.
With RST, sew the units together into rows.
Pin as needed to get nice matches at the points. Click here to learn more about 'Pinning for Perfect Points'.
SAs are pressed towards the side #1/#3 two-patch units.
Rut Roh!
The photo below is a little bit wonky.
That right edge looks rather curvilicious...not so in real life. My bad! I'm a much better quilter than photographer!
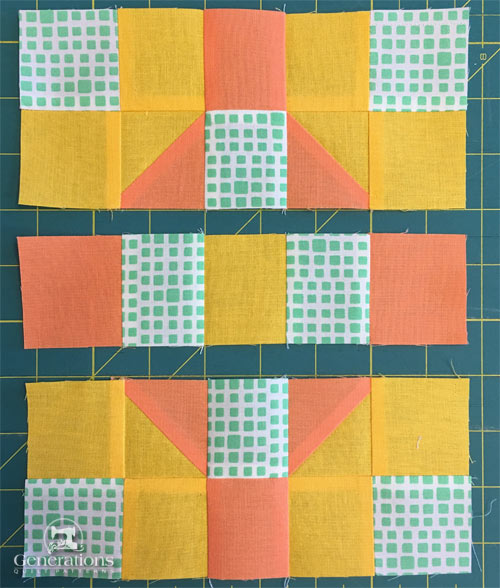
With RST, sew the rows together. Again, pin as much as YOU need for good matches at the points.
And our Georgia quilt block is finished!
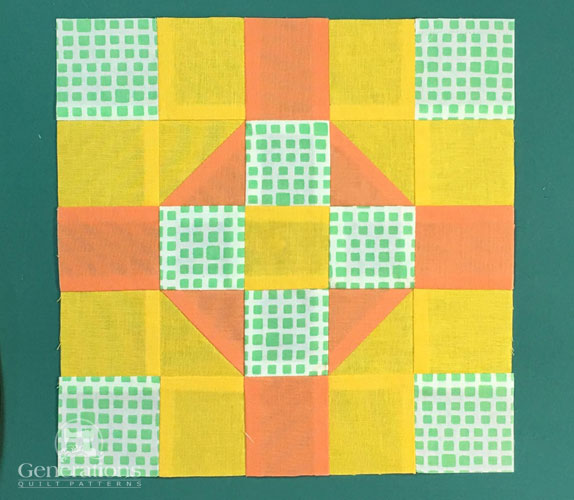 Georiga block from the front
Here you can see it from the wrong side. See how all of our seams nested? This helps make it easier to get good match points in our patchwork.
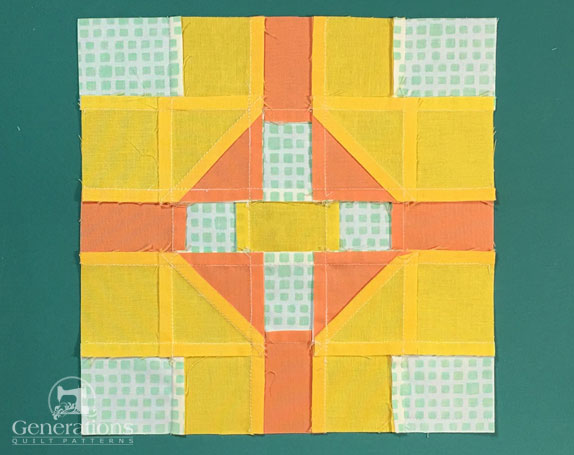 Georgia block from the back
What about a different quilt block?
For a list of all the 220+ quilt block patterns on this site, start here.
If you know the name of the block, shorten your search by using these links:
Click here if you're looking for blocks with at least some paper piecing.
Click here if you're looking for the basic building blocks of quilting, i.e., Flying Geese, half square triangles, quarter square triangles, etc., along with several techniques to make each.
And finally, use these links to find blocks in these finished sizes:
