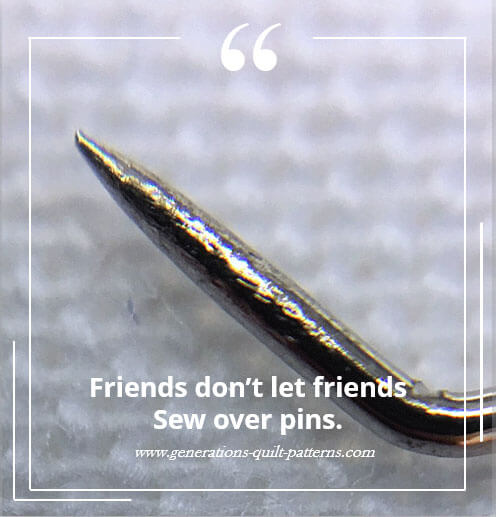
Friend Don't Let Friends Sew Over Pins
...the only one who's happy when you do is your sewing machine repair-guy. Ka-ching!
This post contains affiliate links, for which I receive compensation.
If you've heard it once, you've heard it a million times...
...DON'T. SEW. OVER. PINS!!!
But if you're like me, this is probably what you really heard (click on the little white arrow in the image below)...
Sound familiar?
Endless whiny warnings about something that almost never happens.
So why should you follow the advice?
On this page you'll learn:
- What it'll cost you,
- A warning about some of the 'tricks'—yep! those are air quotes—you might hear about to avoid hitting pins.
Sew, let's get to the point.
Sew what happens when you sew over pins?
You could get lucky!
And for the most part we are..missing more pins than we hit.
But every time we come to a pin and keep sewing, we're taking a chance...
...with our precious sewing machine and our pocketbook no less.
TOTAL COST: A couple of new grey hairs
You could just graze the pin
You know the sound. That little thunk. That exhaled 'Whew!' because you realize how close a call it was.
Everything looks O.K.
But to get the best results in your stitching, shoot the lock off your wallet and change the needle. Toss the old one. Even if you just nicked the pin.
Every time that needle tip meets stubborn resistance it wears a heap more than when it's just sliding through fabric. Your stitch quality suffers.
(The next time I hit a pin—and there'll be a next time—I'm an impatient quilter—I'll take a real close-up picture so that you can see the damage that's invisible to the naked eye. Promise!)
TOTAL COST: Less than $1 for replacement needles and a few more gray hairs.
Bullseye! you nailed it. Dead on.

Now my friend, you've got trouble.
Trouble with a capital 'T'.
That rhymes with "Gee! That.Totally.Sucks!'
If you're lucky, all that's happened is the needle broke. It does that when it hits something solid.
Always.
If you wear glasses like I do, you're probably not all the worried about little pieces of tempered steel blasting off into space.
And they do.
If you're not a wearer of specs, keep your eyes peeled for incoming.
And what goes up, must come down.
Unfortunately, those little razor-sharp shards don't come down in a nice, neat little pile that you can see.
Yep.
They end up on the floor. Don't worry. You'll find them eventually...
...just hopefully not with your big toe.
Take a breath. Check to see how your machine fared.
If you're lucky, the pin is just bent in the fabric...
...and not all jammed into the throat-plate hole, twisted like a lunch-cart pretzel around and through your fabric.
Taunting you to free it.
If you live a charmed life, working it out of your fabric won't leave a hole in your project. Keep those fingers crossed.
Now you can hit a pin and not break the needle. Occasionally that happens. But that doesn't necessarily mean you dodged the bullet.
See the gouge in my throat-plate?
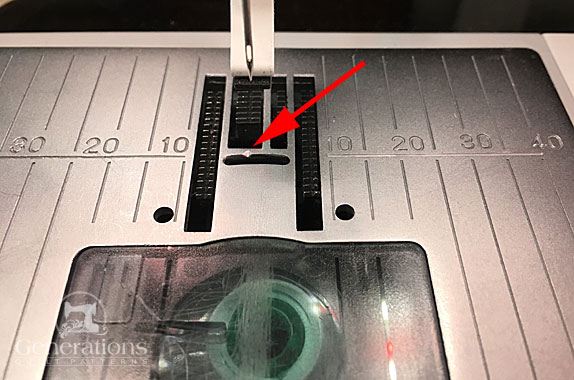
Yep. That was from a pin-hit that was deflected.
LUCKILY the damage is behind the needle so it doesn't (yet) affect stitch formation. If it does, that means a new throat-plate. A total pain in the ol' wallet.
Whether or not your needle breaks, replace it.
Do.Not.Pass.'Go'.
Do.Not.Cheap.Out.
If it didn't break there's a good chance the point is damaged. The shaft is bent.
Even if you can't see it with your naked eye.
After re-threading the machine, say a prayer and stitch a bit.
Are stitches forming?
Do they look OK? Top and bottom?
Anything askew with the tension?
If there's any stitch formation problems that minor adjustments to your tension don't fix, you've probably thrown off your machine's timing—that controls as you sew when your needle thread grabs the bobbin thread to form a stitch.
Check out the videos in my article "How Sewing Machines Work" to get a good visual on the importance of coordinated workings inside your sewing machine.
TOTAL COST: Either new needles and/or a new throatplate and/or a trip to the technician to fix the timing. Real money.
Good-bye sew-time for awhile—here in Illinois, my fix-it-guy wants the machine in his shop 2 weeks before he thinks he'll get to it. ARRRGGGHH!
The Myths
There's a couple falsehoods out there about how to avoid hitting a pin. They include:
- Sew slowly
- Use fine pins
- Pin perpendicular to the cut edge.
I'm the poster child for 'bought the t-shirt'. Here, however; I vouch for the ineffectiveness of these recommendations.
'Sew slowly' works just as long as you really do sew slowly...all the time...and are patient enough to remove pins as you come to them. (That last part is what prevents you from hitting the pins.)
Fine pins?
Intuitively, because they're thinner, you'd think they'd be harder to hit.
Trust me. Fine pins aren't reliable insurance.
IBC's Super Fine Pins are my absolute favorite pins. Use them all the time. Super nice. Super fine. (In fact, all the pins show in the pictures on this page are all my IBC Fine Pins. Though the pin heads are now red instead of white.)
But I've hit those babies.
The needle breaks.
The pin bends all contorted.
It's not pretty.
Pinning perpendicular to the edge. Hey if the pin and your needle are fated to meet, if they cross paths, they will.
The only way to prevent it is to get the pin out of the way.
Pins inserted perpendicularly to the edge are easier to remove—that I will vouch for. One just needs to be disciplined to do it.
In the picture below, the pin heads are to the left because I use a 1/4" foot with a guide on the right-hand side. The block is Amish Star. Instructions to make it are here.
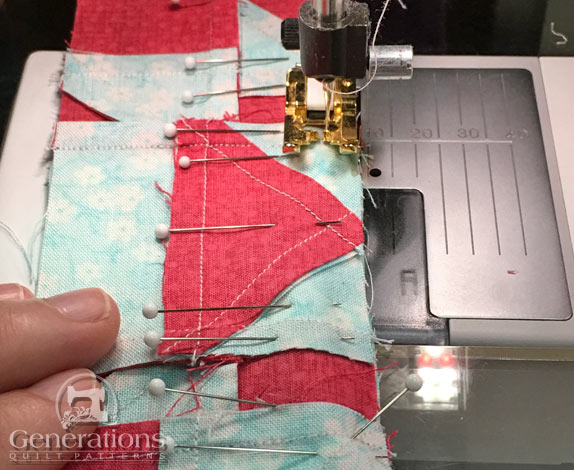 Ready to sew—pins inserted perpendicular to the edge are easier to remove.
Do I sew over pins knowing all this?
While I try really hard not to sew over pins, the honest reality is that I do from time to time. Especially when I'm coming to points that are essential (in my mind) that they match.
The best thing to do is sew slower (you're already doing this if you want to be in control of your machine instead of simply along for the ride).
Stop just before you come to the pin and remove it.
Since it's pinned perpendicular to the edge, it's quick and easy to remove. Keep the pin cushion handy to save time.
Continue until the next one.
Be safe. Save money. Save time.
Don't sew over pins.
Next—take your pinning to the next level...
Nothing says "I've arrived" as a quilter than points that match. Perfectly.
Learn how to Pin for Perfect Points.
