- Home
- Free Quilt Block Patterns
- Chained Star Quilt Block
Breaking the Chains🔗: Simplifying the Chained Star Quilt Block🌟
Free yourself from boring blocks, one chain at a time 🔓🌠
This post contains affiliate links, for which I receive compensation.
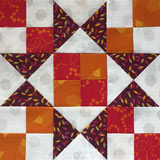
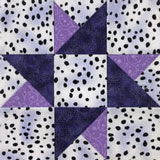
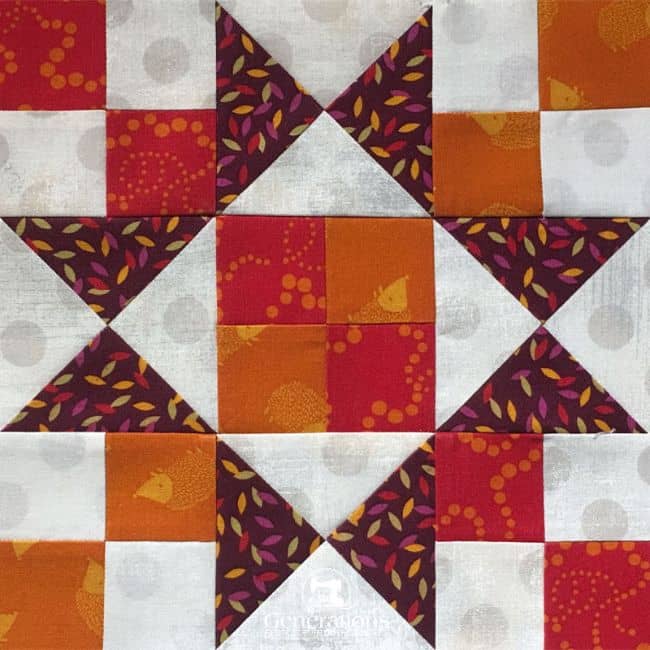
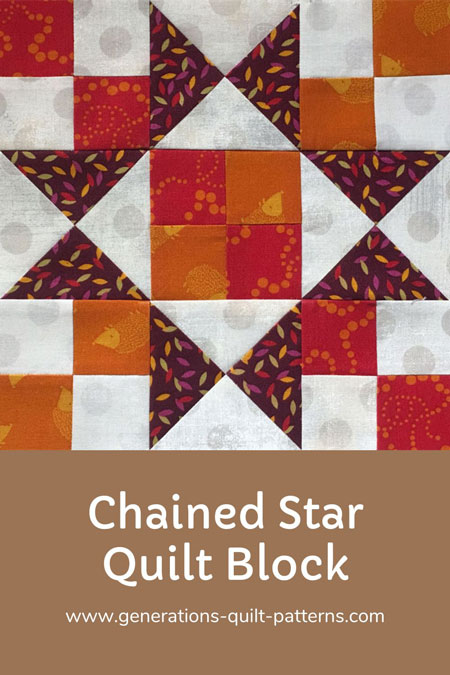
Make a wish and it will come true with this Chained Star quilt block.
Get creative by mixing three fun fabrics, plus an extra dark one to create four-patches and quarter square triangles. You can then choose the perfect size for your dreamy design—whether that be 6", 9", 12", or 15".
The possibilities are endless - all you need is some thread (and maybe a sprinkle of pixie dust!).
🧭Ready to navigate the galaxy of the Chained Star quilt block? 🔍
Our celestial map below will guide you to all the cosmic corners of this tutorial. No need for a space suit – just your trusty mouse!
- A cutting chart in four sizes with downloads of the chart and block design
- A coloring page to download and print to help you plan your fabric placements
Time to cut up and sew!
📋General Instructions
You'll find several abbreviations used on this page. They are:
- SA – seam allowance
- RST – right sides together
- QST - quarter square triangles
1/4” SA are used through this tutorial.
When instructed to press, first press the patches in the closed position just as they came off your sewing machine. This sets the seam, melding the fibers of the threads into the fibers of the fabric.
Throughout this tutorial, highlighted in yellow, are the pressing instructions. The highlight makes them easy to spot.
It's always smart to take a Sewing Test to check the accuracy of your SAs with the fabrics you'll be using in your block.
New quilt fabrics to tickle your fancy...
Click the images below to see the full collection. We share any commercial and/or free patterns that showcase them, too. (For inspiration, of course!)
✂️Cutting patches for a Chained Star quilt block
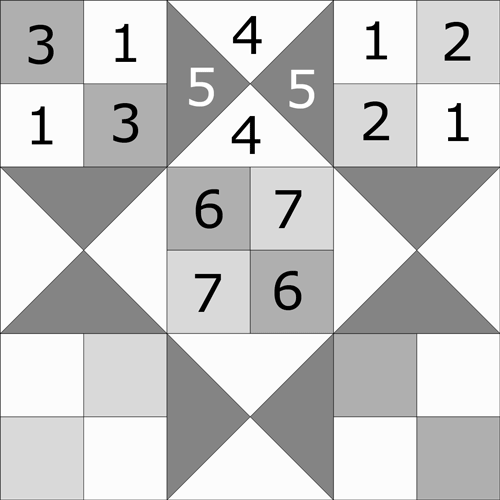 Chained Star design
Sample Block Size: 9" finished / 9½" unfinished
Grid: 6x6
Design Type: Even 9-patch | Star
Attribution: Margaret Huckeby, Quilter's Newsletter
Label your patches. Their numbers all through this tutorial.
To achieve the woven effect of the chains, choose a light, medium and a dark fabric, all with good contrast to each other and the background fabric.
I've used one of my favorite backgrounds—Grunge Hits the Spots. You can find this fabric at Fat Quarter Shop or Amazon to build your stash.
 | Cutting Chart for a~ Traditional Piecing ~ | ||||||
|---|---|---|---|---|---|---|---|
| Patch | Fabric | Qty | Finished Block Size | ||||
| 6'' | 9'' | 12'' | 15'' | ||||
| 1 | Bac | 2 | 1½'' x 7'' | 2'' x 9'' | 2½'' x 11'' | 3'' x 13'' | |
| 2 | Light | 1 | 1½'' x 7'' | 2'' x 9'' | 2½'' x 11'' | 3'' x 13'' | |
| 3 | Med | 1 | 1½'' x 7'' | 2'' x 9'' | 2½'' x 11'' | 3'' x 13'' | |
| 4** | Bac | 2 | 3¼'' x 3¼'' | 4¼'' x 4¼'' | 5¼'' x 5¼'' | 6¼'' x 6¼'' | |
| 5** | Dark | 2 | 3¼'' x 3¼'' | 4¼'' x 4¼'' | 5¼'' x 5¼'' | 6¼'' x 6¼'' | |
| 6 | Med | 2 | 1½'' x 1½'' | 2'' x 2'' | 2½'' x 2½'' | 3'' x 3'' | |
| 7 | Light | 2 | 1½'' x 1½'' | 2'' x 2'' | 2½'' x 2½'' | 3'' x 3'' | |
| Unfinished Block Size | 6½" | 9½" | 12½" | 15½" | |||
| Grid Size | 1'' | 1½" | 2'' | 2½" | |||
| **If you prefer to make oversized QSTs and then trim to perfection (like I do) add extra to these measurements. (I added 1/2" to #4 and #5 for the sample block. There is a chart in the instructions where you need it for trimming the QSTs to size. If your 1/4" seam allowance is spot on use the dimensions in the cutting charts for these patches. | |||||||
🪡Assemble the units for a Chained Star block
Corner 4-patches
Make 2 ea, #1+#2 and #1+#3
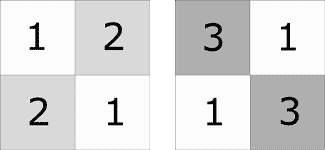 Make 2 of each
To make these four-patches, we need to construct two different strip sets.
With RST, sew a #1 and #2 strip together.
Wist RST, sew a #1 and #3 strip together.
My favorite combination for sewing stripsets is a 1/4” foot with a guide on the right-hand side with heavily starched (50% StaFlo Liquid Concentrate Starch and 50% water) fabric.
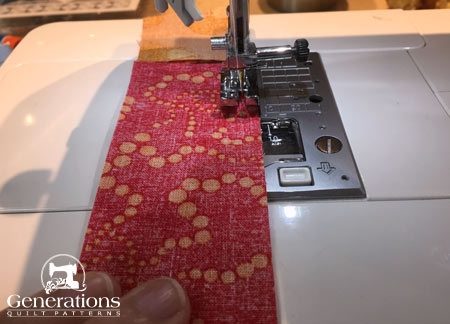 Sewing #1 to #3, repeat for #1 and #2
Press each with the SA away from the lighter #1.
Use the chart below to check your 1/4” seam. Make any adjustments you need to it now before moving on.
StripSet Widths | |||
|---|---|---|---|
| Finished Block Size | Stripset Width after stitching | SubCut Width | 4-Patch Dimensions |
| 6" | 2½" | 1½" | 2½" sq |
| 9" | 3½" | 2" | 3½" sq |
| 12" | 4½" | 2½" | 4½" sq |
| 15" | 5½" | 3" | 5½" sq |
Again referring to the chart, find the Subcut Width that corresponds to your chosen Finished Size.
For our 9" finished sample, the subcut is 2".
Straighten a short edge on each stripset by aligning a straight line on your ruler with the seam line.
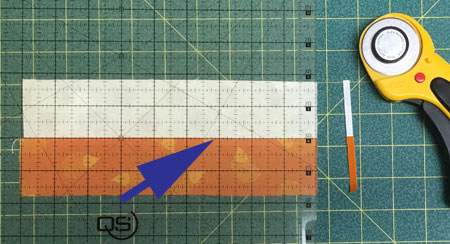
Then make your subcuts.
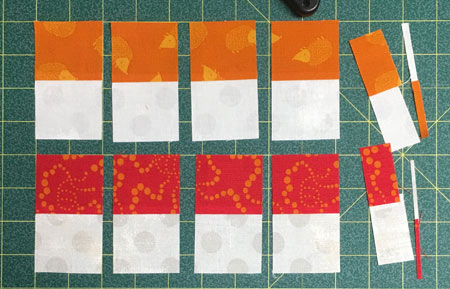 #1/#2 and #1/#3 stripsets are subcut into 4 units each. Waste is on the right.
Stitch two like pairs of each together to form your nine patches.
To minimize bulk in their centers, undo the stitches in the center (do not cut these short thread tails off because they prevent the unit from coming apart) and twirl or fan their seams as shown below.
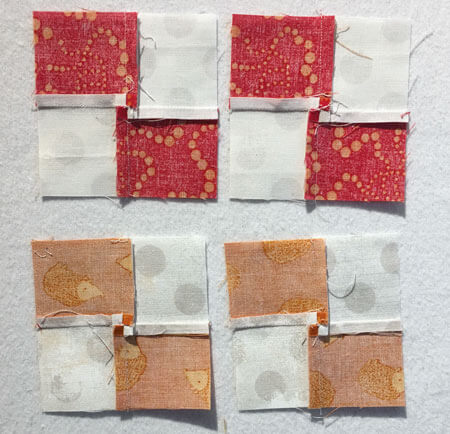 Corner 4-patches after twirling or fanning the centers—you can just barely make out the short thread tails that are left behind
See how the seams form a little four patch in the center? Cool, eh?!!!
Press, use the chart above again to check your accuracy. Set these 4-patches aside for now.
Center
Make 1
 Center 4-patch
With right sides together, sew a #6 and #7 together. Repeat.
Press the SAs toward the darker #6.
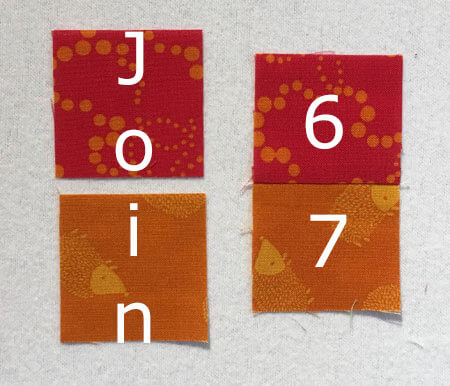 Since there's only one of these, we create this 4-patch out of squares.
With RST, sew the two pairs together, alternating #6s and #7s as shown here.
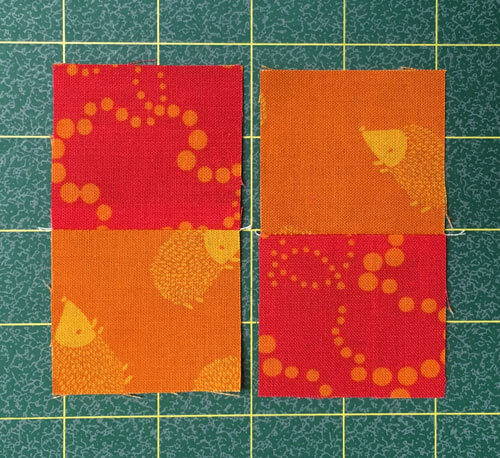
To minimize bulk, twirl, or fan this SA, too.
Use the chart above, one last time, to check your accuracy.
QSTs
Make 4

To make this unit, we use the Quick Pieced or Sandwich Method for making QSTs.
To mark the back side of the #4 squares, either:
- Use any ruler and mark a single diagonal line on the wrong side of #1. Stitch a 1/4” away from both sides of the line with your favorite 1/4” presser foot (below left), or,
- Use a Quick Quarter ruler or Magic Wand and mark two diagonal lines, both a 1/4” from the center diagonal of one pair of corners. Stitch directly on the markings with an open toe appliqué foot—if you have one. It makes it easy to see and stay on the lines (below right).
Regardless of which marking-method you choose, make the marks only as dark as YOU need to see to stitch.
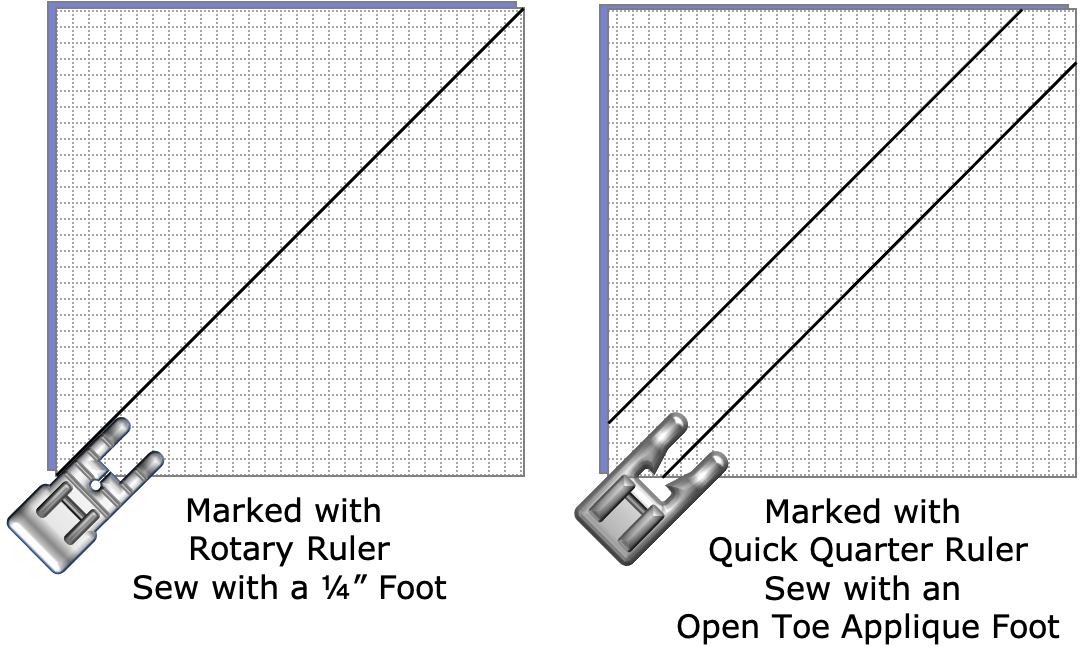
For our sample block, I used the Quick Quarter ruler and an open toe appliqué foot.
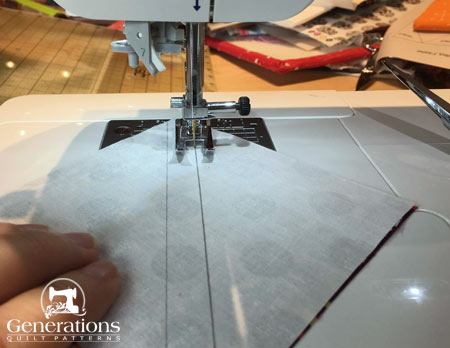 It's so much easier to see the markings with this open toe presser foot
Repeat for both pairs.
Press flat to sets the seams, then cut in half between the two lines of stitching.
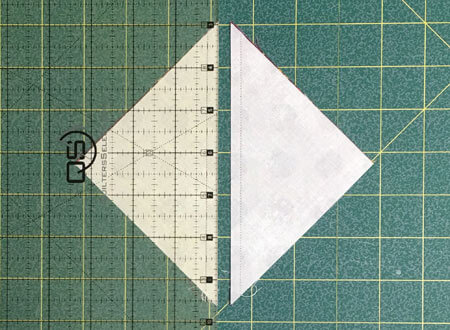
Finally, press the SA to the dark #5s.
Repeat this same marking on the backs of only two of the HSTs you just created.
While it doesn't get mentioned much, it's important that a straight line on your ruler (blue arrow below) lays directly on top of the line of stitching.
This ensures the angles at the center of your QSTs are 90°.
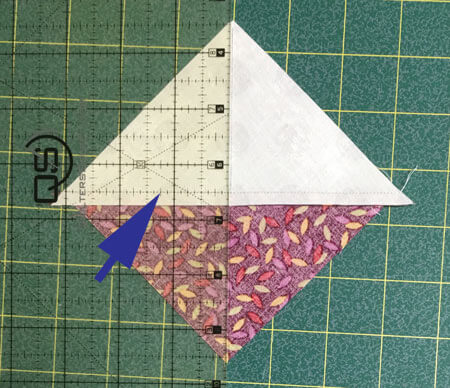
When they're 90°, your QSTs lay flat.
It's for this very reason that I prefer to cut my QST patches oversized and then trim to perfection.
Once in a while, the line you draw doesn't exactly bisect the corner points with the ruler aligned. That's because either the initial cutting was off a bit or the marking/stitching wasn't so straight.
It happens.
We, quilters, are human. We don't have to be perfect to be a quilter. Thank goodness!
I could have used my Quick Quarter ruler again, but I didn't.
However, since I was retreating with my quilting buds (as usual it seems) I forgot to bring my regular 1/4” foot.
So, I adjusted the needle position to 1/4” with my open toe foot installed, lined up the edge of the press footer with the drawn line, and stitched 1/4” away from both sides of it on both pairs of #4/#5s. (There's always more than one way to get things done in quilting!)
Pins help hold the patches together. We want those seams to nest to assist us in matching the seam as we sew.
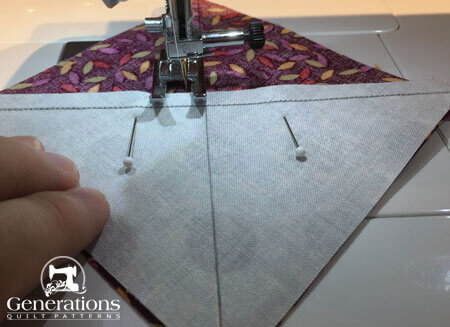 To prevent the SA from flipping, position your patches so that the raw edge of the SA feeds into the needle first.
After completing all four seams, open the units up to check that you're happy with the way they match in the center.
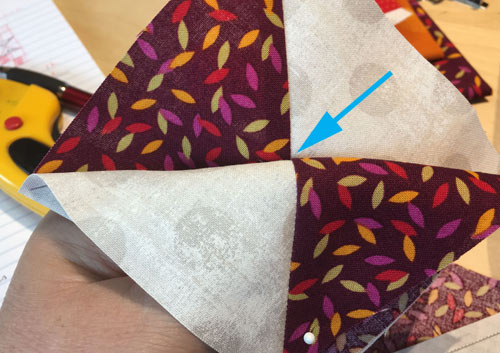 Yep! I'm satisfied with the seams matching in the center
Then, and only then, cut the pairs in half between the stitching lines to create four QSTs for your Chained Star quilt block.
All that's left is to check your accuracy or trim the QSTs to size if you cut oversized squares to start.
QST Dimensions | ||
|---|---|---|
| Finished Block Size | Center Measurement | Trim QST to… |
| 6" | 1¼" | 2½" |
| 9" | 1¾" | 3½" |
| 12" | 2¼" | 4½" |
| 15" | 2¾" | 5½" |
Using the chart here, find the Center Measurement that corresponds to your block's finished size.
For our 9" sample Chained Star, the measurement is 1¾”.
Align that marking on your ruler with the very center of your QST. (No matter how much you added to the squares that you originally cut, this is the measurement.)
At the same time, align the 45° diagonal marking on the square ruler with the seam line (blue arrow).
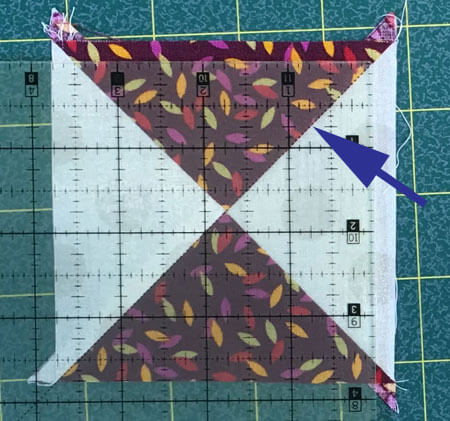 The 1¾" lines on the ruler are positioned in the center of our QST.
The 90° dashed line is positioned over a seam
Trim the two exposed sides.
Flip the QST 180°. (The two trimmed edges are now underneath the ruler.)
Align the ruler as before and, this time, align the 'Trim QST to…' measurement from the chart to the two trimmed sides of your QST that are underneath the ruler.
For our sample Chained Star, that number is 3½”.
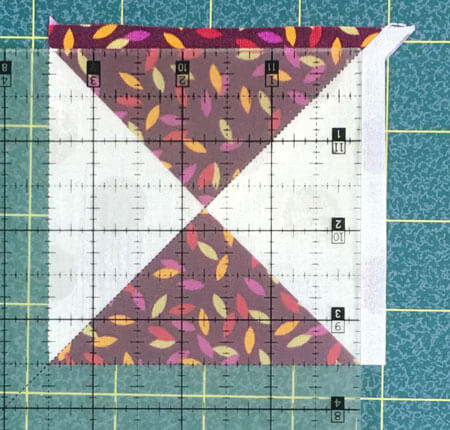
Repeat for the remaining three QSTs.
If you cut your patches exactly from the Cutting Chart, you should be—at most—cutting away the tiniest of slivers of fabric.
🧩Assemble your Chained Star quilt block
Arrange your units to form the Chained Star design. The darker fabrics form a chain running from upper left to lower right. The medium square line up from upper right to lower left.
Pay careful attention to the QSTs. Their light #4 sides are towards the center and outside edges.
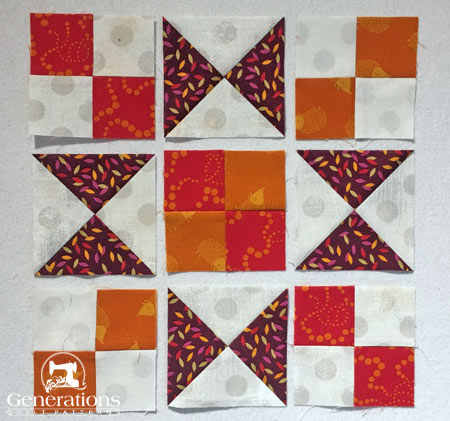
Sew the units in each row together, pressing the SA away from each QST.
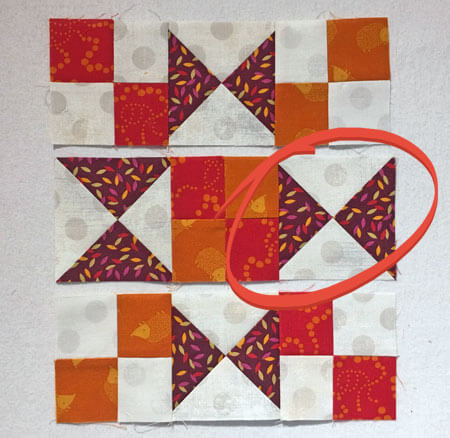 ***heavy sigh***
And of course! Do as I say, not as I do. <heavy sigh!>
You caught me, didn't you?!!
It's sew-sew easy to get patches turned around as you pick them up to stitch. That's undoubtedly what I did, here in the middle row.
A quick un-sewing/resewing session put right my mistake right with my favorite seam ripper.
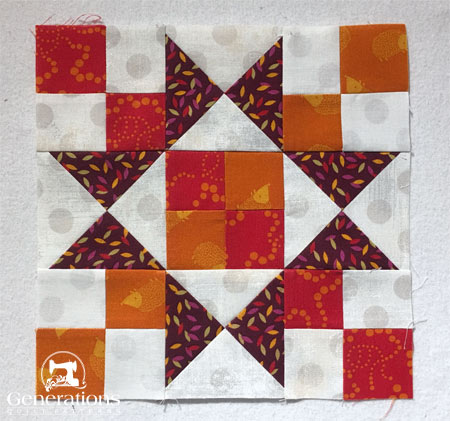
All that's left is to join the rows.
A good press with these last SAs pressed again away from the quarter square triangles. (Use my favorite pressing technique to totally tame any lumpiness in your block.)
Our Chained Star quilt block is no longer a wish.
📌Link up with creativity later 🔗
Pin this tutorial for future quilting adventures! 🌠
More related 8-pointed star quilt block patterns
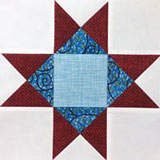
There are several tutorials available to you on this website that start with an Ohio star as its base. Click on any of the images below to go straight to that tutorial.
Aunt Dinah and Twin Star may seem a little suspect.
But look closely. Those are 3-patch quarter square triangles on each side.
You'll find confirmation in Barbara Brackman's BlockBase+ (love the software). These blocks are listed in the '09 Equal Nine Patch' library in '03 Like Ohio Star'.
🔭 Looking for something truly stellar?
You've finished your star quilt block, and you're ready for more!
Browse our collection of 70 stellar star quilt block patterns. All have instructions and cutting charts in multiple sizes. If templates or paper piecing is used in the tutorial, there's a free download for you of those materials.

Eeny. Meenie. Miney. Moe.
Which star quilt block will you sew?
For a star-studded quilting experience, choose from 100+ bedazzling star quilt patterns—for beginners and beyond—click here.
For even MORE blocks to make… 🧩🎨

...visit our Free Quilt Block Pattern Library, with over 260+ blocks to choose from in multiple sizes.
Free downloads are included in all sizes for any blocks require paper piecing patterns or templates.
- Home
- Free Quilt Block Patterns
- Chained Star Quilt Block
