- Home
- Free Quilt Block Patterns
- Baton Rouge Quilt Block
Baton Rouge Quilt Block
From our Free Quilt Block Patterns Library
This post contains affiliate links, for which I receive compensation.
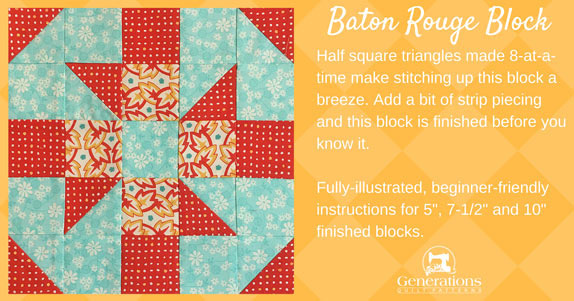
The Baton Rouge quilt block is a breeze to stitch up with half square triangles sewn 8-at-a-time. Add a pinch of strip piecing.
Your patchwork is finished before you know it.
In this tutorial you'll find:
It's time to cut up and sew!
📋 General Instructions
Several abbreviations are used on this page. They are:
- SA - seam allowance
- RST - right sides together
- HST - half square triangles
1/4" SA are used through this tutorial.
When instructed to press, first press the patches in the closed position—just as they came off your sewing machine. This sets the seam, melding the fibers of the threads into the fibers of the fabric.
Then press the SA to the dark unless otherwise noted.
Pressing instructions are highlighted in yellow throughout this tutorial.
New quilt fabrics to tickle your fancy...
Click the images below to see the full collection. We share any commercial and/or free patterns that showcase them, too. (For inspiration, of course!)
Step 1: Cutting for a Baton Rouge quilt block
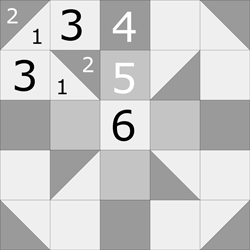 Baton Rouge design
Sample Size: 10" finished / 10 1/2" unfinished
Grid: 5x5
Attribution: Nancy Cabot
Design Type: Uneven 9-patch, small center
Three fabrics with nice contrast are needed to complete your Baton Rouge block.
Remember to label all your patches. We'll refer to their numbers in each step.
Click here to print a vopy of the block design and cutting chart to use at your cutting table.
 | Cutting Chart for a~Traditional Piecing ~ | ||||
|---|---|---|---|---|---|
| Patch | Fabric | Qty | Finished Block Size | ||
| 5" | 7 1/2" | 10" | |||
| 1 | Light | 1 | 4 1/4" x 4 1/4" | 5 1/4" x 5 1/4" | 6 1/4" x 6 1/4" |
| 2 | Dark | 1 | 4 1/4" x 4 1/4" | 5 1/4" x 5 1/4" | 6 1/4" x 6 1/4" |
| 3, 6 | Light | 9 | 1 1/2" x 1 1/2" | 2" x 2" | 2 1/2" x 2 1/2" |
| 4 | Dark | 4 | 1 1/2" x 7" | 2" x 9" | 2 1/2" x 11" |
| 5 | Med | 4 | 1 1/2" x 7" | 2" x 9" | 2 1/2" x 11" |
| Unfinished Block Size | 5 1/2" | 8" | 10 1/2" | ||
| Grid Size | 1" | 1 1/2" | 2" | ||
Step 2: Assemble the units for a Baton Rouge block
HSTs
Make 8
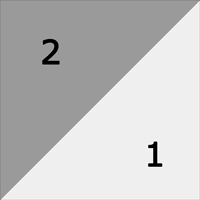
We use the 8-at-a-time method to make our half square triangles. Very efficient.
If you plan to make a lot of blocks, you may want to use another HST method like triangle paper.
On the backside of either the #1 or #2 square (whichever one it's easier to see on) draw a diagonal line from each pair of opposite corners.
Layer the #1 and #2, RST.
Stitch 1/4" away from both sides of both lines for a total of four seams.
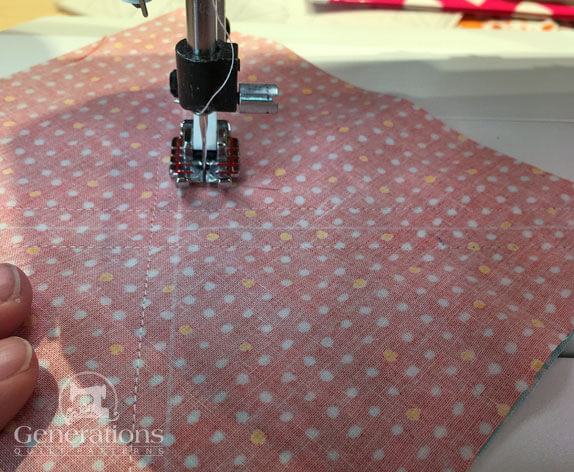 Use your favorite quarter inch foot
Press flat to set the seams.
From the table below, find the Center or Midpoint Measurement that corresponds with your block's finished size.
HST Dimensions | ||
|---|---|---|
| Finished Block Size | Center/Midpoint Measurement | Trim HST to… |
| 5" | 2 1/8" | 1 1/2" x 1 1/2" |
| 7 1/2" | 2 5/8" | 2" x 2" |
| 10" | 3 1/8" | 2 1/2" x 2 1/2" |
At your cutting mat, align this Center Measurement with the side of your block (blue arrow) and cut through the center (red arrow) to cut your block in half.
 The Center Measurement for our 10" Baton Rouge block is 3 1/8".
Turn your mat a quarter turn without disturbing the patches.
Again, align the same mark on your ruler with the edge of your block and cut through the center again.
At this point you should have four equal (or pretty darned close) squares.
Since we started with over-sized patches, if these are 'perfect' squares, don't worry. We've got a bit of wiggle room.
 You can just barely see the chalked diagonal lines (blue arrow).
Cut these squares in half on the drawn line (blue arrow above) to create the 8 HST.
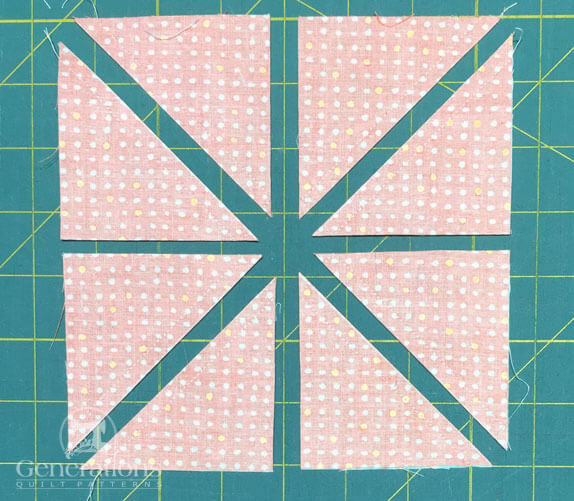
Press the units open with SA to the dark.
Refer once again to the table to find the 'Trim HST to...' size and trim to perfection. For our sample they're trimmed to 2-1/2" x 2-1/2".
 These clean up nice, don't they!
Repeat for all eight HSTs.
Corners
Make 4
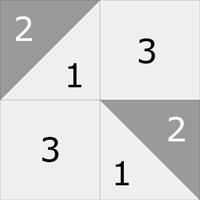
Now for the #1/#2/#3 patches. We'll be making 4 each of a mirror- imaged unit first.
With RST stitch a #3 to the right side of a HST as shown below. The SA is pressed toward #3 to reduce bulk.
Repeat for a total of 4.
 Make 4
This time, with RST add the #3 to the left side of the HST, again pressing the SA toward #3.
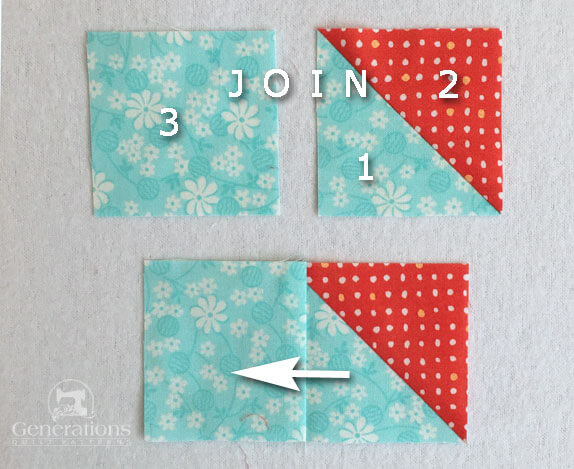 Make 4
To complete the corner units, join one of each #1/#2/#3 together as shown below.
SA are pressed toward the top row so that your seams will nest when you assemble the block.
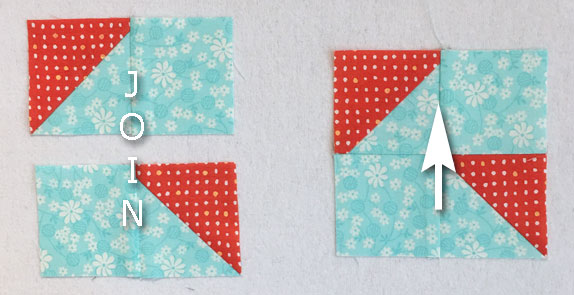
Make a total of four.

Sides

Make 4
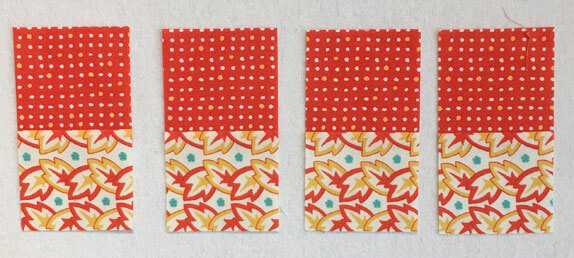
We'll use a bit of strip piecing to create the sides for our Baton Rouge block.
In my humble opinion, it's more efficient and accurate than piecing individual squares together.
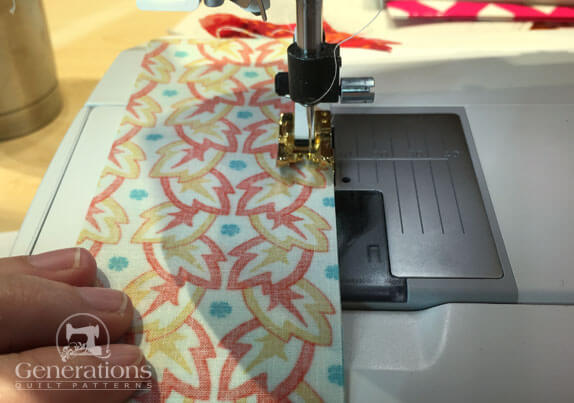
Press with the SA toward the medium #5 patch (the white/orange/yellow/blue fabric in our sample.
From the table below, find the StripSet Width that corresponds to your Finished Block Size.
StripSet Widths | ||
|---|---|---|
| Finished Block Size | Stripset Width after stitching | SubCut Width |
| 5" | 2 1/2" | 1 1/2" |
| 7 1/2" | 3 1/2" | 2" |
| 10" | 4 1/2" | 2 1/2" |
Check that your stitched stripset width is accurate. Make adjustments as needed.
Straighten one short end of your #4/#5 strip by lining up your ruler with the seam line (blue arrow). Trim away just a slight bit—less than a 1/4" is all it takes.
 Sorry for the glare on the ruler. My bad!
Find the SubCut Width that goes with your block and cut four segments. For our 10" sample, that width is 2-1/2".
Here they are after cutting.
Step 3: Assemble your Baton Rouge block
Arrange the corners, sides and center patch to create the Baton Rouge design.
A dark #2 HST is in each corner.
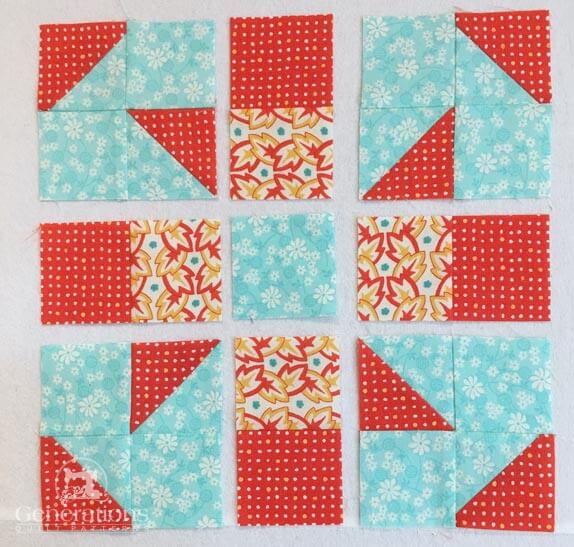
With RST, stitch the units in each row together.
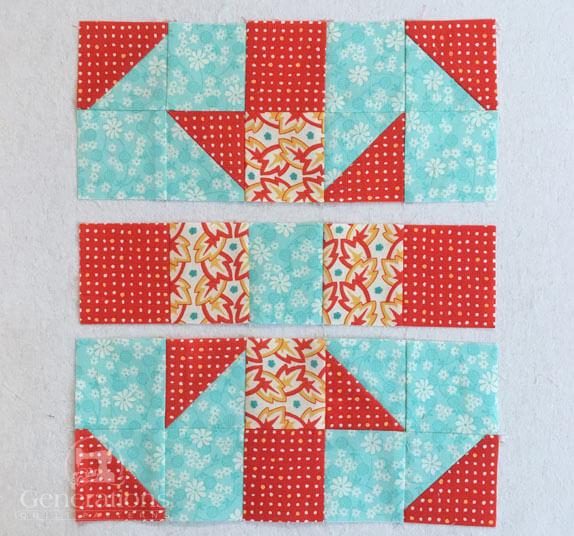
Press.
Finally stitch the rows together and give your block one final pressing.
This is the finished Baton Rouge quilt block.
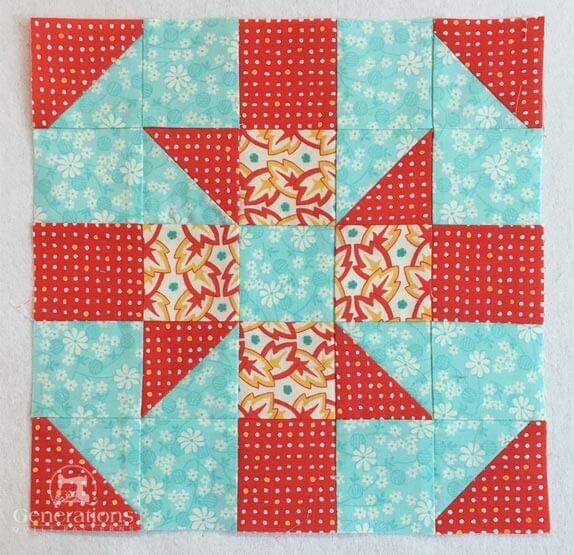 Our Baton Rouge block
What about a different quilt block?
For a list of all the 220+ quilt block patterns on this site, start here.
If you know the name of the block, shorten your search by using these links:
Click here if you're looking for blocks with at least some paper piecing.
Click here if you're looking for the basic building blocks of quilting, i.e., Flying Geese, half square triangles, quarter square triangles, etc., along with several techniques to make each.
And finally, use these links to find blocks in these finished sizes:
