- Home
- Free Quilt Block Patterns
- Tunnels Quilt Block
Tunnels Quilt Block Tutorial: Master the Method, Skip the Stress! 📐
🧵 Four sizes, zero stress, maximum sass - let's do this! 💪
This post contains affiliate links, for which I receive compensation.
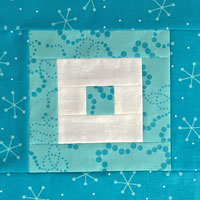
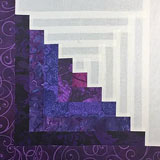
The Tunnels quilt block is here to prove a point: smart beats expensive every time! 🎯
This gorgeous Log Cabin design is our poster child for "why make it complicated when simple works?" ✨

Paper piecing turns all that potentially fiddly stuff into straightforward sewing-on-a-line, and your wallet stays happy too! 🧵
Ready to master the method and skip the stress?
Let's go! 💪
🧭 Quick Navigation (Because Who Has Time to Scroll?) 🔍
Jump straight to what you need—we've organized everything so you can find your info fast and get back to the fun stuff! ✨
📋 General Instructions
⚡ PRINTING TIP: Need help printing this tutorial? Click here for easy instructions!
Several abbreviations are used on this page. They are:
- SA - seam allowance
- RST - right sides together
- HST - Half Square Triangle
- Round - a group of four patches equidistant from the center, used in 'a round of patches'
A 1/4" SA is used in this tutorial.
✅ KEY TECHNIQUE: PRESSING PAPER PIECED PATCHES
To streamline the instructions, it is assumed that you ALWAYS press with your iron after adding each patch.
First press it in the closed position as it came off your sewing machine. This sets the seam, melding the fibers of the threads into the fabric. Then press the patch open. In paper piecing, all SAs are pressed toward the last patch added.
Double check ✅✅to make sure you haven't inadvertently pressed a tuck in along the SA. Once you've sewn across both ends of a seam, it's virtually impossible to get that tuck out.
If we're pressing to simply keep something out of the way, you'll be instructed specifically to fingerpress.
📥 Download and print the paper piecing pattern
To download the pattern, use the most current version of Adobe.
For accurate results, on Adobe's Print Menu page, under 'Page Size and Handling' set 'Custom Scale' to 100%. Then print.
Click here to see what it looks like on the Print Menu page.
Find your finished block size from the chart below and print one copy for each block you want to make.
Download and Print Paper Piecing Pattern |
|---|
| Download Link |
| 4" |
| 5" |
| 6" |
| 8" |
After printing, use the 1" square graphic on the printed page(s) to double-check that your patterns printed at the correct size.
Then cut out the required number of patterns from your copies. A rough cut is good enough—an 1/8"-1/4"-ish away from the outside dashed square.

Not sure which paper to use?
Take a look at my review of several of the most popular brands available to us quilters on the market.
You want a super-easy paper to tear away—less stress on the stitches.
My must-have tools for paper piecing
Most of the tools you'll need for paper piecing, you likely already have. (Whew!!!!)
Compare your current inventory with the recommendations in 'Essential Paper Piecing Skills: The right tools for the job'.
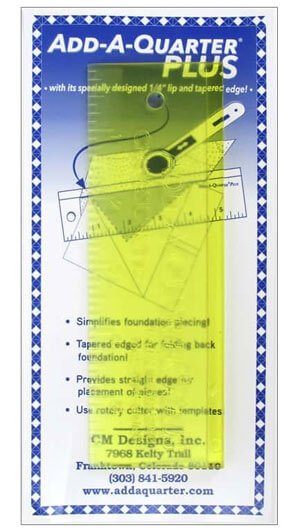
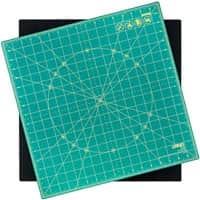
In the meantime, these are the three must-haves in my paper piecing toolbox.
✂️ Cutting patches for your Tunnels quilt block
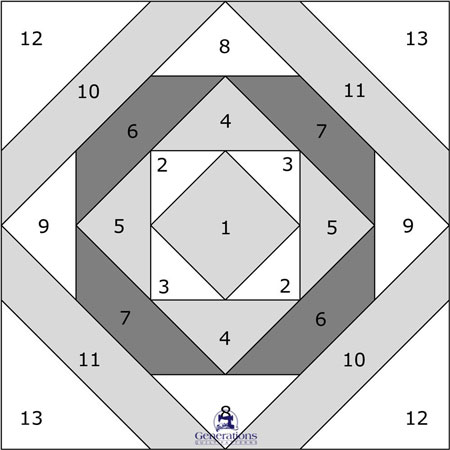
Sample Block Size: 8" finished / 8½" unfinished
Grid: 6x6
Attribution: Maggie Malone's "5,500 Quilt Block Designs", #447, pg.41
Design Type: Log Cabin | Paper piecing
Why is the Tunnels block classified as a "Log Cabin" design?
Log Cabin blocks are built by adding elements around a central shape in complete rounds. You finish one full round before starting the next, and the block grows larger with each round added.
The Tunnels block follows this classic Log Cabin construction method, starting with a center square and adding six rounds of elements around it. Notice how each round is completed entirely before moving to the next round, and how the block grows outward from the center - this is the defining characteristic of Log Cabin construction.
The tutorial is organized by 'Rounds' to follow this traditional Log Cabin building method.
Do yourself a favor and label everything—we're number nerds here! 📝✨
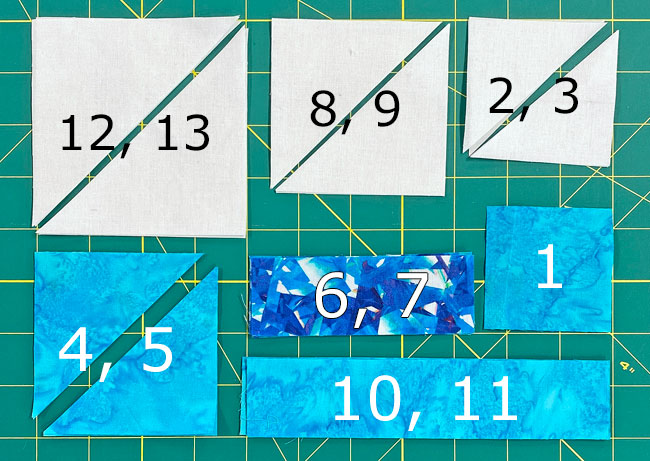
 | Cutting Chart for a~ Paper Piecing ~ | ||||||
|---|---|---|---|---|---|---|---|
| Patch | Fabric | Qty | Finished Block Size | Sub Cut | |||
| 4'' | 5'' | 6'' | 8'' | ||||
| 1 | Med | 1 | 1⅜'' x 1⅜'' | 1¾'' x 1¾'' | 1⅞'' x 1⅞'' | 2⅜'' x 2⅜'' | --- |
| 2, 3 | Bac | 2 | 2'' x 2'' | 2¼'' x 2¼'' | 2⅜'' x 2⅜'' | 2⅝'' x 2⅝'' | |
| 4, 5 | Med | 2 | 2¼'' x 2¼'' | 2½'' x 2½'' | 2¾'' x 2¾'' | 3¼'' x 3¼'' | |
| 6, 7 | Dark | 4 | 1'' x 3'' | 1⅛'' x 3⅜'' | 1¼'' x 3¾'' | 1½'' x 4¾'' | --- |
| 8, 9 | Bac | 2 | 2¼'' x 2¼'' | 2½'' x 2½'' | 2¾'' x 2¾'' | 3¼'' x 3¼'' | |
| 10,11 | Med | 4 | 1'' x 4'' | 1⅛'' x 5'' | 1¼'' x 5½'' | 1½'' x 6⅞'' | --- |
| 12, 13 | Bac | 2 | 2¾'' x 2¾'' | 3'' x 3'' | 3⅜'' x 3⅜'' | 4'' x 4'' | |
| Unfinished Block Size | 4½'' | 5½'' | 6½'' | 8½'' | na | ||
✂️✂️ Subcutting
The squares for 2, 3, 4, 5, 8, 9, 12, and 13 are all subcut once on the diagonal to form HST shapes.
🧵 Stitch up your Tunnels quilt block
We need to make a few adjustments to our sewing machine settings before we paper piece.
- Reduce your stitch length to 16–20 stitches per inch (1.3-1.6 mm). This perforates the paper and stabilizes the seam when you remove the pattern. [Learn more about stitch length here.]
- Reduce your machine's speed or just plain slow down. Sew only as fast as you can AND stay on the solid stitching line.
- Install an open toe appliqué foot (sometimes called an 'embroidery' or 'satin stitch' foot) if you have one (it makes it easier to see where you're stitching).
- Use a larger needle (90/14) IF you have problems removing the pattern. Personally, I use an 80/12 Microtex Sharp for paper piecing without any issues.
To get started, use a tiny bit of Elmer's Washable Glue Stick to position the first patch on the unprinted side of the pattern. Use the dashed guidelines for quick, accurate placement.
NOTE: The pattern for our 8" sample Tunnels block is missing the outside dashed lines when you print the pattern. That's as good as we can do printing an 8" finished block on 8½" paper.
When you trim the block at the end, you'll use the solid lines of the square as reference points.
Nothing to worry about!
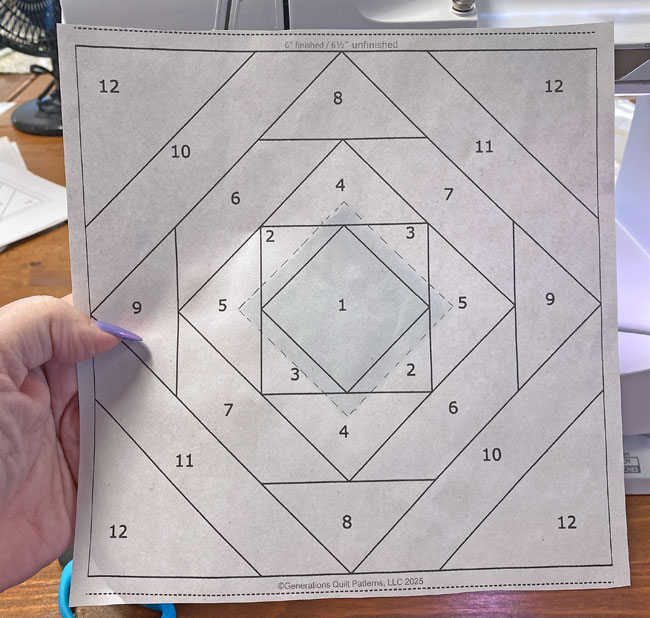 While I drew in the dashed guidelines for this sample block, they are already printed on your downloaded pattern.
First Round
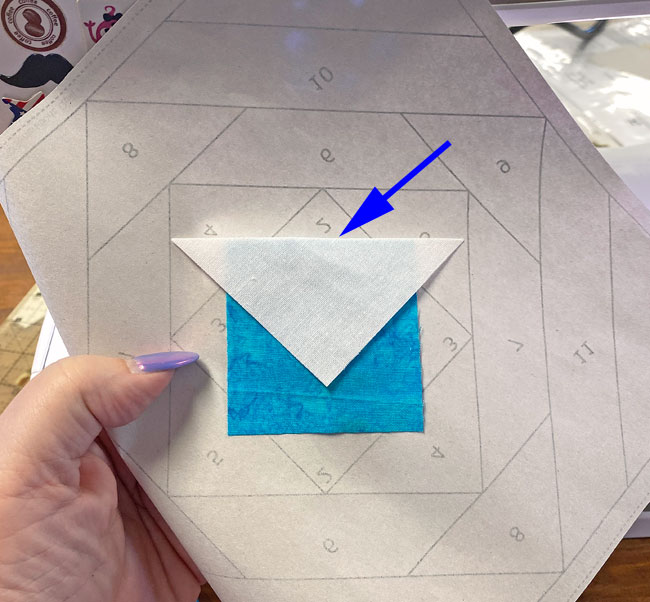
With RST, position a #2 with the edge of #1.
✅ KEY TECHNIQUE: Avoid dark fabrics shadowing through lighter ones
In our sample, the background fabric is much lighter than the dark.
To keep the darker print from shadowing through the light background in the finished block, nudge the edge of the lighter patch a couple of threads past that of the print. (blue arrow)
A simple technique to prevent a lot of angst later.
Sew the seam.
✅ KEY TECHNIQUE: ALL PAPER PIECED SEAMS
ALL the seams in paper piecing are stitched by starting a generous 1/4" before the solid line between patches and ending a generous 1/4" after that line ends. The next line of stitches that cross this seam secures the ends—just like in traditional piecing.
If the seam begins/ends at the outside edge of the block, start and stop your stitches past the outside dashed line surrounding the block.
Use this technique every time you sew a seam.
The only time I might use backstitches is at the outside edges, but never inside the block or unit. I find the shorter stitch length with good thread tension holds my stitches quite well.
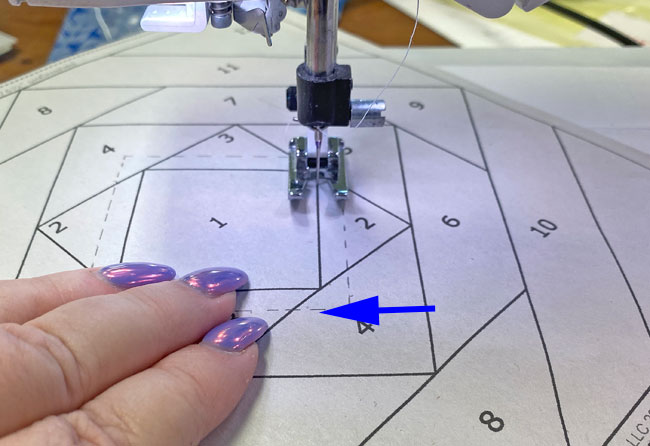
Fingerpress the first #2 into the open position to get it out of your way…especially on the smaller block sizes. (Remember, this sample is an 8" finished block.)
Position the 2nd #2.

Stitch the seam.
Press the patches open with your iron.
Position the 1st #3, nudging again to avoid the dark shadowing through the light.
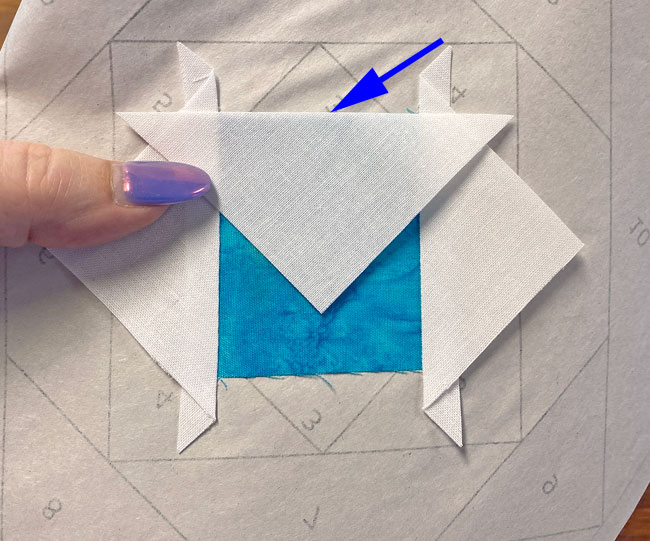
Sew and fingerpress like the #2s.
Position #4.

Sew and press with your iron.
✅ KEY TECHNIQUE: Establish the placement line for the next patch
As your cutting mat, pull the paper away from the stitches where your stitches crossed. If your paper tears more than you like, use a bit of Magic Tape® to repair the pattern from the paper side.
Position the edge of your ruler with the solid line between #2/#3 and #4. Use your thumbnail to crease the pattern on the line.
Fold the pattern back on itself on that line.
Match the 1/4" mark on your ruler with the folded edge and trim away the excess fabric, leaving behind an exact 1/4" SA.
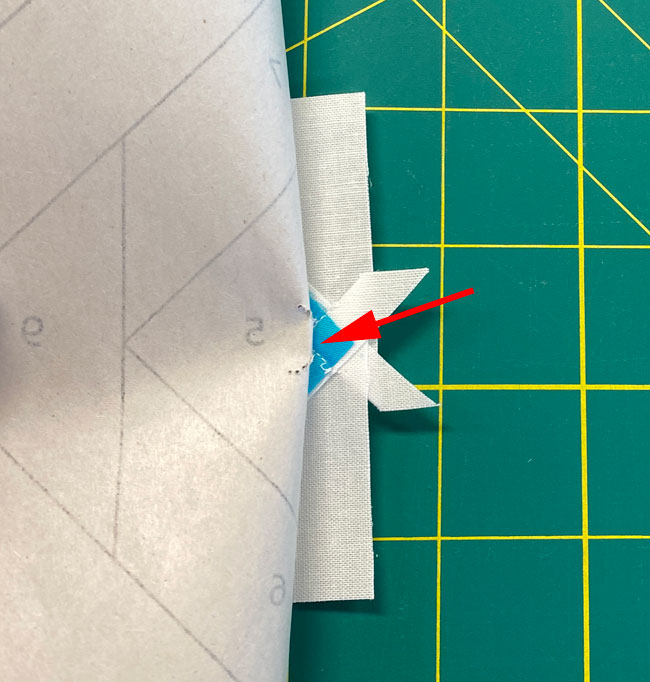 Pull the paper away from the stitches (red arrow)
Position the edge of your ruler directly over the solid stitching line and use your thumbnail to crease the pattern on the line.
Fold the pattern back on itself on the creased line. Match the 1/4" marking on your ruler with the fold. Trim away the excess fabric with your rotary cutter.
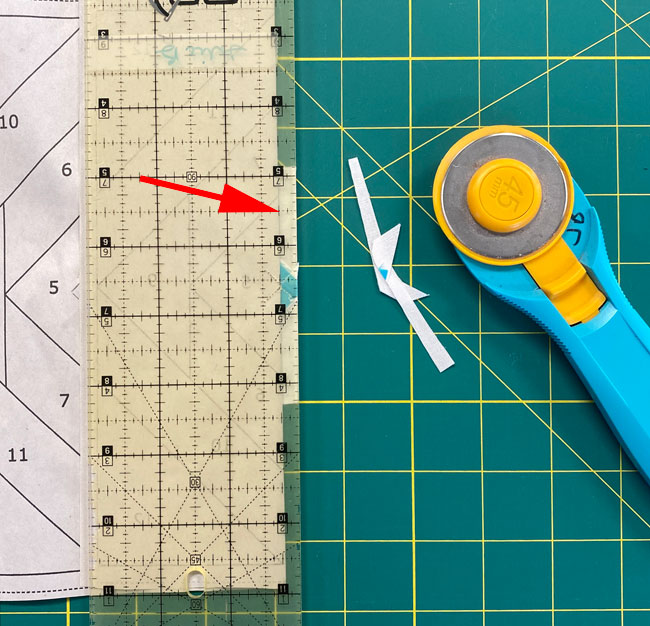
Repeat for all 4 sides. Below is our Tunnels are this trim job. The waste is to the right.
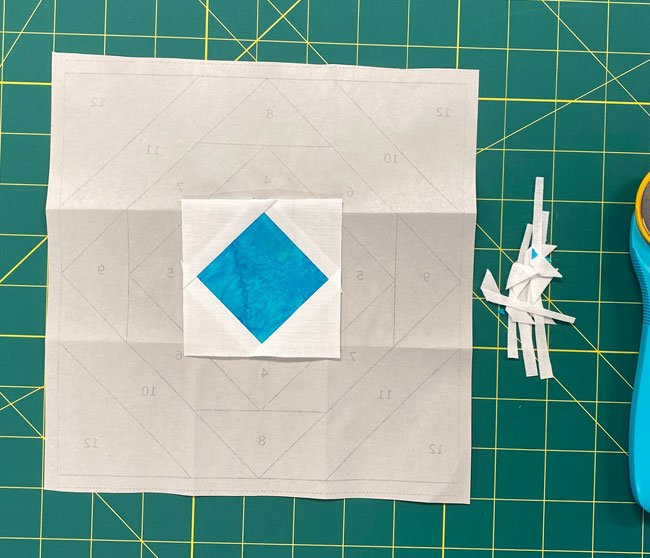
Round 2
Position the first #4. There's no need to nudge this patch over. The white background doesn't show through it.
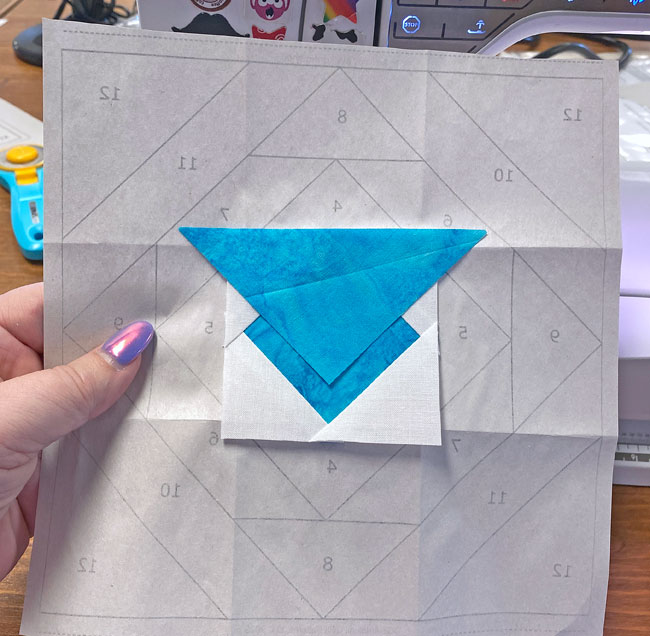
Sew the seam, then fingerpress the patch out of the way.
Repeat for the 2nd #4.
Position the first #5.
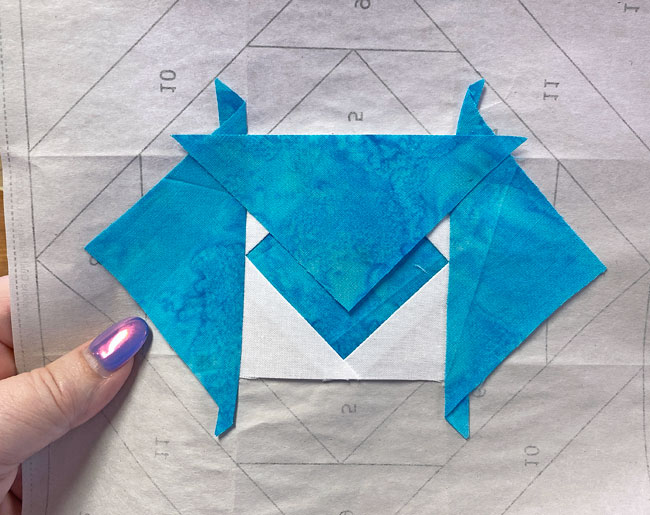
Sew and repeat for the second.
Trim this round of triangles just like you did for the #2 and #3 patches.
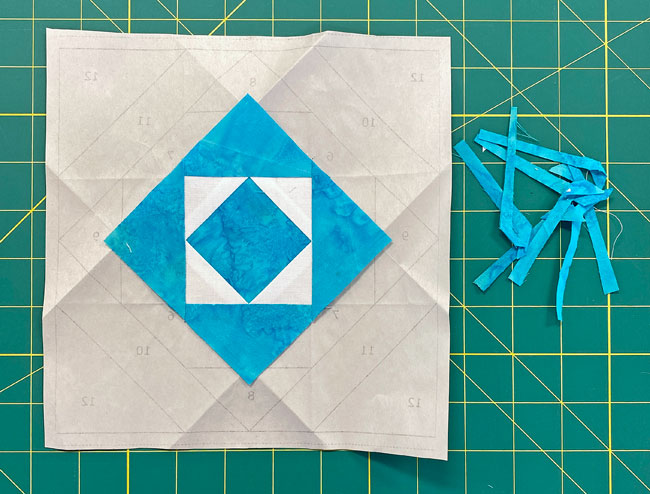
Round 3
Match a long edge of #6 to one side of the trimmed Tunnels block.
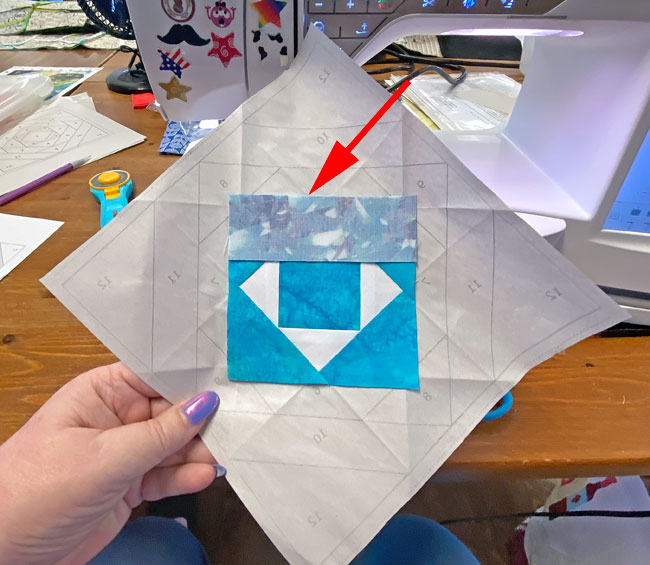
Sew the seam.
Add the 2nd #6 and press.
NOTE: It's tempting to add the #6s and #7s in one sitting, and simply finger pressing them out of the way. However, the seamsof the adjoining patches do overlap. I recommend pressing the patches after sewing the #6s to avoid tucks at the seam allowances.0000000
Add the two #7s.
Press and trim.
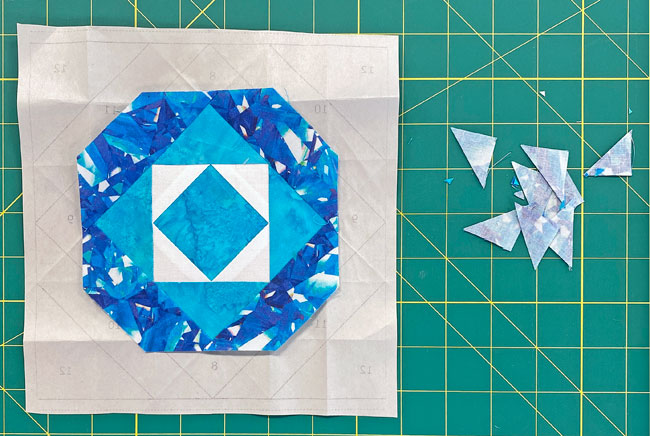 The Tunnels sample after sewing and trimming the third round.
Round 4
Our block is big enough now to add all the #8s and #9s without having to stop and press between each one—none of the patches overlap.
Below, I've glue basted each into position after nudging these light background HSTs over a couple of threads. You could just as easily hold them in position individually as you stitch with your fingers or a well-placed pin from the paper side.
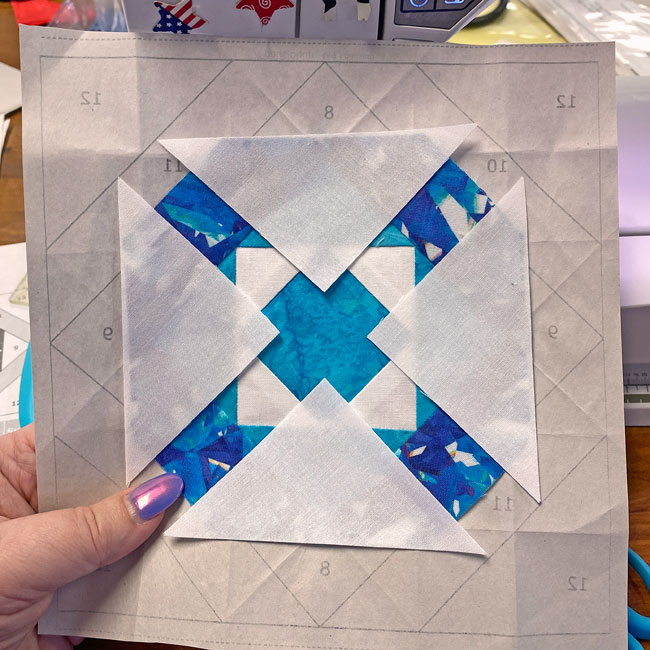
Trim away the excess fabric, leaving behind the perfect placement lines for the #10s and #11s.

Round 5
Position the 1st #5.
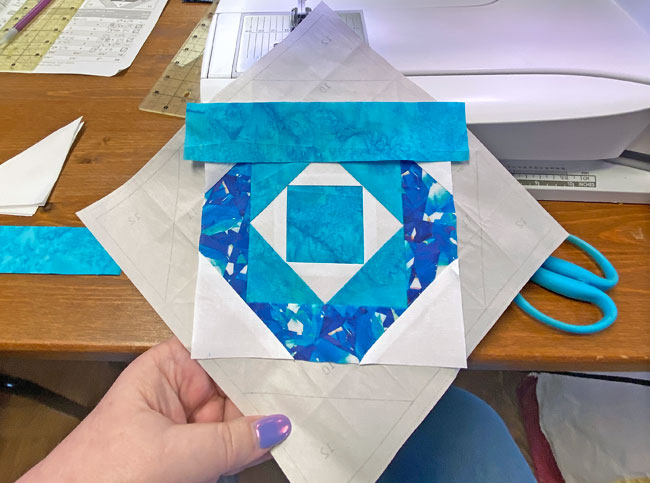
Stitch. Repeat for the opposite side. Since your stitches will overlap a bit, it's best to press now.
Repeat for the #11s.
For the previous rounds, we've trimmed after adding the fourth patch. Here, the edge of the #10 or #11 is close enough to a 1/4" SA that I didn't bother.

Now that's some Quilter genius-level lazy efficiency! 🤫
Round 6
We're in the homestretch now!
With RST, match the long bias edge of a #12 with the edge of #10. If you've nudged your #2s, #3s, #8s, and #9s, do that with your #12s and #13s. (red arrow)

Repeat for the remaining triangles. They can be done one right after the other before pressing open.
With the stitching all finished...
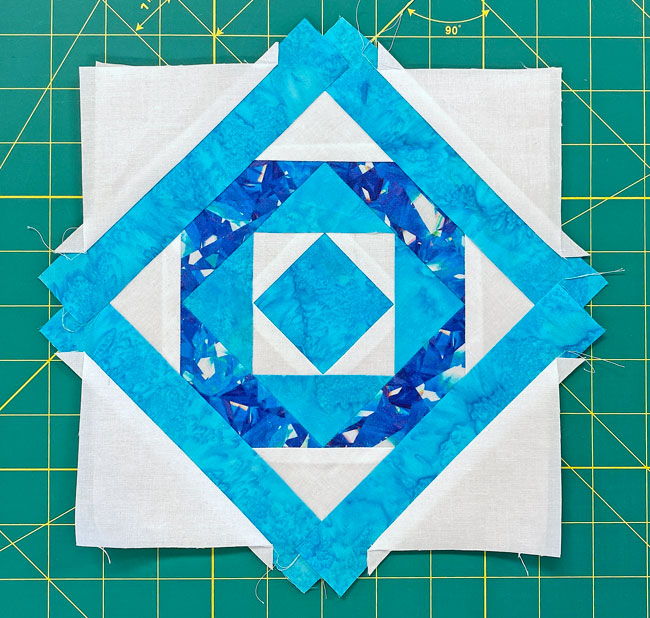
...it's time to trim to perfection.
Trimming our finished Tunnels quilt block
Almost done!
Grab your magic wand...er...your ruler and rotary cutter. At your mat, pattern side up, match the 1/4" line on your ruler with one side of the SOLID outline that surrounds your block.
Once the ruler's in position, trim away the excess fabric and paper.

Rotate and repeat until all four sides are trimmed.
From the front, here is our finished block with the trimmings off to the right.
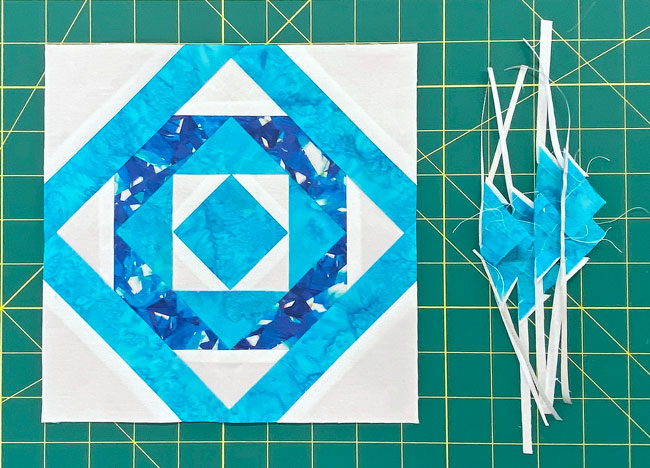
We cut our patches deliberately so all the outside edges are on the straight of grain—just like any block you'd make with traditional methods.
The paper's done its job and is no longer needed. Remove it before piecing this block into a quilt.
Couldn't I leave the paper on until I sew it to another block or sashing?
This is your block and quilt, your time, your money, your workflow. You can do things whichever way works best for you.
IMHO, since the outside edges are stable, I'm not worried about them stretching as I work with them. What I don't care to do is remove those 1/4" bits of paper from the seam allowance.
Until next time, may your seams be straight and your bobbins be full!
And that's how it's done! ✨
Your gorgeous Tunnels quilt block is living proof that simple methods create stunning results! 🎯 No expensive rulers, no stress, no drama - just solid technique and one beautiful block.
💪 Ready to make another? 🧵
📌 Pin This Baby for Safekeeping! 🔐
Trust me, you'll circle back to this tutorial faster than you think—better bookmark it now! ✨ Sharing is caring too! 💕
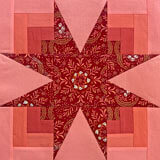
💫 Log Cabin Block Buffet (All You Can Make!)
Feast your eyes on these beauties! 🎯 Each one uses the same "master the method, skip the stress" philosophy you just learned. ✨ Time to put those skills to work on something new! 💪
The blocks below are ones where at least a part of the block uses the Log Cabin piecing technique.
Still have a Log Cabin itch that you can't scratch?
Browse through our curated collection of free or paid Log Cabin quilt patterns. These include traditional and modern blocks, Pineapple and Courthouse Steps designs.
Click here for the inspiration.
For even MORE blocks to make… 🧩🎨

...visit our Free Quilt Block Pattern Library, with over 260+ blocks to choose from in multiple sizes.
Free downloads are included in all sizes for any blocks require paper piecing patterns or templates.
- Home
- Free Quilt Block Patterns
- Tunnels Quilt Block
