Essential Paper Piecing Skills for Beginning Quilters
Part 1: The right tools make your job easier
Practical techniques for the savvy quilter!
This post contains affiliate links, for which I receive compensation.
Good News!
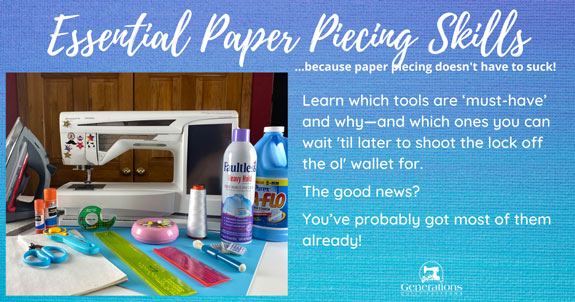
Paper piecing isn't a specialty-tool-hog of a technique.
You'll pretty much be using the tools you already have in your quilting toolbox to start.
As you continue on your paper piecing journey, you may find that a specialty ruler streamlines the process, but for the most part, nothing out of the ordinary is required.
Raid your traditional quilting supplies first before heading off to the store.
On this page we discuss...
...along with some of the tool-upgrades available to you as you make this useful technique your own.
Click here to go the the Table of Contents for Essential Paper Piecing Skills for the Savvy Quilter if you prefer to skip to other sections.
Paper Piecing Tools & Supplies
Sewing Machine
Paper piecing is always done on a sewing machine.
While is doesn't take a super-de-duper model or any fancy stitches, you must be able to reduce the stitch length—the combination of a shorter stitch, weaker/thinner paper and (sometimes) a larger needle makes it easier to remove the pattern with less stress on your stitches.
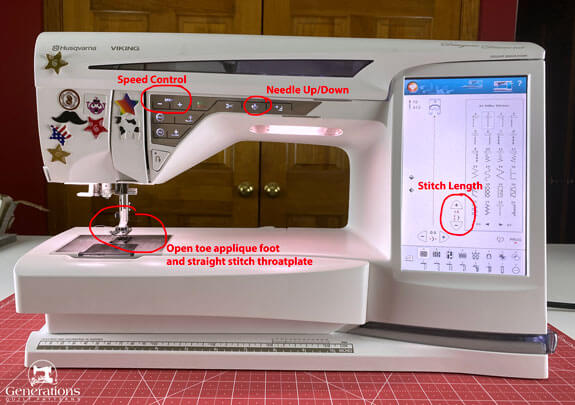 Setting up your sewing machine for paper piecing
Good tension or easy tension adjustment helps. The stronger the stitch the less wear and tear on it.
These features are nice extras to have:
- The ability to adjust the stitching speed to help you stay on the line
- An open toe applique foot to see exactly where the needle pierces the stitching line
- A single stitch throat plate—it just makes for a better quality stitch. If you use one, you MUST sew with the needle in the center position or you'll hit the edge of the throat plate and break your needle.
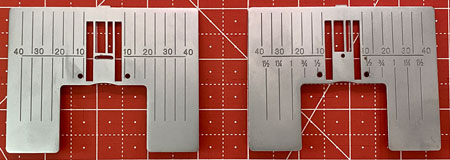 Two different throat plates: Zigzag (left) and straight stitch with the small hole (right)
- Needle up/down control, set it in the down position for extra control when you need to stop to re-position your hands on a long seam
These four 'nice-to-haves' streamline the stitching process, but aren't a deal-killer if your sewing machine doesn't have them.
Many machines have a 'fix' stitch that ties a little knot.
I don't use this in my paper piecing. I don't want the little lump of thread, nor do I think it strong enough to hold the seam through the process of ripping away the pattern.
A seam allowance that is crossed by another seam does a reliable job of securing the ends—just like in traditional piecing.
A bit of backstitching on the outside edges (optional) is more than enough to secure those edges.
Paper
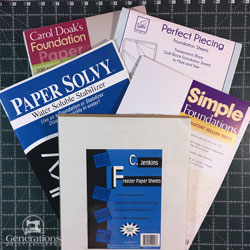
Though it's not necessary to use a paper made specifically for this technique, it does makes the job easier, especially removing the pattern after the block or unit is stitched.
Several differnt options are review here along with the pros and cons of each.
Yes, you can use the paper from your home printer or copier. It's heavier than the specialty papers which makes it tedious to remove. (Though if you like the technique, I'll bet money that you'll eventually use a specialty paper regularly.)
If cost is an issue for you, try it—with the larger 90/14 needle—it makes bigger holes in the paper which can make the paper easier to remove.
Get the cheapest copy/printer paper you can. Really. It's most likely the thinnest.
Then test it out to see if it works for you.
Testing is always the 'great decider'!
Sewing Machine Needles
Many quilters swear that using a larger sewing machine needle, i.e. 90/14 instead of 80/12, makes it so much easier to remove the pattern once stitching is complete.
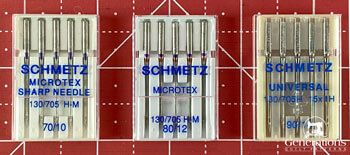 I so rarely use a 90/14 that I don't keep any Microtex Sharp versions.
Personally, I use whatever's in my sewing machine, usually an Schmetz 80/12 needle.
I find that a shorter stitch length is the key to easier pattern removal.
If it's handy, I prefer the Microtex Sharp version over the Universals shown here.
And yes, I admit it, I've even paper pieced with a 70/10 Microtex Sharp...it was what was in the machine.
I recommend moving to a larger needle size ONLY IF you're having a hard time removing the paper as that is it's only benefit.
I'm a firm believer in doing only as much as you need to do in order to get the result you desire.
What works best for YOU is what is best.
Seam Ripper
If Ye piece, so shall Ye rip—it's the first rule of quilting.
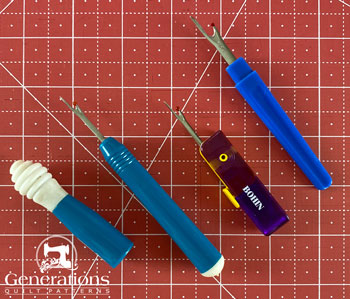 A Seam Fix, a Bohin folding, and my old dressmaking seam sippers (from left to right)
While we take a number of steps to avoid ripping:
- Starching
- Cutting generous patches
- Trimming seams to create placement guides...
...eventually something will need to be re-stitched.
Find a seam ripper that fits nicely in your hand. Easy to hold.
And because the stitches are so small in paper piecing, it helps to have one with a finer point on it.
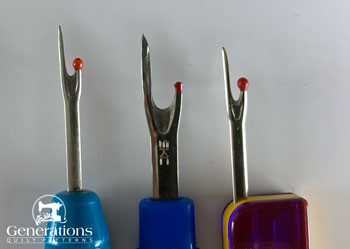 You can see how much bigger the point on the middle, dressmaker's seam is. Because of this I don't use it for paper piecing.
I really like this Seam Fix (far left). The only thing I don't care for it that the handle is round, which means it rolls.
There's now a 'two-part' version with an awl on one end and the ripper on the other. If you like using a stiletto to help you guide the patches through your sewing machine, this may be the one for you.
Rulers specifically for trimming seams
For most of my paper piecing career, a standard Olfa ruler has been my go-to for trimming paper piecing.
I had used the Add-A-Quarter Ruler sporadically—usually didn't have it handy when it was needed—as I was comfortable with my handy-dandy 6"x 12".
Then the Add-A-Quarter folks did something ingenious!
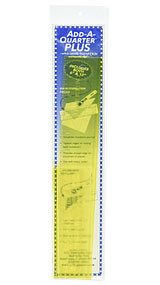
They extended the folding edge, tapered it and renamed it the Add-A-Quarter Plus.
A wicked good improvement in my opinion!
It still brain-fart-proofs trimming the seam allowances—and yes, I've done my fair share of accidentally trimming off the seam allowance. Now the folding edge is finally perfect.
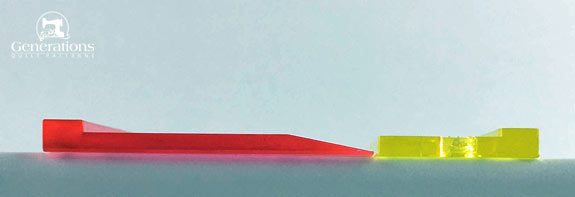 The 'Add-A-Quarter Plus' on the left vs the 'Add-A-Quarter' on the right. Both are 6" long. As you can see, the 'Plus' version is wider, now, too.
No more running your fingernail along an awkward edge to crease the pattern.
If you're brand new to paper piecing, you'll be just fine in your first attempts using your standard ruler (a 6" square or 6"x12" or 1"x12" rotary ruler, something a bit longer than your seams).
If you end up loving paper piecing, then I heartily recommend adding the Add-A-Quarter Plus ruler to your quilting toolbox to streamline the folding/trimming process.
Gluestick or Pins
Holding that first patch in place with your fingers is a pain, especially when Patch #1 is in the middle of a big sheet.
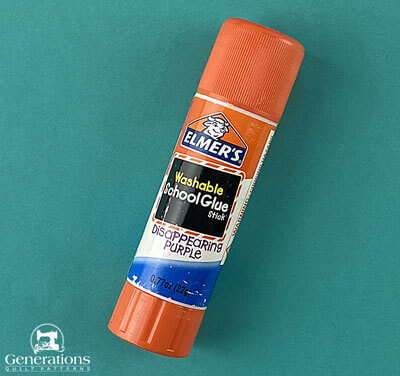
Elmer's Washable Glue Stick, the one that goes on purple and dries clear, is perfect for the job. (I always stock up at the 'back to school' specials and then store my bounty in a Ziploc bag.)
A tiny dab is all you need.
Seriously.
Only just as much as you need to hold the patch for a wee bit.
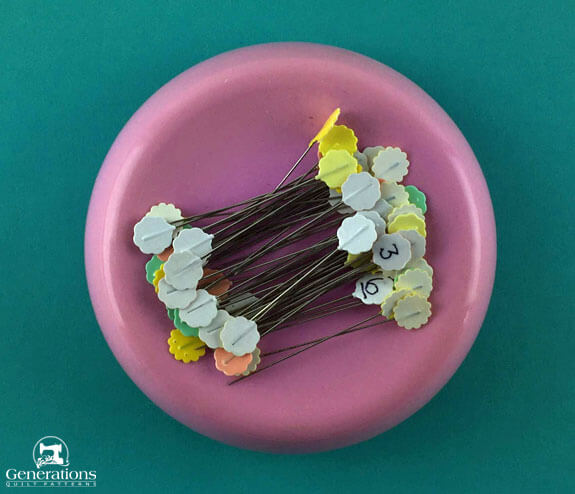
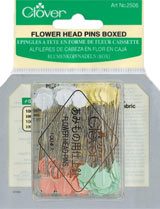
If glue stick isn't your thing, a nice Clover Flower Head Pin holds the patch in place with little, if any, distortion.
It's a nice alternative.
These pins are also useful for garment construction. Because the head is flat, you can use your rotary cutter and ruler to make quick work of cutting out garment pattern pieces.
In my own work, I opt for the gluestick. You'll see it used in all the paper pieced quilt block tutorials on this website.
Thread
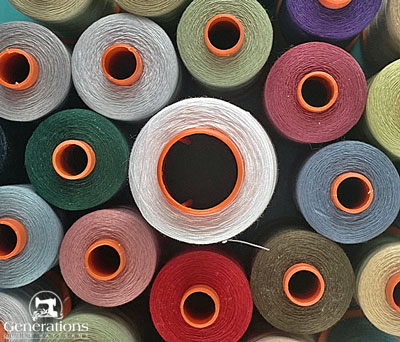
50wt 100% cotton thread does the trick reliably. Aurifil on the orange cone is my go-to choice.
If you're having problems with your thread breaking as you tear away the pattern, try a polyester or polyester-wrapped cotton instead. It's stronger than 100% cotton.
Now using 100% cotton thread is sacrosanct to some quilters.
Others swear that a polyester thread cuts the fibers in your seams and your quilt will fall apart when you use it.
I've never had this problem—in clothes, yes—but not in quilts. I believe the quilting, itself, relieves much of the stress along seam lines which would cause any tearing.
Typically, I choose a light colored neutral thread for paper piecing all the patches in my quilt—notice the big white cone in the photo above.
A darker color may shadow through the lighter fabrics at the seams making the piecing look 'dirty' or 'grubby'.
Another advantage to using a light thread is if the thread shows through in the seam from the front side, you can go back and color it in with a matching fabric marker.
A nice trick to have in your quilting arsenal!
Scissors
Trimming your seam allowances with your rotary cutter and ruler creates a perfect placement line for your next patch, however...
...there are certain situations where trimming with a scissor is more efficient—such as this group of half square triangles all stitched in a row.
 6 HSTs paper pieced as a single unit, to prevent shadowing the upright dark edge is scissor trimmed back a few threads
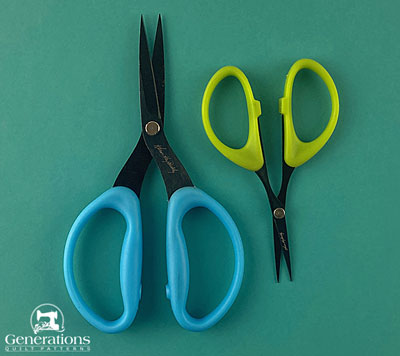
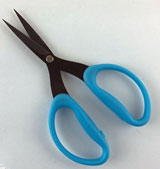
Karen K. Buckley's 'Perfect Scissors' are the perfect tool for scissor trimming patches, particularly when you trim to prevent a darker fabric from shadowing through.
One of the blades is micro serrated (think super tiny teeth) which helps grab the fabric.
Those 'teeth' make holding onto a slim edge while you trim just so much easier.
More accurate.
The handles are big. Easy to quickly get your fingers through the holes.
The 6" version with the blue handles is my recommendation for grading paper pieced seams.
If you do a lot of scissor-trimming, I heartily urge you to add these scissors to your toolbox.
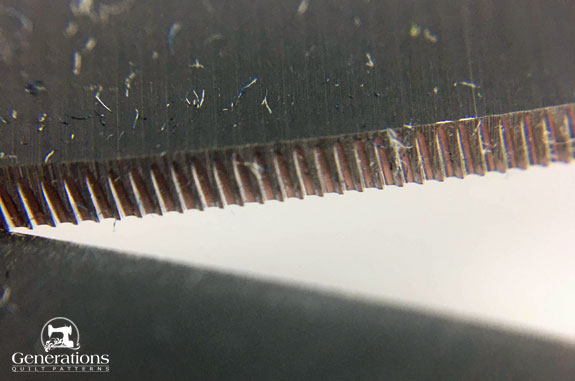 Super close-up of the micro-serrated blade...see the fibers left after trimming?
Now, you will see knockoffs on the market.
While I'd love to be able to make a recommendation, I haven't tried them.
If you do choose a more cost-effective alternative look for ones with a micro-serrated blade...it makes all the difference.
Promise!
Printer for making pattern copies
A laser printer is my first choice because the toner tends to be more stable than the ink in an inkjet printer—the toner transfers less and doesn't bleed if it gets wet.
I prefer to print extra copies of patterns instead of tracing them (with either a pen and ruler or an un-threaded sewing machine) because the printer is accurate...and that's the whole point of paper piecing.
I also prefer to print PDF copies of the original pattern instead of Xeroxing them. Copy machines tend to have an inherent distortion in them.
We're aiming for perfection with our paper piecing technique. Why start off imperfect?
Pressing
You'll need an iron to press everything nice and flat. What you're already using is just fine.
It's nice to have something handy to protect your pressing surface like a press cloth.
Sometimes the toner or ink transfers with the heat of the iron.
Something that acts as a presscloth...a fabric scrap or paper...will do the trick. Nothing fancy needed.
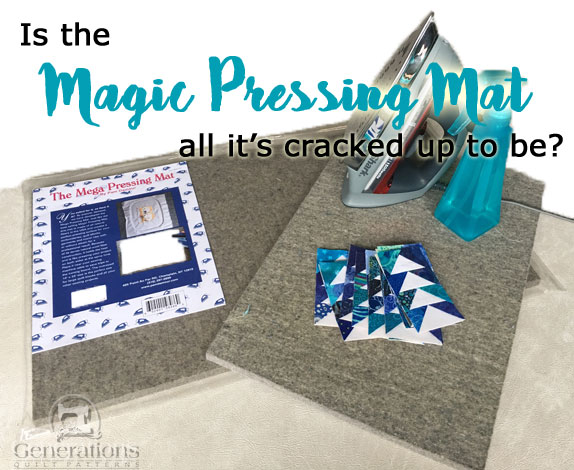
My new favorite quilting tool is a Magic Pressing Mat̵—a half-inch thick wool pad that absorbs heat like crazy. Read my review here.
While I LOVE the results I get and heartily recommend this amazing pressing tool, if you're new to quilting this expensive acquisition can absolutely wait a bit...
...or put it on your Christmas list.
Cutting Mat
There's a bunch of trimming in paper piecing. Your every day rotary mat works just fine.
If you're regularly trimming a bunch of units to size, consider a rotating rotary cutting mat. I have both the 12" and 17" sizes—I like the spin-action that much.
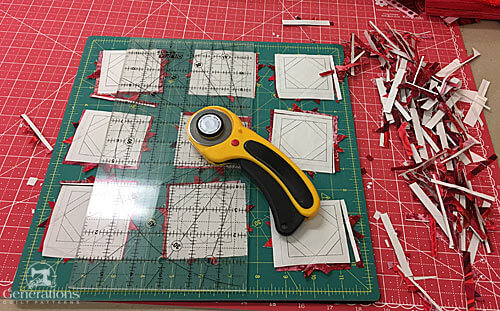 Trimming nine blocks at once on the 12" version
Just arrange all your blocks/units, trim all of one side and then turn the mat a quarter turn. Trim again. Wash. Rinse. Repeat.
Saves a ton of time. More than you can imagine.
Alternatively, if you have a smaller (12"x18") mat (one that doesn't spin), arrange as many blocks on it as you can, trim and then turn the mat a 1/4 turn.
Just be careful not to disturb the blocks while rotating.
Click here to learn more about caring for your mat and prolonging its useful life.
And last but not least
Like every other paper piecer that has gone before you, you're going to accidentally rip the pattern apart...before you're ready to.
Scotch Brand Magic™ Tape to the rescue!
Return to the Essential Paper Piecing Skills for Beginning Quilters Table of Contents to choose your next topic.
OR
For blocks to try paper piecing, check out for Free Paper Piecing Block Library where each design is at least partially paper pieced.
