- Home
- Free Quilt Block Patterns
- Log Cabin Quilt Pattern
Easy Log Cabin Quilt Pattern
Paper Pieced to Perfection!
This post contains affiliate links, for which I receive compensation.
Skill Level: Beginner
In a Log Cabin quilt pattern, once the cut strips are 1" or narrower, the more noticeable any wiggling in your seam allowance is.
To compensate, I prefer to paper piece blocks with narrow logs for more accuracy.

On this page you'll find a free download for a 4-1/2" finished Log Cabin block, the cutting and piecing instructions and different ways to color the block (and the necessary cutting charts).
There's hints to help improve your accuracy, too.
For ideas on how to set your finished blocks together visit my Log Cabin Quilt Designs page.
Let's build our Log Cabin!
General Instructions
Even though we're piecing on a foundation, there are still a couple of things you can do to make the process more enjoyable.
Starch your fabric
The main benefit is you are able fingerpress and avoid all those ups and downs to the ironing board. With starched fabric, I find I iron only after stitching a complete round of 4 logs.
Don't forget starch is a food product. Wash your quilt after it's finished to remove it so that it doesn't attract critters.
Needle Size
Many quilters swear by a 90/14 needle reasoning that it punches a bigger hole which makes it easier to remove the paper once the block is finished.
I use an 80/12 Microtex Sharp—usually it's already in my machine—with no problems. Personally, I think the type of paper you use has more to do with how easy or hard it is to tear away. (Freezer paper and standard printer paper being the hardest to remove.)
If you have a hard time removing it, then try a larger needle or a lighter weight paper.
Foundation Papers
My favorites are:
Both work in either a laserjet or inkjet printer. I prefer a laser jet because inkjet ink can run when it gets wet.Stitching Seams
To secure every seam, stitch on the line between the two patches you are joining, starting and ending a 1/4" past the line. The next line of stitching secures it. There is no need to backstitch within the borders of the block.
New quilt fabrics to tickle your fancy...
Click the images below to see the full collection. We share any commercial and/or free patterns that showcase them, too. (For inspiration, of course!)


Step 1: Printing the free paper pieced Log Cabin quilt pattern
You'll need the Adobe Reader installed on your computer. You can get it here for free (a new window opens). Follow Adobe's instructions for download and installation.
Click here to download and print the PDF pattern page. Each page contains two blocks. You may print as many as you like for your own personal use.
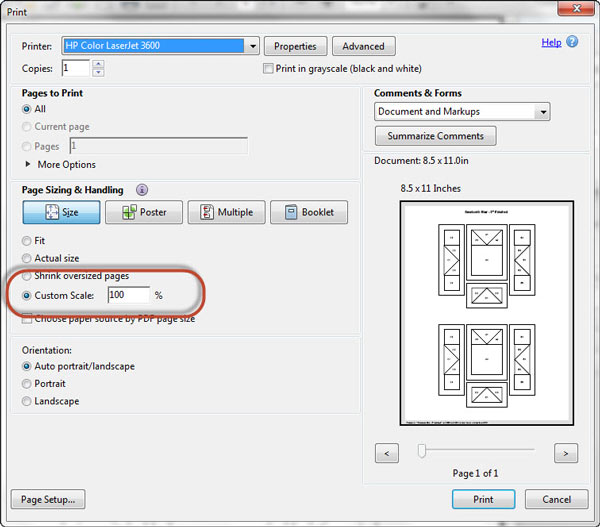
To print the correct size, under 'Page Sizing and Handling' in the Adobe print menu, you must set 'Custom Scale' to 100%. Click here to see what it looks like on the Print Menu page.
Rough cut the patterns from the page just past the outer dashed guideline. No need for perfection here—we'll trim at the end.
Step 2: Cutting patches for a Log Cabin
 Our Log Cabin design
The design above shows our Log Cabin quilt pattern from the front of the finished block. The actual printed pattern will be reversed from left to right.
Your eyes aren't deceiving you!
To reduce the amount of trimming during block construction, cut your patches to size for all but the outer round of logs.
For the outer round I add a bit of extra fabric as follows:
- #14, #15, #16 and #17 are cut from strips 1/4" wider
- #15 and #16 are 1/4" longer
- #17 is 1/2" longer
This ensures enough excess fabric past the outside dashed line so that you can trim to the exact size. This is all in the cutting chart below.
To make it easier to identify the 'rounds' of logs, I've used two different reds for my dark fabric. You can use two fabrics—a light and a dark—or many fabrics for the light and many for the dark. The choice is up to you.
CUTTING CHART for 4-1/2” Finished Log Cabin Quilt Block Pattern | |||
|---|---|---|---|
| Patch # | Fabric Value | Subcut one each from a strip width of: | |
| 1" | 1-1/4" | ||
| 1 | Center | 1” | -- |
| 2 | L | 1” | -- |
| 3 | L | 1-1/2” | -- |
| 4 | D | 1-1/2” | -- |
| 5 | D | 2” | -- |
| 6 | L | 2” | -- |
| 7 | L | 2-1/2” | -- |
| 8 | D | 2-1/2” | -- |
| 9 | D | 3” | -- |
| 10 | L | 3” | -- |
| 11 | L | 3-1/2” | -- |
| 12 | D | 3-1/2” | -- |
| 13 | D | 4” | -- |
| 14 | L | -- | 4” |
| 15 | L | -- | 4-3/4” |
| 16 | D | -- | 4-3/4” |
| 17 | D | -- | 5-1/2” |

Step 3: Assembling the Log Cabin quilt pattern
Use a dot of Elmer's Washable Glue Stick to stick the wrong side of your center square to the back side of the pattern. Use the dashed guidelines for easy positioning.
 The black arrows point to the dashed placement guides.
With right sides together (RST), align all the edges of #2 with #1.
Stitch on the line between #1 and #2.
 Don't forget to start and stop a 1/4" off the drawn line (black arrows)
Press.
With RST, position the #3 light patch with the sewn #1/#2. They should be virtually the same size.

From the printed side of the pattern, stitch the seam between #1/#2 and #3.
Press.
With RST, align #4 with #1/#2/#3.

Stitch and press.

With RST, align #5 with the top edge. Stitch and press as before.
The first round of logs is complete.

If I've fingerpressed all the logs up to this point, I would stop and press with my iron now.
Add the remaining patches to the block in the same manner.
A few things to be aware of as your block grows
Shadowing
If you use a really light light and the darker fabric sticks out past the seam allowance—as in the photo below—use a scissor and trim it away. That way it can't show through or 'shadow' to the top of your quilt when it's finished.

Turn of the Cloth and the Seam Allowance
Since we use the printed pattern to keep our sewn logs even, you may lose a bit of fabric to 'the turn of the cloth' in the seam allowance. The raw edge of the sewn patch may not extend a full 1/4" past the sewing line.
If this happens, simply eyeball the position of the next patch you are adding using the sewing line that shows through from the back of your pattern.
Once you get to the last round, the logs are a bit wider and longer for insurance. (In my book, ripping out paper pieced patches because they aren't quite big enough is a huge waste of time.)
Back to our Log Cabin quilt pattern...
With RST, position #14. Stitch and press.
Now comes #15. In the photo below you can see through the pattern and how I'm using the printed lines to help me position this patch.
On the left, the fabric extends an extra 1/4" past the dashed line (a 1/2" past the solid one). On the right side, it extends a generous 1/4" past the sewing line.
The top edge of #15 is a 1/4" away for the solid line around the outside of the block.

Stitch and press.
With RST, position #16 using the same techniques to position it as #15.

And finally add #17 in the same manner. Press.
This is the untrimmed Log Cabin quilt block pattern. The extra paper on the right side is waste...remember we did just a rough cut to free the patterns from the page.

To trim, lay the quarter inch line of your ruler on the solid line around the outside edge of the block. Trim with a rotary cutter. I find this to be a whole lot easier than trying to match the edge of my ruler to the dashed outside guide.
 The ruler's 1/4" mark is directly on top of the outer solid line of the block.
Our Log Cabin quilt block after trimming.

Most of the extra that was added in the cutting chart was cut away unused.
But look at the trimmed waste in the upper left corner. A little extra was definitely needed to make this a perfect block.
Spend a little fabric.
Save a lot of time.
Seems like a good deal to me!
More about Log Cabin quilt patterns…
If you love Log Cabin quilts, there's lots more about this favorite pattern here on the website. Use the links below to find YOUR new favorites.
- How to quilt a Streak of Lightning quilt
- Courthouse Steps Quilt Pattern: Design ideas
💫 Log Cabin Block Buffet (All You Can Make!)
Feast your eyes on these beauties! 🎯 Each one uses the same "master the method, skip the stress" philosophy you just learned. ✨ Time to put those skills to work on something new! 💪
The blocks below are ones where at least a part of the block uses the Log Cabin piecing technique.


Still have a Log Cabin itch that you can't scratch?
Browse through our curated collection of free or paid Log Cabin quilt patterns. These include traditional and modern blocks, Pineapple and Courthouse Steps designs.
Click here for the inspiration.
For even MORE blocks to make… 🧩🎨

...visit our Free Quilt Block Pattern Library, with over 260+ blocks to choose from in multiple sizes.
Free downloads are included in all sizes for any blocks require paper piecing patterns or templates.
- Home
- Free Quilt Block Patterns
- Log Cabin Quilt Pattern


Try out your new skill with these patterns
for Log Cabin quilts
Most of these commercial patterns are available as a PDF download instead of—or in addition to—a printed copy that must be shipped. Choose which option suits you best .


By Julie Baird
Copyright © 2008-2026 Generation Quilt Patterns, LLC
All Rights Reserved
Generations-quilt-patterns.com does not sell any personal information. (See Privacy Policy)