- Home
- Free Quilt Block Patterns
- Amish Squares Quilt Block
Amish Squares Quilt Block
From our Free Quilt Block Patterns Library
This post contains affiliate links, for which I receive compensation.
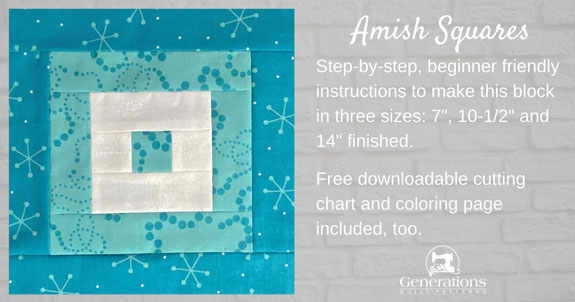
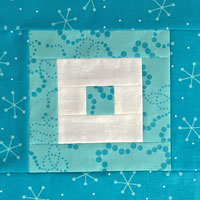
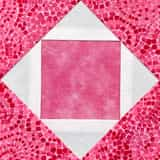
An Amish Squares quilt block is one of many variations on the Courthouse Steps patchwork design.
It's quicker to piece than a standard Log Cabin because you can add patches (logs) to two opposite sides before having to jump up to press. This makes for much faster piecing without sacrificing accuracy.
📋 General Instructions
A couple abbreviations are used in this lesson to make an Amish Squares block. They are:
- SA - seam allowance
- RST - right sides together
1/4" SA are used through this tutorial.
When instructed to press, first press the patches in the closed position just as they came off your sewing machine. This sets the seam, melding the fibers of the threads into the fibers of the fabric.
At this point the SA can be pressed either:
- Out from the center to avoid bulk, or
- Open, as I did with the sample to avoid both bulk and shadowing
Pressing instructions are highlighted in yellow like this throughout the tutorial to make them easy to find.
There are two articles on the site that may be of interest to you:
Let's cut up and sew!
The newest quilt fabrics to tickle your fancy...
Click the images below to see the full collection. We share any commercial and/or free patterns that showcase them, too. (For inspiration, of course!)
Step 1: Cutting an Amish Squares
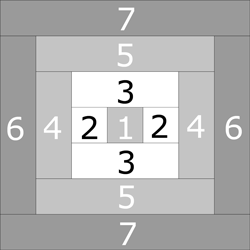 Amish Squares design
Sample Size: 7" finished / 7-1/2" unfinished
Grid: 7x7
Design Type: Log Cabin
Please label all your patches. We refer to their numbers throughout this tutorial.
To print a copy of just the block design here and cutting chart below to use at your cutting table, click here.
I've used a creamy Moda Fabrics Grunge for my light fabric.
Do you have any Grunge in your stash? It's become a staple in mine.
You can find a variety of Grunge fabrics (yardage and precuts) here and here. (These links open in new windows to make it easier to come back to this spot in the tutorial.)
The turquoise is from, I believe, an older line from Craftsy.
If you love working with precuts (and who doesn't?) the 10-1/2" version is Honey Bun friendly. The 14-1/2" design is Jelly Roll friendly.
 | Cutting Chart for an~ Traditional Piecing ~ | ||||||
|---|---|---|---|---|---|---|---|
| Patch | Fabric | Qty | Finished Block Size | ||||
| 7" | 10½" | 14" | |||||
| 1 | Med | 1 | 1½'' x 1½'' | 2" x 2" | 2½'' x 2½'' | ||
| 2 | Light | 2 | 1½'' x 1½'' | 2" x 2" | 2½'' x 2½'' | ||
| 3 | Light | 2 | 1½'' x 3½'' | 2" x 5" | 2½'' x 6½'' | ||
| 4 | Med | 2 | 1½'' x 3½'' | 2" x 5" | 2½'' x 6½'' | ||
| 5 | Med | 2 | 1½'' x 5½'' | 2" x 8" | 2½'' x 10½'' | ||
| 6 | Dark | 2 | 1½'' x 5½'' | 2" x 8" | 2½'' x 10½'' | ||
| 7 | Dark | 2 | 1½'' x 7½'' | 2" x 11" | 2½'' x 14½'' | ||
| Unfinished Block Size | 7½" | 11" | 14½" | ||||
| Grid Size | 1" | 1½" | 2" | ||||
Step 2: Stitch up an Amish Squares quilt block
With RST add a #2 square to the left and right sides of #1. (The red arrow points to my 'spider'—a scrap piece of fabric that I start my stitching on. The first stitch on to the cut patches is so much nicer that way.)
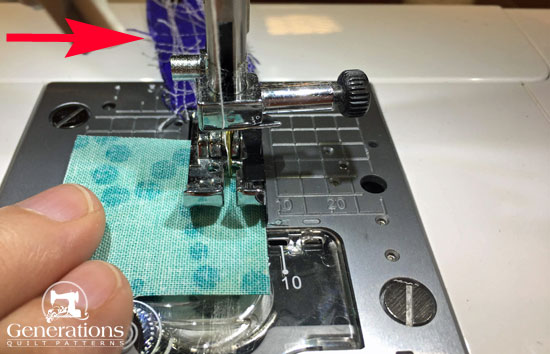 Adding the darker #1 to a lighter #2.
Choose your pressing method for your SAs—either away from the #1 square or open. In this sample, the SAs are open to eliminate bulk and to prevent the darker fabric from shadowing through the lighter one.
Shadowing can happen where you add a light patch to a darker one and the patches are pressed toward the lighter fabric.
By pressing the seams open (shown below) we won't need to worry about shadowing. There's never a dark seam allowance directly below a lighter patch.
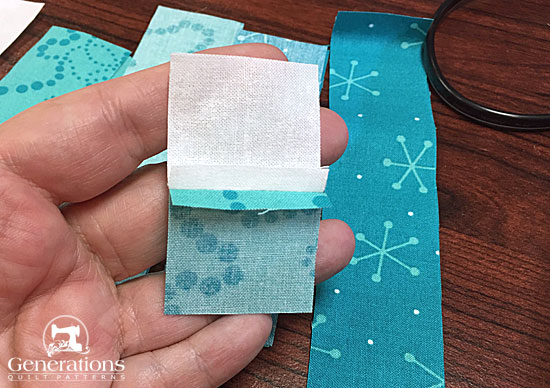 Now I'll add the second #2 to the opposite side. I find it easier to get those first few seams pressed open right after they're stitched instead of waiting to do it after both #2s are sewn.
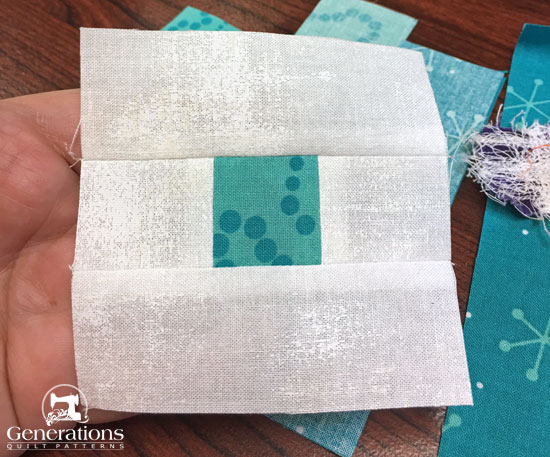
Add a #3 to each long side of the #2/#1/#2 unit. If your seam allowance is exact, these patches will match exactly.
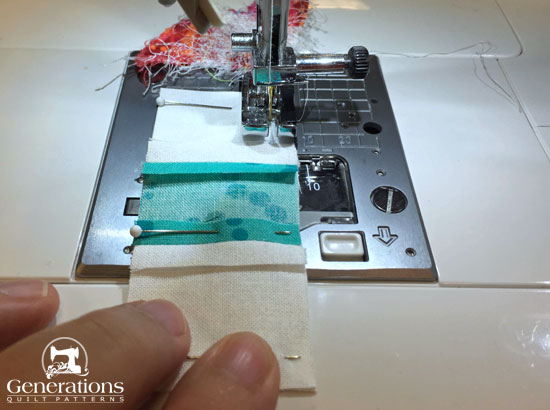 So far, so good! The sewn patches (#2/#1/#2) are exactly the same size as #3.
If not, adjust your seam allowance now to make the rest of the block effortless to piece.
Press.
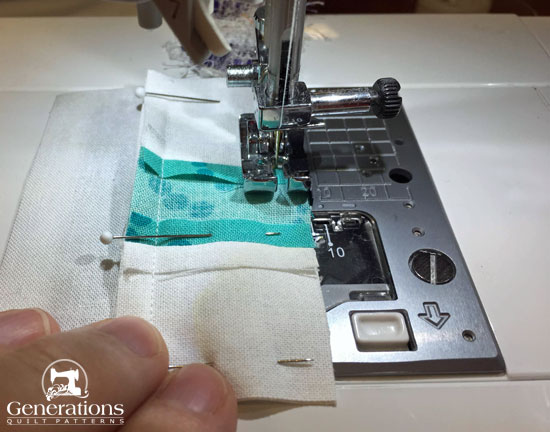 Pins are your friends when trying to keep edges, especially small edges, aligned.
Use the chart below to check the accuracy of your stitching before proceeding to the next round of logs.
Block Dimensions During Construction | |||
|---|---|---|---|
| Finished Amish Squares Block Size | After adding... | ||
| Patch #3 | Patch #5 | Patch #7 | |
| 7" | 3 1/2" | 5 1/2" | 7 1/2" |
| 10 1/2" | 5" | 8" | 11" |
| 14" | 6 1/2" | 10 1/2" | 14 1/2" |
Here's our Amish Squares from the front after completing the first round.
Continue with the next round of logs.
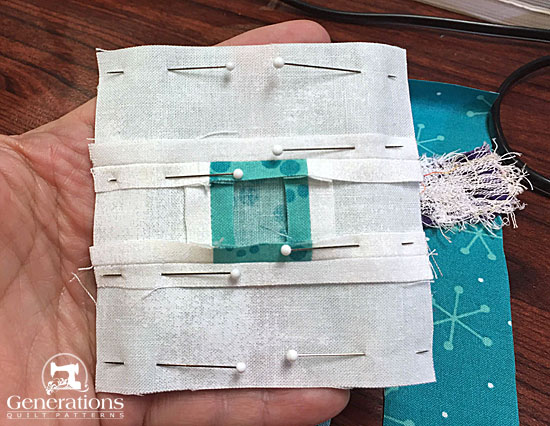
With RST, add a #4 to opposite sides that contain both #2 and #3 patches—the first log in a new round is always added to a pieced side, not a solid cut side.
Now that the block is a bit bigger, it's easy to pin the patches for both sides at one time (if you're a pinner, like me).
Press.
With RST, add a #5 to the two remaining opposite sides.
Press.
Two rounds complete! One left to go.
 Don't forget to check your accuracy. Right sized blocks are so much easier to put together in a quilt.
The #6 and #7 patches are added in the same manner.
One final press.
Can you see how adding a log to both sides before needing to press makes this version of a Log Cabin so much quicker to piece?
It's one of my favorite block-types to make when in need of some mindless sewing time to unwind!
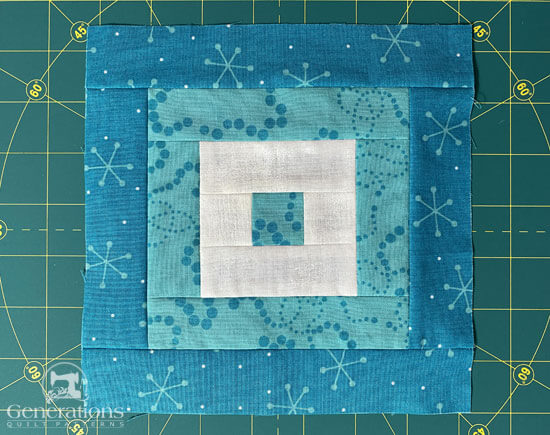
Here is our finished Amish Squares from the front...
...and from the back so you can see the final result of pressing the seams open.
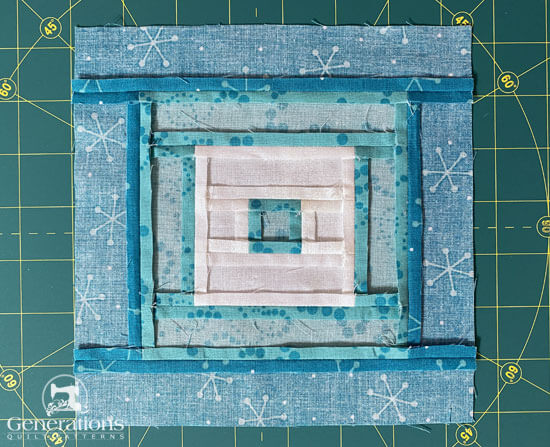
When they're pressed open like this, you never have to worry about dark fabrics shadowing through lighter ones.
And there's less bulk overall.
Well worth the effort, IMHO.
More about Log Cabin quilt patterns…
If you love Log Cabin quilts, there's lots more about this favorite pattern here on the website. Use the links below to find YOUR new favorites.
- How to quilt a Streak of Lightning quilt
- Courthouse Steps Quilt Pattern: Design ideas
💫 Log Cabin Block Buffet (All You Can Make!)
Feast your eyes on these beauties! 🎯 Each one uses the same "master the method, skip the stress" philosophy you just learned. ✨ Time to put those skills to work on something new! 💪
The blocks below are ones where at least a part of the block uses the Log Cabin piecing technique.
Still have a Log Cabin itch that you can't scratch?
Browse through our curated collection of free or paid Log Cabin quilt patterns. These include traditional and modern blocks, Pineapple and Courthouse Steps designs.
Click here for the inspiration.
For even MORE blocks to make… 🧩🎨

...visit our Free Quilt Block Pattern Library, with over 260+ blocks to choose from in multiple sizes.
Free downloads are included in all sizes for any blocks require paper piecing patterns or templates.
- Home
- Free Quilt Block Patterns
- Amish Squares Quilt Block
