- Home
- Free Quilt Block Patterns
- Pineapple Quilt Patterns
📚 Pineapple Quilt Patterns 101: Your Key to Quilting Success 🔑
Quilting gone tropical: No sunscreen required! 🏖️✨
This post contains affiliate links, for which I receive compensation.
With all of those pieces, pineapple quilt patterns used to be a good test of a quilter's piecing skills.
In the good ol' days before computers and copy machines, a quilter needed to make templates to get the job done.
Or buy special rulers.
Yuck and double yuck!
These days, we have the luxury of paper piecing.
Suddenly, all those points don't look so daunting. If you can sew on a line, the blocks will be accurate. With a few blocks under your belt to develop a rhythm, you'll be cranking them out like nobody's business.
The only tradeoff for all that accuracy and efficiency is that the paper must be removed at the end.
Let's get started!
🧭Quick Navigation Links🔍
- A download of the paper piecing patterns and templates for each size
- A coloring/fabric planning page to download and print
- Coloring pages to download and print for a quilt with blocks laid out in straight rows and columns or on-point
- Explore more Log Cabin quilt block patterns
Cut. Sew. Press. Turn your fabric into a pineapple party!
📋 General Instructions
For paperpiecing, set your stitch length to 1.5 and install an open toe appliqué foot if you've got one.
If you find it difficult to remove the paper, change to a 90/14 needle.
Starching your quilt fabric ahead of time makes pressing your paperpiecing so much easier. It also saves time during construction because you're able to fingerpress seams open avoiding the back and forth between the iron and your sewing machine.
My preference is a liquid starch concentrate diluted 1:1 with water.
The drawback to starch is once your quilt is finished, it should be washed to completely remove the starch.
If you choose not to starch your fabric, then every time you're instructed to 'Press', first do so with the patches right sides together (RST) and then press them open.
Refer to our Best Pressing Technique for the most perfectly flat blocks you'll ever see. It's wickedly simple.
New quilt fabrics to tickle your fancy...
Click the images below to see the full collection. We share any commercial and/or free patterns that showcase them, too. (For inspiration, of course!)


📥 Download and print the Pineapple pattern
You'll need the most current version of Adobe installed on your computer to download the pattern.
On the Adobe Print Menu page, under 'Page Size and Handling' set 'Custom Scale' to 100% before printing for accurate results. Click here to see what it looks like on the Print Menu page.
Click on the finished size below to download your paperpiecing patterns.
- 6" - the solid black outline of this block measures 6" square.
- 8" (NOTE: You MUST add a quarter inch seam allowance to the left and right sides of the pattern. When printed correctly, the outside black solid line measures 8" square.)
Once you've printed your pattern(s), rough cut just past the outside dotted line to get rid of the excess paper.
✂️ Cutting patches for a Pineapple block
The patches that form the 'X' through the block are one value or color. The patches that create the '+' through it are another value or color.
 Dark 'X'
 Light 'X'
In the stitched example below, I've used just two fabrics, but you could easily choose to make this 'scrappy'.
To create the bold graphic quality, there must be a clear distinction between the two colors or two values. If there is not, the result is 'mushy' looking and all your piecing goes to waste.
Avoid fabric choices that contain both values.
Our pineapple design is all about pointy points. You may want to avoid fabrics with both colors/or values in it so that you don't lose points unexpectedly.
 | Cutting Chart for a~Paper Piecing ~ | |||||
|---|---|---|---|---|---|---|
| Patch | Round | Fabric | Qty | Finished Block Size | Sub Cut | |
| 6" | 8" | |||||
| Center | -- | A | 1 | 1-1/2” x 1-1/2” | 2” x 2” | -- |
| 2-5 | 1 | B | 4 | 1” x 1-3/4” | 1-1/4” x 2-1/8” | -- |
| 6-9 | 1 | A | 4 | 1” x 2-1/8” | 1-1/4” x 2-5/8 | -- |
| 10-13 | 2 | B | 4 | 1” x 2-1/8” | 1-1/4” x 2-5/8” | -- |
| 14-17 | 2 | A | 4 | 1” x 2-5/8” | 1-1/4” x 3-1/4” | -- |
| 18-21 | 3 | B | 4 | 1” x 2-5/8” | 1-1/4” x 3-1/4” | -- |
| 22-25 | 3 | A | 4 | 1” x 3” | 1-1/4” x 3-3/4” | -- |
| 26-29 | 4 | B | 4 | 1” x 3” | 1-1/4” x 3-3/4” | -- |
| 30-33 | 4 | A | 4 | 1” x 3-1/2” | 1-1/4” x 4-1/2” | -- |
| 34-37 | 5 | B | 4 | 1-1/4” x 3-1/2” | 1-1/2” x 4-1/2” | -- |
| 38-41 | 5 | A | 2 | 3-1/2” x 3-1/2” | 4-1/2” x 4-1/2” | |
**To simplify the cutting for Patches #2-#33, cut two strips each from Fabric A and Fabric B. For the 6” version cut the strips 1” wide; for the 8” cut them 1-1/4” wide. Subcut these strips into the segments listed above.

🪡 Stitch the Pineapple patterns
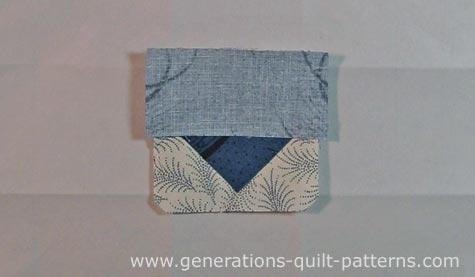
Use a dab of Elmer's Washable Gluestick® to adhere the wrong wide of the center square to the unprinted side of the pattern within the dashed placement lines.

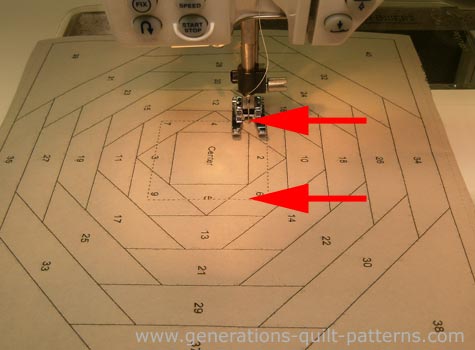
With RST align the edge of #2 with the edge of the center. #2 is just a bit wider than the center patch.
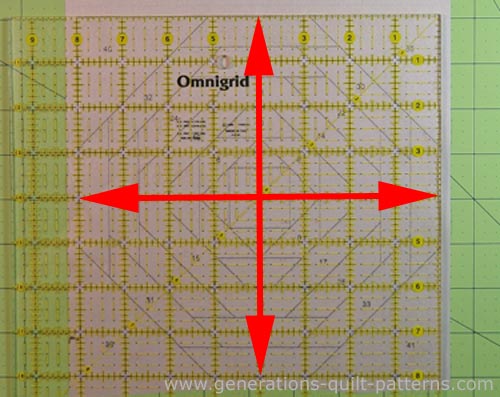
From the printed side, stitch starting about a 1/4" before and ending a 1/4" after the solid line between the Center and #2. (See the red arrows below)
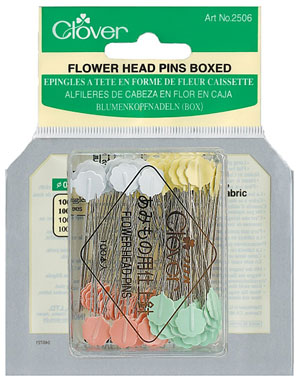
Getting at these first few patches can be awkward. If you need to pin, try using a Flower Head Pin.
It lays flat and can be pinned from the fabric side without distorting the pattern.
Repeat for #3 on the opposite side.
Press or fingerpress (if you used starch) the seams.

Now add #4 and #5, centering each on the previously sewn patches.
Press.
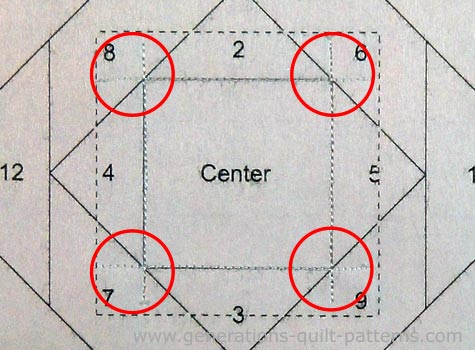
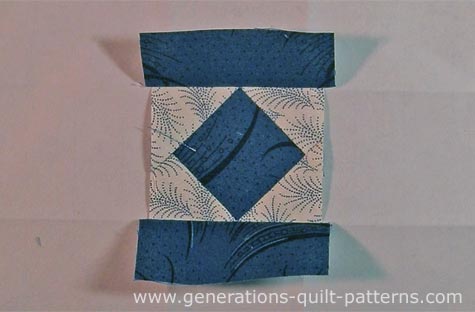
In the photo below, you can see the stitching lines from #2-#5.
To trim to establish the next placement line, we'll need to pull the paper away from the stitches, as shown below.
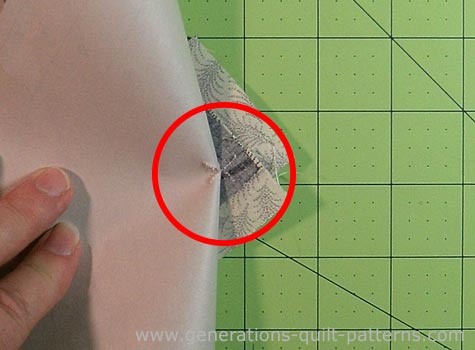
Lay your ruler on the solid line between Center and #2, creasing the paper with your finger.

Fold the paper back on itself.
Now align the 1/4" mark of your ruler with the folded edge and trim with your rotary cutter. This creates your 1/4" seam allowance.

Repeat for the 3 remaining corners. You have something like this…

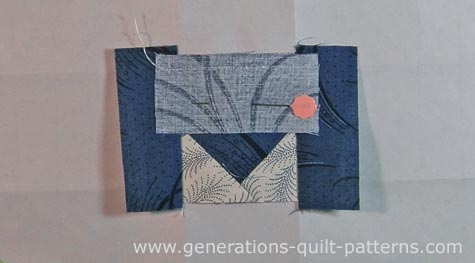
Add #6 and #7 in the same manner, making sure to center the patches on the previously stitched unit. Here #6 is centered RST with the sewn unit.
Press and/or fingerpress.
Add #8 and #9, still centering the patch on the sewn units. It looks a little strange, but as long as it's centered it'll be just fine.
Press or fingerpress.
Trim as before to establish the next placement line.
You've now finished the first 'Round' of your Pineapple.

Up until this point, we've been adding patches to two opposite sides at a time and pressing in between pairs.
At some point in the remaining pairs, you'll be able to add all four strips of one color and size at the same time by pinning them in place. This is what your paper pineapple quilt pattern looks like when all four are pinned.

Sew the seams as always, starting and stopping before and after the solid line by about a 1/4". Lift your presser foot to move to the next seam and stitch again, repeating for all four patches. This totally speeds up the process.
Press and trim as before.
Continue adding the patches through #33 using these techniques.
🧩Finish your Pineapple quilt block
For this final round, the width of #34-#37 is 1/4" larger so that there is enough fabric to trim. Add these patches in the same way as #2-#33.
Trim/press.
Align the bias edge of #38-#41 RST with the sewn units. Line up the point of the triangle patch with the points of the Center square (red arrows).
 For our sample block, the point of the patch kisses a corner of the first Center square.
After stitching all four corners, trim to size.
From the pattern side, align the 1/4" mark of your ruler with the solid black outline and trim with your rotary cutter.
Repeat for the 3 remaining sides and remove the paper.
The finished Pineapple looks like this...
 Perfect! Pointy! Pineapple Perfection!
Wrapping Up Your Pineapple Paradise! 🌟
Look at you now—creating perfect pineapple blocks like a pro! 🎯 Wasn't that paper piecing method a game-changer? ✨
Your quilting friends won't believe how precise your points are (and we'll never tell them how easy it actually was!) 🤫
Now grab your favorite fabrics and make another one—you know you want to! 🧵
Until next time, may your fabric be plentiful and your inspiration endless. 🧵💡
🏖️ Quilting mojo on vacation?
📌 Pin this tutorial and send it a pineapple postcard! 🍍 When your sewing spirit returns, ✨ you'll be ready to embark on a tropical quilting adventure! 🧵🌴

Learn More About Pineapple Quilt Patterns
If you enjoyed making this design, consider designing your own Pineapple quilt.
Start with the following pages for inspiration:
💫 Log Cabin Block Buffet (All You Can Make!)
Feast your eyes on these beauties! 🎯 Each one uses the same "master the method, skip the stress" philosophy you just learned. ✨ Time to put those skills to work on something new! 💪
The blocks below are ones where at least a part of the block uses the Log Cabin piecing technique.


Still have a Log Cabin itch that you can't scratch?
Browse through our curated collection of free or paid Log Cabin quilt patterns. These include traditional and modern blocks, Pineapple and Courthouse Steps designs.
Click here for the inspiration.
For even MORE blocks to make… 🧩🎨

...visit our Free Quilt Block Pattern Library, with over 260+ blocks to choose from in multiple sizes.
Free downloads are included in all sizes for any blocks require paper piecing patterns or templates.
- Home
- Free Quilt Block Patterns
- Pineapple Quilt Patterns


Yummy fabrics
to drool over
Click any image below to see the full collection and find pricing and ordering information.


By Julie Baird
Copyright © 2008-2026 Generation Quilt Patterns, LLC
All Rights Reserved
Generations-quilt-patterns.com does not sell any personal information. (See Privacy Policy)