- Home
- Free Quilt Block Patterns
- Courthouse Steps Quilt Block
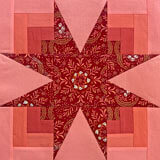
Order in the Quilt Court: Mastering the Courthouse Steps Star Quilt Block
Justice is served... one stitch at a time! ⚖️🧵
This post contains affiliate links, for which I receive compensation.
Ready to lay down the law of quilting? 👨⚖️📜 The Courthouse Steps Star quilt block is here to bring order to your fabric chaos! 🏛️✨
This judicial jigsaw of joy will have you pleading guilty to creating jaw-dropping quilts faster than you can say "Order in the court!" 🔨😮
So grab your gavel (ahem, rotary cutter) ✂️ and prepare to piece together a verdict of quilting victory! 🏆🧵
🔍No need for a search warrant here! 🕵️♀️📜
Use these anchor links to navigate our Courthouse Steps quilt block evidence.
- A cutting chart in four sizes with downloads of the chart and block design
- A downloadable chart to check for accuracy as you stitch up your blocks
- Sometimes there's just not enough hours in the day. Pin or bookmark this to use later.
General Instructions
Several abbreviations are used on this page. They are:
- SA - seam allowance
- RST - right sides together
1/4" SA are used through this tutorial.
Pressing instructions are highlighted in yellow throughout this tutorial to make them easy to spot.
When instructed to press, first press the patches in the closed position just as they came off your sewing machine. This sets the seam, melding the fibers of the threads into the fibers of the fabric.
New quilt fabrics to tickle your fancy...
Click the images below to see the full collection. We share any commercial and/or free patterns that showcase them, too. (For inspiration, of course!)
Secrets to sewing an accurate Courthouse Steps
There are two.
The first is to take a Sewing Test before starting to test the accuracy of your seam allowance. Use scraps from your block for the test.
The other biggie, is to cut your strips on the lengthwise grain of your fabric. That way the lengthwise, sturdiest, least-stretchy grain is on the length of your logs. The block has very little give when you're finished.
To learn more about these techniques, read my article, "Perfect Log Cabin Quilt Blocks: Secrets Nobody Spills".
✂️ Cut the logs for a Courthouse Steps quilt block
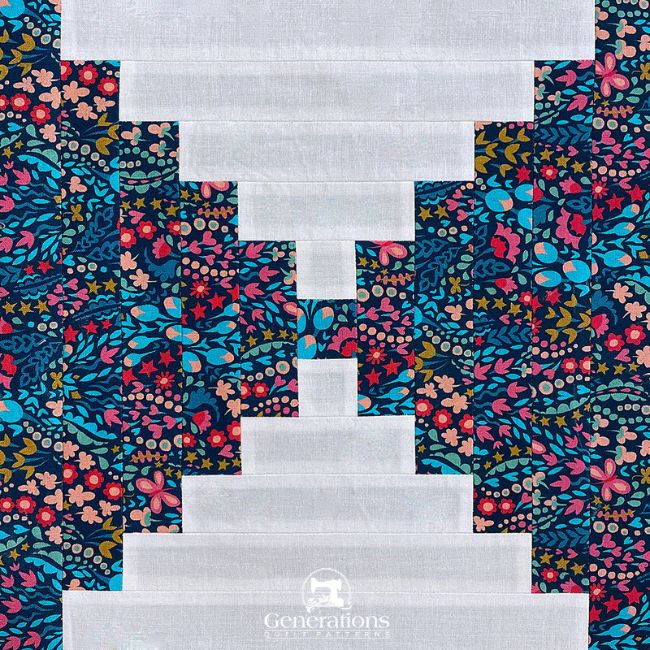
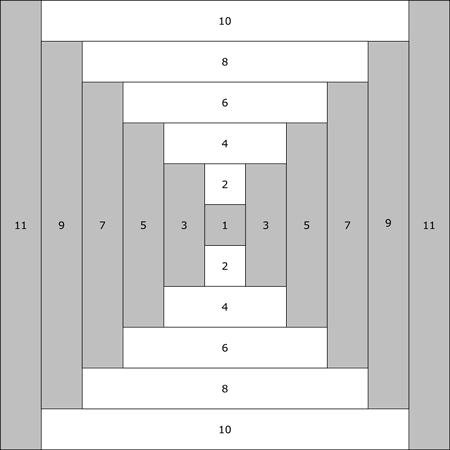 Courthouse Steps design
Sample Block Size: 11" finished / 11½" unfinished
Grid: 11x11
Design Type: Log Cabin
To print a copy of the block design and cutting chart to use at your cutting table, click here.
Please label all your patches. We use their numbers throughout this tutorial.
If you're a lover of Jelly Rolls, you're in luck. The 22" finished version of this block uses 2-1/2" wide strips—perfect for using up some of those rounds of quilty-goodness!
 | Cutting Chart for a~ Traditional Piecing ~ | |||||
|---|---|---|---|---|---|---|
| Patch | Fabric | Qty | Finished Block Size | |||
| 5½'' | 11'' | 16½'' | 22'' | |||
| 1 | A | 1 | 1'' x 1'' | 1½'' x 1½'' | 2'' x 2'' | 2½'' x 2½'' |
| 2 | B | 2 | 1'' x 1'' | 1½'' x 1½'' | 2'' x 2'' | 2½'' x 2½'' |
| 3 | A | 2 | 1'' x 2'' | 1½'' x 3½'' | 2'' x 5'' | 2½'' x 6½'' |
| 4 | B | 2 | 1'' x 2'' | 1½'' x 3½'' | 2'' x 5'' | 2½'' x 6½'' |
| 5 | A | 2 | 1'' x 3'' | 1½'' x 5½'' | 2'' x 8'' | 2½'' x 10½'' |
| 6 | B | 2 | 1'' x 3'' | 1½'' x 5½'' | 2'' x 8'' | 2½'' x 10½'' |
| 7 | A | 2 | 1'' x 4'' | 1½'' x 7½'' | 2'' x 11'' | 2½'' x 14½'' |
| 8 | B | 2 | 1'' x 4'' | 1½'' x 7½'' | 2'' x 11'' | 2½'' x 14½'' |
| 9 | A | 2 | 1'' x 5'' | 1½'' x 9½'' | 2'' x 14'' | 2½'' x 18½'' |
| 10 | B | 2 | 1'' x 5'' | 1½'' x 9½'' | 2'' x 14'' | 2½'' x 18½'' |
| 11 | A | 2 | 1'' x 6'' | 1½'' x 11½'' | 2'' x 17'' | 2½'' x 22½'' |
| Unfinished Block Size | 6'' | 11½'' | 17'' | 22½'' | ||
| Grid Size | 1/2'' | 1'' | 1½'' | 2'' | ||
🪡 Stitching your Courthouse Steps block
When pressing the SAs for this block you have two choices.
- Press every SA away from the center #1 square. You may want to check that your darker fabrics aren't showing through the lighter ones from the top side of the quilt. If they do, you'll want to trim away just a smidge of the darker patch (aka grading a seam allowance) to prevent this from happening.
- Press all the SAs open. Since the dark fabrics are pressed underneath themselves, you have no worries about them shadowing through the top of your block or quilt.
For the 11" sample block, I'll be pressing those SAs open to reduce bulk.
As you finish a 'round of logs' i.e., after adding the second #3, #5, #7, #9, and the final #11 patches, it's a good idea to check the accuracy of your stitching. Use the table below to do this.
To print this "Check the accuracy of your stitching chart", click here.
Check the accuracy of your stitching | |||||
|---|---|---|---|---|---|
| Finished Block Size | Measurement after adding the second patch... | ||||
| #3 | #5 | #7 | #9 | #11 | |
| 5½'' | 2" x 2" | 3" x 3" | 4" x 4" | 5" x 5" | 6" x 6" |
| 11" | 3½" x 3½" | 5½" x 5½" | 7½" x 7½" | 9½" x 9½" | 11½" x 11½" |
| 16½'' | 5" x 5" | 8" x 8" | 11" x 11" | 14" x 14" | 17" x 17" |
| 22" | 6½" x 6½" | 10½" x 10½" | 14½" x 14½" | 18½" x 18½" | 22½" x 22½" |
It occurred to you, didn't it?
You can add as many rounds of logs as you want. You don't have to go up to 5 or stop at 5 either. The finished size is 1/2" less than the measurements in the chart (to account for the SA).
Ready to start sewing?
With RST, stitch a #2 to opposite sides of your center #1 patch.
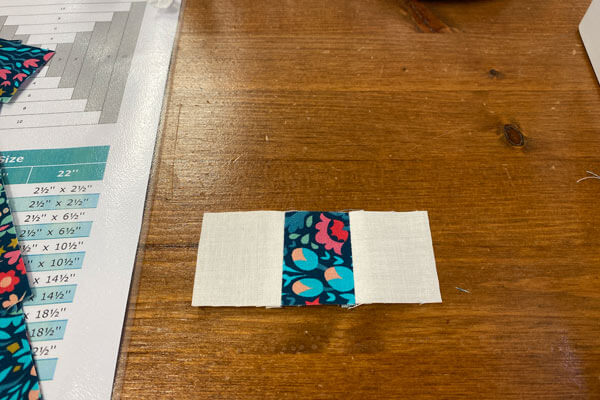
Press as you have chosen—either open or away from #1.
Since this first patch is pretty small, add one and then the other, pressing in between. You'll get a much flatter SA that way.
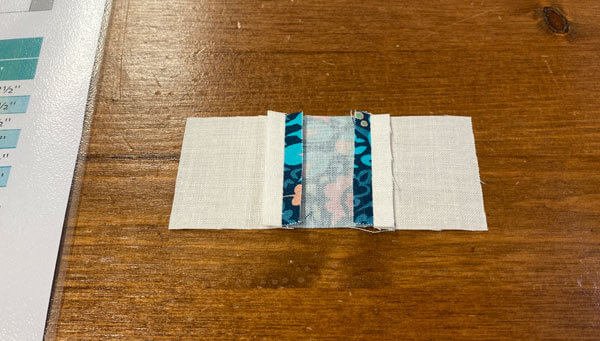 For the sample, I've chosen to press my SAs open.
With RST, add a #3 to each long edge. My preference is to stitch from the side with the seams on top. It's easier to AVOID flipping seams over as you sew.
I do pin to keep the edges aligned.
Again, add one #3 at a time, pressing in between for this first round.
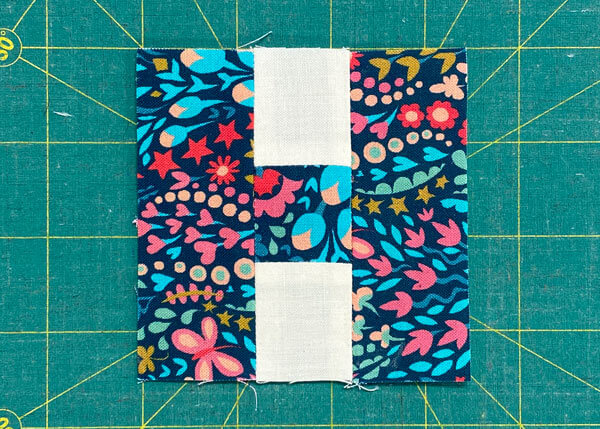
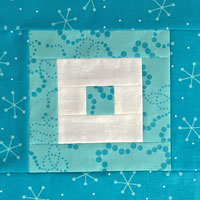
The first round on our Courthouse Steps quilt block is complete. Use the chart above to check your accuracy.
Here it is from the back.
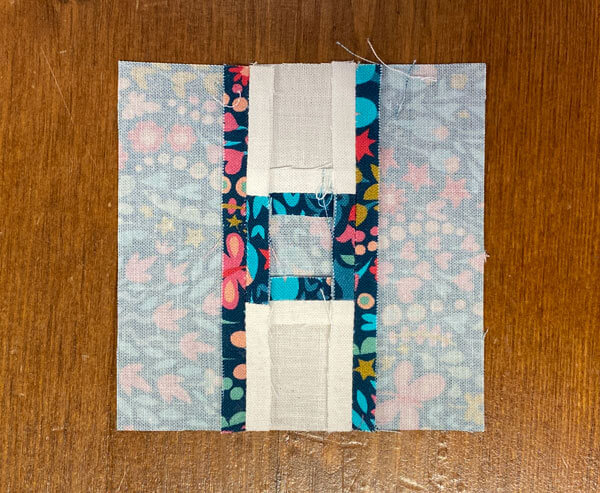
You can see how the dark fabric is behind the dark and the light behind the light. No worries about dark fabric shadowing through the lighter one.
A very simple solution.
With RST, add a #4 to both shorter sides of the sewn unit. Only this time, you may be able to comfortably work your iron into the center to get a good press.
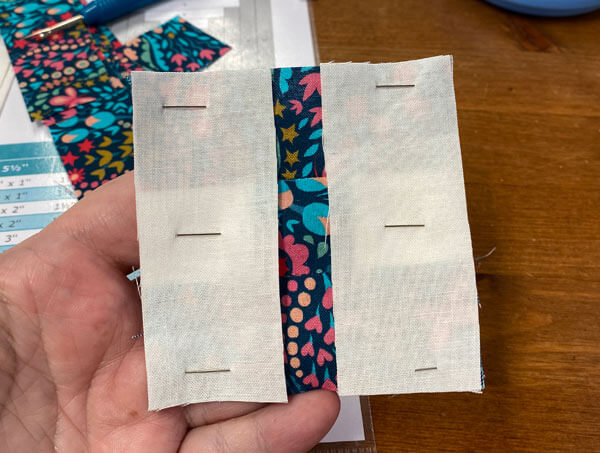 This is shown from the backside so you can see which patches are being added
As soon as you can, add your patches one to each side and then press.
This is the beauty of the Courthouse Steps, being able to add two patches between trips to the ironing board.
For a big quilt, this one thing is a HUGE time saver.
Add a dark #5 to each side of the growing Courthouse Steps, and press.
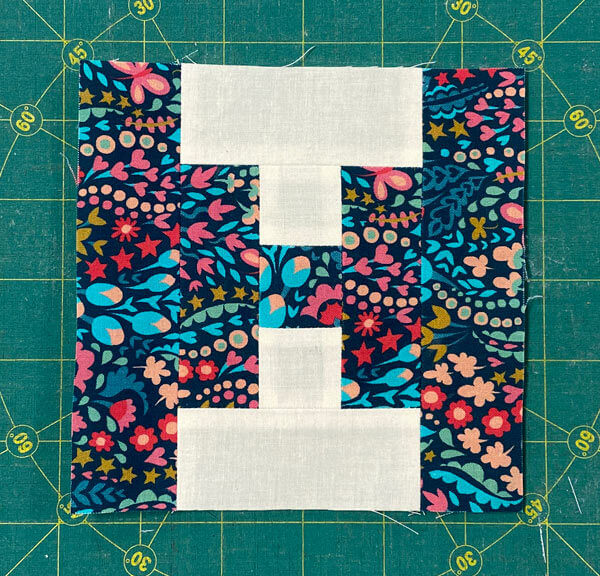
Again, use the chart above to check the accuracy of your seam allowance. Make any adjustments you need.
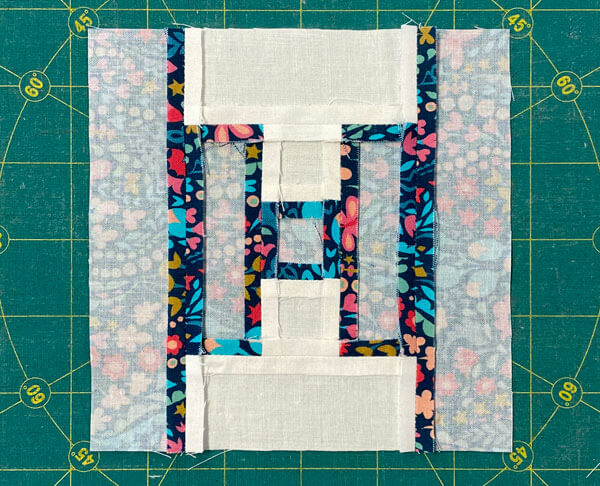 2 rounds finished from the back
Add the #6 and #7 patches in the same manner as all the previous ones.
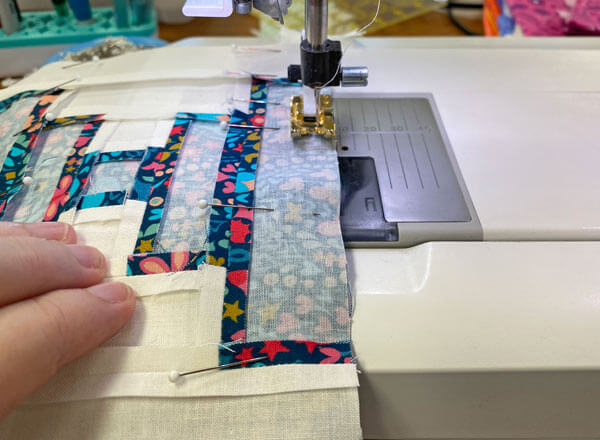 If your favorite 1/4" foot has a flange on the right like mine, just make sure the pins don't hang over the edge. If you happen to sew over them, the presser foot won't get hung up on the pin.
Here is our block after stitching the #7s. The third round of logs is finished. Our Courthouse Steps is starting to look like something now.
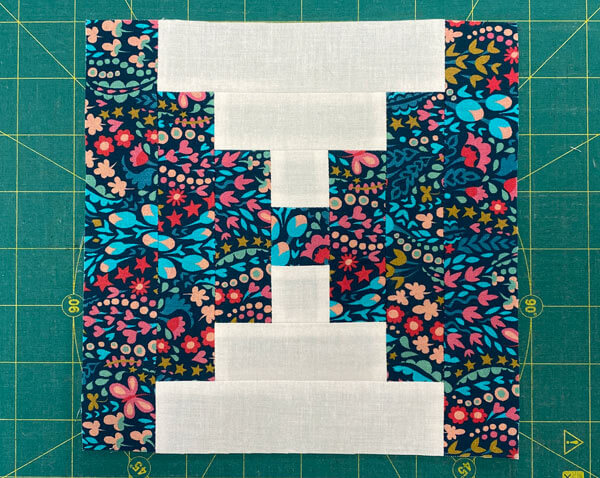
Use the chart to check the accuracy of the block. Adjust as needed.
Here it is after sewing the second #9.
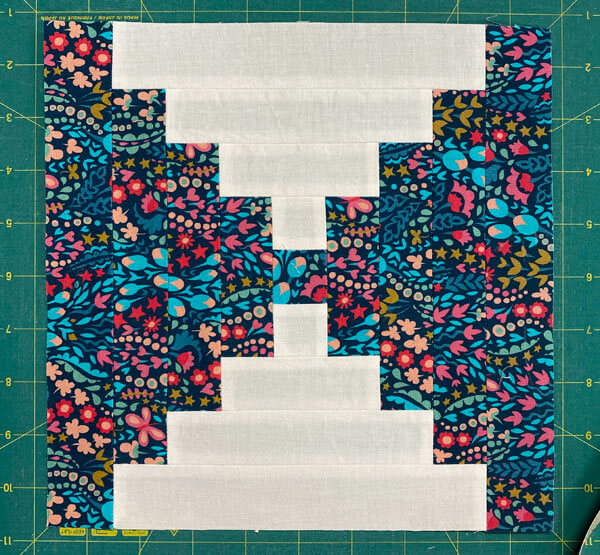
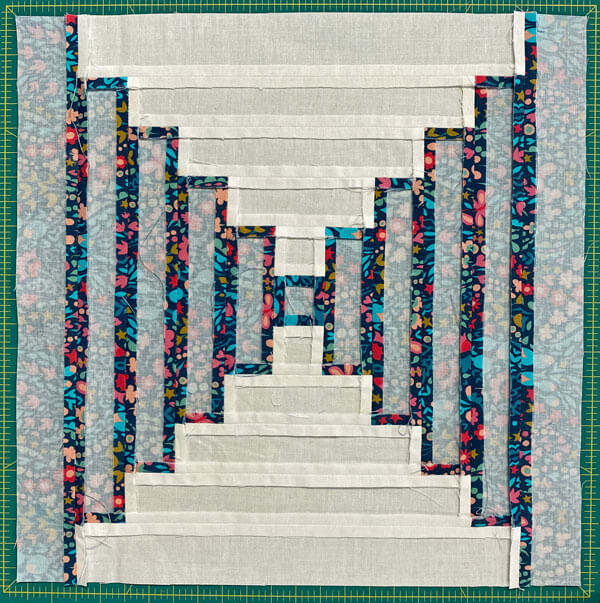
Finish off your block with the #10 and #11 rectangles. Give your block a final press—you're going to LOVE-LOVE-LOVE how flat this block is after pressing all the SAs open.
And our finished Courthouse Steps quilt block is complete.
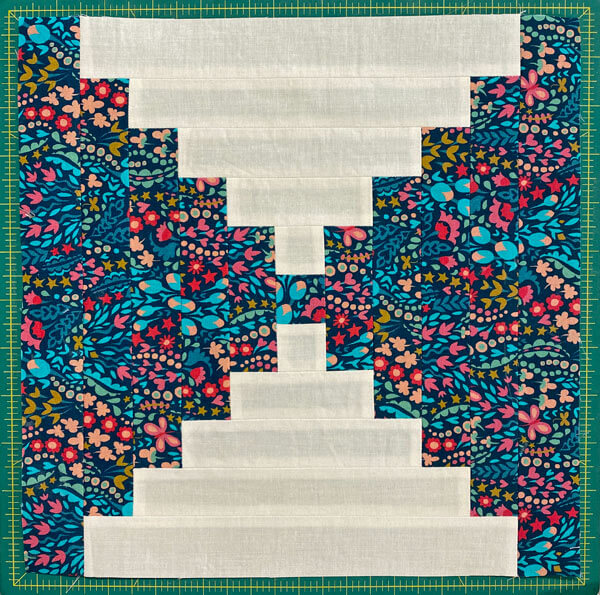
One final peek at the backside.
Super neat.
Super flat.
This will be a pleasure to stitch into a quilt.
Consistency in how you press helps you do a better machine quilting job, too.
If all the blocks have SAs in the same direction, you're never guessing which side of a seam has the ditch, or where you'll run into a big lump that'll cause your stitches to go off kilter.
🏛️✨ Ready to transform your Courthouse Steps quilt blocks?
Dive into our "Easy Courthouse Steps quilt pattern layouts" for a burst of creative inspiration!
Case adjourned? ⏸️🏛️
Pin this Courthouse Steps tutorial for later! 📌💾 Justice delayed is just more time to pick fabrics. ⚖️🎨👨⚖️
💫 Log Cabin Block Buffet (All You Can Make!)
Feast your eyes on these beauties! 🎯 Each one uses the same "master the method, skip the stress" philosophy you just learned. ✨ Time to put those skills to work on something new! 💪
The blocks below are ones where at least a part of the block uses the Log Cabin piecing technique.
Still have a Log Cabin itch that you can't scratch?
Browse through our curated collection of free or paid Log Cabin quilt patterns. These include traditional and modern blocks, Pineapple and Courthouse Steps designs.
Click here for the inspiration.
For even MORE blocks to make… 🧩🎨

...visit our Free Quilt Block Pattern Library, with over 260+ blocks to choose from in multiple sizes.
Free downloads are included in all sizes for any blocks require paper piecing patterns or templates.
- Home
- Free Quilt Block Patterns
- Courthouse Steps Quilt Block
