- Home
- Free Quilt Block Patterns
- Sun Rays Quilt Block
Sunburst Sensation: Your Guide to the Perfect
Sun Rays Quilt Block
Sunbeams and seams, the perfect team! 🌞🧵
This post contains affiliate links, for which I receive compensation.
Ready to add some sizzle to your quilting scene? 🔥🧵 Buckle up, buttercup, because the Sun Rays quilt block is about to rock your world! ☀️🌎
This stellar tutorial is hotter than a sidewalk in July, packed with:
- Free patterns in 5 sizzling sizes (4½" to 12") 📏🔥
- Paper piecing tips sharper than your rotary cutter ✂️💯
- Triangle-in-a-Square units so pointy, they'll make your pins jealous 📌😎

So slap on your shades 😎, crank up the AC ❄️, and let's turn your sewing room into Quilt Beach! 🏖️🧵 It's time to catch some rays and stitch up a storm! ⚡☀️
Ready to shine? Let's dive in! 🏊♀️✨
🧭Navigate through this sunny tutorial with ease! 🔍
Here's your map to quilting brilliance – just click on the section you need and teleport there faster than light. No sunscreen required for this journey! ☀️🚀
- No time to quilt? Pin this for later.
Cut. Sew. Press. Radiate quilting brilliance with every stitch
General Instructions
Several abbreviations are used on this page. They are:
- SA - seam allowance
- RST - right sides together
- TiaS - triangle in a square
- Bac - background fabric
1/4" SA are used through this tutorial.
Pressing instructions are highlighted in yellow throughout this tutorial to make them easy to spot.
When instructed to press, first press the patches in the closed position just as they came off your sewing machine. This sets the seam, melding the fibers of the threads into the fibers of the fabric.
Then press the SA to the dark unless otherwise noted.
Download and print the paper piecing pattern
You'll need the most current version of Adobe installed on your computer to download the pattern.
On the Adobe Print Menu page, under 'Page Size and Handling' set 'Custom Scale' to 100% before printing for accurate results. Click here to see what it looks like on the Print Menu page.
Choose your finished block size from the chart below and print the corresponding number of pages for a total of 4 TiaSs. Then print a copy of the Center template.
Print the Triangle in a Square | |||
|---|---|---|---|
| Sun Rays Finished Size | # of copies per block | Finished TiaS Size | Center Templates |
| 4½" | 1 | 1½" | Print 1 |
| 6" | 1 | 2" | Print 1 |
| 7½" | 1 | 2½" | Print 1 |
| 9" | 1 | 3" | Print 1 |
| 12" | 2 | 4" | Print 1 |
After printing, use the 1" square graphic on the printed page(s) to double check that your patterns printed at the correct size.

Not sure which paper to use?
Take a look at my review of several of the most popular brands available to us quilters on the market.
You want a super-easy paper to tear away—less stress on the stitches.
New quilt fabrics to tickle your fancy...
Click the images below to see the full collection. We share any commercial and/or free patterns that showcase them, too. (For inspiration, of course!)
✂️ Cut your patches for a Sun Rays quilt block
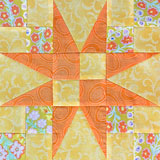
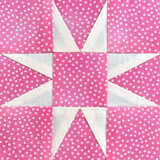
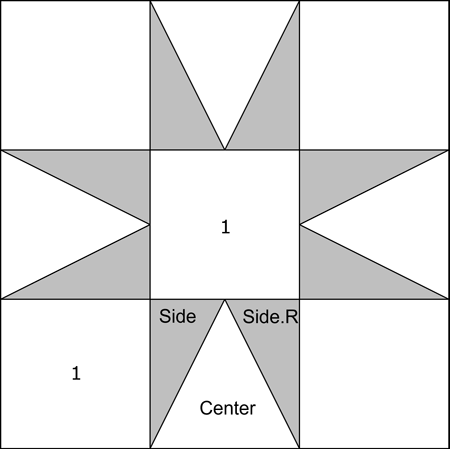 The Sun Rays quilt block
Sample Block Size: 4½" finished / 5" unfinished
Grid: 6x6
Attribution: Kansas City Star
Design Type: Even 9-patch | Star
Please label all your patches. We use their numbers throughout this tutorial.
You'll notice I've swapped the lights and darks in this block. You are always in charge of the fabrics you choose for your quilts—regardless of what the instructions say. :D
Helpful Tip
I took a risk using a dotted background fabric with a 'Rays' fabric that almost matches the dot color. Occasionally, you'll lose the points because the tips are the same color as something in the background fabric.
'Not sure if this will be a problem for your quilt? Make a sample block to be sure.
To print a copy of the block design and cutting chart to use at your cutting table, click here.
 | Cutting Chart for a~ Paper PLUS Traditional Piecing ~ | ||||||
|---|---|---|---|---|---|---|---|
| Patch | Fabric | Qty | Finished Block Size | ||||
| 4½" | 6" | 7½" | 9" | 12" | |||
| 1 | Bac | 5 | 2" x 2" | 2½'' x 2½'' | 3" x 3" | 3½'' x 3½'' | 4½'' x 4½'' |
| Center | Bac | 4 | 2¼'' x 2½'' | 2¾'' x 3" | 3¼'' x 3½'' | 3¾'' x 4'' | 4¾'' x 5'' |
| Side, Side.R | Rays | 4 | 2¾'' x 2⅝'' | 3¼'' x 2⅞'' | 3¾'' x 3⅛'' | 4¼'' x 3⅜'' | 5¼'' x 3⅞'' |
| Unfinished Block Size | 5'' | 6½'' | 8'' | 9½'' | 12½'' | ||
| Grid Size | 3/4'' | 1'' | 1¼'' | 1½" | 2'' | ||
Subcutting your patches
After cutting out the corresponding Center template, align its top and bottom edges with the top and bottom of your Center fabric rectangles. Right-side or wrong-side up doesn't matter for this patch.
Trim away the excess on both sides with your rotary cutter and ruler.
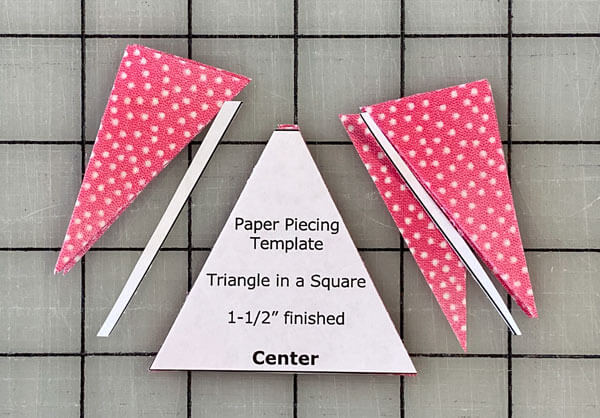
To cut the mirror-imaged pairs we need, layer your Side rectangles in pairs right sides together. Unlike the triangles we just cut, RST matters here.
The longer edges are on the left and right sides, shorter on the top and bottom.
With a pencil, make a mark 5/8" in from the top left and bottom right edges (red arrows).
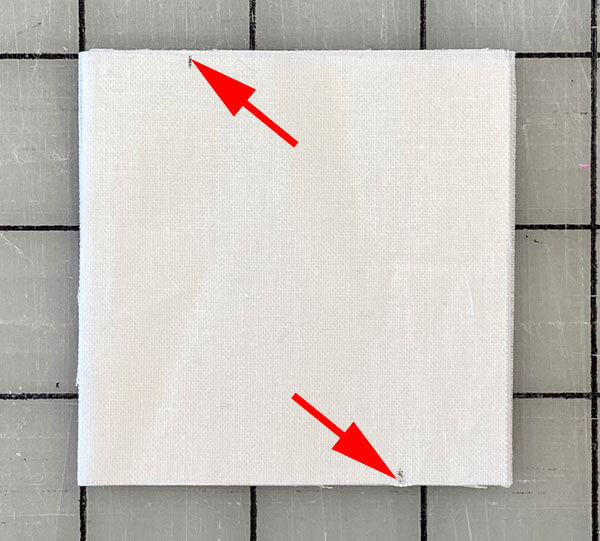
Match your ruler with the marks at the edge of the rectangles and cut through all four layers.
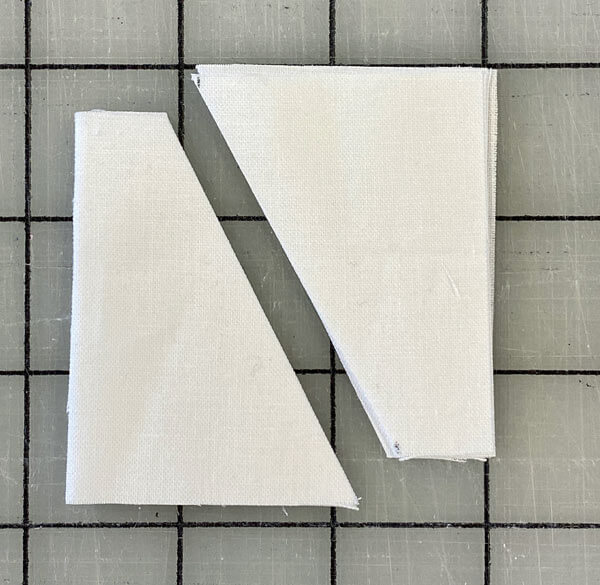
Precutting our oversized patches like this means that all the outside edges of our units are on the straight of grain—just like if we pieced these with traditional methods.
🪡 Assemble the units for a Sun Rays block
TiaS Unit
Make 4
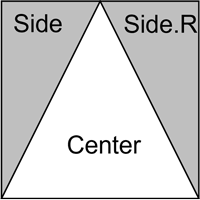
You'll be sun-stoppable using this paper piecing technique for making your points the pointiest!
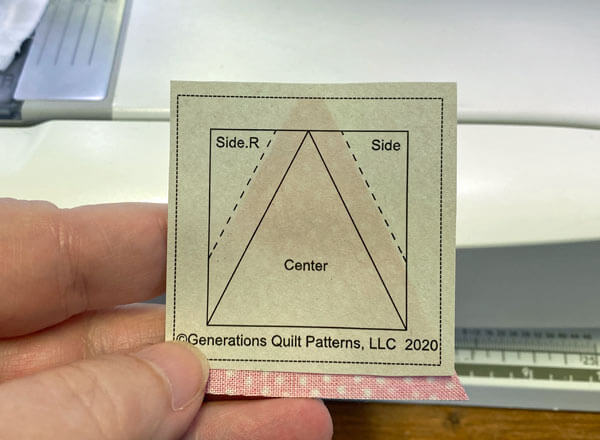
To begin, use a tiny bit of a washable glue stick to stick the Center patch, wrong side to the unprinted side of the pattern. I love Elmer's Washable Glue Stick for this—it's cheap, easy to find and works perfectly
Notice below that I've just done a rough cut around the pattern. There's no bonus points for cutting exactly on the line. ;)
The dashed placement lines make it quick work to position the Center.
We need to make a few adjustments to our sewing machine settings to paper piece.
- Reduce your stitch length to 16–20 stitches per inch (1.3-1.6 mm). This perforates the paper and stabilizes the seam when you remove the pattern. [Learn more about stitch length here.]
- Reduce your machine's speed or just plain slow down. Sew only as fast as you can AND stay on the solid stitching line.
- Install an open toe appliqué foot (sometimes called an 'embroidery' or 'satin stitch' foot) if you have one (it makes it easier to see where you're stitching).
- Use a larger needle (90/14) IF you have problems removing the pattern. Personally, I use an 80/12 Microtex Sharp for paper piecing without any issues.
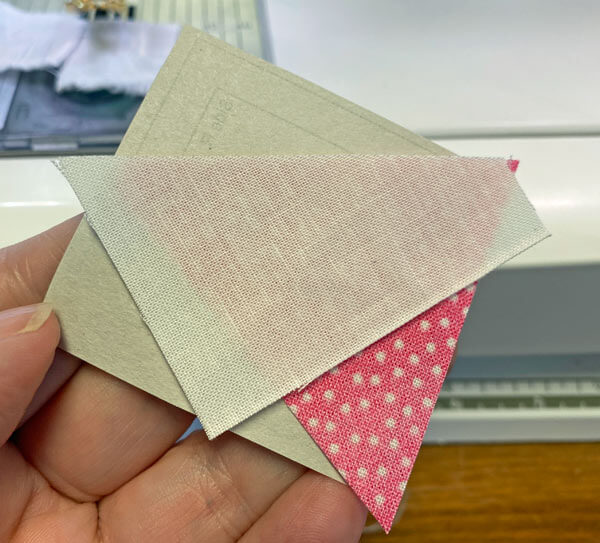
With RST, match the long bias edge of a Side (you can start with either Side or Side.R, it makes no difference) to the Center patch. Wide end to the point or short end.
Just a wee bit of the Center should stick out past the short end of the Side as shown below on the right.
If you're making your TiaS with a dark center and light Sides, nudge the Side just a few threads past the edge of the Center. This will prevent the darker fabric from shadowing through the quilt top later on.
For a good sturdy seam, start and end your stitching past the outside dashed edges of the block. No need to trim just yet. The final trim takes care of all the thread tails.
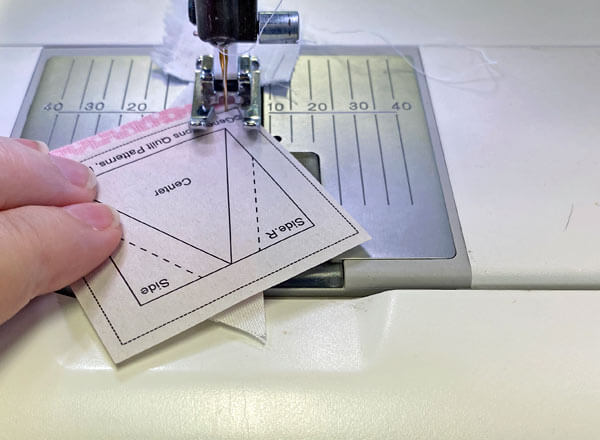
Press.
Add the second Side in the same manner.
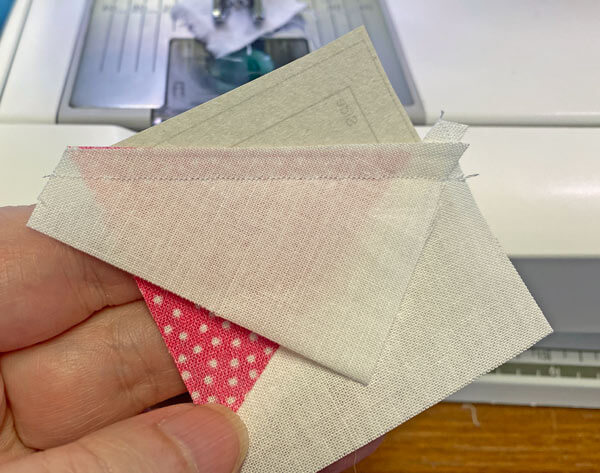 The stitches go past the beginning and end of the solid line
Press.
Even though I positioned the second Side a bit low, cutting generously sized patches helps. There's just enough to trim away on this one. No ripping for me today!
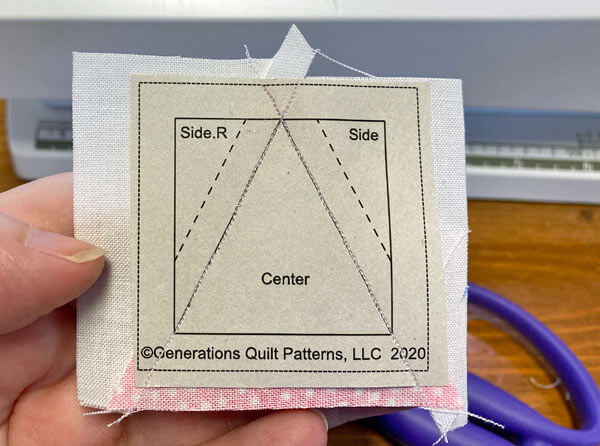
To trim this to the exact size, at your cutting mat printed side up, line up the 1/4" mark on your ruler with one side of the solid square (red arrow). Trim away the excess.
Repeat for the remaining sides on the remaining units.
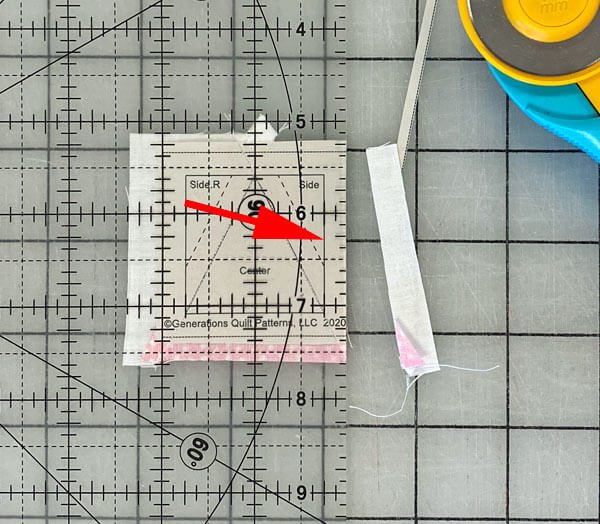
All done! These will be easy to piece into our Sun Rays block.
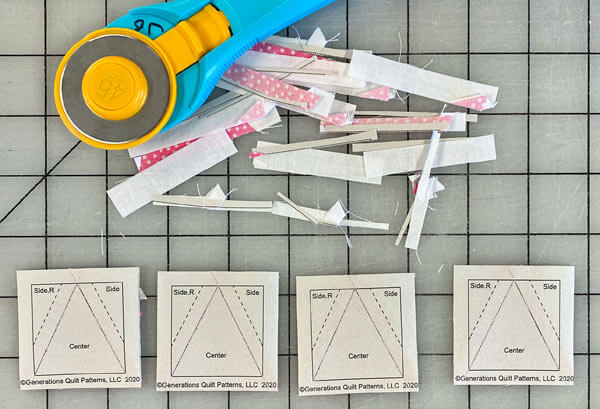

The paper piecing is complete. From this point forward, return your stitch length to the one you regularly use for piecing and install your favorite 1/4" presser foot.
🧩 Assemble your Sun Rays quilt block
Arranged the pieced TiaSs and the cut squares into the Sun Rays design. The background fabric is on all the outside edges.
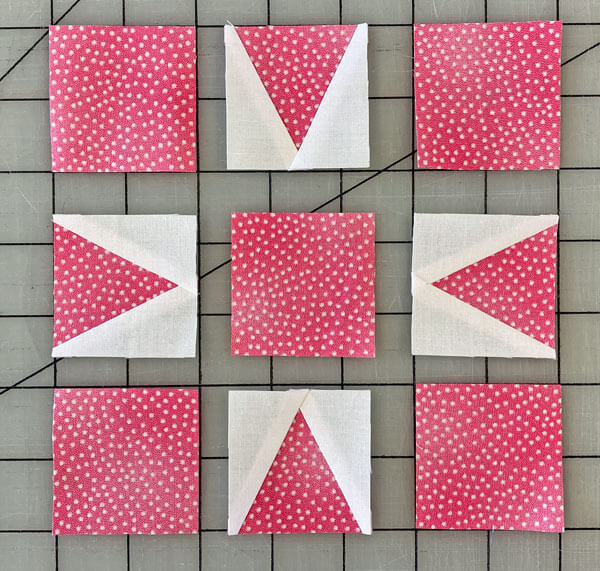
With RST, sew the units in each row together. I prefer to sew with the pieced patch on top whenever possible. When you can see the seams, it's harder to accidentally flip them over as you stitch.
The SAs are pressed away from the TiaSs to reduce bulk.
Sew the rows together.
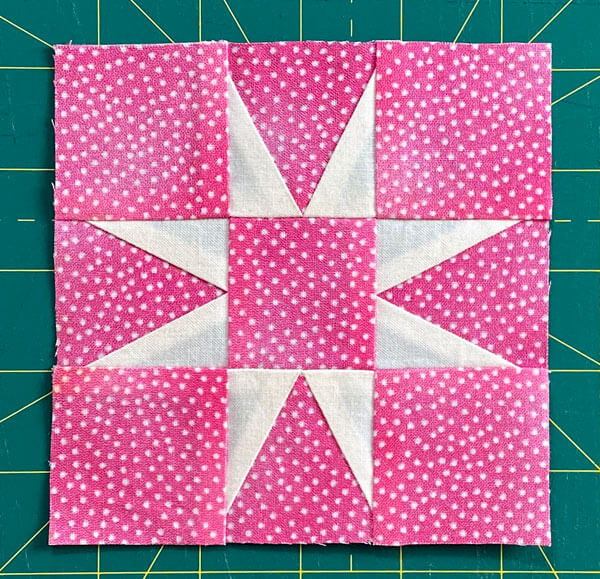
With the naked eye, you can see one of the benefits of paper piecing.
As long as you stitch directly on the line—and especially where the stitching line hits the outside solid square—your blocks are SUPER accurate. The points of the triangle in the middle row are EXACTLY where they need to be without any special futzing around.
Perfectly sized units making putting the block together a more enjoyable experience.
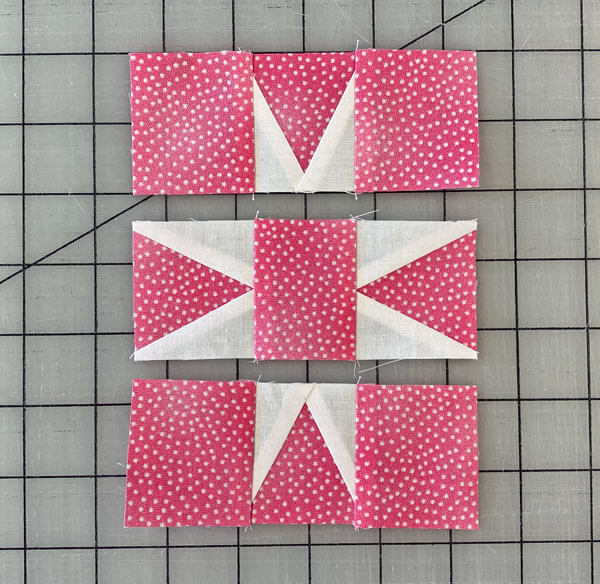
These last two seams are pressed out from the center.
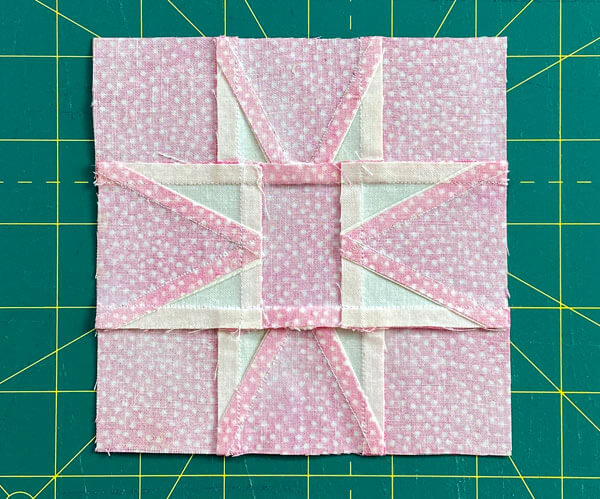
I always like to share a look-see from the backside.
When I learned to sew from my Mom and Grandma, they always insisted (painfully sew sometimes!) that the inside of a garment should look as good as the outside. That idea has stayed with me through quilting.
📌 Don't let this sunny opportunity slip away!🌞
Pin this tutorial faster than a sunbeam and brighten up your quilting future! ☀️
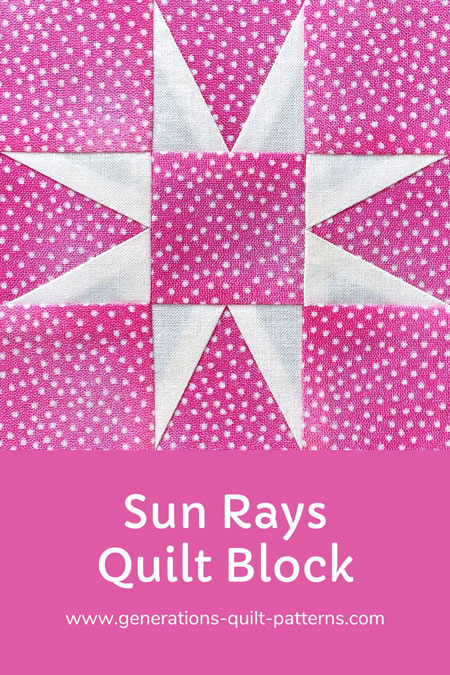
Voila! You're now a certified Sun Rays superstar! ☀️🌟
From itty-bitty 4½" to whopping 12" blocks, you're ready to light up any quilt! 🧵✨
Paper piecing? Conquered! 📄✅
Pointy triangles? Nailed it! 📐💪
Now go forth and spread that quilty sunshine! 🌞🧵 Show us your radiant creations—we're dying to see your glow-up! 😎🔥
Keep stitching and stay bright, Quilters! 🌈💖
More blocks based on the Sun Rays design
🔭 Looking for something truly stellar?
You've finished your star quilt block, and you're ready for more!
Browse our collection of 70 stellar star quilt block patterns. All have instructions and cutting charts in multiple sizes. If templates or paper piecing is used in the tutorial, there's a free download for you of those materials.

Eeny. Meenie. Miney. Moe.
Which star quilt block will you sew?
For a star-studded quilting experience, choose from 100+ bedazzling star quilt patterns—for beginners and beyond—click here.
For even MORE blocks to make… 🧩🎨

...visit our Free Quilt Block Pattern Library, with over 260+ blocks to choose from in multiple sizes.
Free downloads are included in all sizes for any blocks require paper piecing patterns or templates.
- Home
- Free Quilt Block Patterns
- Sun Rays Quilt Block
