- Home
- Free Quilt Block Patterns
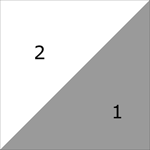
- Rocky Road to California
Rocky Road to California Quilt Block
From our Free Quilt Block Patterns Library
This post contains affiliate links, for which I receive compensation.
Skill Level: Beginner
A Rocky Road to California quilt block is a variation on the 9-patch version of a Jacob's Ladder.
(At the bottom of this page you'll find links to several variations.)
 Pin It to enjoy later!
Instead of five 4-patches, this block is a bit quicker to make with only three. Solid squares are substituted for two of them.
Quick pieced half square triangles and two cut squares complete the block.
Simple nine patch construction is all it takes to complete this beginning-quilter friendly design.
I promise, it won't be a Rocky Road to California.
Let's get started!
📋 General Instructions

I prefer to use two different presser feet to make this block. One is a standard quarter inch foot and the other is a 1/4" foot with a guide on the right hand side—perfect for strip piecing, especially when those strips have been starched.
Seam allowances (SA) are all 1/4".
Step 1: Cut patches for the Rocky Road to California
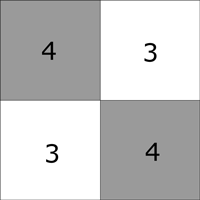
 Rocky Road to California design
Sample Size: 6" finished / 6½" unfinished
Grid: 6x6
Attributed to: Ladies Art Company
AKA: Home Queen (unknown)
Design Type: Jacob's Ladder
The measurements for the #1 and #2 squares are exact in the chart below.
However, I prefer to cut oversized patches for HSTs, stitch them and then trim them down to the perfect size.
So for the 6" finished sample block I added a 1/4" and cut my #1/#2 patches at 3-1/8"x3-1/8". They are marked with ** to help you quickly identify them.
If you choose a directional print and wish to have the design flow in the same direction, you'll find helpful hints written into the directions in Step 2.
 |
Cutting Chart for a~ Traditional Piecing ~ | ||||
|---|---|---|---|---|---|
| Patch | Fabric | Qty | Finished Block Size | ||
| 6” | 9” | 12” | |||
| 1** | A | 2 | 2-7/8”sq | 3-7/8”sq | 4-7/8”sq |
| 2** | Background | 2 | 2-7/8”sq | 3-7/8”sq | 4-7/8”sw |
| 3 | A | 1 | 1-1/2” x 10” | 2” x 13” | 2-1/2” x 16” |
| 4 | Background | 1 | 1-1/2” x 10” | 2” x 13” | 2-1/2” x 16” |
| 5 | A | 2 | 2-1/2”sq | 3-1/2”sq | 4-1/2”sq |
| Unfinished Block Size | 6-1/2” | 9-1/2” | 12-1/2” | ||
| Grid Size | 1" | 1 1/2" | 2" | ||

Step 2: Assembling the Rocky Road to California units
Half Square Triangles (HST)
Make 4
We'll use the Quick Pieced method for making our HSTs.
With a pencil, draw a diagonal line on the back of your two #2 background squares.
For directional prints, note that both are drawn in the same direction (for our sample, from upper left to lower right) with the design of the fabric running up and down for each square.

With right sides together (RST) layer a marked #2 with a #1 square.
Stitch a 1/4" from both sides of the line for both pairs of squares.

Cut the pairs in two along the drawn lines. Press with the SA towards the darker fabric.

All that's left is to trim these HSTs. If you cut the original squares at the exact size, trim off the dog ears with a scissor and double check that each equals the measurement that corresponds to the finished size in the chart below.
If you cut generously, you'll now need to trim these HST to the size listed in the chart.
| Finished Block Size | Trim HST to... |
|---|---|
| 6” | 2-1/2” |
| 9” | 3-1/2” |
| 12” | 4-1/2” |
Click here if you'd like more information about making half square triangles using this Quick Pieced method.
4-Patches
Make 3
If you choose a directional background fabric and you want the design to flow in the same direction, click here for those subcutting and piecing directions.
For this unit, I've switched to my favorite quarter inch foot with a guide.
With RST, sew strip #3 to #4 along the long edge. SA are pressed to the darker fabric.
 The guide on the right hand side of the foot making stitching strips together a breeze! The arrow points to my 'spider'.
At your cutting mat, lay the strip set pretty-side up.
Straighten one of the short edges by laying a line on your ruler directly on top of the seam line. Trim off a sliver to create a perfectly straight edge.
 The arrow points to the line on the ruler aligned with the seam line. It looks a bit jagged due to the design in the striped fabric.
Refer to the chart below and subcut the stripset into six units.
| Finished Block Size | Strip Set width after stitching | Subcut Width |
|---|---|---|
| 6” | 2-1/2” | 1-1/2” |
| 9” | 3-1/2” | 2” |
| 12” | 4-1/2” | 2-1/2” |
After cutting the patches look like this. There's a bit of scrap leftover on purpose (just in case you needed to re-straighten the edge).

With RST, stitch the four pairs of patches together, alternating light and dark fabrics. I pressed this SA open to distribute bulk. (It won't be needed to nest with any other seam to help with alignment).
After stitching and pressing, these are the 3 units.

An alternative to pressing the SA closed and to the side or open is to pick out the stitches in the center and 'twirl' the SA. Here they are all pressed in a clockwise direction.

If you use a directional print like I did...
...and you want the design of the fabric flowing in the same direction, subcut each #3 and #4 strip into 6 squares each the dimensions listed in the chart below. There will be a bit leftover from each fabric.
| Finished Block Size | Subcut width |
|---|---|
| 6” | 1-1/2” |
| 9” | 2” |
| 12” | 2-1/2” |
With RST, stitch each #3 to a #4. SAs are pressed to the dark. Sew pairs together so that you have 3 units with the fabric design flowing like the images below.
 Make 2 Make 2 |
 Make 1 Make 1 |
Step 3: Assemble your Rocky Road to California block
Arrange the cut patches and stitched units as shown below.
Pay particular attention to the orientation of the dark squares in the four-patches—the center is different than the corners.

With RST stitch the units in each row together, pressing with the SA toward the HST units.

Sew the rows together, pinning as necessary if it helps to keep the edges even.

After your Rocky Road to California quilt block is finished, give it one last, good press. I recommend our favorite pressing technique. It's super simple and the results can tame even the lumpiest of quilt blocks!
Other Jacob's Ladder variations...
The Rocky Road to California quilt block is one of many Jacob's Ladder quilt block variations. There are instructions on this site for several more—both 9-patch and four-patch variations—in various sizes.
Simply click any of the images below to go directly to those block instructions.


What about a different quilt block?
For a list of all the 260+ quilt block patterns on this site, start here.
If you know the name of the block, shorten your search by using these links:
Click here if you're looking for blocks with at least some paper piecing.
Click here if you're looking for the basic building blocks of quilting, i.e., Flying Geese, half square triangles, quarter square triangles, etc., along with several techniques to make each.
And finally, use these links to find blocks in these finished sizes:


By Julie Baird
Copyright © 2008-2026 Generation Quilt Patterns, LLC
All Rights Reserved
Generations-quilt-patterns.com does not sell any personal information. (See Privacy Policy)