- Home
- Free Quilt Block Patterns
- Buckeye Beauty Quilt Block
💖 Fall in Love with Quilting Again: The Buckeye Beauty Quilt Block Tutorial
This post contains affiliate links, for which I receive compensation.
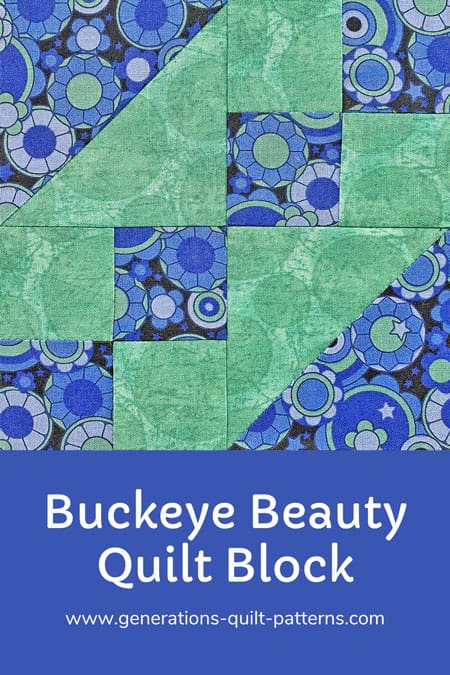
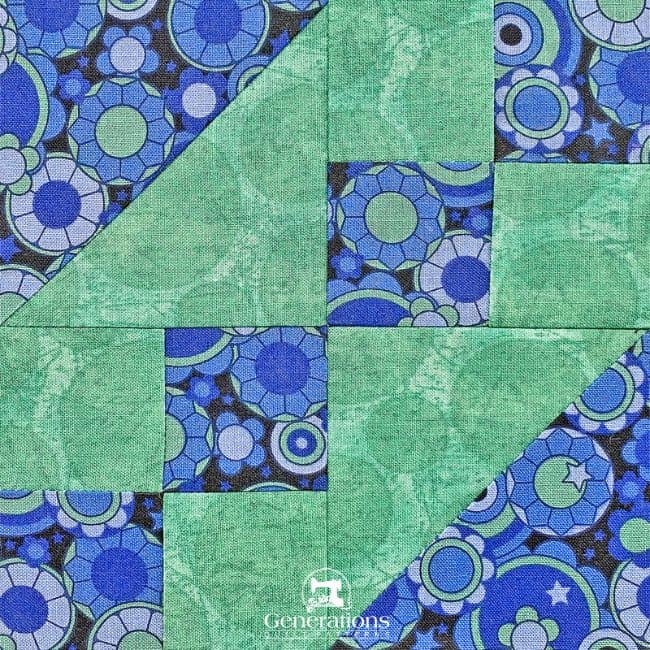
The Buckeye Beauty quilt block is superfast and easy--just two half square triangles and two four patches—and you're good to go!
Perfect for scrappy quilts because each block takes so little fabric. As always, scrap quilts are all about value. Keep your lights light and your darks dark to maintain the design.
Looking for something specific?
We've got you covered! Use these handy links to
navigate through our Buckeye Beauty tutorial with ease. You're just a click
away from quilting nirvana!
Cut. Sew. Press. Watch your fabric blossom into Buckeye Beauty!
General Instructions
All seam allowances (SA) are 1/4".
When you are instructed to press, first press the pieced unit flat to set the seam.
Then open the patches, pressing from the front.
Seam allowances are pressed to the darker fabric unless otherwise noted.
✂️Cutting for a Buckeye Beauty
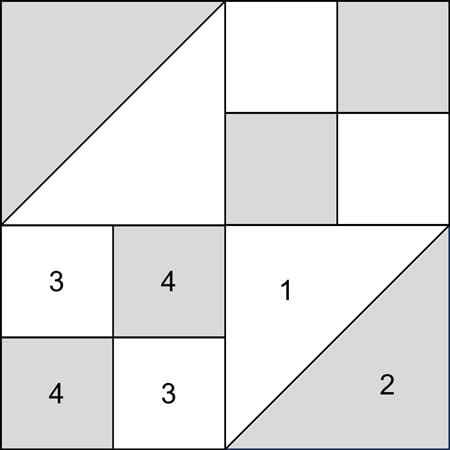
4×4Finished Block Size: 6" finished / 6½" unfinished
Grid: 4x4
Design Type: 4-patch
AKA: Double Four Patch (Household Journal), Gay Scrap Quilt (Old Chelsea Station), Going to Chicago (Nancy Page), Hour Glass (Wallaces' Farmer), Jacob's Ladder (Grandmother Clark), New Four Patch (Farm and Fireside), Crossing (Ruth Finley), World's Fair (Coats & Clark), Railroad (Farm Journal and Nancy Cabot), World's Fair (Farm and Fireside)
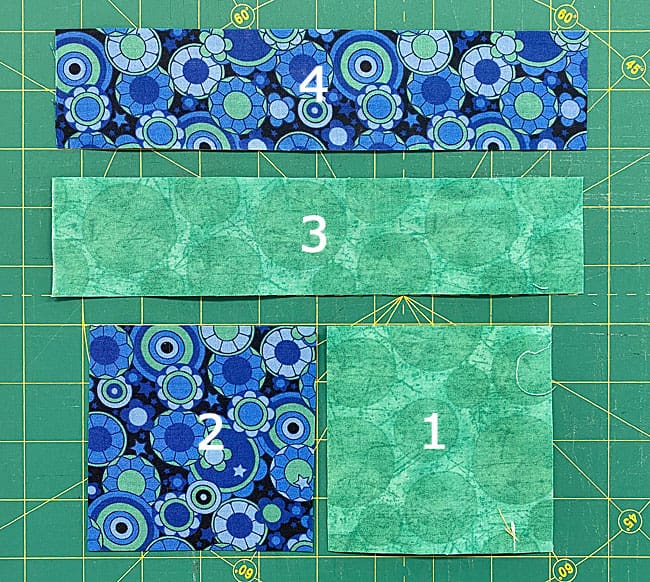
The squares for the half square triangles (marked with **) are based on using the Quick Piecing technique.
I like to use over-sized squares, stitch the unit and then trim to an exact size.
 | Cutting Chart for a~ Traditional Piecing ~ | |||||||
|---|---|---|---|---|---|---|---|---|
| Patch | Fabric | Qty | Finished Block Size | |||||
| 3'' | 4'' | 6'' | 8'' | 12'' | 16" | |||
| 1** | Light | 1 | 2⅜'' x 2⅜'' | 2⅞'' x 2⅞'' | 3⅞'' x 3⅞'' | 4⅞'' x 4⅞'' | 6⅞'' x 6⅞'' | 8⅞" x 8⅞" |
| 2** | Dark | 1 | 2⅜'' x 2⅜'' | 2⅞'' x 2⅞'' | 3⅞'' x 3⅞'' | 4⅞'' x 4⅞'' | 6⅞'' x 6⅞'' | 8⅞" x 8⅞" |
| 3 | Light | 1 | 1¼'' x 6'' | 1½'' x 7'' | 2'' x 9'' | 2½'' x 11'' | 3½'' x 15'' | 4½" x 19" |
| 4 | Dark | 1 | 1¼'' x 6'' | 1½'' x 7'' | 2'' x 9'' | 2½'' x 11'' | 3½'' x 15'' | 4½" x 19" |
| Unfinished Block Size | 3½'' | 4½'' | 6½'' | 8½'' | 12½'' | 16½" | ||
| Grid Size | ¾'' | 1'' | 1½'' | 2'' | 3'' | 4" | ||
**I prefer to cut my patches extra large for HST, stitch, and then trim them to size. If you prefer to do the same, add a bit extra to the measurements for Patches #1 and #2 above.
There is a chart further down in these instructions where you need it for trimming them to size.
And these are the cut patches.
🪡 Create the patches for your Buckeye Beauty quilt block
Half Square Triangles (HST)
Make 2
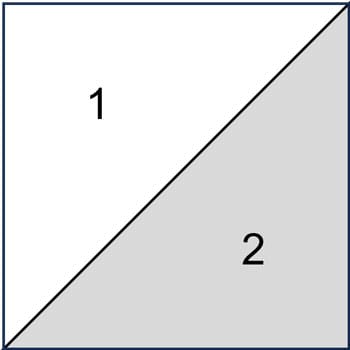
Using the Quick Piece technique for making a Half Square Triangle, draw a diagonal line on the back of one of your squares. I used a mechanical pencil on this dark-ish fabric.
With RST, layer a #1 and #2 square and stitch a 1/4" from each side of the drawn line.
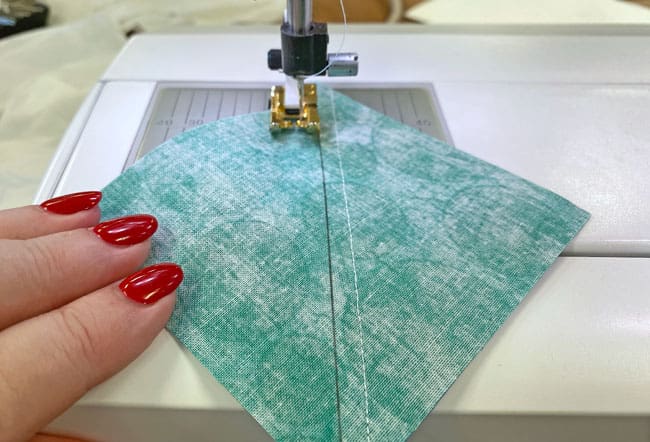 Stitch on both sides of the line
Cut on the line to create two HST units.
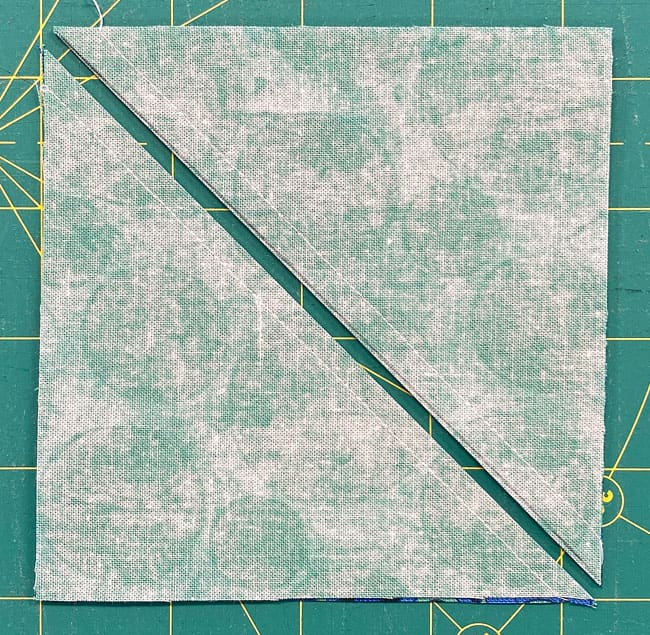
Press.
If you cut oversized patches, use the chart below to find the 'Trim HST to...' size. If you cut your patches exactly, use this same measurement to check for accuracy. Make any necessary adjustments.
HST Dimensions | |
|---|---|
| Finished Block Size | Trim HST to… |
| 3" | 2" |
| 4" | 2½" |
| 6" | 3½" |
| 8" | 4½" |
| 12" | 6½" |
| 16" | 8½" |
For our 6" sample, my oversized HSTs get trimmed to 3-1/2" square.
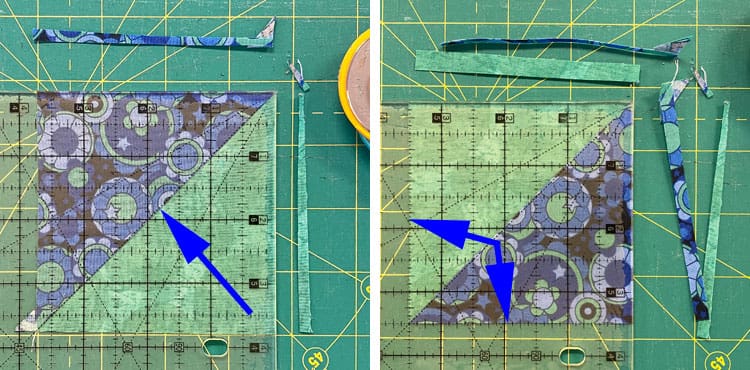 Trim the first two sides (left) and the last two sides (right)
Click here if you need more detailed information on the Quick Piecing technique used above. (This link opens in a new window to make it easier to come back to this spot to continue.)
4-patches
Make 2
With RST, layer a #3 and #4 strip and stitch along the long edge to create a strip set.
Press.
Find your Finished Block Size in the chart below to check that your strip set is the correct width.
For our 6" sample, the width is 3½",
Four Patch Measurements | |||
|---|---|---|---|
| Finished Block Size | Stripset Width after stitching | SubCut Width | 4-Patch Dimensions |
| 3" | 2" | 1¼" | 2" x 2" |
| 4" | 2½" | 1½" | 2½" x 2½" |
| 6" | 3½" | 2" | 3½" x 3½" |
| 8" | 4½" | 2½" | 4½" x 4½" |
| 12" | 6½" | 3½" | 6½" x 6½" |
| 16" | 8½" | 4½" | 8½" x 8½" |
Give one short side a haircut.
Line up your ruler and use your rotary cutter to create a crisp, even edge perpendicular to the seam line.
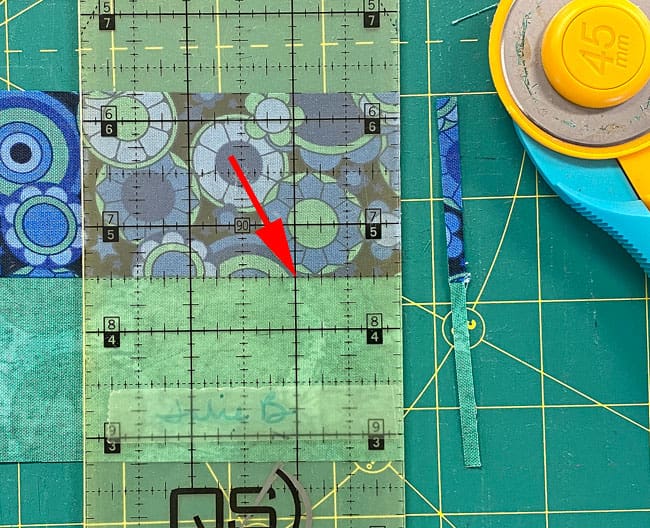 Straighten one short side of the #3/#4 strip set
Using the Subcut Width from the chart, cut this strip set into four equal units.
From the chart for our 6" sample, that subcut is 2" wide.
The two odd-size pieces on the right side are waste
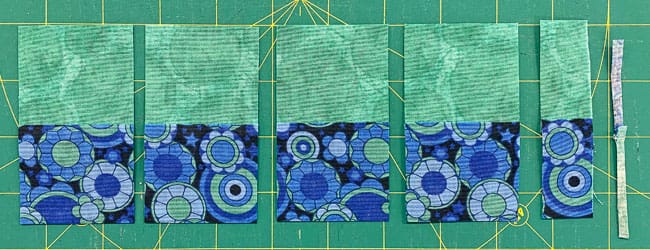
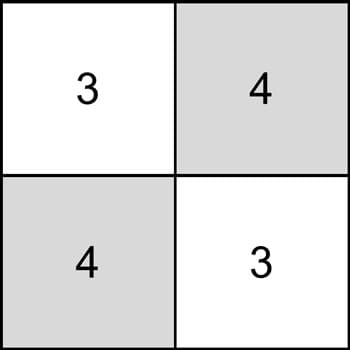
Alternate the segments as shown below.
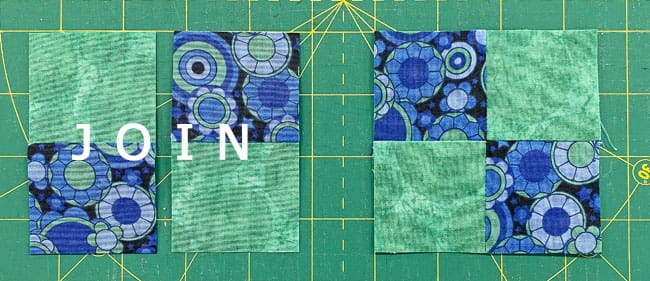 Alternate light and dark fabrics (left), sew together into 4-patches (right)
After stitching your four patches together, use the chart one final time to check for accuracy.
For our 6" sample they measure 3-1/2" square.
Consider twirling or fanning the SAs at the center of your 4-patches
To do this:
- Loosen the stitches in the center, leaving the thread tails. DO NOT trim them because they are the stability in the block
- With your fingers, work the SAs around the center. They will only go one way naturally.
- Give the units a final pressing.
This is what it looks like. You can just make out the thread tails are still there. (red circle)
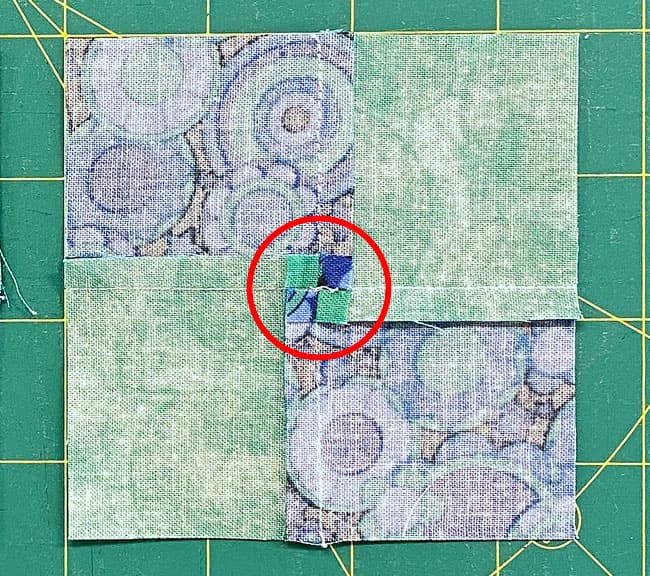 A close-up of the twirled or fanned SA
🧩Assemble your Buckeye Beauty quilt block
Lay out the units. Dark corners of your HST in the corners and dark squares in your 4-patches forming a diagonal row through the block's center.
Even though this is a simple quilt block, it's incredibly easy to flip the triangle squares. Unfortunately, we quilters never seem to notice until we've stitched a whole pile and are at the ironing board to press. ARGGGHHHH!!!!
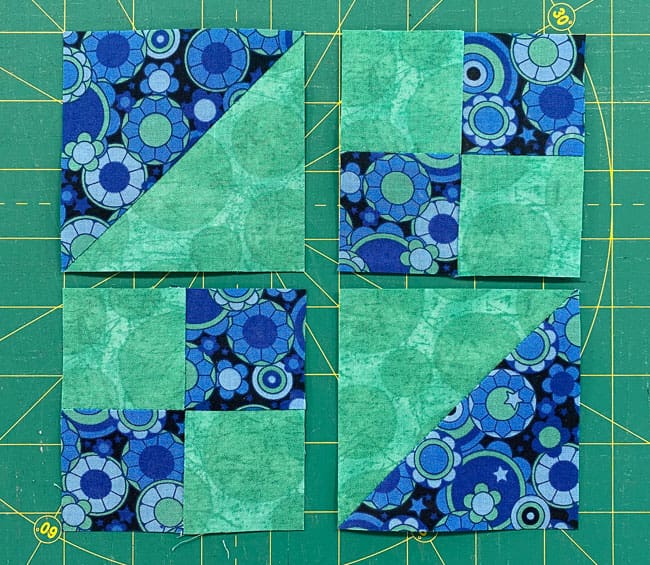 Lay out the patches in the Buckeye Beauty design
Stitch the patches into rows.
You can press in either direction, just be consistent so that your seams will nest for ease in matching the seams.
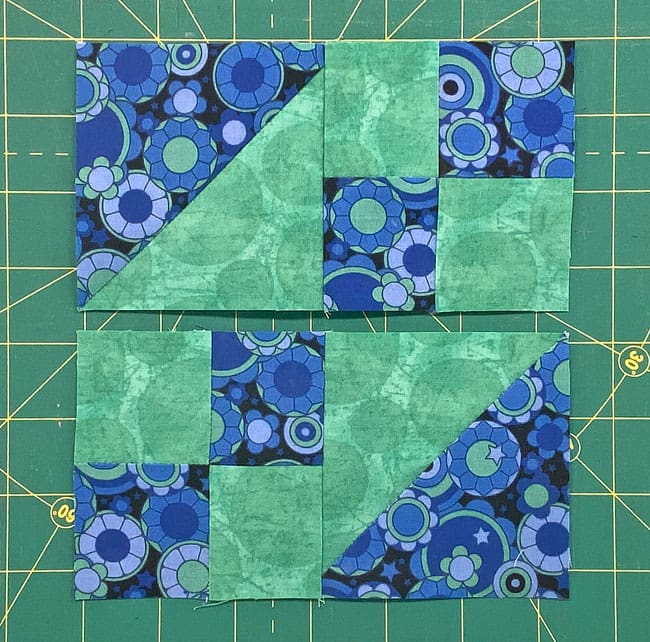 Stitch patches into rows
Sew the two rows into a block.
I twirled the seam allowance to reduce bulk in the center of the block.
Just like for the 4-patches, pick out a couple of the stitches holding the seam together, starting at the edge of the seam up to the stitching that crosses it. You can then maneuver the seams into position with your fingers. Finish up with a turn at the ironing board,
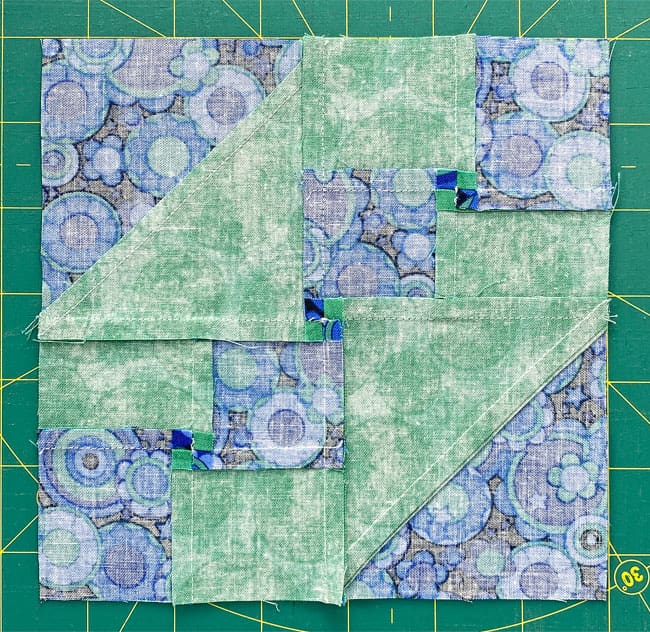 Our sample Buckeye Beauty from the backside
Instead of having the bulk of the seam all pressed to one side, it is now spread around the joined seam.
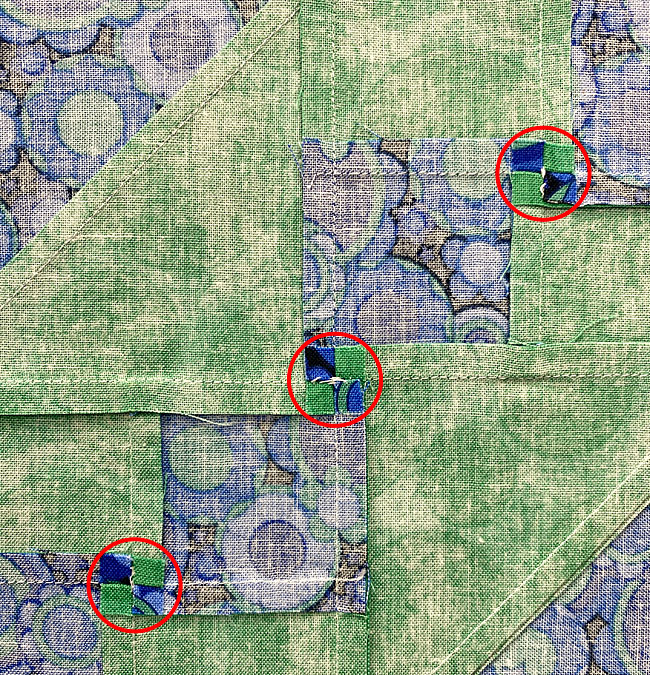 All the twirled seam allowances from the backside of the block
This is your finished Buckeye Beauty quilt block. Pretty cute!
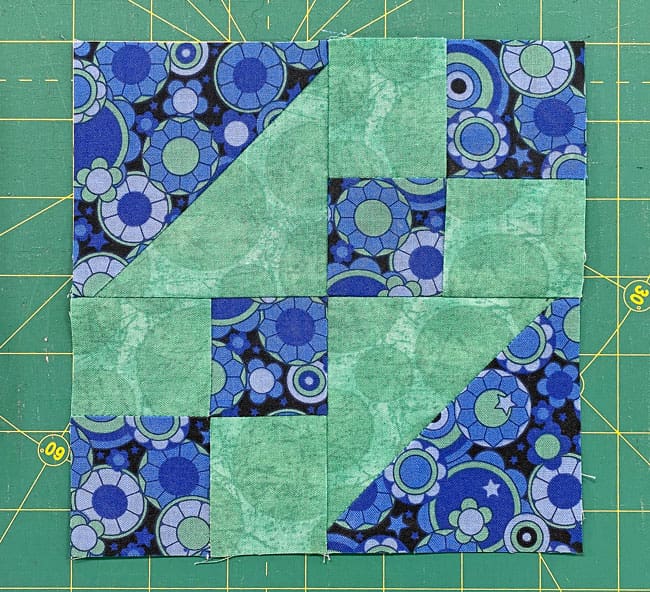 Our finished Buckeye Beauty quilt block sample from the front
👀 Fabric stash giving you the side-eye? 📌
Pin this Buckeye Beauty guide and promise those lonely scraps a beautiful future. ✨ It's time to turn potential into patchwork perfection! 🧵🌟
Same name, different block...

—An entirely different look from the Buckeye Beauty quilt block in our tutorial.
This one is also known as the Rockingham's Beauty.
It's a real humdinger!

'Like the design, but need a bit more design opportunity within the block?
Then click here to go to our nine patch version of the Jacob's Ladder quilt block. It looks like two Buckeye Beauty's melded together.
Need help deciding how to lay out your finished blocks. Look to our Jacob's Ladder (alias Buckeye Beauty) pattern page for inspiration.
For even MORE blocks to make… 🧩🎨

...visit our Free Quilt Block Pattern Library, with over 260+ blocks to choose from in multiple sizes.
Free downloads are included in all sizes for any blocks require paper piecing patterns or templates.
- Home
- Free Quilt Block Patterns
- Buckeye Beauty Quilt Block

