- Home
- Free Quilt Block Patterns
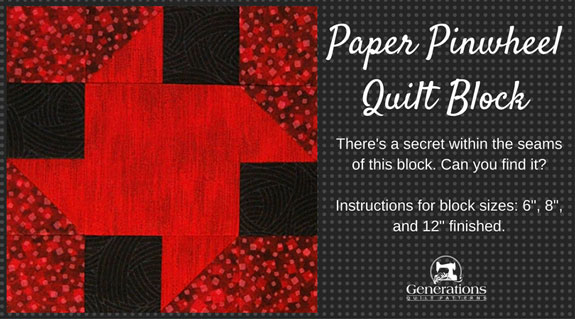
- Paper Pinwheel Quilt Block
Paper Pinwheel Quilt Block
It's hiding something. Can you figure out what?
This post contains affiliate links, for which I receive compensation.
The Paper Pinwheel is a simple little block that holds a secret within its seams.
Can you guess what it is?
This is a very basic block to make. Just a few half square triangles and cut squares. But when you put it together with a bunch of its friends, well...
Magic happens.
You'll see at the end of this page.
Let's begin.
📋 General Instructions

Several common abbreviations are used in this tutorial:
- RST - right sides together
- SA - seam allowance
- HST - half square triangles
All seams are 1/4".
When instructed to press, first press the seam flat before opening the patches. This is to set the seam, melding the thread fibers into the fabric.
Then open the patch and press again. I prefer to press from the right side so that no tucks are accidentally created at the SA.
SA are pressed to the dark unless otherwise instructed.
New quilt fabrics to tickle your fancy...
Click the images below to see the full collection. We share any commercial and/or free patterns that showcase them, too. (For inspiration, of course!)


Step 1: Cutting patches for a Paper Pinwheel block
 Paper Pinwheel design
Sample Block Size: 6" finished / 6½" unfinished
Grid: 4x4
Attributed to: Nancy Page
AKA: Pinwheel (Ruth Finley)
Design Type: Uneven 9-patch, small center, Pinwheel
Our Paper Pinwheel takes three fabrics: light, medium and dark.
Though my two reds are relatively close in value, the difference in pattern helps.
You may want to skip to the bottom of the page to see what all the 'secret' fuss about this Paper Pinwheel is about before choosing your colors.
 | Cutting Chart for a~ Traditional Piecing ~ | ||||||
|---|---|---|---|---|---|---|---|
| Patch | Fabric | Qty | Finished Block Size | ||||
| 4'' | 6'' | 8'' | 12'' | ||||
| 1** | Med | 2 | 1⅞'' x 1⅞'' | 2⅜'' x 2⅜'' | 2⅞'' x 2⅞'' | 3⅞'' x 3⅞'' | |
| 2** | Light | 2 | 1⅞'' x 1⅞'' | 2⅜'' x 2⅜'' | 2⅞'' x 2⅞'' | 3⅞'' x 3⅞'' | |
| 3 | Med | 4 | 1½'' x 1½'' | 2'' x 2'' | 2½'' x 2½'' | 3½'' x 3½'' | |
| 4 | Dark | 4 | 1½'' x 1½'' | 2'' x 2'' | 2½'' x 2½'' | 3½'' x 3½'' | |
| 5 | Light | 1 | 2½'' x 2½'' | 3½'' x 3½'' | 4½'' x 4½'' | 6½'' x 6½'' | |
| Unfinished Block Size | 4½" | 6½" | 8½" | 12½" | |||
| Grid Size | 1'' | 1½" | 2'' | 3'' | |||
| **I prefer to cut my patches extra large for HST, stitch, and then trim them to size. If you prefer to do the same, add a bit extra to the measurements for Patches #1 and #2 above (I added 3/8" to each dimension for the sample block). There is a chart further down in these instructions where you need it for trimming them to size. If you have a perfectly reliable 1/4" seam allowance use the dimensions in the cutting charts for these patches. | |||||||

Step 2: Assemble the Paper Pinwheel units
 Make 4
Using the quick pieced method to make our HST, draw a diagonal on the backside of either the #1 or the #2 patches. Which one depends on the marking tool you use.
The chalk line I get with my Bohin Mechanical Chalk pencil (below) is bright enough to show equally well on either the dark or light fabric.
With RST, layer a #1 and #2. Stitch a 1/4" away from both sides of the line for both pairs of patches.
 The white arrow points to the 'spider' that I use. It's a scrap piece of fabric that I sew onto first and then onto my patches. Less chance of my machine chewing up the point.
Press in the closed position to set the seam.
Cut in half between the two stitching lines. This creates four HST.
Press the HST open.
Find your finished block size in the chart below. Trim your HST to the size listed for it.
| HST Dimensions | ||
|---|---|---|
| Finished Block Size | Trim HST to… | |
| 4" | 1½" | |
| 6" | 2" | |
| 8 " | 2½" | |
| 12" | 3½" | |
If you cut your patches exactly the size in the chart and your SA is a good 1/4", likely all you'll need to trim away are the dog ears.

ith RST, add a #4 to the #2 side of a HST as shown below.
Make four. Press with the SA toward #4 to reduce bulk.
Set two aside for Step 3.

To the remaining two #1/#2/#4, with RST add a #3 to both short sides.
Make two. Press SA towards #3.

Step 3: Assemble your Paper Pinwheel quilt block
Arrange the units and cut patch into rows. Double check that the lightest triangle is pointed out, away from the center.

With RST, stitch the side units to the #5 square.
Press with SA to the center.

Stitch the rows together. The seams nest to make matching them a piece of cake.
This is the finished Paper Pinwheel quilt block.
 Our Paper Pinwheel is ready for a quilt!
If you press the last two seams in, then if you choose to make a quilt of these blocks set edge to edge, all of your seams will nest.
I promised you a reveal!

Frequently I write about how much I love the EQ quilting software program (available for both PC and Mac - I use it on both, too.)
Seriously. It's Da-Bomb.
I make all the images and patterns on this site with it.
The Paper Pinwheel looked to be a good skill builder block—some HSTs for the newer quilter to practice on without having to drown in them to get a quilt finished.
Well I popped this design into a straight set quilt in EQ and look what popped up right away.
This little beauty...
 Paper Pinwheel Quilt: 7 rows of 6 blocks each
Blocks set in straight rows and columns.
No sashing.
Just Paper Pinwheels set edge-to-edge (remember the pressing suggestions?)
The secondary design created is a mirror image of the original pinwheel...just spinning in reverse.
How cool is that?
And it was revealed with just a few clicks in the EQ8 software.
A happy accident!
What about a different quilt block?
For a list of all the 260+ quilt block patterns on this site, start here.
If you know the name of the block, shorten your search by using these links:
Click here if you're looking for blocks with at least some paper piecing.
Click here if you're looking for the basic building blocks of quilting, i.e., Flying Geese, half square triangles, quarter square triangles, etc., along with several techniques to make each.
And finally, use these links to find blocks in these finished sizes:


Yummy fabrics
to drool over
Click any image below to see the full collection and find pricing and ordering information.


By Julie Baird
Copyright © 2008-2026 Generation Quilt Patterns, LLC
All Rights Reserved
Generations-quilt-patterns.com does not sell any personal information. (See Privacy Policy)