- Home
- Free Quilt Block Patterns
- Cross and Square Quilt Block
Cross and Square Quilt Block: Where Geometry📐Meets Genius!🧠
Where every stitch is a cross-roads of creativity 🛣️
This post contains affiliate links, for which I receive compensation.
The Cross and Square quilt block is a variation of the Sawtooth Star block. We tweak the Flying Geese that create the star points. A simple Square in a Square in the center completes the transformation.
You'd think with all those points you have to match, that it'd be tricky to put together.
Not with this one simple technique.
One technique to rule them all.
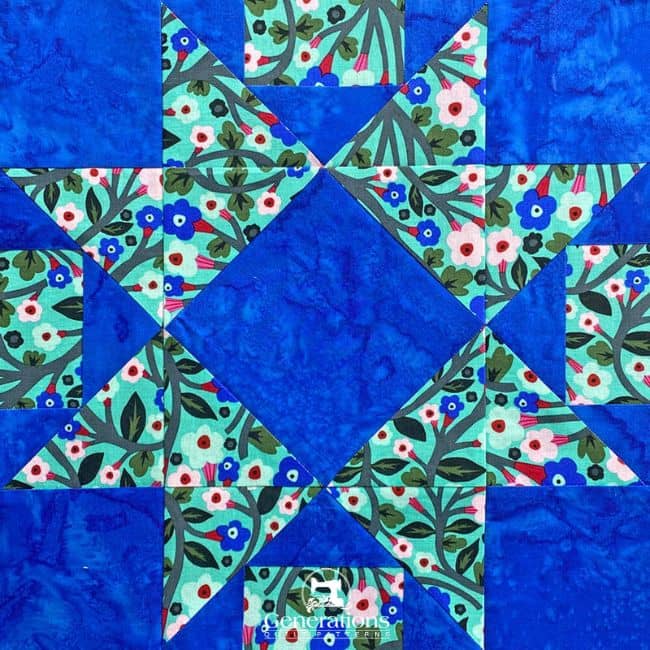
Paper piecing makes the tricky simple and straightforward. No special rulers to buy—you can use what you've got.
No new technique to master and commit to memory.
No instruction sheets to keep handy in your 'safe place'. (Yeah, we all know how 'safe' our safe place is, right? Wink! Wink!)
All you need to do is sew slow enough to stitch on a printed line, and then trim with your handy-dandy rotary cutter and ruler.
It's as basic as it gets.
🧭Ready to navigate this quilting adventure like a pro?
Use these handy anchor links to jump to the exact spot you need. It's like GPS for your quilting journey, minus the "recalculating" voice!
- A cutting chart in five sizes, with downloads of the chart and block design
- Short on quilting time? Bookmark or pin this tutorial for your next creative session!
Cut. Sew. Press. Square up your skills and crossover into quilting stardom
📋General Instructions
Several abbreviations are used on this page. They are:
- SA - seam allowance
- RST - right sides together
- HST - half square triangles
- QST - quarter square triangles
- SiaS - square in a square
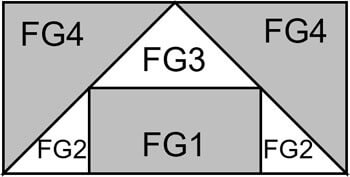
- FG - Flying Geese Variation 1
A 1/4" SA is used in this tutorial.
Highlighted in yellow, pressing instructions are easy to spot.
To press, first press the patches in the closed position as they came off your sewing machine. This sets the seam, melding the fibers of the threads into the fibers of the fabric.
Paper pieced seams are always pressed toward the last patch added.
Download and print the paper piecing patterns
To download the pattern, use the most current version of Adobe.
For accurate results, on Adobe's Print Menu page, under 'Page Size and Handling' set 'Custom Scale' to 100%. Then print.
Click here to see what it looks like on the Print Menu page.
Find your finished block size from the chart below. Print the corresponding number of pages for a total of one Square in a Square and four Flying Geese, Variation 1 for each block you want to make.
Print Paper Piecing Patterns for | ||||
|---|---|---|---|---|
| Finished Block Size | SiaS | FG Var 1 | ||
| # of Copies to Print | SiaS Finished Size | # of Copies to Print | FG Var 1 Finished Size | |
| 4" | 1 copy | 2" | 1 | 1" x 2" |
| 6" | 3" | 1 | 1½" x 3" | |
| 8" | 4" | 1 | 2" x 4" | |
| 10" | 5" | 2 | 2½"" x 5" | |
| 12" | 6" | 2 | 3" x 6" | |
After printing, use the 1" square graphic on the printed page(s) to double-check that your patterns printed at the correct size.
Then cut out the required number of patterns from your copies. A rough cut is good enough—an 1/8"-1/4"-ish away from the outside dashed square.
Not sure which paper piecing paper to use?
Click here for "Does it really matter which paper piecing paper you use?" to help you make the best decision for your needs.
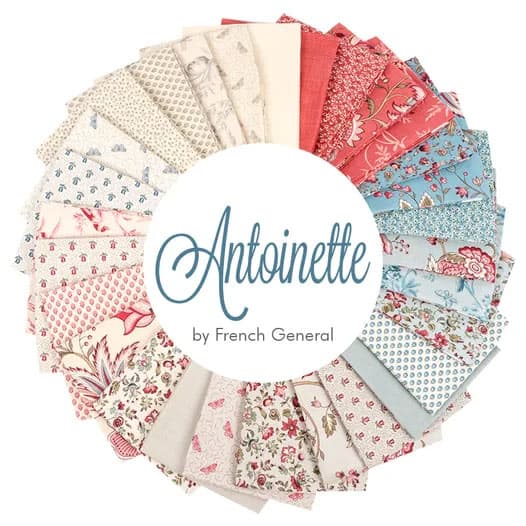
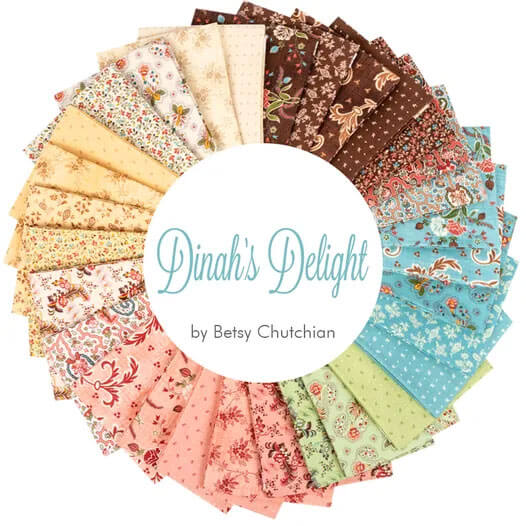
New quilt fabrics to tickle your fancy...
Click the images below to see the full collection. We share any commercial and/or free patterns that showcase them, too. (For inspiration, of course!)
✂️Cutting patches for a Cross and Square block
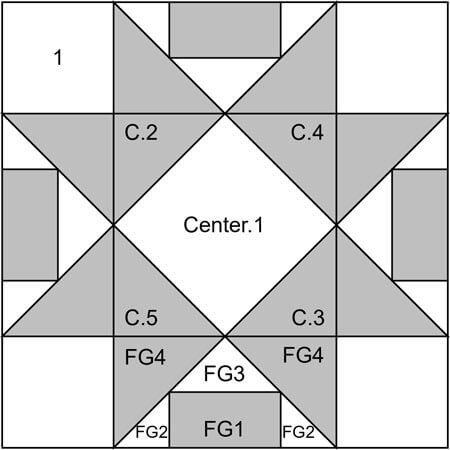 Cross and Square block design
Sample Block Size: 12" finished / 12½" unfinished
Grid: 8x8
Attribution: Nancy Cabot
AKA: Home Treasure (Old Chelsea Station Needlecraft Service)
Design Type: Star | Paper piecing | Uneven 9-patch, large center
Don't skip the labeling your patches—it's the roadmap to your quilting success.
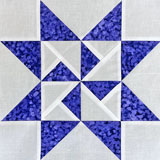
I pulled a bit of fast one in stitching up this sample. Instead of using a light background, I've chosen a brilliant Royal Blue batik fabric instead. It makes for a striking block in the end.
To print a copy of the block design and cutting chart to use at your cutting table, click here.
 | Cutting Chart for a~ Paper & Traditional Piecing ~ | |||||||
|---|---|---|---|---|---|---|---|---|
| Patch | Fabric | Qty | Finished Block Size | Sub Cut | ||||
| 4" | 6" | 8" | 10" | 12" | ||||
| FG1 | Dark | 4 | 2½'' x 1¾'' | 3½'' x 2¼'' | 4½'' x 2¾'' | 5½'' x 3¼'' | 6½'' x 3¾'' | --- |
| FG2 | Light | 4 | 2⅜'' x 2⅜'' | 2⅞'' x 2⅞'' | 3⅜'' x 3⅜'' | 3⅞'' x 3⅞'' | 4⅜'' x 4⅜'' | |
| FG3 | Light | 1 | 2¾'' x 2¾'' | 3¼'' x 3¼'' | 3¾'' x 3¾'' | 4¼'' x 4¼'' | 4¾'' x 4¾'' | |
| FG4 | Dark | 4 | 2⅜'' x 2⅜'' | 2⅞'' x 2⅞'' | 3⅜'' x 3⅜'' | 3⅞'' x 3⅞'' | 4⅜'' x 4⅜'' | |
| Center | Light | 1 | 1⅞'' x 1⅞'' | 2⅝'' x 2⅝'' | 3⅜'' x 3⅜'' | 4⅛'' x 4⅛'' | 4¾'' x 4¾'' | --- |
| C2, C3 C4, C5 | Dark | 2 | 2⅜'' x 2⅜'' | 2⅞'' x 2⅞'' | 3⅜'' x 3⅜'' | 3⅞'' x 3⅞'' | 4⅜'' x 4⅜'' | |
| 1 | Light | 1 | 1½'' x 1½'' | 2" x 2" | 2½'' x 2½'' | 3" x 3" | 3½'' x 3½'' | --- |
| Unfinished Block Size | 4½'' | 6½'' | 8½'' | 10½'' | 12½'' | na | ||
| Grid Size | 1'' | 1½'' | 2'' | 2½'' | 3'' | na | ||
🪡Stitch the units for your Cross and Square
Let's get the gluing out of the way first.
I like to use a dot of Elmer's Washable Glue Stick to hold the first patch in place on the unprinted side of the pattern. You could use a pin, but it may distort the pattern more than you'd like. Gluestick is a practical alternative.
Use the dashed guides to help position each quickly and accurately.
Note that the Center.1 patch is not a perfect fit. It runs a tiny bit smaller or larger than the dashed square placement guide (below right).
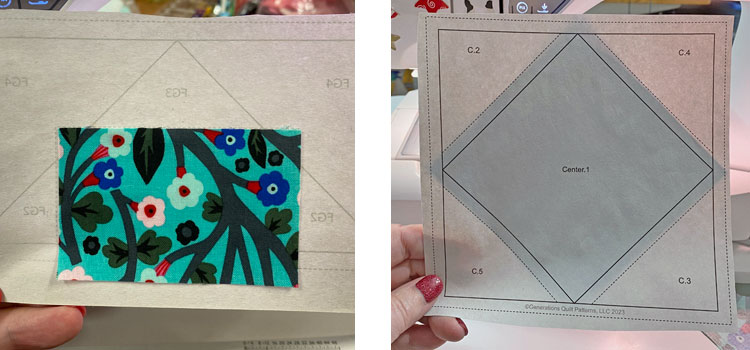 Use a dot of glue stick to hold the first patch in place for each FG unit (left) and the SiaS (right)
That's just how the center of a Square in a Square rolls. Because these squares are on point, they aren't a 'perfect' fit with our rotary cutters and rulers. (One of the reasons why I prefer to paper piece this block.)
Once all the first patches are positioned, you can put away the gluestick. We won't need it again.
Now set up your machine for the technique.
We need to make a few adjustments to our sewing machine settings to paper piece.
- Reduce your stitch length to 16–20 stitches per inch (1.3-1.6 mm). This perforates the paper and stabilizes the seam when you remove the pattern. [Learn more about stitch length here.]
- Reduce your machine's speed or just plain slow down. Sew only as fast as you can AND stay on the solid stitching line.
- Install an open toe appliqué foot (sometimes called an 'embroidery' or 'satin stitch' foot) if you have one (it makes it easier to see where you're stitching).
- Use a larger needle (90/14) IF you have problems removing the pattern. Personally, I use an 80/12 Microtex Sharp for paper piecing without any issues.
Flying Geese - Variation 1
Make 4
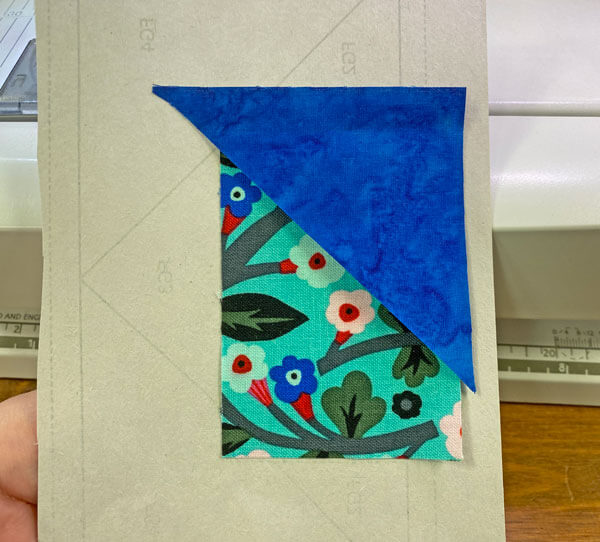
With RST, position FG2 and FG1 with their side edges even as shown. You may want to hold the patches at the seam and flip the FG2 open to confirm it's positioned correctly.
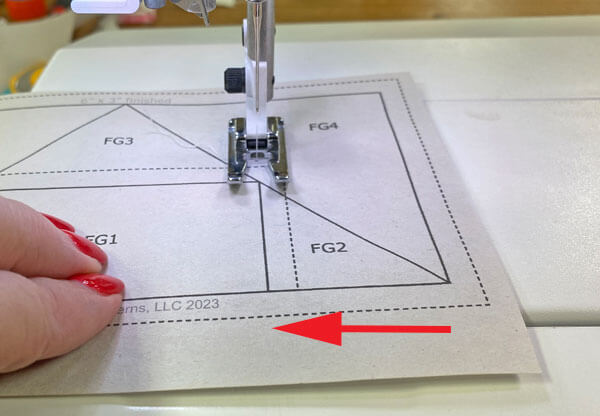
From the printed side, stitch the seam between the FG1 and FG2. Start and stop your stitches a generous 1/4" before and after the solid line, ending at about the red arrow (below).
For the smaller FGs in smaller Cross and Square blocks, you'll need to jump up and press this seam.
The FG for our 12" sample is 6" wide, so both FG2s can be stitched before pressing.
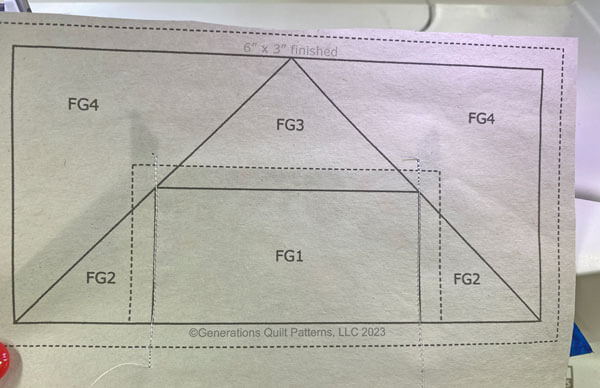 Here you can see how the stitches extend well before and after the solid lines.
With RST, match the long edge of FG3 with FG1.
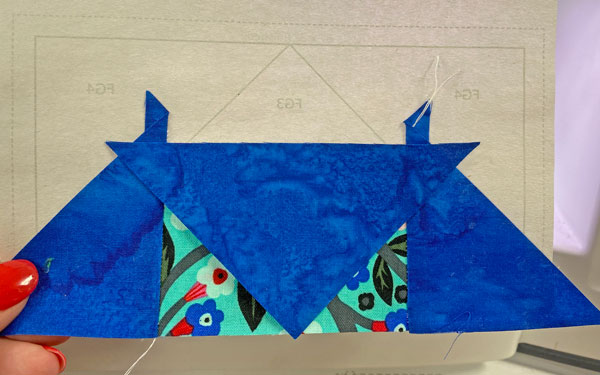
Stitch the seam just as you did the previous seams, Press.
Now we're going to create the perfect placement lines for our FG4s.
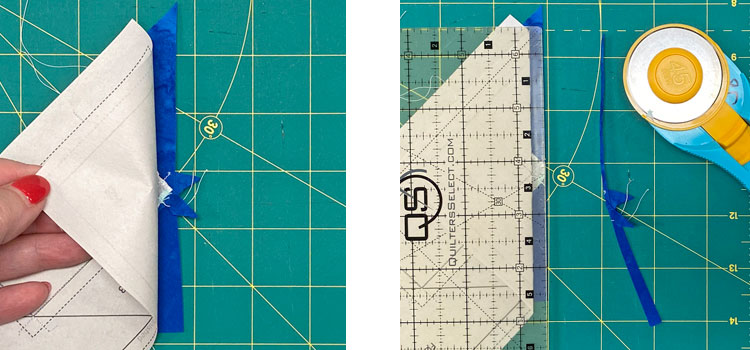
On your cutting mat, paper side up, pull the pattern away from the stitches in both upper corners of the FG1 rectangle. The paper may tear a bit. That's normal. (below left)
If you accidentally mangle it while tearing (I've done it), use a bit of Magic Tape to repair the pattern—just remember NOT to iron directly on the tape. It'll melt and crap up the bottom of your iron.
Next, fold back the pattern on the solid line between FG4 and FG2/FG3. Give it a good crease with your finger. Align the 1/4" mark on your ruler with the fold, and trim away the excess fabric. (below, right)
Repeat for the other side of the FG2/FG3 triangle.
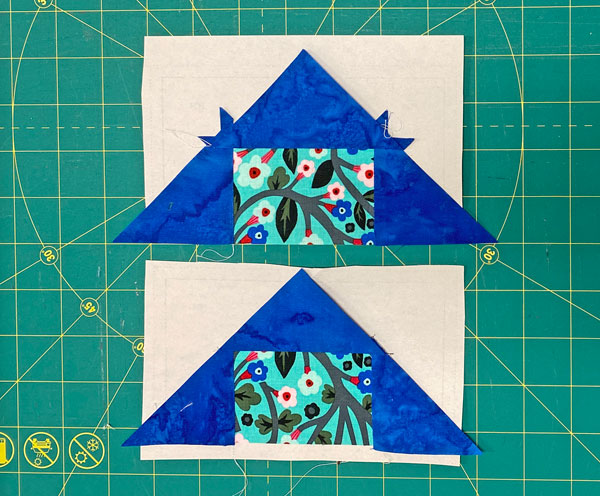
In the photos below, the untrimmed unit is on top. The trimmed FG is on the bottom.
Back to the sewing machine, position an FG4 RST with the stitched unit. The cut edge of the FG2/FG3 is a perfect 1/4" seam, so we know exactly where to position it.
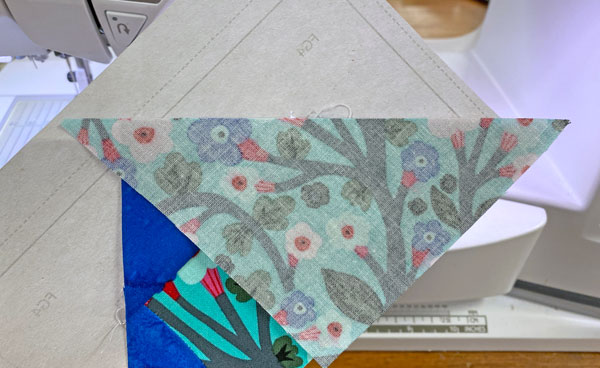
Sew the seam as before. This time, since the SA runs from one side of the pattern to the other, it is possible to chain piece it if you like.
Press.
Repeat for the second FG4, pressing to complete the unit.
At the cutting mat, paper side up, line up the 1/4" mark on your ruler with the solid line on one side of the block. Trim away the excess.
Rotate the FG a quarter turn, trim, repeating in this manner until all four sides of all four FGs are trimmed.
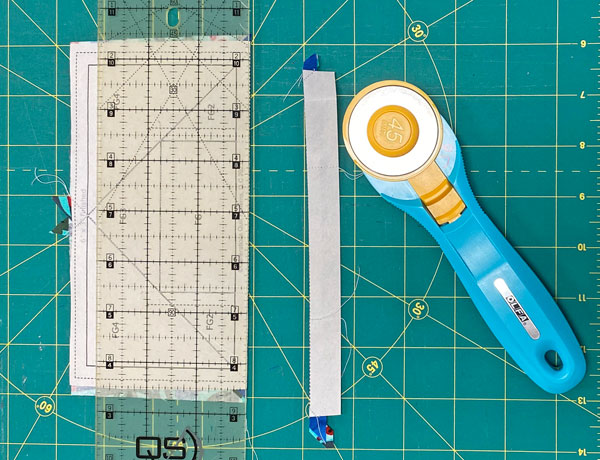
Our FG is rather a hot mess after stitching, and pure perfection after trimming.
All the points are precisely where they should be, as long as you took the time to stitch on the line.
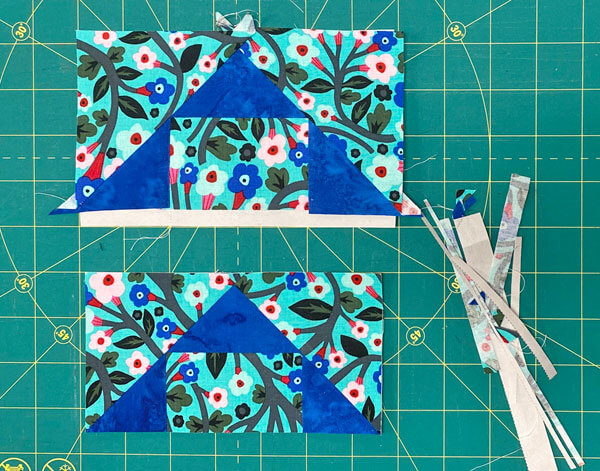
You've got to love it when you don't need to buy yet another specialty ruler, or have to line-up multiple points on your ruler before trimming.
Paper piecing.
One technique to rule them all!
Square in a Square (SiaS)
Make 1
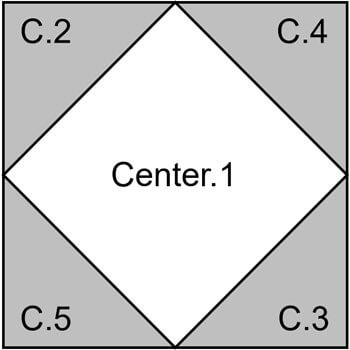
With RST, align the long bias edge of C.2 with one side of Center.1.
A simple trick for quick placement…
The point at the bottom of C.2 should be directly opposite of the corner printed on the top of the pattern. 'Close' should be good enough, as these patches are cut over-sized to begin with.
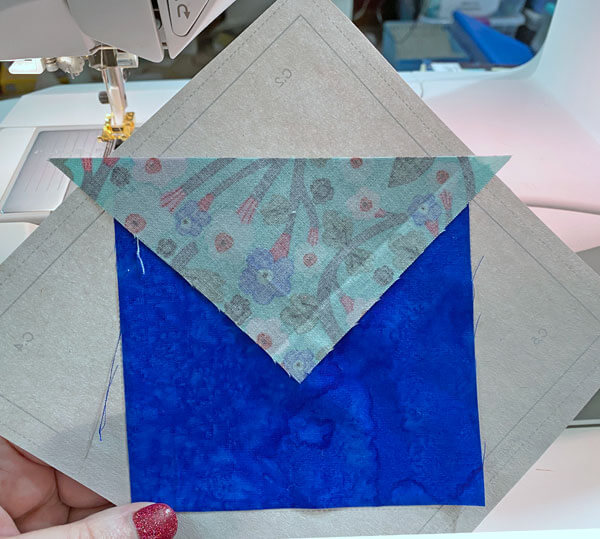
From the printed side, sew on the solid line between C.2 and Center.1, starting and stopping past the outside dashed edges of the Sias.
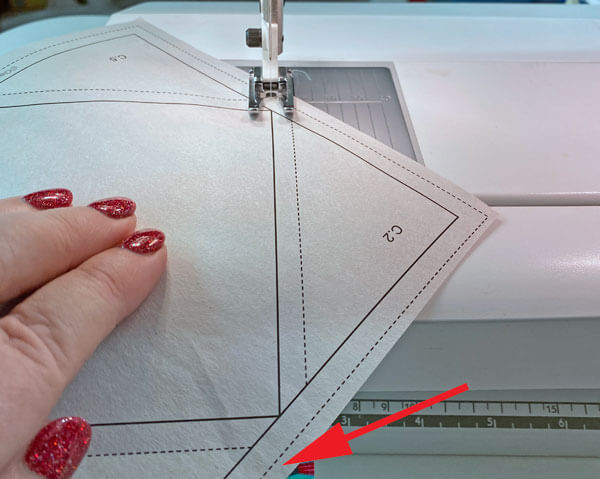
Position and stitch C.3 the same as C.2.
For smaller blocks, you may need to press between adding each C.2-C.5. For this 12" finished sample, there's plenty of room, No fear of accidentally sewing over one of the side triangles and having to rip it out.
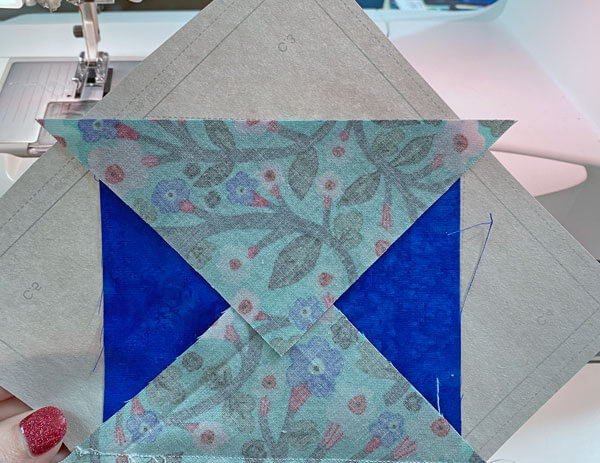
Press.
I do like to remove the dog ears that stick out. At the red arrow I've trimmed away the first one, Less bulk in the finished unit where we're matching lumpy seams.
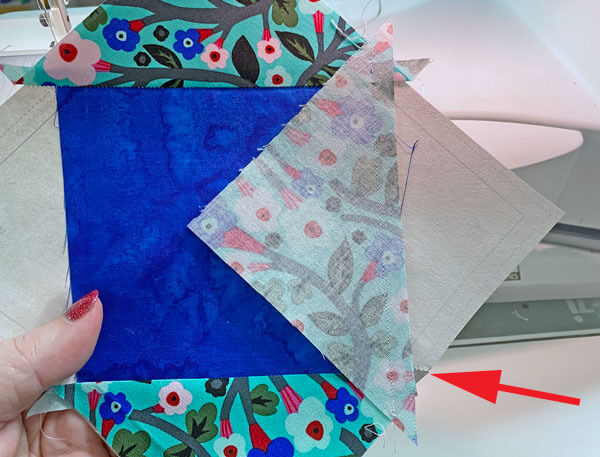
Add the final side triangle, C.5, and give your SiaS a good pressing.
Here is it before trimming.
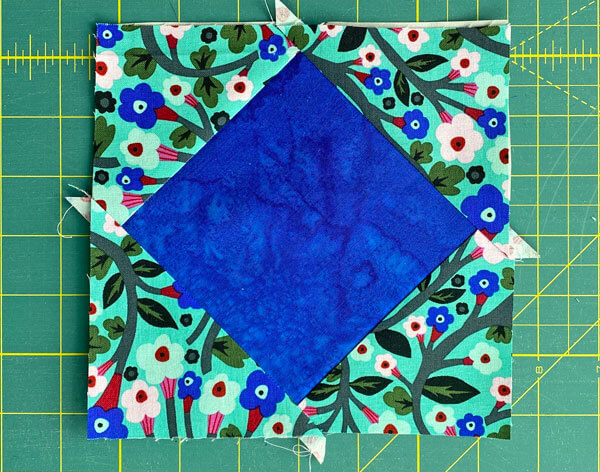 The usual 'hot mess' before we trim.
Trim the SiaS to perfection, just like we did the Flying Geese. One side at a time.
Turning and cutting away the excess fabric and paper on all sides.
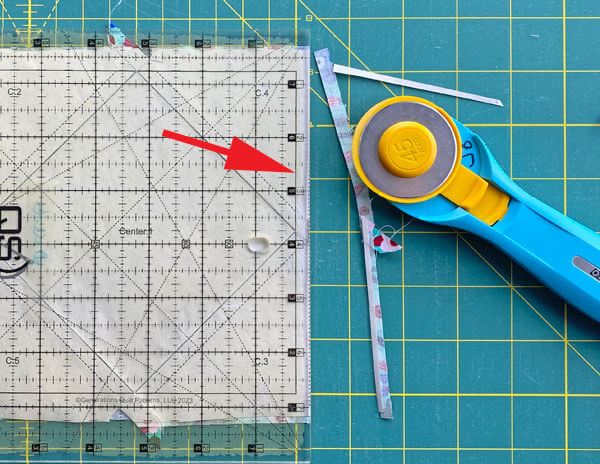 The 1/4" mark on the ruler is directly over the solid line surrounding the block.
Not a lot of waste for a SiaS that is precisely the size we need, with points positioned perfectly.
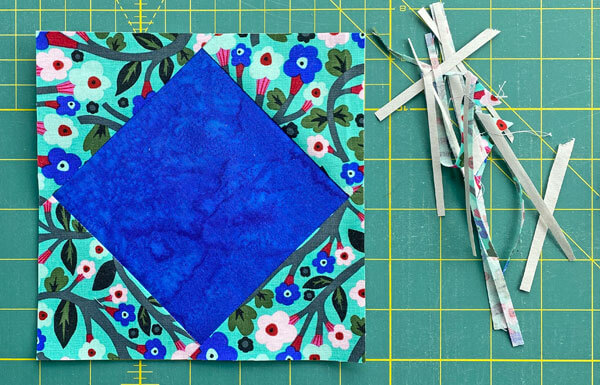

The paper piecing is complete. From this point forward, return your stitch length to the one you regularly use for piecing and install your favorite 1/4" presser foot.
Remove all the paper from all your units. We precut our patches so that there'd be straight of grain on all the outside edges. That means there's no more stretch in them than there'd be if you used traditional piecing methods.
The paper no long has a purpose.
Step 3: Assemble your Cross and Square quilt block
Arrange all your Flying Geese, the SiaS and the solid corner squares into the Cross and Square quilt block design. FG points into the center.
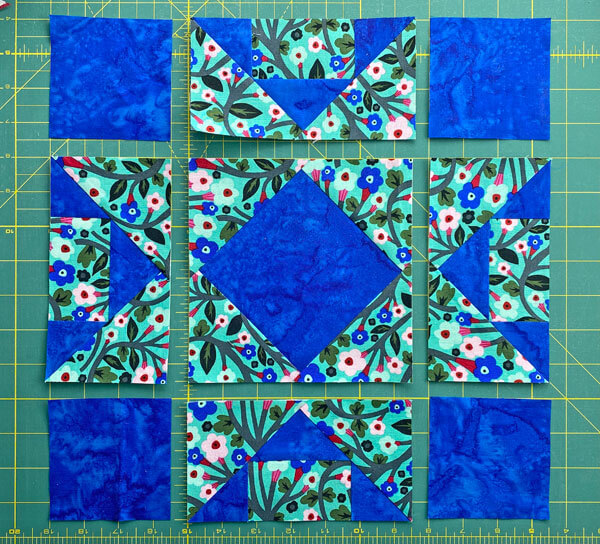
With RST, sew the units in each row together.
SAs are pressed away from the FGs.
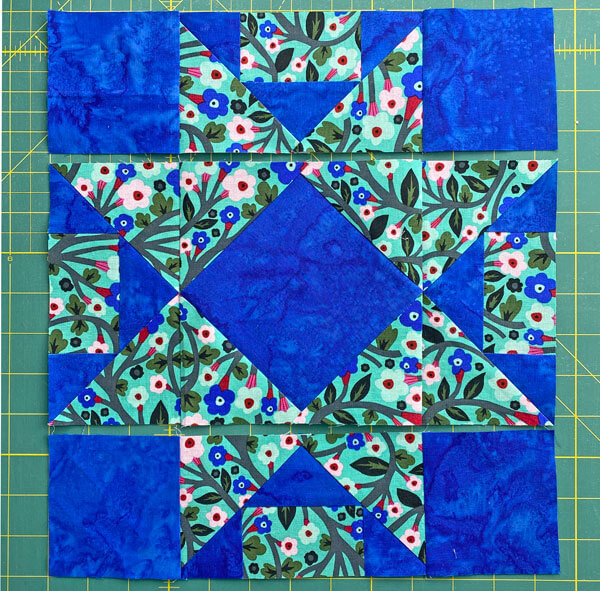
Those seams were the points all meet with the SiaS are lumpy. There's a lot of fabric all in one spot.
Two things you can do while pressing to make it easier to manipulate the fabric:
- When you're pressing the seams as they came of the sewing machine give your patches a shot of steam. The moisture makes the patches more pliable. Be mindful of not pulling them out of shape.
- Use my secret pressing technique after stitching the units into rows. No specialty tools needed. The results are remarkable for something so simple to do.
Finally, stitch the rows together. (I've used my favorite IBC pins to hold the edges evenly together and the points in place.)
Again, if you've been diligent about stitching on the line, this is easier than you might imagine.
Our Cross and Square quilt block is finished.
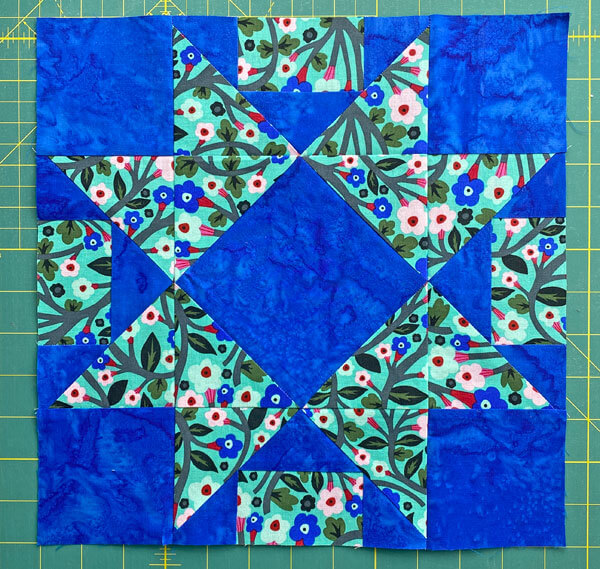
A look at the back reveals how all the SAs fit together.
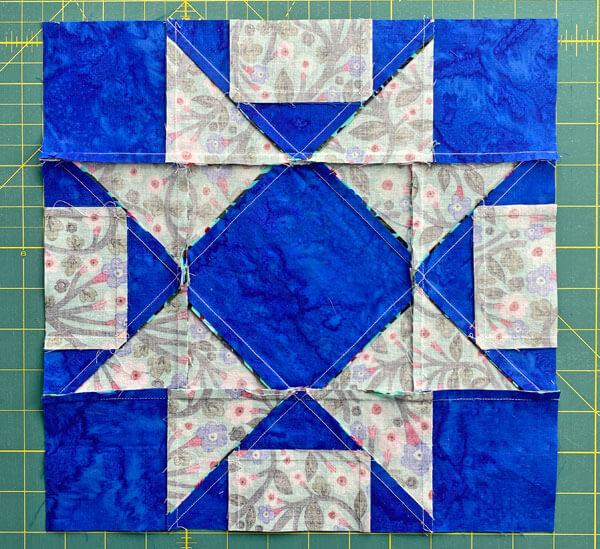
I mentioned earlier that the Center.1 square isn't an exact match to the dashed guidelines.
Here you can see how after centering the patch between the dashed lines, there's enough SA. Regardless of being a bit small.
This isn't just about squares and crosses...it's about unleashing your creativity! 🌈💡
Bravo, quilt stars! 🌟 You've mastered the Cross and Square quilt block, turning geometry into fabric magic. 🎩✨
What's your next quilting adventure? A full Cross and Square quilt or a springboard to new designs? 🚀
Share your creations and keep that quilting love strong! 💖🧵 Until next time, may your bobbins be full and your imagination limitless! 🧰💭
📌Pin this post faster than a quilter at a fabric sale!
Your future self will thank you when inspiration strikes. 📌✨
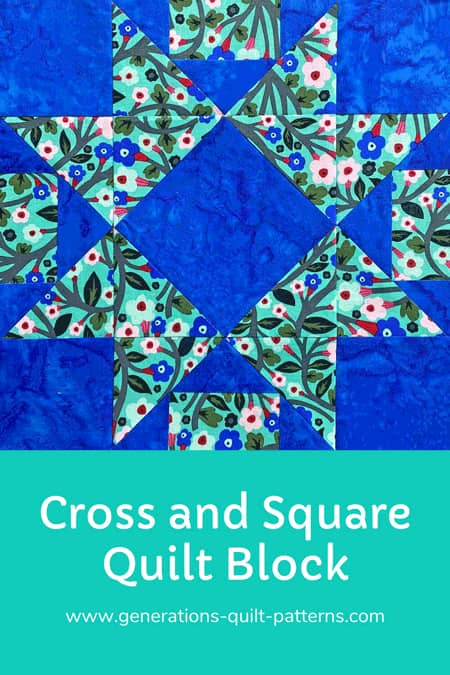
For more Sawtooth Star variations
The Sawtooth Star is a favorite among quilters. And we've got several tutorials for some of the design variations. As always, in mulitple sizes to suit your needs.
Click any image below to jump to that tutorial.
🔭 Looking for something truly stellar?
You've finished your star quilt block, and you're ready for more!
Browse our collection of 70 stellar star quilt block patterns. All have instructions and cutting charts in multiple sizes. If templates or paper piecing is used in the tutorial, there's a free download for you of those materials.
Eeny. Meenie. Miney. Moe.
Which star quilt block will you sew?
For a star-studded quilting experience, choose from 100+ bedazzling star quilt patterns—for beginners and beyond—click here.
For even MORE blocks to make… 🧩🎨

...visit our Free Quilt Block Pattern Library, with over 260+ blocks to choose from in multiple sizes.
Free downloads are included in all sizes for any blocks require paper piecing patterns or templates.
- Home
- Free Quilt Block Patterns
- Cross and Square Quilt Block

