Perfecting Log Cabin Quilt Blocks
Two simple techniques no one talks about...
This post contains affiliate links, for which I receive compensation.
Linda G., a South Carolina reader, wrote asking...
"I'm looking for tips about how to sew Log Cabin quilt blocks together so that everything lines up squarely and evenly.
Can you help?"
For Log Cabin quilt blocks, or any block for that matter, the general advice is cut, sew and press accurately.
Well duh!
Not particularly helpful, and I'm sure not what Linda is looking for!
Fortunately, there is some advice I can offer that you don't usually hear or read about.
I don't know why.
It's really easy.
It shouldn't be a secret.
Simple changes that can make all the difference in the world to the accuracy of your finished blocks.
That's what we're after, right?!!
Blocks that go together like they were made for each other.
Because we all know that once the blocks are finished, we, quilters are...
...the most impatient people on the planet!
Always itchin' to see if our quilt top lives up to our creative expectations.
What 'They' don't tell you...
These two 'secrets' are simple changes to the way you cut the logs and set up for sewing. Nothing more than that.
An investment of maybe 5-10 extra minutes, and you're on your way to making accurate Log Cabin quilt blocks. You'll get those minutes back in spades when it comes time to set your blocks together.
Because they FIT together!
The FIRST time.
Are you game?
It all starts with...
The Perfect Quarter Inch Seam Allowance
This is incredibly important for a block that has so many seams running left to right and top to bottom.

In the block shown here, if each seam were off a mere 1/32" per each log, that means 1/16" per seam (two logs make up a seam). A wee bit that adds up to a lot!
Multiply by the number of seams—8 (not
counting the outside edge) times 1/16—and the block could be as much as
1/2" bigger or smaller.
That's way too much fabric to try to ease into the next block or sashing strip.

I prefer to use a 1/4" presser foot with a guide or flange along the right side—a physical barrier—and not just rely on sight using the standard 1/4" foot that came with my machine.
Log Cabin quilt
blocks mean lots of sewing. Not hard sewing. But a lot. Your mind can
wander. You just plain get tired. Or bored.
This foot, along with a healthy application of starch, makes for strips that ride right up next to the guide without collapsing against it.
This combo compensates for those times when you have the undeniable urge to sew, but really, honestly are too tired to do your usual good job.
Now, we can talk about a quarter inch versus a 'scant' quarter inch all day. The only thing that really matters is that it works, and works specifically for the fabric(s) and thread combination you are using for your current project.
Elsewhere on this site I recommend to all my beginning quilters to 'do a sewing test' with 3 strips of fabric before every project. That'll do for a lot of beginning projects.
For Log Cabin quilt blocks, we need to take this a bit further.
Secret #1: The Ultimate Sewing Test
Let's assume we're going to make the red and white block shown above. It is a total of 9 logs across including the center square.
As I showed previously, very small mistakes add up during construction—1/32" off per log added up to 1/2" off each block!
For our Ultimate Sewing Test, from fabrics in your block you'll need nine 1-1/2" squares and one 1-1/2" x 9-1/2" strip. (For blocks 7 logs wide, seven 1-1/2" squares and one 1-1/2" x 7-1/2" strip, etc.)

I used three different fabrics so it's a bit easier to see, but you could just as easily use only one.
Set up your quarter inch on your sewing machine. Stitch the squares together end to end.
Press, first with each seam closed to set it, melding the thread into the fibers of your fabric, and press then to the side.
Now compare it to the 9-1/2" strip.

If you can stitch the two strips together without having to ease one side to the other (below), you're ready to jump in and start making your blocks.

If your sewn strip is longer than the cut one, your seam allowance is too small.

If the pieced strip is shorter, your seam allowance is too big.
Either way, you need to make adjustments and do the test again. Rinse and repeat until the two strips are equal.
To save time on future projects, make note of this test. Keep this information at your sewing machine, handy for when you need it next time.
If you are struggling with your perfect 1/4" seam allowance, you may want to try Perkins Dry Goods' Perfect Seam Guide (shown right).
Secret #2: Use the lengthwise grain
Huh, what?
Yep! The lengthwise grain of your fabric runs parallel to the selvedge. There's virtually no stretch to it. (Click here for a refresher on the different grainlines.)
For our Log Cabin quilt blocks, that means you can't inadvertently stretch a strip as you sew to to the block.
Most quilt patterns instruct you to cut cross grain strips and then subcut these into the required patches. That's OK for most shapes.
For our Log Cabin, however, most of the stitching is done along the length of the patch. Having a lengthwise grain edge for stitching means you just can't stretch the patch while sewing it.
This then leads right back to Secret #1. Your seam allowance must be spot on because you can't ease out the imperfections.
Example: Log/patch that measures 1-1/2" x 9-1/2"
- Old Way: Cut a cross grain strip (selvedge to selvedge) 1-1/2" wide. Sub cut a 9-1/2" patch.
- New Way: Cut a cross grain strip 9-1/2" wide. Sub cut a 1-1/2" wide patch. Yes, you did read that correctly. You're still cutting crossgrain strips, but cutting them the length of the patch, 9-1/2", and not the width of the patch, 1-1/2".
OR....
Cut a strip parallel to the selvedge that is the width of the patch, 1-1/2". Sub cut a 9-1/2" patch.
Double check to see that you've got enough fabric for cutting this way. It SHOULD be close, but you don't want to run out two blocks from the end.
If there are multiple sized patches cut from one fabric, cut the longest patch first, cutting as many as needed. Then subcut other patches from the remainder, making economical use of your fabric.
One additional advantage to this method is that the designs printed on our fabrics tend to be straight on the lengthwise grain. On the crosswise grain...not so much. They're usually off-kilter.
That's all there is to perfect Log Cabin quilt blocks!
I promised simple and that they are!
These techniques are based on ones used in garment construction. The best pressing secret that I regularly recommend in all my free quilt block patterns is, too.
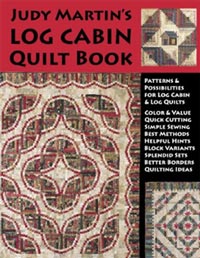
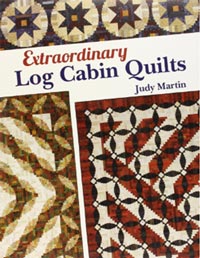
But there's not a lot of crossover between garment sewing and quilting. So you can imagine my surprise when I came across these books by Judy Martin (Seriously. She's a Quilting Goddess!).
She recommends the same thing in her books and for the same reasons. Vindication! <big smile!>
If you're inspired to take your Log Cabin quilting skills to the next level, please take a look at both these books by Judy. If you are partial to Log Cabin quilts, they are both a MUST in my book!
Clicking on the images will take you right to Amazon.com where you can learn more.
More about Log Cabin quilt patterns…
If you love Log Cabin quilts, there's lots more about this favorite pattern here on the website. Use the links below to find YOUR new favorites.
- How to quilt a Streak of Lightning quilt
- Courthouse Steps Quilt Pattern: Design ideas


Try out your new skill with these Log Cabin quilt patterns & books
Most of these commercial patterns are available as a PDF download instead of—or in addition to—a printed copy that must be shipped. Choose the option that suits you best .


By Julie Baird
Copyright © 2008-2026 Generation Quilt Patterns, LLC
All Rights Reserved
Generations-quilt-patterns.com does not sell any personal information. (See Privacy Policy)