- Home
- Free Quilt Block Patterns
- Crystal Star Quilt Block
Crystal Star Quilt Block Pattern
From our Free Quilt Block Patterns Library
This post contains affiliate links, for which I receive compensation.
Skill Level: Beginner
The Crystal Star quilt block is yet another variation on the Sawtooth Star—this time a square in a square is added to the center for interest.
We use the Connector or Folded Corners technique for the center and Flying Geese. Add four more cut squares and that's all there is to it.
No special tools. No special rulers. All you need are your basic quilting supplies.
All will be crystal clear as you follow along in the tutorial.
Let's get started!

📋 General Instructions
All seams are 1/4".
When you are instructed to press, first press the pieced unit flat to set the seam. Suggestions are provided throughout these instructions on which way to press the seam allowances.
Click here for cutting instructions for additional block sizes.
A directional white and black print is used for the background.
Instructions are provided on how to cut and mark the patches so that the design moves across the block in one direction.
As you piece, flip back the corner of the patch BEFORE stitching to ensure that it is in the correct position. This quick check is much faster than having to rip out a patch that should have been turned a quarter turn.
While we've used the connector corners method here in this tutorial, the 'four at a time' Flying Geese method would also be an efficient way to make the Geese units, too.
The newest quilt fabrics to tickle your fancy...
Click the images below to see the full collection. We share any commercial and/or free patterns that showcase them, too. (For inspiration, of course!)


Step 1: Cut the patches for your Crystal Star
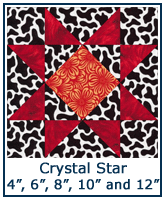
 Crystal Star design
Sample Size: 8" finished / 8½" unfinished
Grid: 4x4
Attribution: KC Star
AKA: Joining Star (Nancy Page), Lone Star ( Carrie Hall and Rose Kretsinger), Star of Virginia (Wallaces' Farmer), Texas Star (Carrie Hall and Rose Kretsinger)
Design Type: Star, 4-patch, Uneven 9-patch, large center
This block is the perfect example of why you want to make a practice block.
Though there seemed to be plenty of contrast between the fabrics laid out next to each other, the piecing looks a bit 'mushy' in the finished block.
To remedy this, I'd choose a more 'white' black and white print for the background next time.
 | Cutting Chart for a~Traditional Piecing x/Connector Corners ~ | ||||||
|---|---|---|---|---|---|---|---|
| Patch | Fabric | Qty | Finished Block Size | ||||
| 4" | 6" | 8" | 10" | 12" | |||
| 1 | L | 4 | 1½" x 2½" | 2" x 3½" | 2½" x 4½" | 3" x 5½" | 3½" x 6½" |
| 2 | D | 8 | 1½" x 1½" | 2" x 2" | 2½" x 2½" | 3" x 3" | 3½" x 3½" |
| 3 | M | 1 | 2½" x 2½" | 3½" x 3½" | 4½" x 4½" | 5½" x 5½" | 6½" x 6½" |
| 4 | L | 8 | 1½" x 1½" | 2" x 2" | 2½" x 2½" | 3" x 3" | 3½" x 3½" |
| Unfinished Block Size | 4½" | 6½" | 8½" | 10½" | 12½" | ||
| Grid Size | 1" | 1½" | 2" | 2½" | 3" | ||

The patches for this block are below. Notice particularly how the rectangle patches are cut—two in each direction of the print. This is to keep the print design flowing from top to bottom of the block.

Step 2: Assemble the units for the Crystal Star
Flying Geese Units
Make 4
Mark a diagonal line from corner to corner on the back of the eight #2 squares for the star points.
Align one of these marked squares with the end of a rectangle patch. The drawn line bisects one of the corners.
Stitch on the line. You can chain stitch these pieces.

Press flat. Trim the seam allowance on the side of the stitching line closest to the corner.
Press the square open and towards the corner.
Align another #2 with the open end of the rectangle. The drawn line bisects the corner on the same long edge as the previous square did.
Stitch on the drawn line.
 The red arrow points to my anchor cloth
Press flat, trim the seam allowance and press as you did for the first square.
If any of the #2 squares extend past the #1 rectangles, trim the patches even.
For this sample 8" finished block the Flying Geese measure 2-1/2" x 4-1/2" at this point.
Square in a Square Center
Make 1
We'll use the connector corner technique again.
Mark the backs of only four of the eight #4 patches with a diagonal line from corner to corner.
For a directional print, you'll want to mark the lines as shown below. For two the print runs top to bottom. For the other two, the print runs left to right.

With RST, align the edges of two of the #4s with the larger #3. The ends of the drawn lines touch the sides of the large square.
Stitch on the line. Press flat, trim the seam allowance on the side of the stitching closest to the corner.
 After the seam allowances are trimmed
Press the patches open and toward the corners.
Repeat for the two remaining marked #4s.
 The red arrow points to my anchor cloth
If the #4 patches extend past the edges of the large squares, trim them even.
Your finished square in a square should measure 4-1/2" x 4-1/2" for this 8" finished block.
Step 3: Assemble your Crystal Star
Lay out the finished units and remaining cut squares for this Crystal Star block.

Sew them into rows. Press the seam allowances away from the Flying Geese.
Stitch the rows together, pinning if needed to help match the seams.
This is what the Crystal Star quilt block looks like from the back side.
For pressing a perfectly flat block—even with the added layer from the connector corners—use the Best Pressing Technique for Quilt Blocks.
It's so easy and works so well you'll wonder why you didn't think of it yourself!

This is your finished Crystal Star quilt block.

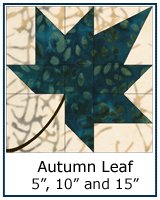
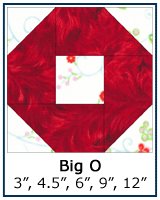
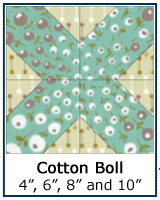
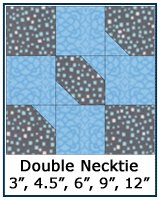
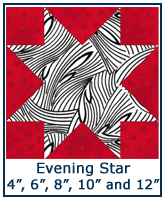
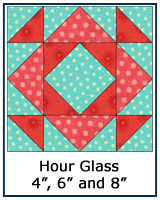
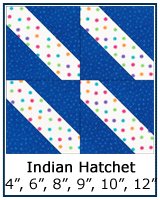
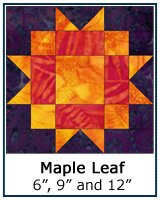
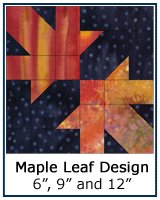
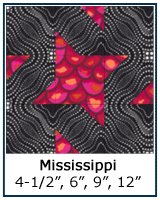
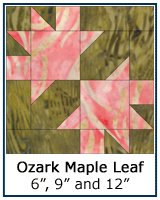
More blocks that use Connector Corners
As promised, below is a sampling of the free quilt block patterns found on this website that use this simple technique for creating triangle shapes out of nothing more than cut squares and rectangles.
Click each image to go to those instruction pages.
For even more patterns, visit our Free Quilt Block Patterns Library.
🔭 Looking for something truly stellar?
You've finished your star quilt block, and you're ready for more!
Browse our collection of 70 stellar star quilt block patterns. All have instructions and cutting charts in multiple sizes. If templates or paper piecing is used in the tutorial, there's a free download for you of those materials.

Eeny. Meenie. Miney. Moe.
Which star quilt block will you sew?
For a star-studded quilting experience, choose from 100+ bedazzling star quilt patterns—for beginners and beyond—click here.
For even MORE blocks to make… 🧩🎨

...visit our Free Quilt Block Pattern Library, with over 260+ blocks to choose from in multiple sizes.
Free downloads are included in all sizes for any blocks require paper piecing patterns or templates.
What about a different quilt block?
For a list of all the 220+ quilt block patterns on this site, start here.
If you know the name of the block, shorten your search by using these links:
Click here if you're looking for blocks with at least some paper piecing.
Click here if you're looking for the basic building blocks of quilting, i.e., Flying Geese, half square triangles, quarter square triangles, etc., along with several techniques to make each.
And finally, use these links to find blocks in these finished sizes:
- Home
- Free Quilt Block Patterns
- Crystal Star Quilt Block


Yummy fabrics
to drool over
Click any image below to see the full collection and find pricing and ordering information.


By Julie Baird
Copyright © 2008-2025 Generation Quilt Patterns, LLC
All Rights Reserved
Generations-quilt-patterns.com does not sell any personal information. (See Privacy Policy)