- Home
- Free Quilt Block Patterns
- Hour Glass Quilt Block
Hour Glass Quilt Block Instructions
From our Free Quilt Block Patterns Library
This post contains affiliate links, for which I receive compensation.
Skill Level: Confident Beginner
This Hour Glass quilt block looks nothing like the traditional block by the same name—the one that looks like a quarter-square triangle.
This 3 fabric block is constructed with a Square in a Square (SIAS), Flying Geese and half square triangles (HST) all of which are basic building blocks in quilting.
To construct this block you have the option of paper piecing or using a combination of No Waste Flying Geese and Folded Corners.

All the instructions are here, as well as downloads for the foundation patterns.
Information on blocks with similar design structure and then a list of blocks with the same name (and instructions when available) are at the bottom of this page.
We've got lots to stitch, let's get started!
📋 General Instructions
These abbreviations are used on this page:
- SA - seam allowance
- RST - right sides together
- HST - half square triangles
- SiaS - square in a square
- BAC - background fabric
SA are 1/4" and pressed toward the darker fabric unless noted.
New quilt fabrics to tickle your fancy...
Click the images below to see the full collection. We share any commercial and/or free patterns that showcase them, too. (For inspiration, of course!)


Step 1: Choose the size, technique and cut the patches
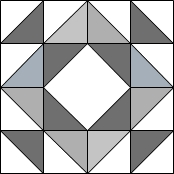
 Hour Glass design
Sample Size: 6" finished / 6½" unfinished
Grid: 4x4
Attribution: Nancy Page
Design Type: Uneven 9-patch, large center
The blue chart is for paper pieced blocks. The dimensions in that chart are cut generously to make the assembling the units almost foolproof.
The pink one is for traditional methods that include Folded corners and a no waste technique for Flying Geese.
Choose one or the other. Each is a complete cutting chart for the block.
HSTs are quick pieced for both alternatives and the cutting dimensions are exact.
My preference is to add an additional 1/4" to shown dimensions for Patch #1 and #1 (they are marked with '**') to make them oversized, stitch the units and cut them down to the 'Trim HSTs to...' size listed in the chart.
Perfectly sized units make for blocks that nearly put themselves together on their own.
Now that's MY KIND of quilting!
 |
Cutting Chart for an~ Paper Piecing ~ | |||||
|---|---|---|---|---|---|---|
| Patch | Fabric | Qty | Finished Block Size | Sub Cut | ||
| 4” | 6” | 8” | ||||
| 1** | A | 2 | 1⅞" x 1⅞" | 2⅜" x 2⅜" | 2⅞" x 2⅞" | --- |
| 2** | BAC | 2 | 1⅞" x 1⅞" | 2⅜" x 2⅜" | 2⅞" x 2⅞" | --- |
| Center | BAC | 1 | 1⅞" x 1⅞" | 2⅝" x 2⅝" | 3⅜" x 3⅜" | --- |
| Corner | A | 2 | 2⅜" x 2⅜" | 2⅞" x 2⅞" | 3⅜" x 3⅜" | |
| Goose | B | 1 | 3⅝" x 3⅝" | 4⅝" x 4⅝" | 5⅝" x 5⅝" | |
| Sky | BAC | 4 | 2⅜" x 2⅜" | 2⅞" x 2⅞" | 3⅜" x 3⅜" | |
| Unfinished Block Size | 4½" | 6½" | 8½" | -- | ||
| Grid Size | 1" | 1½" | 2" | --- | ||
| Trim HSTs to... | 1½" | 2” | 2½" | --- | ||
| Trim Flying Geese to... | 1½" x 2½" | 2” x 3½" | 2½" x 4½" | --- | ||
| Trim Square in a Square to... | 2½" | 3½" | 4½" | --- | ||
| **I prefer to cut my patches extra large for HST, stitch, and then trim them to size. If you prefer to do the same, add a bit extra to the measurements for Patches #1 and #2 above. | ||||||
For the 8" finished Hour Glass above, the 'Center' and 'Corner' are both cut 3-3/8" x 3-3/8", that is not a typo.
 |
Cutting Chart for an~ No Waste Flying Geese and Folded Corners ~ | ||||
|---|---|---|---|---|---|
| Patch | Fabric | Qty | Finished Block Size | ||
| 4” | 6” | 8” | |||
| 1 | A | 2 | 1⅞" x 1⅞" | 2⅜" x 2⅜" | 2⅞" x 2⅞" |
| 2 | BAC | 2 | 1⅞" x 1⅞" | 2⅜" x 2⅜" | 2⅞" x 2⅞" |
| Center | BAC | 1 | 2½" x 2½" | 3½" x 3½" | 4½" x 4½" |
| Corner | A | 4 | 1½" x 1½" | 2” x 2” | 2½" x 2½" |
| Goose | B | 1 | 3¼" x 3¼" | 4¼" x 4¼" | 5¼" x 5¼" |
| Sky | BAC | 4 | 1⅞" x 1⅞" | 2⅜" x 2⅜" | 2⅞" x 2⅞" |
| Unfinished Block Size | 4½" | 6½" | 8½" | ||
| Grid Size | 1" | 1½" | 2" | ||
| Trim HSTs to... | 1½" | 2” | 2½" | ||
| Trim Flying Geese to... | 1½" x 2½" | 2” x 3½" | 2½" x 4½" | ||
| Trim Square in a Square to... | 2½" | 3½" | 4½" | ||
| **I prefer to cut my patches extra large for HST, stitch, and then trim them to size. If you prefer to do the same, add a bit extra to the measurements for Patches #1 and #2 above. | |||||
Step 2: Download foundation patterns
If you cut from the pink chart, skip this step. Otherwise print the foundation patterns from the chart below.
You'll need the most current version of Adobe installed on your computer to download the pattern.
On the Adobe Print Menu page, under 'Page Size and Handling' set 'Custom Scale' to 100% before printing for accurate results. Click here to see what it looks like on the Print Menu page.
After printing, use the 1" square graphic on the printed pages to confirm they are printed accurately.
Measure the 1" square on the printed pattern to confirm it is the correct size.
Chart for Printing Paperpiecing
| Per Block | Finished Hour Glass Quilt Block Size | ||||
|---|---|---|---|---|---|
| Unit | # of Units | Copies to Print | 4” | 6” | 8” |
| Flying Geese | 4 | 1 | 1" x 2" | 1½" x 3" | 2" x 4" |
| SiaS | 1 | 1 | 2" | 3" | 4" |
Step 3: Assemble the units for your Hour Glass
Flying Geese
Make 4
Click the link below for detailed instructions to make these units based on the patches you cut:
Hit the 'Back" button on your computer's browser bar to return here when you are finished.
Use the Cutting Chart in Step 1 to check that your Flying Geese are the correct size—the rows are highlighted in yellow. Trim as needed.
Irrespective of the technique you used, you will end up with four Flying Geese like this...

HSTs
Make 4
Draw a diagonal line on the back of the two #2 squares. (I switch fabrics around all the time. So...if these are not the lighter of your #1 and #2 patches, then mark the backs of the lightest fabric so it's easiest to see the line.)
With RST, layer a #1 and #2 patch. Sew a 1/4" away from the drawn line on both sides.

Cut along the drawn line.
Press.
Repeat for the second pair.
Use the Cutting Chart in Step 1 to check that your HST are the correct size—the rows are highlighted in yellow. Trim as needed.
If you need more detailed instructions, click here to go to Half Square Triangles - Technique #1 Quilt Pieced. Hit the 'Back' button on your browser bar to return here.
Square in a Square
Make 1
Choose the method to match the patches you cut for detailed instructions:
Hit the 'Back" button on your computer's browser bar to return here when you are finished.
Use the Cutting Chart in Step 1 to check that your SiaS is the correct size—the rows are highlighted in yellow. Trim as needed.
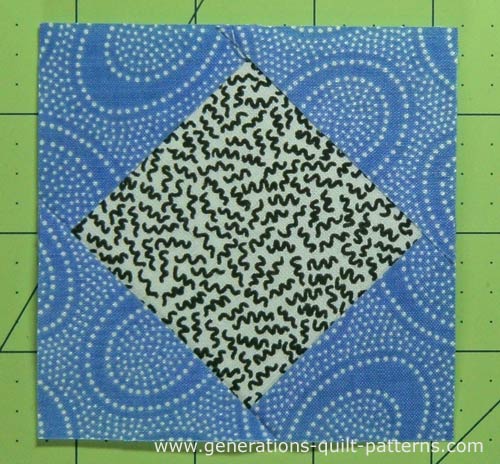
This finished unit looks like this.
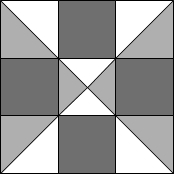
Step 4: Assemble your Hour Glass quilt block
Arrange the pieced patches into the Hour Glass design.
You've noticed, of course, that even though this Hour Glass is drawn on a 4x4 grid, we put it together like an uneven 9-patch.

Stitch the rows together with 1/4" seam allowances. Press with the seams in the direction of the arrows (below) to distribute the bulk.

Stitch the rows together with 1/4" seams.
After a final press (check out our 'Best Pressing Technique' for the flattest quilt block you'll ever make), your Hour Glass quilt block looks like this...
 Hour Glass quilt block. Ding! Ding! Ding! DONE!
Variations on the Hour Glass design
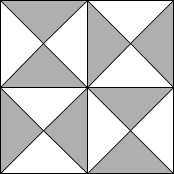
The following blocks are all based on this basic Hour Glass quilt block design, though none are called an 'hour glass'.

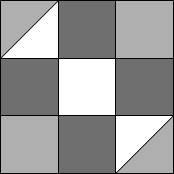
Connecticut
A two color block with some of the lights and darks reversed.
AKA: Mosaic #16

Signature
The SIAS is swapped out of the center for another unit, the perfect place to put, what else?
A signature!

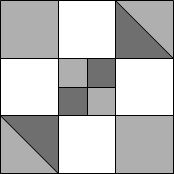
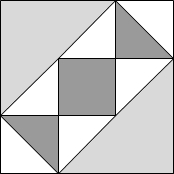
The Cypress
The SIAS is replaced with a solid patch. As an 8" block, this would be the perfect place to showcase some of your 4" machine embroidery designs.

Canadian Gardens
A fourth color is added to the original patchwork design.
Same name, different block
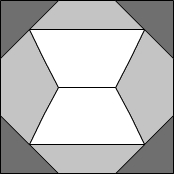
'Hourglass' is a unbelievably common name for quilt blocks. The ones shown below are know as Hourglass quilt blocks, too.
Use your cursor to click on the colored illustrations to go to instructions on how to make that particular version of the Hourglass or additional names for the block.


For even MORE blocks to make… 🧩🎨

...visit our Free Quilt Block Pattern Library, with over 260+ blocks to choose from in multiple sizes.
Free downloads are included in all sizes for any blocks require paper piecing patterns or templates.
- Home
- Free Quilt Block Patterns
- Hour Glass Quilt Block


My
Favorite Paper
Piecing Tools
For a complete list of all the tools I personally use, click here to read 'The Right Tools Make Your Job Easier', part of my series called, "Essential Paper Piecing Skills".


The serrated edge on this short-bladed scissor make it easy to trim seam allowances—my all-time favorite scissor.

By Julie Baird
Copyright © 2008-2026 Generation Quilt Patterns, LLC
All Rights Reserved
Generations-quilt-patterns.com does not sell any personal information. (See Privacy Policy)