- Home
- Free Quilt Block Patterns
- The Rosebud Quilt Block
The Rosebud Quilt Block
From our Free Quilt Block Patterns Library
This post contains affiliate links, for which I receive compensation.
Skill Level: Beginner
Sweet. Simple. Cute.
That's the Rosebud quilt block in a nutshell!
To make it, we'll use a bit of strip piecing. A wee amount of traditional piecing. A few seams and this block it ready for your quilt.
It'd be perfect for a baby quilt.
The center square is large enough that you could also use it as a memory quilt for a new bride. Have the squares signed at the shower or mailed to you. Then whip up the blocks as they arrive in the mail.
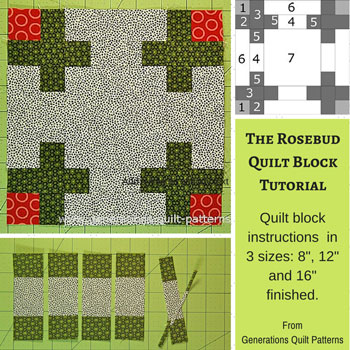
Easy enough that it could be finished even in the whirlwind of wedding preparations.
See our layout suggestions at the end of this page.
Let's get started!
📋 General Instructions
These abbreviations are used in this tutorial:
- SA - seam allowance
- RST - right sides together
- BAC - background fabric
SA are a 1/4" throughout.
When pressing, first press with the patches in the 'closed' position—just like they were sewn. Then press them open with the SA toward the darker fabric unless instructed otherwise.
New quilt fabrics to tickle your fancy...
Click the images below to see the full collection. We share any commercial and/or free patterns that showcase them, too. (For inspiration, of course!)
Step 1: Cut patches for the Rosebud block
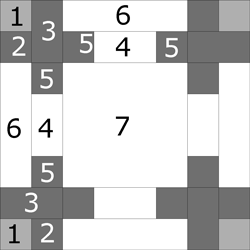 Rosebud design
Sample Size: 8" finished / 8½" unfinished
Grid: 7x7
Attribution: KC Star
Design Type: Uneven 9-patch large center
It'll take just three fabrics to complete this block.
You'll need to watch the scale of the fabrics for the 8" block (the rosebud patch finishes at 1" square).
Other than that, just be sure there is enough contrast between the bud and leaf fabrics so that the buds stand out.
If you plan to use the center square for autographs or best wishes for a wedding or baby quilt, cut the #7 patch larger and use painters tape to mark off the area for people to sign. Make this area a bit smaller than the finished size of this patch so that nothing gets cut off in the seam allowances.
 |
Cutting Chart for a~ Traditional Piecing ~ | ||||
|---|---|---|---|---|---|
| Patch | Fabric | Qty | Finished Block Size | ||
| 8” | 12” | 16” | |||
| 1 | Bud | 4 | 1-1/2” x 1-1/2” | 2” x 2” | 2-1/2” x 2-1/2” |
| 2 | Leaf | 4 | 1-1/2” x 1-1/2” | 2” x 2” | 2-1/2” x 2-1/2” |
| 3 | Leaf | 4 | 1-1/2” x 2-1/2” | 2” x 3-1/2” | 2-1/2” x 4-1/2” |
| 4 | BAC | 1 | 2-1/2” x 7” | 3-1/2” x 9” | 4-1/2” x 11” |
| 5 | Leaf | 2 | 1-1/2” x 7” | 2” x 9” | 2-1/2” x 11” |
| 6 | BAC | 4 | 1-1/2” x 4-1/2” | 2” x 6-1/2” | 2-1/2” x 8-1/2” |
| 7 | BAC | 1 | 4-1/2” x 4-1/2” | 6-1/2” x 6-1/2” | 8-1/2” x 8-1/2” |
| Unfinished Block Size | 8-1/2” | 12-1/2” | 16-1/2” | ||
| Grid Size | 1” | 1-1/2” | 2” | ||
Step 2: Assemble the Rosebud units

Rosebud
Make 4
With right sides together, stitch #1 to #2, pressing the SA toward #2.
Sew #3 to the righthand side of the #1/#2 pair.
Press toward #3.
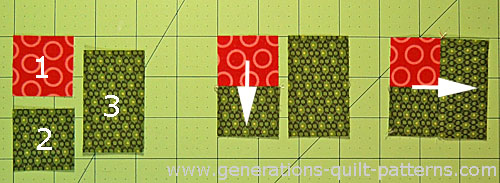 Press SA in the direction of the arrows.
Repeat for a total of four.
Sides
Make 4

With RST, stitch a #5 to both sides of the #4 strip, pressing the SA toward #5.
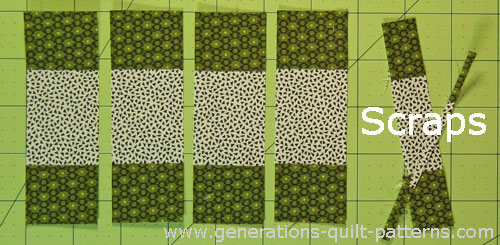
Before subcutting this into units, you should straighten the edge.
Match a straight line on the ruler to one of the seamlines (see arrow below). Trim the edge with your rotary cutter.
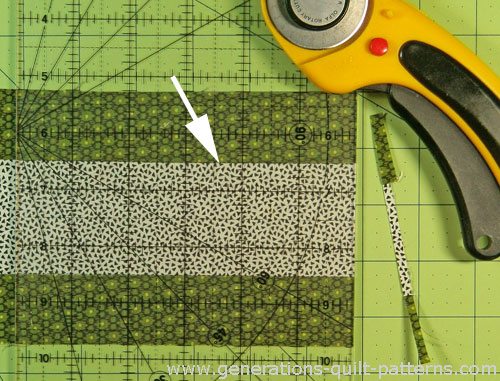 Trim off only as much as is needed.
Find your finished block size in the chart below. Cut four patches from this strip set equal to the corresponding 'Subcut Width'.
| Finished Block Size | #5/#4/#5 Measurements | Subcut Width |
|---|---|---|
| 8” | 4-1/2” x 7” | 1-1/2” |
| 12” | 6-1/2” x 9” | 2” |
| 16” | 8-1/2” x 11” | 2-1/2” |
The #5/#4/#5 patches look like this after cutting, the extra is to the right.
With RST, stitch this patch to a #6. Press SA toward #6 to reduce bulk.
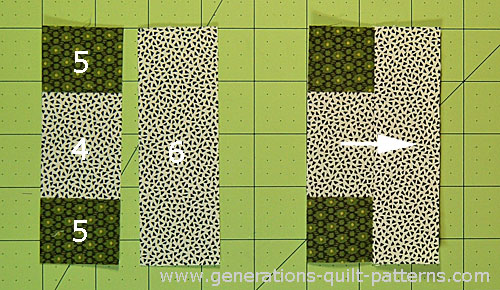 Repeat for a total of four of these units.
Step 3: Assemble the Rosebud quilt block
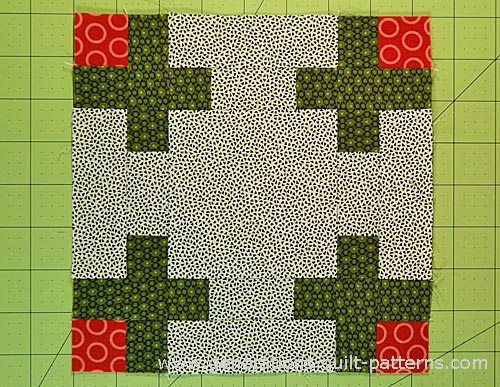
Arrange the sewn units and center square into the Rosebud design. The #1 bud fabric is always in the outside corners.
The white lines below highlight the seam between #1/#2 and #3. Orient your seams in this manner and all the SA will nest. This makes matching them so much easier.
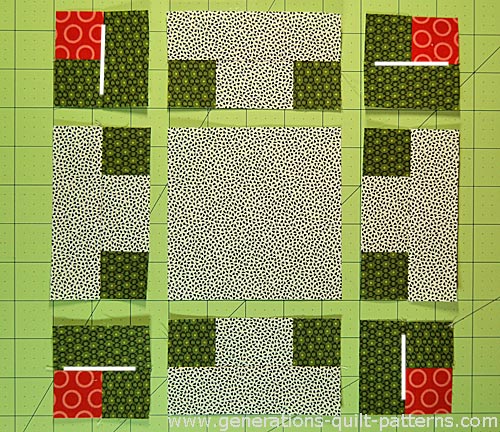
With RST, sew the units in each row together. SAs are pressed away from all the side-units and towards the center or rosebuds.
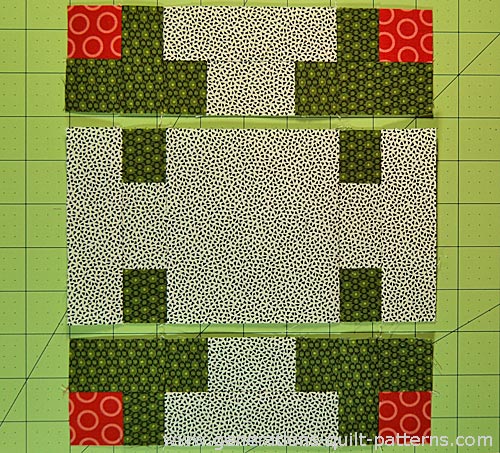 Press the SA out for the top and bottom rows and in for the center.
With RST, stitch the rows together. Give it a final press.
You have finished the Rosebud quilt block. Enjoy!
Quilt Design Options
Since the rosebud patch is at every corner of the block, you may want to add some sashing around each to put some distance between those patches.
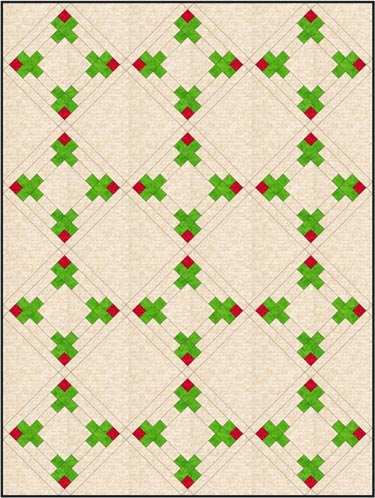
For an adorable baby quilt, a sashing is added around each of the Rosebud blocks. Then they are set with a solid alternate block in an on-point layout.
With only half the blocks to make, it'd make up quick as a whistle!
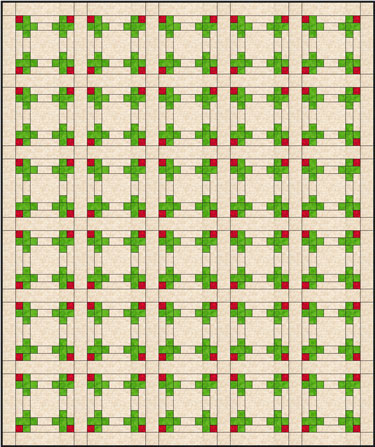
In this next example, the Rosebud quilt block is used in a straight set. The sashing is bigger this time, equal to twice the grid unit (found at the bottom of the cutting chart on this page) plus SA.
Sweet. Simple. Cute.
What's not to love?!
What about a different quilt block?
For a list of all the 220+ quilt block patterns on this site, start here.
If you know the name of the block, shorten your search by using these links:
Click here if you're looking for blocks with at least some paper piecing.
Click here if you're looking for the basic building blocks of quilting, i.e., Flying Geese, half square triangles, quarter square triangles, etc., along with several techniques to make each.
And finally, use these links to find blocks in these finished sizes:


