- Home
- Free Quilt Block Patterns
- Night Vision Quilt Block
Night Vision Quilt Block Instructions
From our Free Quilt Block Patterns Library
This post contains affiliate links, for which I receive compensation.
Skill Level: Beginner
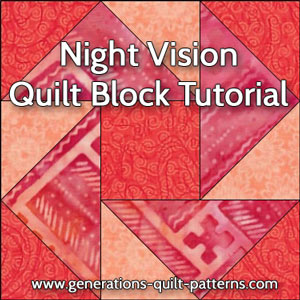
The Night Vision quilt block is a fun little block to make using the partial seams method.
To make the design appear, you'll need three fabrics in three noticeably different values.
You can construct the Flying Geese units it contains using either paper piecing or the Connector (or Folded) Corners technique.
We've included instructions for both on this page so you can do what works best for YOU!
Time to get to work!
📋 General Instructions
All seam allowances (SA) are 1/4" unless otherwise noted.
When you are instructed to press, first press the pieced unit flat to set the seam. Then open the patch and press again.
New quilt fabrics to tickle your fancy...
Click the images below to see the full collection. We share any commercial and/or free patterns that showcase them, too. (For inspiration, of course!)
Step 1: Choose a size, a technique and cut your patches
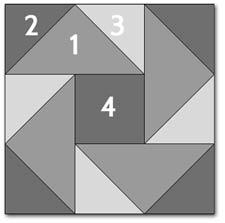 Night Vision design
Sample Size: 6" finished / 6½" unfinished
Grid: 3x3
Attribution: Quilter's Newsletter
Design Type: Even 9-patch
Cutting instructions are provided by both paper piecing (blue chart) and connector corners (pink).
Choose your technique. If it's paper piecing, you can print the units directly from the chart. They are listed under the finished block sizes.
You'll need the most current version of Adobe installed on your computer to download the pattern.
On the Adobe Print Menu page, under 'Page Size and Handling' set 'Custom Scale' to 100% before printing for accurate results. Click here to see what it looks like on the Print Menu page.
After printing, use the 1" square graphic on the printed pages to confirm they are printed accurately.
In our example, the 'Geese' are dark, but that doesn't mean you can't change the color values around. To make sure that the points show, choose fabrics with enough contrast.
Paper piecing patches are ample in size to make placement easy and accurate.
Unless otherwise noted, the dimensions are for squares.
For example, Patch #1 in the blue chart for a 6" block is cut 5-5/8" x 5-5/8" square from a medium value fabric, and then sub-cut twice on the diagonal.
 | Cutting Chart for a~Paper Piecing ~ | |||||
|---|---|---|---|---|---|---|
| Patch | Fabric | Qty | Finished Block Size | Sub Cut | ||
| 3” | 4½" | 6” | ||||
| 1 | Med | 1 | 3⅝” | 4⅝” | 5⅝” | |
| 2 | Dark | 2 | 2⅜" | 2⅞" | 3⅜" | |
| 3 | Light | 2 | 2⅜" | 2⅞” | 3⅜" | |
| 4 | Dark | 1 | 1½" | 2" | 2½" | -- |
| PRINT 4 Flying Geese units (1 page) | 1" x 2" | 1½" x 3" | 2" x 4" | -- | ||
| Unfinished Flying Geese measure... | 1½" x 2½" | 2” x 3½" | 2½" x 4½" | -- | ||
| Grid Size | 1” | 1½" | 2” | -- | ||
| Unfinished Night Vision block measures... | 3½" | 5” | 6½" | -- | ||
 | Cutting Chart for a~Connector Corners Technique ~ | ||||
|---|---|---|---|---|---|
| Patch | Fabric | Qty | Finished Block Size | ||
| 3” | 4-1/2” | 6” | |||
| 1 | Medium | 4 | 1½” x 2½” | 2” x 3½” | 2½” x 4½” |
| 2, 4 | Dark | 5 | 1½” x 1½" | 2” x 2" | 2½” x 2½" |
| 3 | Light | 4 | 1½” x 1½" | 2” x 2" | 2½” x 2½" |
| Unfinished Flying Geese measure... | 1½" x 2½” | 2” x 3½” | 2½” x 4½” | ||
| Grid Size | 1” | 1-1/2” | 2” | ||
| Unfinished Night Vision block measures... | 3½" | 5” | 6½" | ||
Step 2: Assemble the Flying Geese units
Regardless of the method you chose, make 4 Flying Geese for the Night Vision quilt block.
Paperpiecing
We need to amend the pattern just a bit.
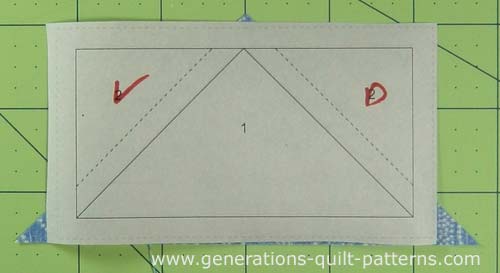
As you look at the printed side, change the '2' on the left to a 'L' for light and the '2' on the right to a 'D' for dark. It will look like this. (2's are used on both sides because it doesn't matter which one you add first.)
It might look backwards to you. Using two different 'sky' fabrics turns this into an asymmetrical block, so we need to essentially 'mirror image' the pattern. It does work out in the end. You'll see!
Then use a dab of Elmer's Glue Stick (the one that goes on purple and dries clear—because it washes out with soap and water) and position #1 with its wrong side to the unprinted side, using the dashed placement lines makes it easy to get just right!
General Sewing Machine Setup for Paperpiecing
- Reduce your stitch length to 16–20 stitches per inch (1.3-1.6 mm). This perforates the paper and stabilizes the seam when you remove the pattern. [Learn more about stitch length here.]
- Reduce your machine's speed or just plain slow down. Sew only as fast as you can stay on the stitching lines.
- Install an open toe appliqué foot (sometimes called an 'embroidery' or 'satin stitch' foot) if you have one (it's easier to see where you're stitching with one installed).
- Use a larger needle (90/14) if you have problems removing the pattern.
- If your machine has a needle stop up, use it. The stitching goes faster when you don't have to lift the presser foot with every seam.
- As you stitch each seam, start and stop a generous 1/4” before and after the solid stitching lines. ALWAYS. Future lines of stitching secure the ends.
After adding each patch, press the unit as it was sewn to set the seam and then open. The SA is automatically pressed towards the last patch added.
Before adding the next patch, take a look to make sure the one you just added covers the space plus seam allowance that it is supposed to.
Steam is optional and usually curls the pattern.
If that bothers you, don't use steam. Sometimes I do. Sometimes I don't.
It truly depends on my mood.
Remember, as you follow this paper piecing tutorial, the printed and the fabric sides of this block are mirror-images of each other.
At last!
Let's sew!
With RST, align the long bias edge of a dark triangle with #1. From the printed side, stitch on the drawn line starting and ending past the outside edge of the block.
Press.
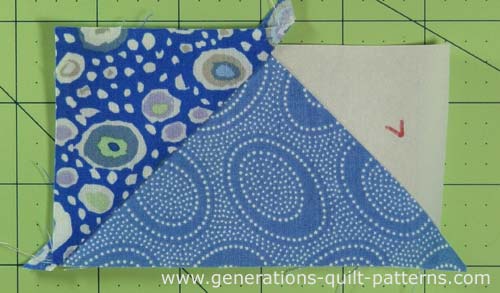
Add the light triangle #2 in the same manner. Repeat the process for the three remaining Geese.
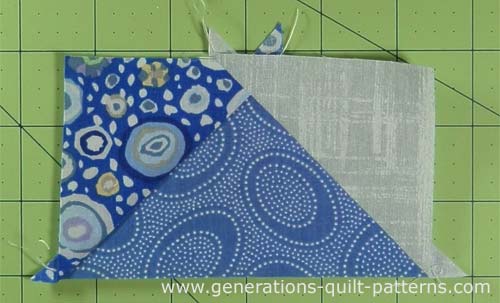
Trim the units to size by lining up the 1/4" mark on your
ruler with the outside solid line of the unit and trim with your rotary
cutter. Repeat for all sides of all units.
Remove the paper and they look like this...
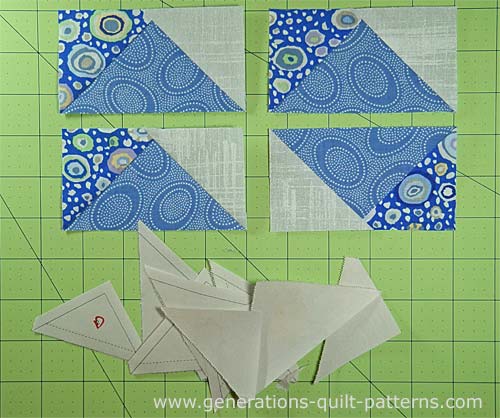
Did you notice the one in the lower right is upside down? No?!
I bet you DID notice that they are all pieced with the same fabric in the same position for each!

The paper piecing is complete. From this point forward, return your stitch length to the one you regularly use for piecing and install your favorite 1/4" presser foot.
Connector Corners Technique
For detailed instructions to make this patch using the 'Connector Corners' technique, CLICK HERE.
Hit the back button on your browser bar to return.
Step 3: Assemble the Night Vision quilt block
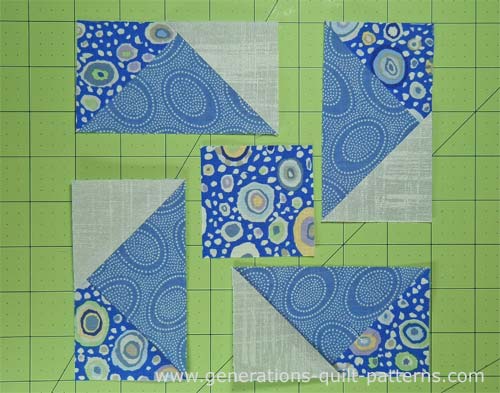
Lay out the units.
The points of the goose patches point out from the center.
You'll be stitching the first goose to the center square, but only partially sewing the seam...about half way (stop at the red arrow below).
I did take a couple of backstitches to prevent accidentally pulling out some of the stitches.
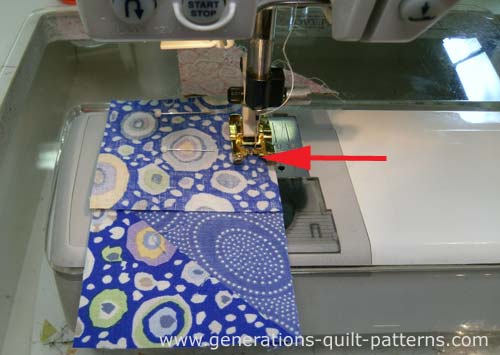
Don't worry. We'll get to that loose part at the end.
Now turn the unit a quarter turn counter-clockwise and add another goose to the first two patches.
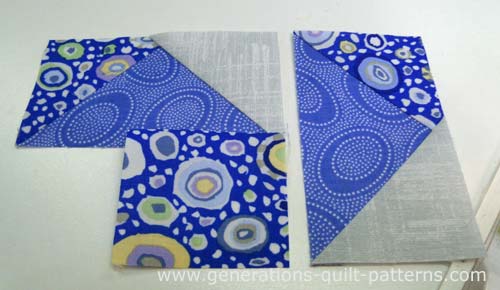
Then press with the SA toward the center. And repeat...
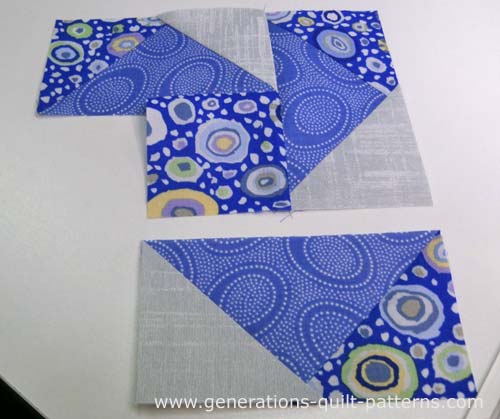
Continue adding and pressing until all four geese are stitched to the center square.
The last thing to stitch is that partial seam...
Use pins to secure the remainder of the SA. The pin on the left (arrow) is where the backstitches are.
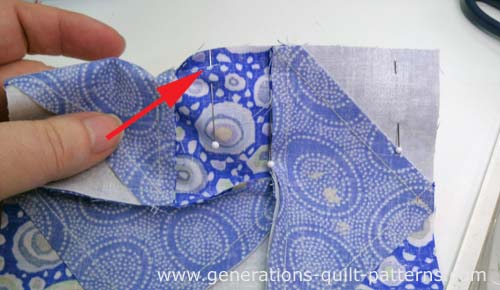
Stitch the seam.
Press; SAs to the center.
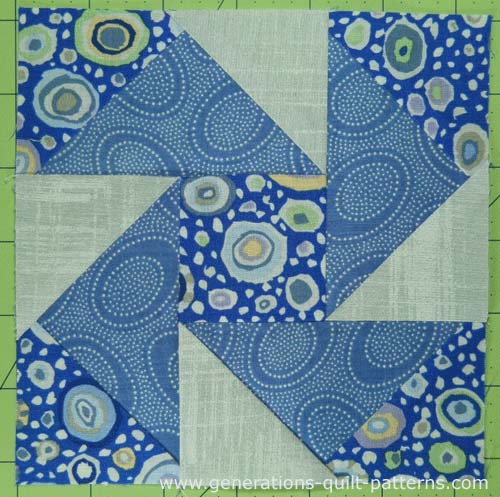
This is the finished Night Vision quilt block!
What about a different quilt block?
For a list of all the 220+ quilt block patterns on this site, start here.
If you know the name of the block, shorten your search by using these links:
Click here if you're looking for blocks with at least some paper piecing.
Click here if you're looking for the basic building blocks of quilting, i.e., Flying Geese, half square triangles, quarter square triangles, etc., along with several techniques to make each.
And finally, use these links to find blocks in these finished sizes:
