- Home
- Free Quilt Block Patterns
- House Jack Built
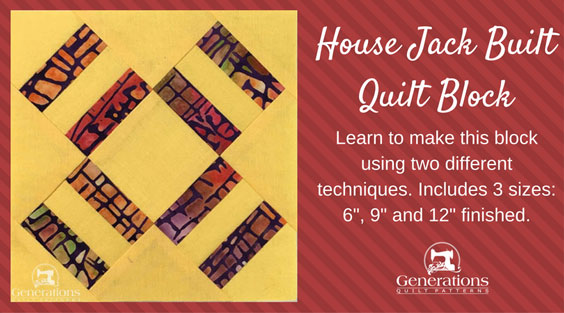
The House Jack Built Quilt Block
From our Free Quilt Block Patterns Library
This post contains affiliate links, for which I receive compensation.
The House Jack Built quilt block is a sweet little design that looks like it could be a bit tricky.
Can you say 'patches on point'?
Never fear.
I've got you covered!
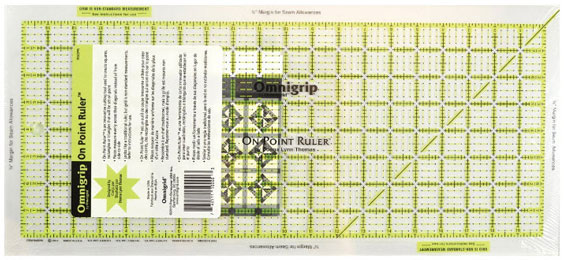
There's a perfect tool for the job—the 'On Point' ruler—that makes it as simple as piecing a plain ol' regular block.
If you're not in the market for yet another ruler, you're covered there, too.
There are free downloads on this page for the templates you'll need, as well as a coloring page for the block.
If the House Jack Built looks familiar, you may know it by its other name, Triple Stripe.
Let's get started.
📋 General Instructions
Please read all the instructions before beginning.
To make this sample block I used the On-Point Ruler by Donna Lynn Thomas (read my review of it here).
It's made specifically to cut on-point patches for standard quilt blocks, and takes all the 'messy' math out of the calculations.
All you need to remember is the finished size of the patch. Then cut it with the On-Point.
If you're not a gadget-gal, then print one copy of the template page for your finished block size from the table below. The fabrics and quantities to cut are printed right on the template.
Use the free Adobe reader to download and print (get it here if you don't have it already installed on your computer.)
On the Adobe Print Menu page, under 'Page Size and Handling' set 'Custom Scale' to 100% before printing for accurate results. (Click here to see what it looks like on the Print Menu page.)
| PRINT the Paper Templates for a House Jack Built block | ||
|---|---|---|
| Finished Block Size | # of copies to print | Link to PDF Templates |
| 6" | 1 | 6" |
| 9" | 1 | 9" |
| 12" | 1 | 12" |
After printing, measure the 1" square on the page to confirm it's printed accurately.
You can download and print a coloring page of this block here.
Several common abbreviations are used in this tutorial:
- SA - seam allowance(s)
- RST - right sides together
- HST - half square triangle
- QST - quarter square triangle
- RF - Rail Fence unit
All SA are 1/4" and pressed to the dark unless otherwise instructed.
Step 1: Cutting the House Jack Built patches
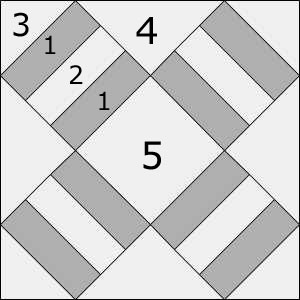 House Jack Built design
Sample Size: 6"finished / 6½" unfinished
Grid: 4x4
Attribution: Ladies Art Company
AKA: Triple Stripe (Grandma Dexter)
Design Type: On-Point
Choose two contrasting fabrics.
To tame the bias edges of the #3 and #4 patches, I strongly recommend starching your fabric before cutting.
You'll want a very good quarter inch SA for this block. Take a quick Sewing Test to help fine-tune your stitching.
In this first chart, patches in the rows highlighted in yellow and marked with an asterisk (*) are cut with the On-Point Ruler.
Patches #3 and #4 are cut with your everyday ruler—don't forget to subcut them as directed.
 | Cutting Chart for a~Traditional Piecing ~ | |||||
|---|---|---|---|---|---|---|
| Patch | Fabric | Qty | Finished Block Size | Sub Cut | ||
| 6" | 9" | 12" | ||||
| 1* | D | 2 | 1" x 16" | 1½" x 24" | 2" x 34" | na |
| 2* | L | 1 | 1" x 16" | 1½" x 24" | 2" x 34" | na |
| 3 | L | 2 | 2⅜" x 2⅜" | 3⅛" x 3⅛" | 3⅞" x 3⅞" | |
| 4 | L | 1 | 4¼" x 4¼" | 5¾" x 5¾" | 7¼" x 7¼" | |
| 5* | L | 1 | 3" x 3" | 4½" x 4½" | 6" x 6" | na |
| Unfinished Block Size | 6½" | 9½" | 12½" | --- | ||
| #1, #2 and #5 are cut with the On-Point ruler for accuracy. Templates are available for you to download from the blue chart under 'Construction Instructions'. Choose which alternative works best for you and your budget. Remember to subcut #3 and #4 as directed. | ||||||
Step 2: Piecing the Rail Fence (RF) units
A Note from Julie...
In this section, you may notice two different cutting mats and two different sets of lighting. I went back and re-shot a couple of photos in my home studio.
That's why they look different—your eyes are NOT deceiving you!
 Make 4
With RST, stitch a #1 to a #2 along the long edge.
After stitching, press flat to set the seam. Then open with the SA toward the darker #1.
With RST stitch a #1 to the opposite long edge of #2.
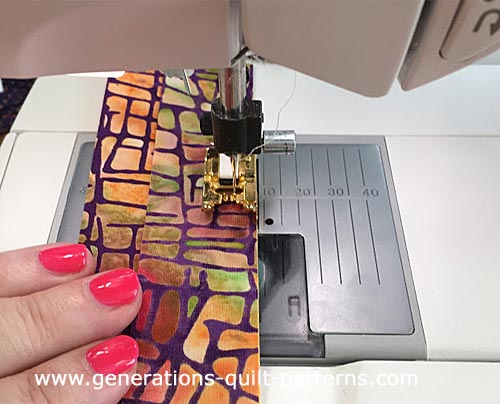 Adding the 3rd strip to the RF stripset.
Press as before.
You MUST use your On-Point ruler for measuring the numbers in the following chart.
| SubCutting Chart for a House Jack Built block | ||
|---|---|---|
| Finished Block Size | Width of StripSet | SubCut Width |
| 6" | 3" | 3" |
| 9" | 4½" | 4½" |
| 12" | 6" | 6" |
First check that the stripset is as wide as it should be. For this 6" sample it should be 3" wide using the OnPoint Ruler. And it is! (Make any adjustments if you need to.)
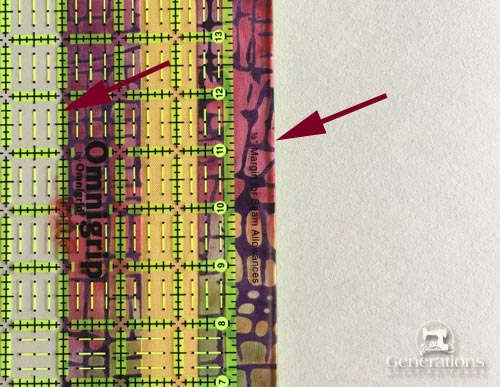 Double check the width of your strip set with your On Point ruler
At your cutting mat, align one of the lines on your ruler (red arrow) with a seam-line. Straighten the edge with your rotary cutter by trimming off a complete sliver.
 Align your ruler marks(red arrows) with seam lines in the stripset and trim the short edge
Now align the ruler marks with a seam, subcut the stripset into four squares using the measurements from the chart above.
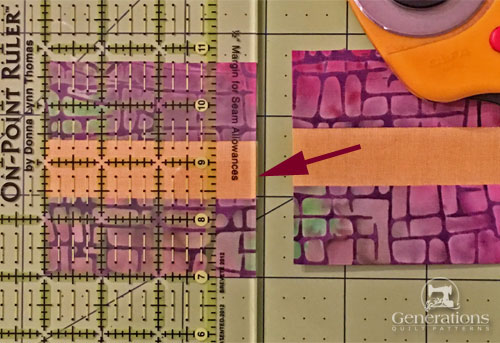 Subcutting 3" patches with your OnPoint Ruler
This is what you have after cutting.
 There'll be just a wee bit leftover (right, above)
If you downloaded templates, you will be stitching a #1 and #2 together. Then press. Add the second #1 to the other side of the #2. Press.
There is no subcutting. You #1/#2/#1 unit should measure the same size as the #5 template. Make any adjustments you need.
From this point forward construction is the same no matter how you cut your patches.
Step 3: Assembling the House Jack Built
Arrange your pieced and cut patches into the design. The dark strips in the Rail Fence units are parallel to the edges of the center square.
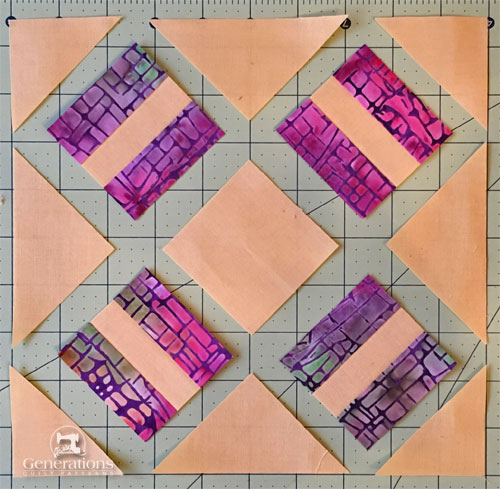 I admit here, openly, that I got these patches turned around when I first stitched the block. (If I'd left them in that position, this would have been called the 'Autograph' block instead! :D)
We'll stitch the units together into 3 diagonal rows.
Mark the center of the dark #1 side of two different Rail Fence patches. I simply fold them in half and finger press a crease.
 Batiks, in particular, take a really nice, sharp fingerpress with little effort.
Mark the centers of the long bias edge of all four HST (#3) in the same manner, being careful not to stretch the bias.
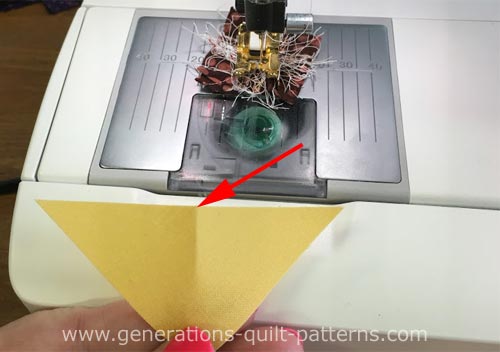 Starched fabric helps keep these edges from stretching much.
With RST, match the centers (the creases) of a RF and a #3 HST. I use a pin to hold the centers in place.
Stitch.
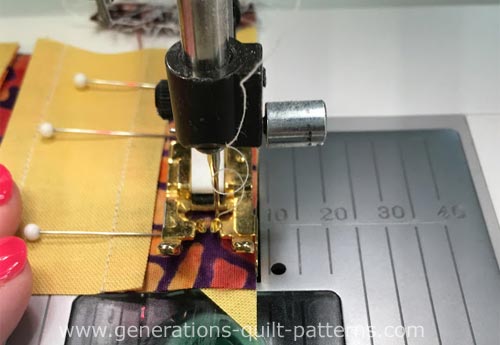
The #3 will be a bit longer that the edge of the RF at this point (red arrows below). That is correct.
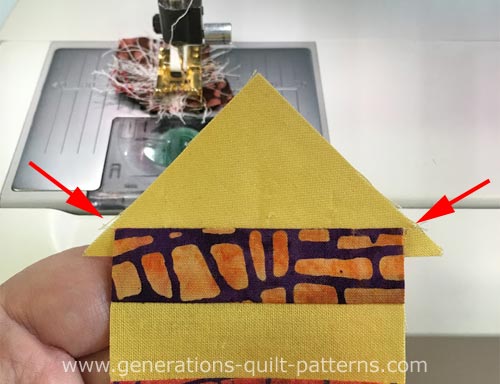
To two RF, with RST add a #4 QST to each side. I prefer to feed the even ends of the pair of patches into the sewing machine first. That way my machine doesn't 'chew up' the points making for messy patchwork.
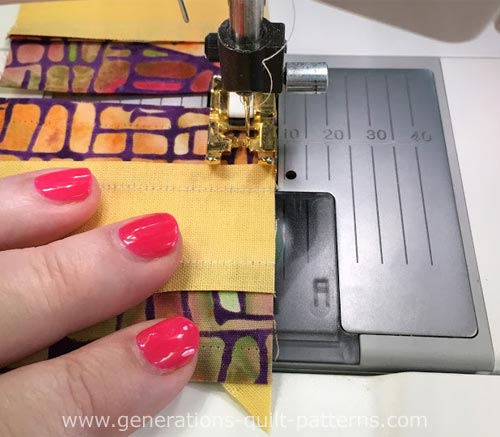
Press.
It looks rather like a blunt triangle at this point.
 I'm not too particular about those thread tails at this point. They'll be trimmed away when I get rid of the dog ears later.
Fold the unit in half and fingerpress a crease in the center of the short #1 side of the sewn patches.
With RST, match the center of a previously marked #3 HST with this new crease. Pin to hold the centers together.
Stitch. This time your stitching goes right through the middle of the valley created by the patches.
Trim away the dog ears with scissors to reduce bulk.
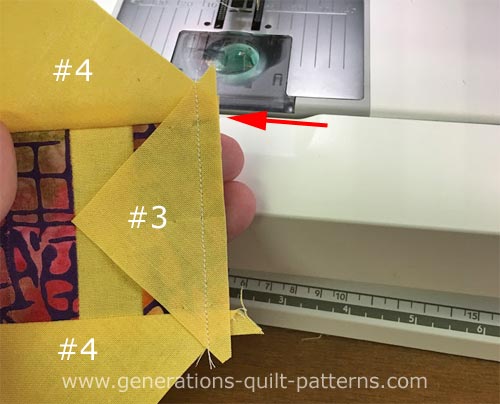
The three diagonal rows are now pieced.
Stitch the rows together, pinning if needed. The seams nest.
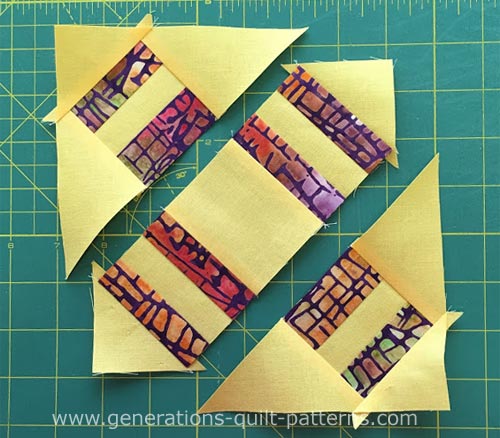 Two more seams and our House Jack Built block is complete!
Trim away any remaining dog ears.
The House Jack Built is finished and ready for your quilt.
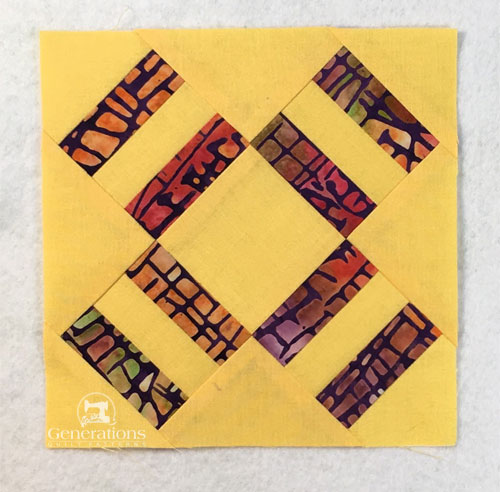 The finished House Jack Built quilt block
More blocks made with an On Point Ruler
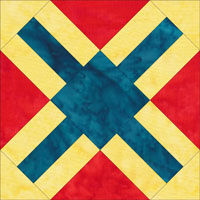
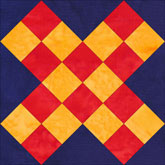
There are several blocks that share this similar, on-point type of design. A few are:
What about a different quilt block?
For a list of all the 220+ quilt block patterns on this site, start here.
If you know the name of the block, shorten your search by using these links:
Click here if you're looking for blocks with at least some paper piecing.
Click here if you're looking for the basic building blocks of quilting, i.e., Flying Geese, half square triangles, quarter square triangles, etc., along with several techniques to make each.
And finally, use these links to find blocks in these finished sizes:
For even more blocks to make...
For you, are quilt block designs like potato chips...
...you can't have just one?!!
Check the amazing resources I rely on for all the quilt block designs you see on this website.
To see if they're worthy of a spot in YOUR quilting library, CLICK HERE.
