- Home
- Free Quilt Block Patterns
- California Oak Leaf quilt block
California Oak Leaf Quilt Block
From our Free Quilt Block Patterns Library
This post contains affiliate links for which I receive compensation
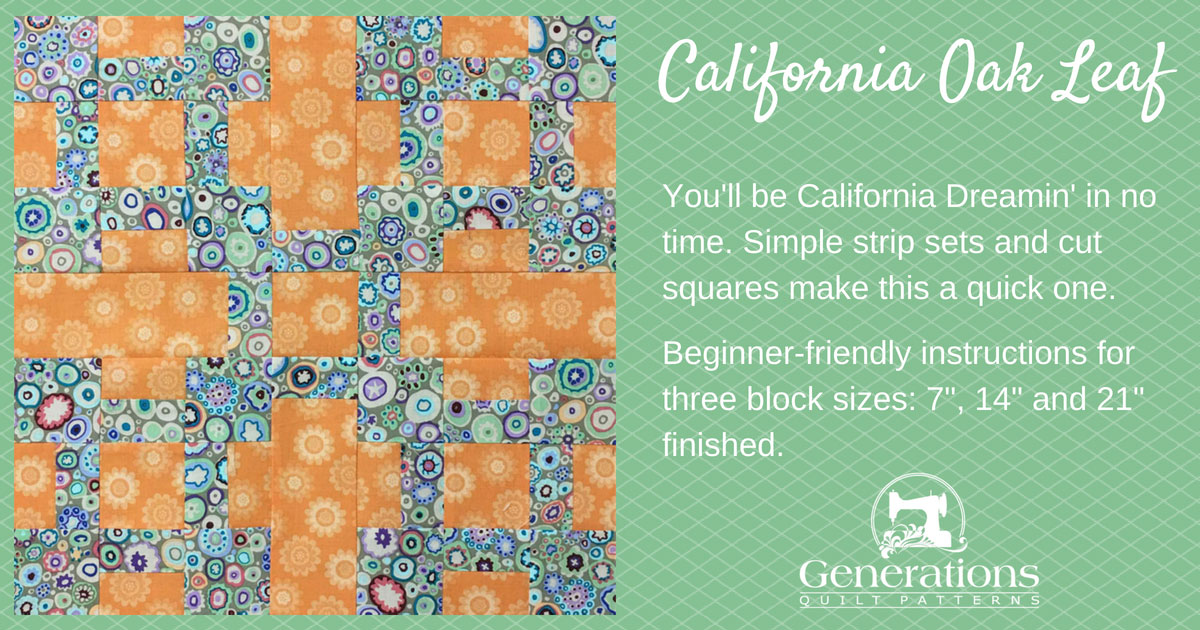
The California Oak Leaf quilt block will have you California Dreamin' in no time.
Simple strip sets and cut squares make this a quick one to piece.
You might know of this patchwork design by a different name—like Hand, Sassafras Leaf or True Lover's Knot.
In this tutorial you'll find:
- A cutting chart in three sizes with a download for the chart and block design
- A coloring page to download and print
- No time to quilt? Pin this for later.
It's time to cut up and sew!
📋 General Instructions
I use these abbreviations in the tutorial:
- SA - seam allowance
- RST - right sides together
- SS - strip set
1/4" SA are used through this tutorial.
Pressing instructions are highlighted in yellow throughout this tutorial.
When instructed to press, first press the patches in the closed position—just as they came off your sewing machine.
This sets the seam, melding the fibers of the threads into the fibers of the fabric.
Then press the SA to the dark unless otherwise noted.
Step 1: Cutting for a California Oak Leaf quilt block
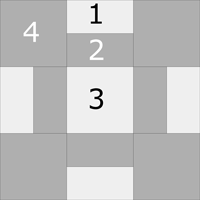
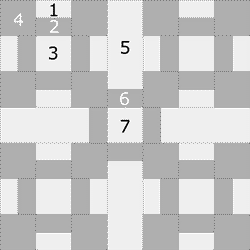 California Oak Leaf design
Sample Block Size: 14" finished / 14 ½" unfinished
Grid: 14x14
Attribution: Carrie Hall and Rose Kretsinger
Design Type: Uneven 9-patch, small center
AKA: Hand, Sassafras Leaf, True Lover's Knot - all Carrie Hall and Rose Kretsinger
Two fabrics are used in our 14" sample block.
However, you could just as easily turn this into a scrap quilt pattern. Simple choose a single background fabric and then scraps with high contrast to it.
In the sample I've used one of my favorite fabrics designs—'Paperweight' by Kaffe Fassett. This particular colorway goes by the dreadful name of 'Sludge'.
You can find more colorways here...most with more quilter-friendly names.
Please label all your patches. We refer to their numbers throughout this tutorial.
To print a copy of the block design and cutting chart to use at your cutting table, click here.
 | Cutting Chart for a~Traditional Piecing ~ | ||||
|---|---|---|---|---|---|
| Patch | Fabric | Qty | Finished Block Size | ||
| 7" | 14" | 21" | |||
| 1 | Light | 1 | 1" x 25" | 1½" x 41" | 2" x 57" |
| 2 | Dark | 1 | 1" x 25" | 1½" x 41" | 2" x 57" |
| 3, 7 | Light | 5 | 1½" x 1½" | 2½" x 2½" | 3½" x 3½" |
| 4 | Dark | 16 | 1½" x 1½" | 2½" x 2½" | 3½" x 3½" |
| 5 | Light | 4 | 1 1/2" x 3" | 2 1/2" x 5 1/2" | 3 1/2" x 8" |
| 6 | Dark | 4 | 1 1/2" x 1" | 2 1/2" x 1 1/2" | 3 1/2" x 2" |
| Unfinished Block Size | 7½" | 14½" | 21½" | ||
| Grid Size | ½" | 1" | 1½" | ||
Step 2: Assemble the units for a California Oak Leaf
#1/#2 Strip Set (SS)
Make 16

We'll use strip piecing to quickly, accurately stitch the #1/#2 units.
I prefer to use starched quilt fabric for stripsets because my cutting is more accurate and it works so well with my favorite quarter inch foot—the one with the guide on the righthand side (see picture below).
Click here to learn more about why and how to starch your quilt fabric.
With RST, layer #1 and #2 together and stitch along the long edge.
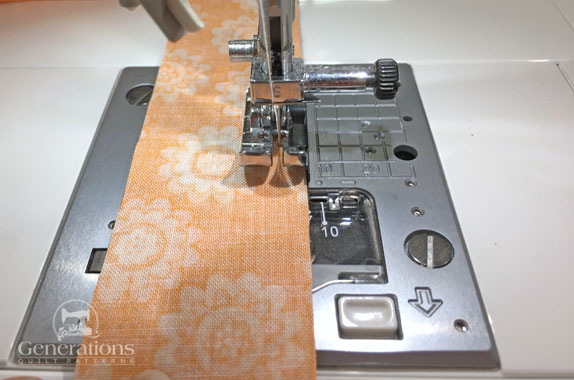 This is my 1/4" presser foot with the guide on it.
After stitching, press flat to set the seam and then open with the SA toward the darker #2.
Using the table below, check that your #1/#2 is the correct width. For our 14" sample California Oak Leaf it's 2-1/2" wide. Make any necessary adjustments now.
Find the SubCut Width for your Finished Block Size. For our 14" sample it is 2-1/2".
#1/#2 Strip Set | ||
|---|---|---|
| Finished Block Size | SS Width after stitching | SubCut Width |
| 7" | 1 1/2" | 1 1/2" |
| 14" | 2 1/2" | 2 1/2" |
| 21" | 3 1/2" | 3 1/2" |
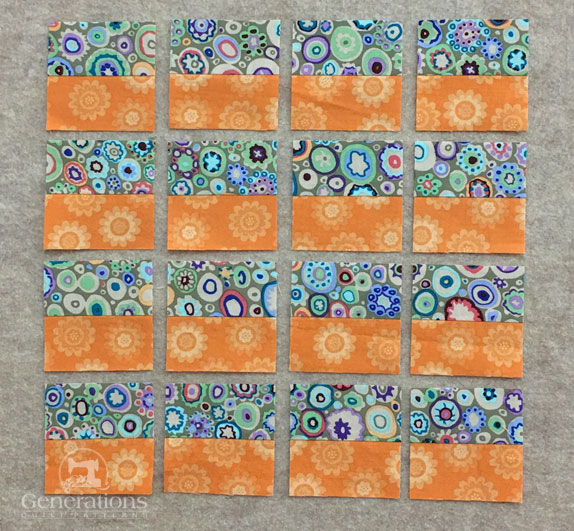
Straighten one of the short ends of your #1/#2 stripset. Then cut sixteen squares this width.
Here they are. Perfectly straight edges—that's the beauty of starting with strip sets.
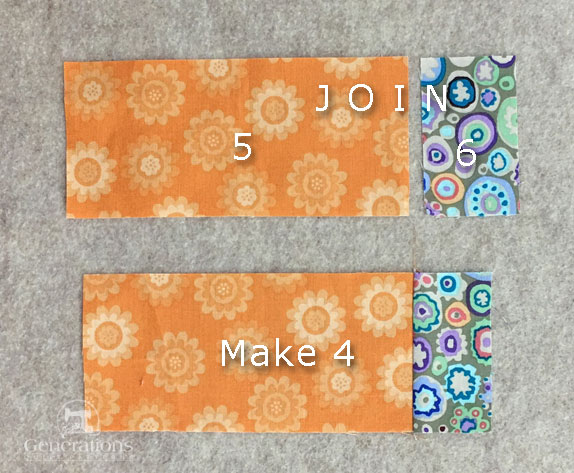
#5/#6 Sashing

Make 4
With RST, sew a #5 to a #6.
SAs are pressed to the darker #6.
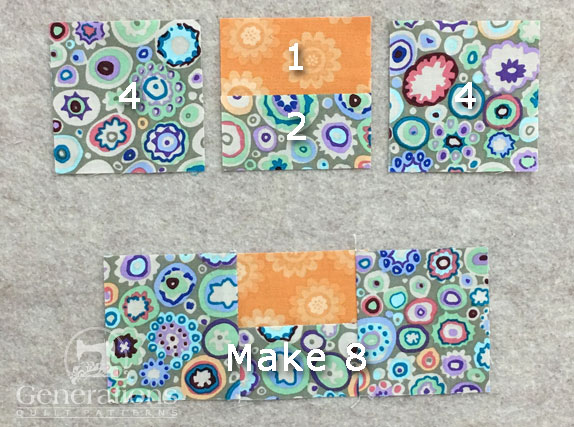
Quarter Blocks
Make 4
With RST, stitch a #4 to two opposite sides of each #1/#2. Make a total of 8 segments.
Press SAs toward the #4s to avoid bulk.
With RST add the #2 side of a #1/#2 unit to two opposite sides of each #3 square.
SAs are pressed towards the #3.
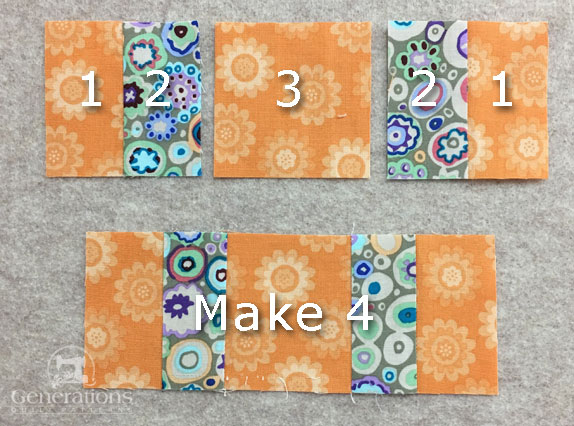
Arrange the segments into the quarter block pattern. Light #1s are on the outside edges.
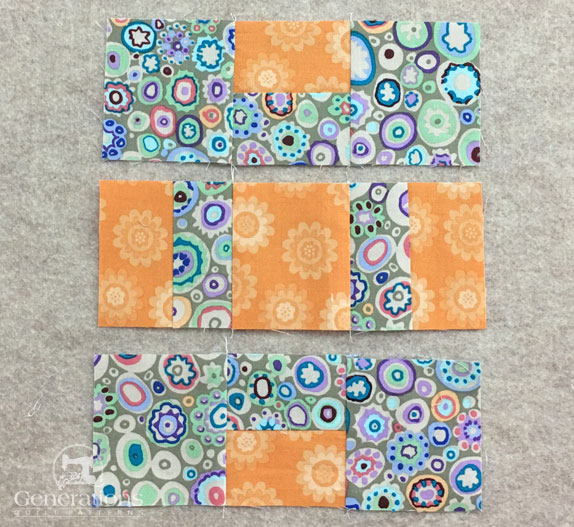
With RST stitch the rows together.
The SA nest to make matching the joins pretty easy. You might be able to finger pin, otherwise use pins if needed.
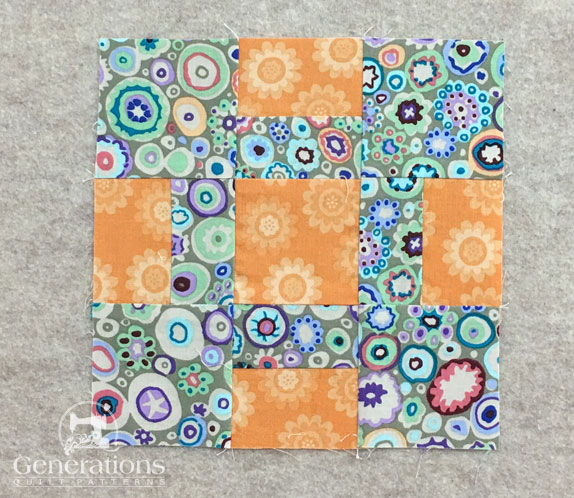
These last two seams are pressed out from the center.
Step 3: Assemble your California Oak Leaf quilt block
Arrange the quarter blocks, sashing and cut center square into the California Oak Leaf design.
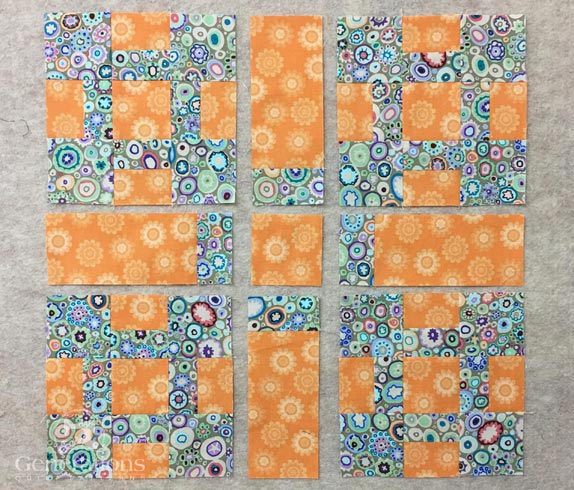
With RST sew the units in each row together. One of the reasons this block is so quick to make is there are no seams to match here, just the ends of each unit. Sweet!
Press the SA in the direction of the arrows toward the #5/#6 sashings.
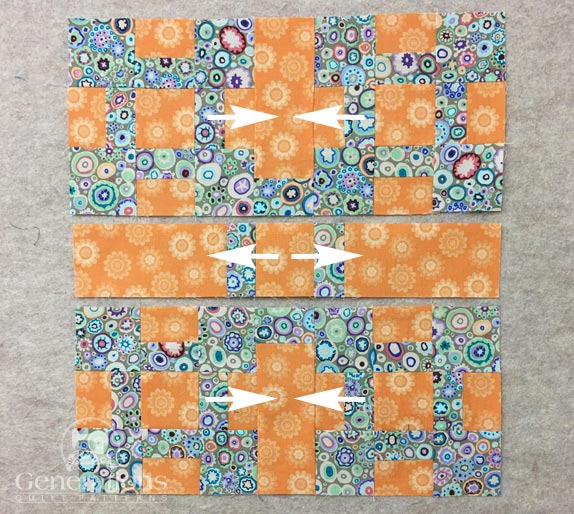
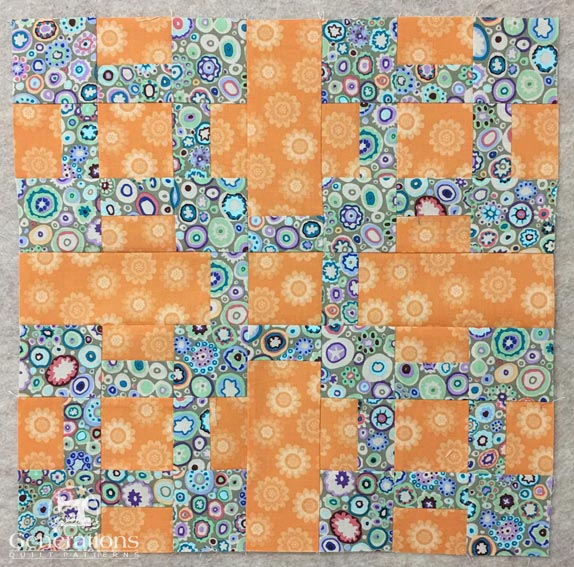
Join the rows together, pressing these last two seams out from the center.
This is our completed California Oak Leaf quilt block.
And finally, here's a view from the back to see how all those seams nest.
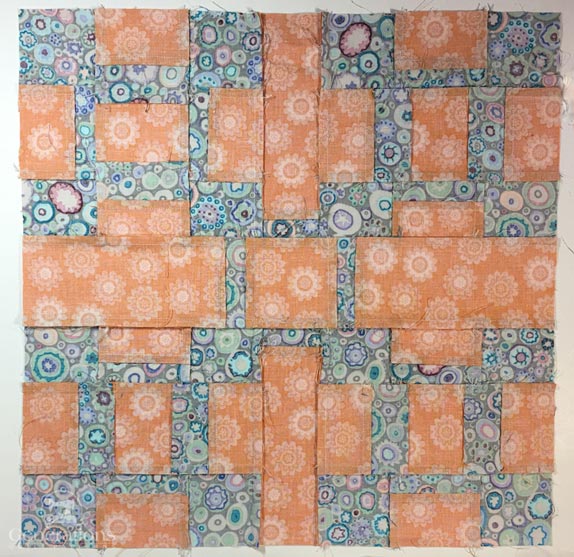 The California from the back
What about a different quilt block?
For a list of all the 220+ quilt block patterns on this site, start here.
If you know the name of the block, shorten your search by using these links:
Click here if you're looking for blocks with at least some paper piecing.
Click here if you're looking for the basic building blocks of quilting, i.e., Flying Geese, half square triangles, quarter square triangles, etc., along with several techniques to make each.
And finally, use these links to find blocks in these finished sizes:
