- Home
- Free Quilt Block Patterns
- Autumn Leaves Quilt Block
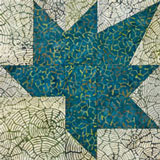
🍂 Autumn Leaves Quilt Block: From Simple Shapes to Stunning Leaves
Simple techniques, spectacular leaves—because you don't need expensive tools to shine! ✨🍁
This post contains affiliate links, for which I receive compensation.
The secret to a gorgeous Autumn Leaves quilt block?
It's simpler than you think! 🍂
This tutorial combines the accuracy of paper piecing with traditional techniques you already know, creating stunning results with nothing but your everyday rulers.
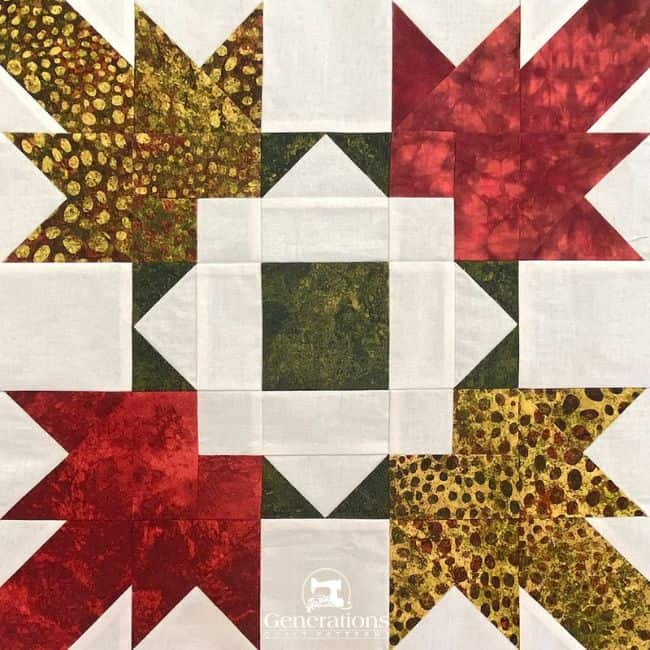
Choose from 4 sizes (10" through 25") and watch simple shapes be transformed into intricate-looking leaves that'll have everyone asking for your "secret."
🚨 Spoiler alert : there isn't one—just smart techniques that actually work! 🍁😉
🎯 Find What You Need Fast
Your roadmap to autumn quilting success starts here—click and conquer! 🍁💪
- Looking for another 'leaf' design? There's more here!
📋 General Instructions
⚡ PRINTING TIP: Need help printing this tutorial? Click here for easy instructions!
A gaggle of abbreviations are used on this page. They are:
- SA - seam allowance
- RST - right sides together
- HST - Half Square Triangle
- QST - Quarter Square Triangle
- FG - Flying Geese
- FC - Folded Corners
A 1/4" SA is used in this tutorial.
✅ KEY TECHNIQUE: PRESSING PAPER PIECED PATCHES
To streamline the instructions, it is assumed that you ALWAYS press with your iron after adding each patch.
First press it in the closed position as it came off your sewing machine. This sets the seam, melding the fibers of the threads into the fabric. Then press the patch open. In paper piecing, all SAs are pressed toward the last patch added.
Double check ✅✅to make sure you haven't inadvertently pressed a tuck in along the SA. Once you've sewn across both ends of a seam, it's virtually impossible to get that tuck out.
If we're pressing to simply keep something out of the way, you'll be instructed specifically to fingerpress.
📥 Download and print the paper piecing pattern
To download the pattern, use the most current version of Adobe.
For accurate results, on Adobe's Print Menu page, under 'Page Size and Handling' set 'Custom Scale' to 100%. Then print.
Click here to see what it looks like on the Print Menu page.
Find your finished block size from the chart below. For each block you want to make, print the corresponding number of copies for a total of:
- 4 QST A
- 4 QST B
- 4 Flying Geese
Download and Print the Paper Piecing Patterns | ||||||
|---|---|---|---|---|---|---|
| Finished Block Size | Flying Geese | 3-Patch QST Includes A & B units | ||||
| # of Copies | Download | # of Copies | Download | |||
| 10" | 1 | 1" x 2" | 2 | 2" | ||
| 15" | 1 | 1½" x 3" | 2 | 3" | ||
| 20" | 1 | 2" x 4" | 4 | 4" | ||
| 25" | 2 | 2½" x 5" | 4 | 5" | ||
After printing, use the 1" square graphic on the printed page(s) to double check that your patterns printed at the correct size.
Then cut out the required number of patterns from your copies. A rough cut is good enough—an 1/8"-1/4"-ish away from the outside dashed square.

Not sure which paper to use?
Take a look at my review of several of the most popular brands available to us quilters on the market.
You want a super-easy paper to tear away—less stress on the stitches.
My must-have tools for paper piecing
Most of the tools you'll need for paper piecing, you likely already have. (Whew!!!!)
Compare your current inventory with the recommendations in 'Essential Paper Piecing Skills: The right tools for the job'.
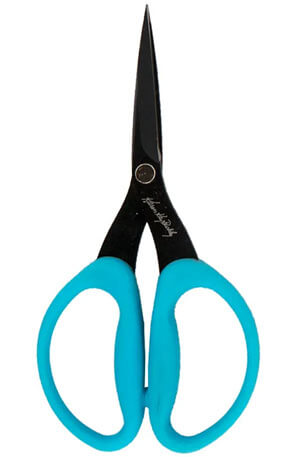
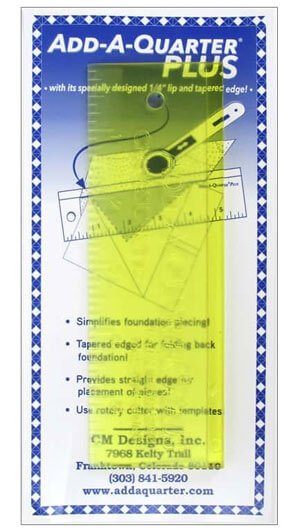
In the meantime, these are the three must-haves in my paper piecing toolbox.
✂️ Cut patches for your Autumn Leaves quilt block

Sample Block Size: 15" finished / 15½" unfinished
Grid: 10x10
Attribution: Maggie Malone's "5,500 Quilt Block Designs", #2885, pg.120
Design Type: Leaf | Paper piecing
Label each patch now or spend forever hunting for the right piece later (your choice, but I know what I'd pick)! 🏷️😉
 | Cutting Chart for an~ Paper PLUS Traditional Piecing ~ | ||||||
|---|---|---|---|---|---|---|---|
| Patch | Fabric | Qty | Finished Block Size | Sub Cut | |||
| 10'' | 15'' | 20'' | 25'' | ||||
| 1, 5 | Bac | 12 | 1½'' x 1½'' | 2'' x 2'' | 2½'' x 2½'' | 3'' x 3'' | --- |
| 2 | A, B, C, D | 1 ea | 1½'' x 1½'' | 2'' x 2'' | 2½'' x 2½'' | 3'' x 3'' | --- |
| 3 | A, B, C, D | 1 ea | 1½'' x 2½'' | 2'' x 3½'' | 2½'' x 4½'' | 3'' x 5½'' | --- |
| 4 | A, B, C, D | 1 ea | 2½'' x 2½'' | 3½'' x 3½'' | 4½'' x 4½'' | 5½'' x 5½'' | --- |
| 6 | Bac | 4 | 1½'' x 2½'' | 2'' x 3½'' | 2½'' x 4½'' | 3'' x 5½'' | --- |
| 7 | Bac | 4 | 2½'' x 2½'' | 3½'' x 3½'' | 4½'' x 4½'' | 5½'' x 5½'' | --- |
| 8 | Dark | 1 | 2½'' x 2½'' | 3½'' x 3½'' | 4½'' x 4½'' | 5½'' x 5½'' | --- |
| QST.1, Goose.1 | Bac | 3 | 3¾'' x 3¾'' | 4¾'' x 4¾'' | 5¾'' x 5¾'' | 6¾'' 6¾'' | |
| QST.2 | A, B, C, D | 1 ea | 3¾'' x 3¾'' | 4¾'' x 4¾'' | 5¾'' x 5¾'' | 6¾'' 6¾'' | |
| QST.3 | A, B, C, D | 1 ea | 3⅜'' x 3⅜'' | 4⅜'' x 4⅜'' | 5⅜'' x 5⅜'' | 6⅜'' 6⅜'' | |
| Sky.1 | Dark | 4 | 2⅜'' x 2⅜'' | 2⅞'' x 2⅞'' | 3⅜'' x 3⅜'' | 3⅞'' 3⅞'' | |
| Unfinished Block Size | 10½'' | 15½'' | 20½'' | 25½'' | na | ||
| Grid Size | 1'' | 1½'' | 2'' | 2½'' | na | ||
✂️✂️ Subcutting
QST.1, QST.2 and Goose.1 are subcut twice on the diagonal to create QST shapes with straight of grain on the outside long edge.
QST.3 and Sky is cut once on the diagonal to make HST shapes whose two shorter edges are on grain.
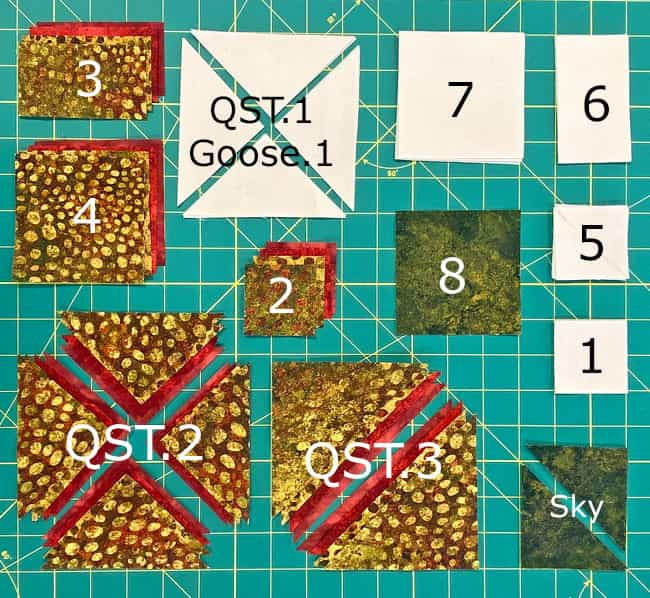
🧵 Create the units for your Autumn Leaves quilt block
To get started, use an Elmer's Washable Glue Stick ® to hold the wrong side of your QST.1s and Goose.1 patches in position on the unprinted side of the pattern,
Use those dashed lines around the patch to help you get the patches in the correct position.

We need to make a few adjustments to our sewing machine settings to paper piece.
- Reduce your stitch length to 16–20 stitches per inch (1.3-1.6 mm). This perforates the paper and stabilizes the seam when you remove the pattern. [Learn more about stitch length here.]
- Reduce your machine's speed or just plain slow down. Sew only as fast as you can AND stay on the solid stitching line.
- Install an open toe appliqué foot (sometimes called an 'embroidery' or 'satin stitch' foot) if you have one (it makes it easier to see where you're stitching).
- Use a larger needle (90/14) IF you have problems removing the pattern. Personally, I use an 80/12 Microtex Sharp for paper piecing without any issues.
QSTs
Make 4 of A and 4 of B
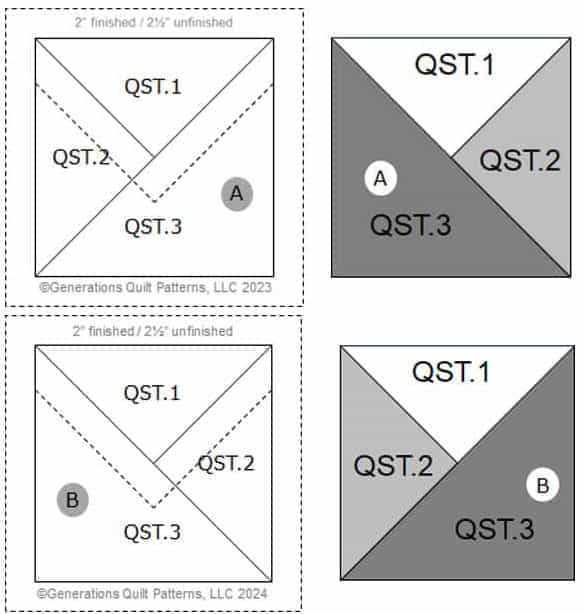 Our QST patches are a mirror image of the pattern after they are sewn.
With RST, match BOTH short sides of QST.2 with QST.1.
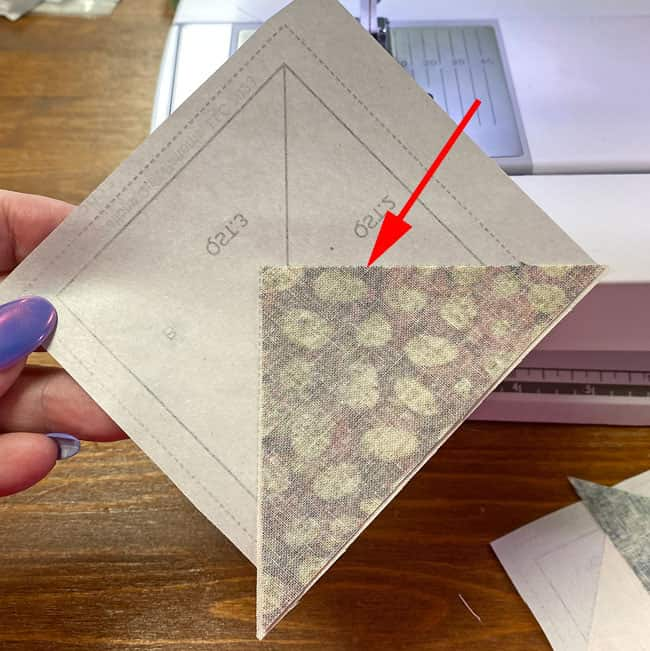
Sew the seam.
✅ KEY TECHNIQUE: ALL PAPER PIECED SEAMS
ALL the seams in paper piecing are stitched by starting a generous 1/4" before the solid line between patches and ending a generous 1/4" after that line ends. The next line of stitches that cross this seam secures the ends—just like in traditional piecing.
If the seam begins/ends at the outside edge of the block, start and stop your stitches past the outside dashed line surrounding the block.
Use this technique every time you sew a seam.
The only time I might use backstitches is at the outside edges, but never inside the block or unit. I find the shorter stitch length with good thread tension holds my stitches quite well.
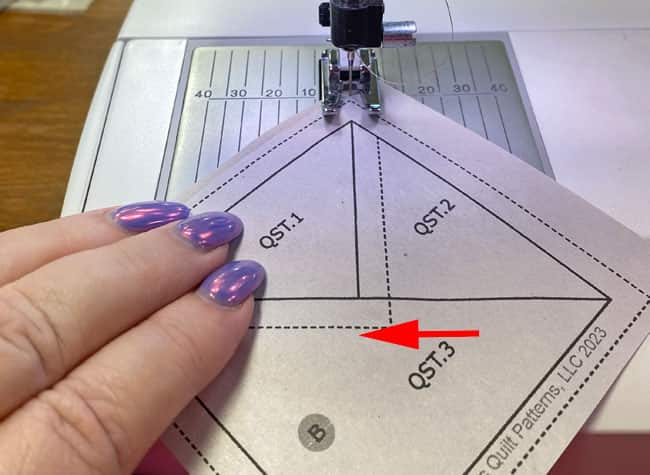 Your stitches should end roughly at the point of the red arrow.
Press.
If you matched the edges of the QST.1 and QST.2, there is no need to trim to establish a 1/4" seam allowance. It's close enough.
With RST, match the long bias edge of QST.3 to the edges of QST.1/QST.2.
My advice is to trim away that thread in the center (from the previous seam) NOW. It's a PITA to have to stop and trim all kinds of threads once the block is finished. Wouldn't you rather start piecing these into a quilt?
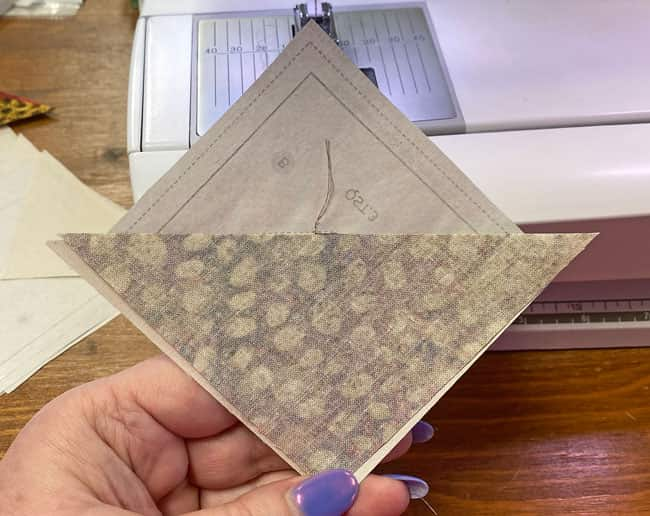
Stitch.
This is the 'B' version of this QST after stitching. The A is a mirror image of this, which you'll see in the finished Autumn Leaves block at the end of the tutorial.
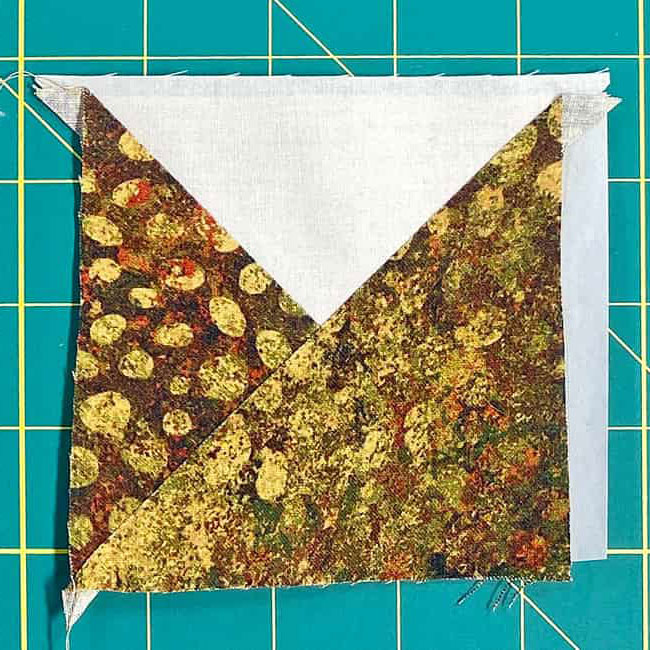
Complete the remaining QSTs and put them aside for now.
Flying Geese (FG)
Make 4

With RST, position the first Sky.1, its edge matched to the Goose.1.
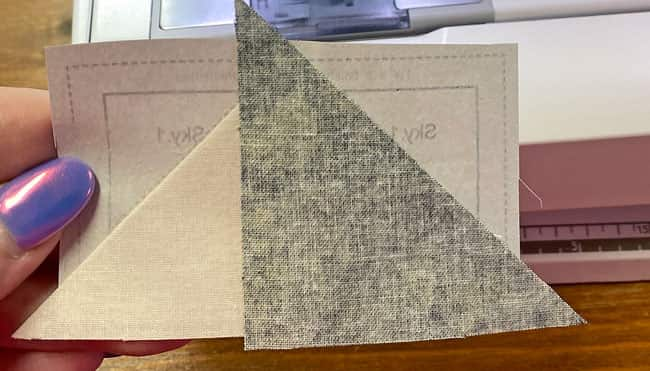
Stitch. Since the seam runs from outside edge to outside edge, you can chain piece the first Sky.1.
 End your stitches at the tip of the red arrow
After pressing, position the 2nd Sky.1.
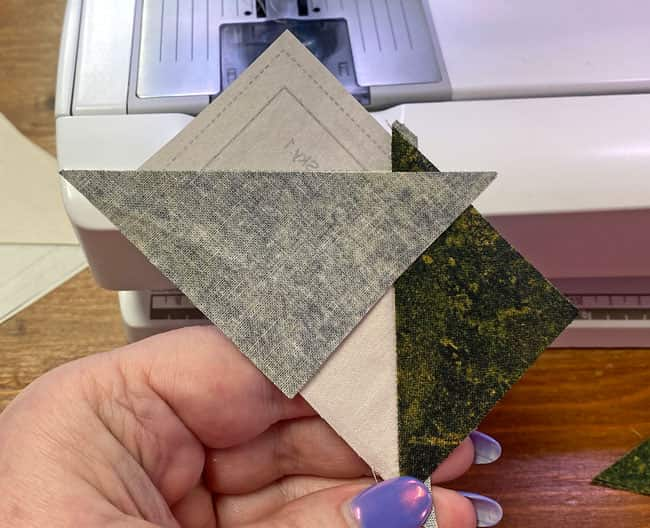
Stitch.
After a quick pressing, our FG is finished and ready to be trimmed.
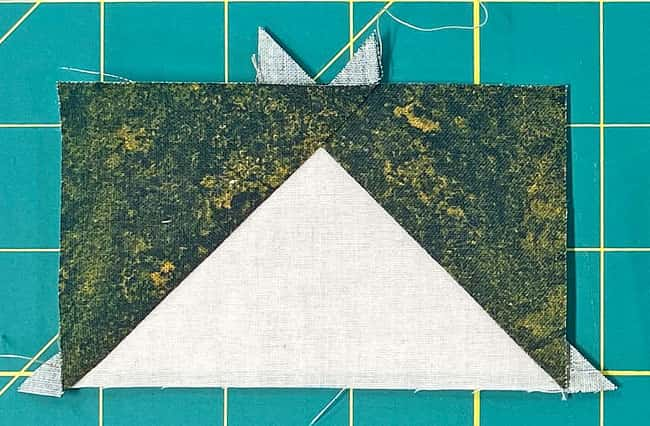
Trimming the FGs and QSTs
At your cutting mat, place an FG pattern side up, with the 1/4" mark of your ruler directly over one side of the solid rectangle that surrounds your FG.
Trim away the excess paper and fabric with your rotary cutter.
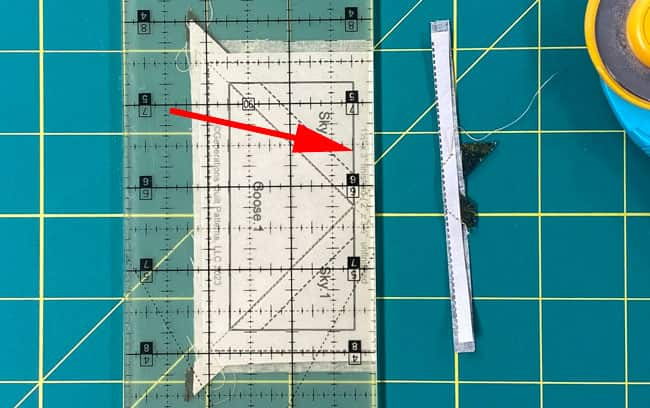
Rotate the FG a 1/4 turn and repeat.
Trim every side of every FG and QST in the same manner.
An untrimmed FG (left) and trimmed (center). The waste is on the right.
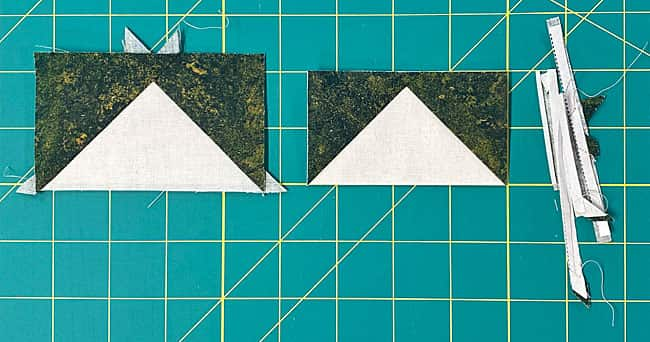
An untrimmed QST 'B' (left) and trimmed (center). The waste is on the right.
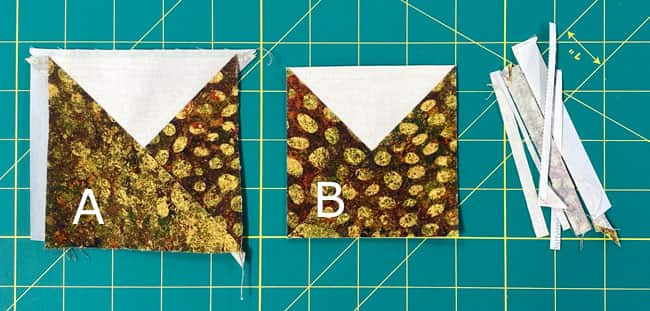
These units all have straight of grain on the outside edges and are no different from if you pieced them with traditional methods.
Since the paper no longer has a role to play, remove it.
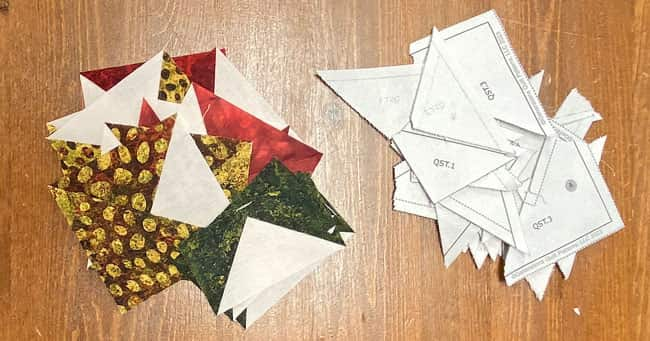
Sometimes pulling the paper from a seam that runs through a corner can undo a couple of stitches.
To avoid this problem, rip the paper from a patch in the middle of the patch. Then rip from there to the outside point.
Below, I've finished half the job. Just remember to pull from the center out to the point. It much gentler with your stitching.
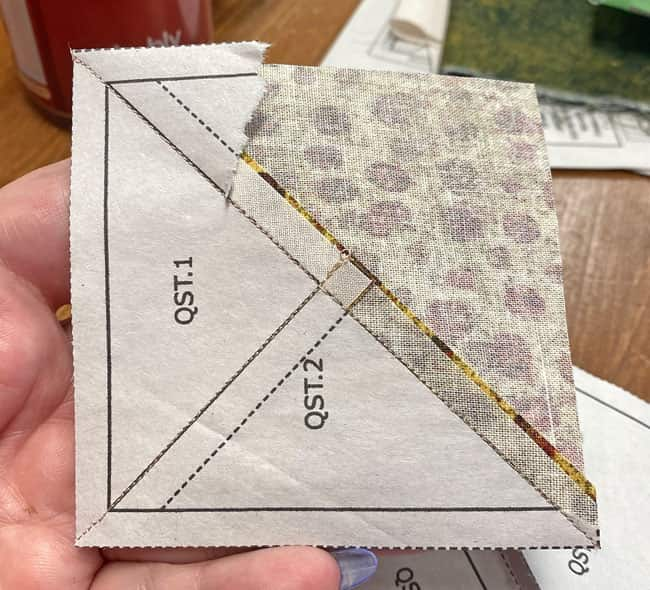

We're finished with the paper piecing. Please return your stitch length to what you normally piece with. Leave that open toe foot on for now. There's a few more lines to stitch on.
Leaf Point
Make 4
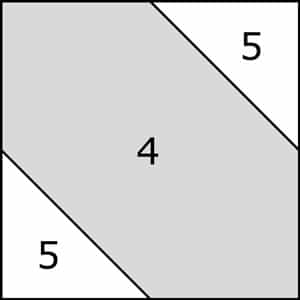
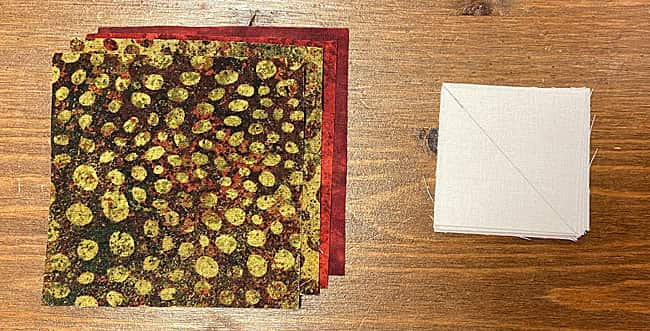
On the back side of eight #5s, draw a diagonal line from corner to corner (below right)
Accuracy counts here. For best results, use a mechanical pencil with a light touch—the lead creates a consistently fine line. You only need a line dark enough for YOU to see it.
With RST, match two edges of a #5 with the edges of a corner. I like to pin these in position. Repeat for the opposite diagonal corner.
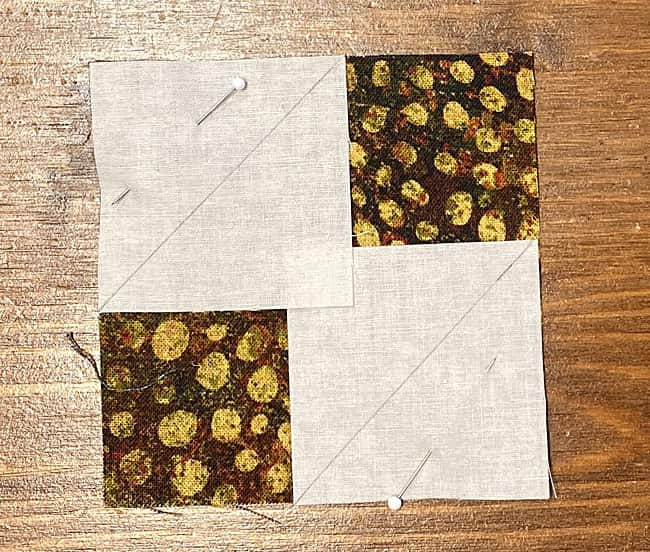
Stitch the seams.
💡 Pro Tip for Sewing Folded or Stitch n'Flip Corners
To accommodate the 'turn of the cloth', that bit of fabric that gets used up when the patch is folded open, stitch on the side of the line/right next to the line closest to the corner.
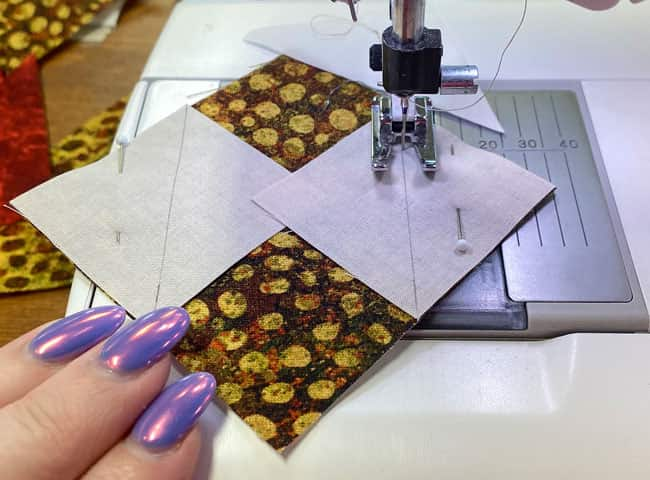 Sewing on the side of the line closest to the corner
Press.
While you could leave the excess layers of #5 and #4, I prefer to remove the extra bulk now.
Check your pressed Leaf Points.
If the top edges of the #5s line up with the edges of the bottom #4 (below left), then:
- Open a #5 revealing the 2 underneath layers
- Place the 1/4" mark on your ruler directly over the stitching
- Trim away the excess fabric leaving your perfect 1/4" SA
- Repeat for the opposite side
Continue the process on the remaining squares of different fabrics.
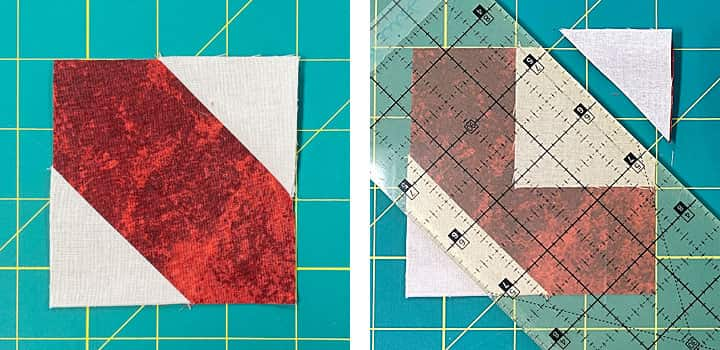 Yep. This is a fabric from another of the leaves.
📏Check for Accuracy
After a last visit to your ironing board, the units should measure the original size of the #4s.
Leaf Point Dimensions | |
|---|---|
| Finished Block Size | Edge-to-Edge Measurement |
| 10" | 2½" x 2½" |
| 15" | 3½" x 3½" |
| 20" | 4½" x 4½" |
| 25" | 5½" x 5½" |

All the 'stitching on a line' is done. Install your favorite 1/4" presser foot to use for the rest of this tutorial.
1-2-3 Units
Make 4 - one from each A, B, C, and D fabric
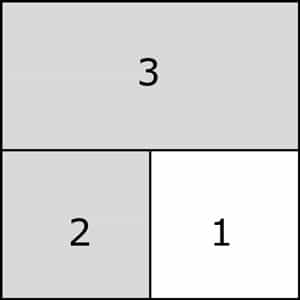
With RST, sew a #1 to #2, pressing to the dark.
Add the #3 to #1/#2 as shown below. Press this SA toward #3.
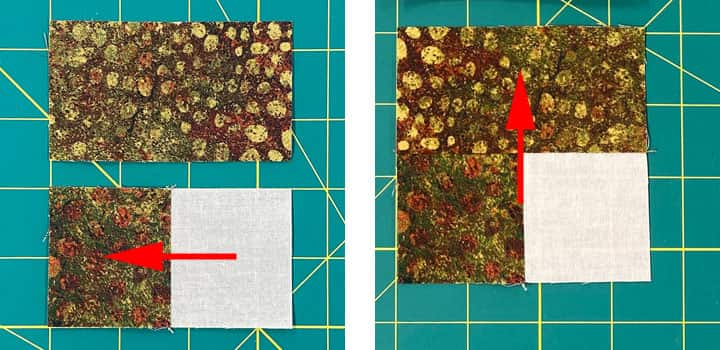
Repeat for the patches from the 3 remaining fabrics.
📏Check for Accuracy
1-2-3 Dimensions | |
|---|---|
| Finished Block Size | Edge-to-Edge Measurement |
| 10" | 2½" x 2½" |
| 15" | 3½" x 3½" |
| 20" | 4½" x 4½" |
| 25" | 5½" x 5½" |
Corners
Make 4
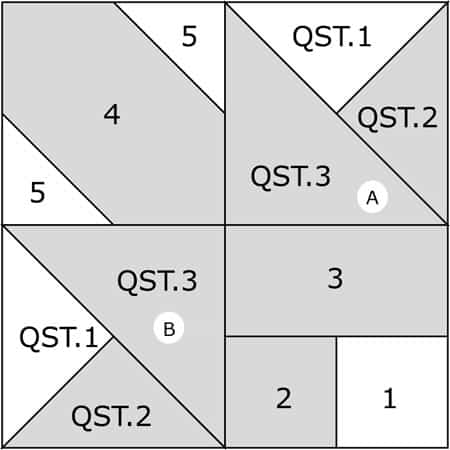
Time to put those patches together. Layout the Leaf Point, QST A & B and the 1-2-3 unit that are all stitched from the same leaf fabric (A, B, C, or D) as shown below.
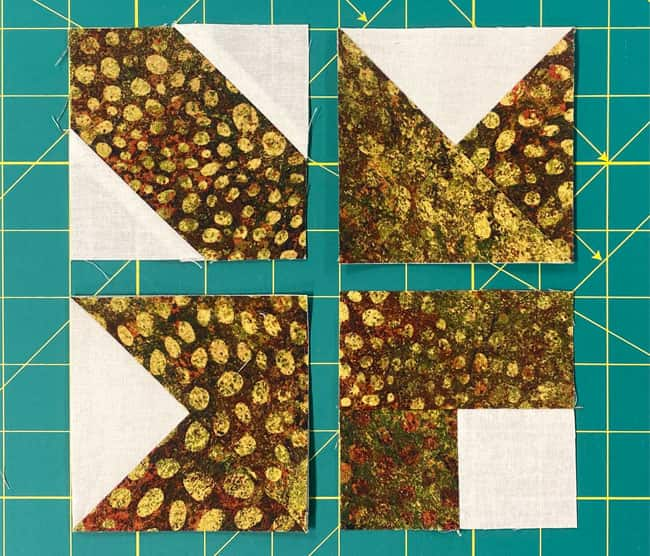 The QST 'A' is in the upper right; the QST 'B' in the lower left
With RST, sew the units in each row together, pressing the SA in the direction of the red arrow.
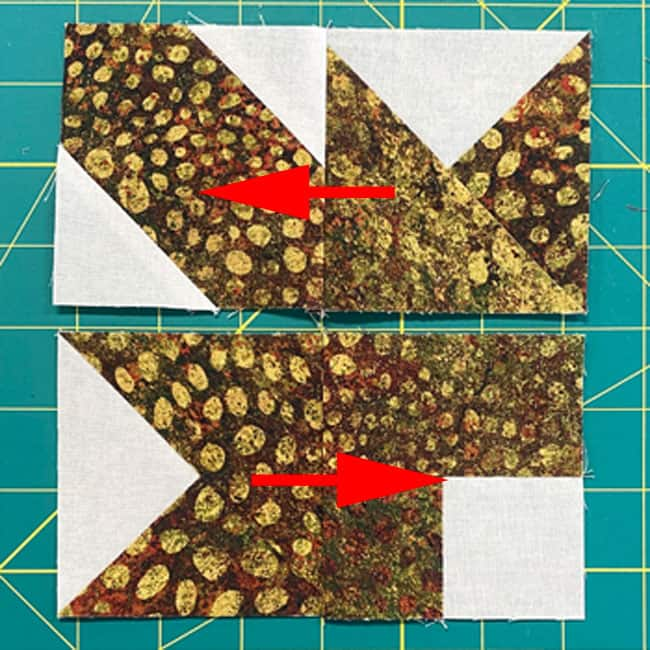
With RST, join the rows together. This seam is pressed towards the 1-2-3 and QST 'B'.
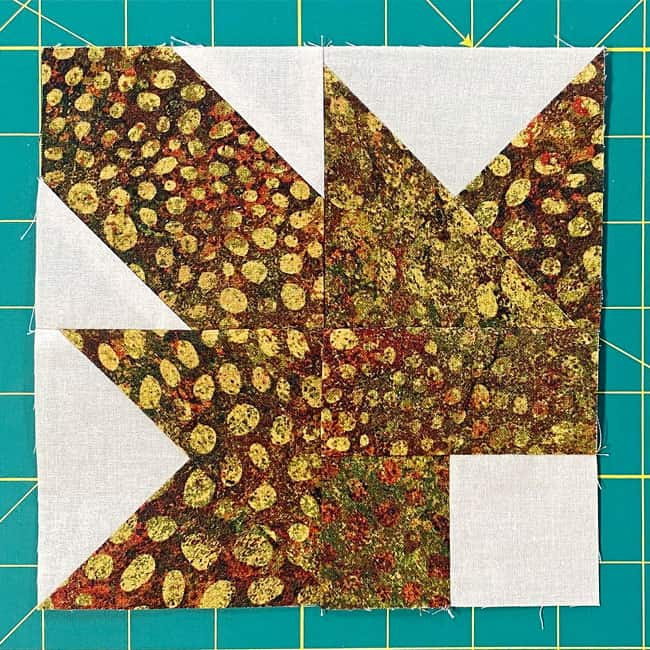
📏Check for Accuracy
Corner Dimensions | |
|---|---|
| Finished Block Size | Edge-to-Edge Measurement |
| 10" | 4½" x 4½" |
| 15" | 6½" x 6½" |
| 20" | 8½" x 8½" |
| 25" | 10½" x 10½" |
Sides
Make 4
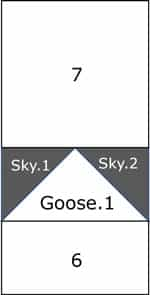
With RST, stitch a #7 to the top of a FG and a #6 to the bottom, as shown below.
Both seams are pressed away from the FG.
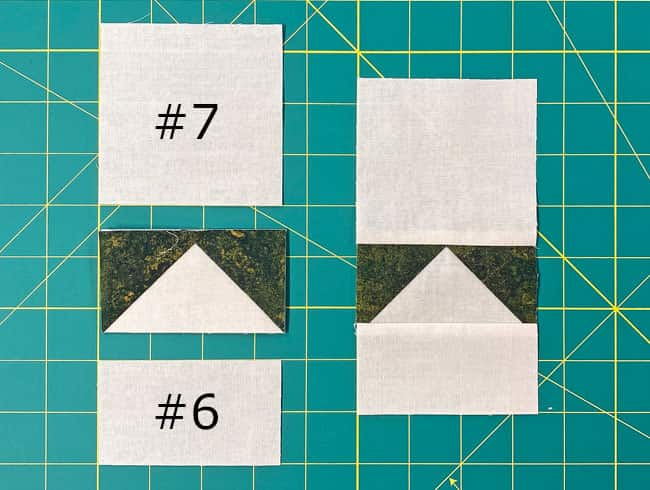
📏Check for Accuracy
Side Dimensions | |
|---|---|
| Finished Block Size | Edge-to-Edge Measurement |
| 10" | 2½" x 4½" |
| 15" | 3½" x 6½" |
| 20" | 4½" x 8½" |
| 25" | 5½" x 10½" |
🧩 Final Assembly of our Autumn Leaves quilt block
What with a]l the units in this block, you'd think it'd be a bugger to piece together.
But fear not!
Other than matching seams at the top and bottom of each FG, the block goes together just like a 9-patch made from cut squares.
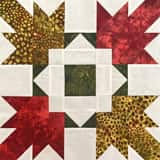
Arrange your patches into the Autumn Leaf design—leaves and FG all pointing away from the center.
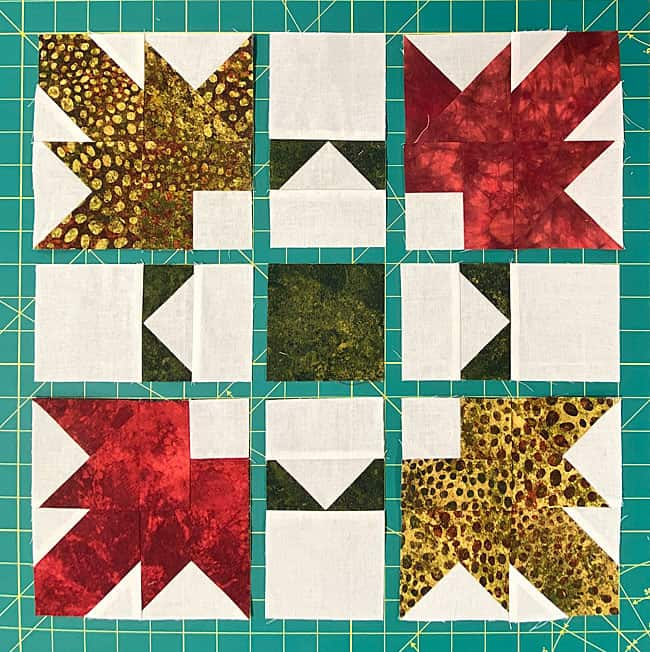
With RST, sew the units in each row together. Our seams were pressed to make matching them easier...they nest!
The SAs in each row are pressed away from the Side units.
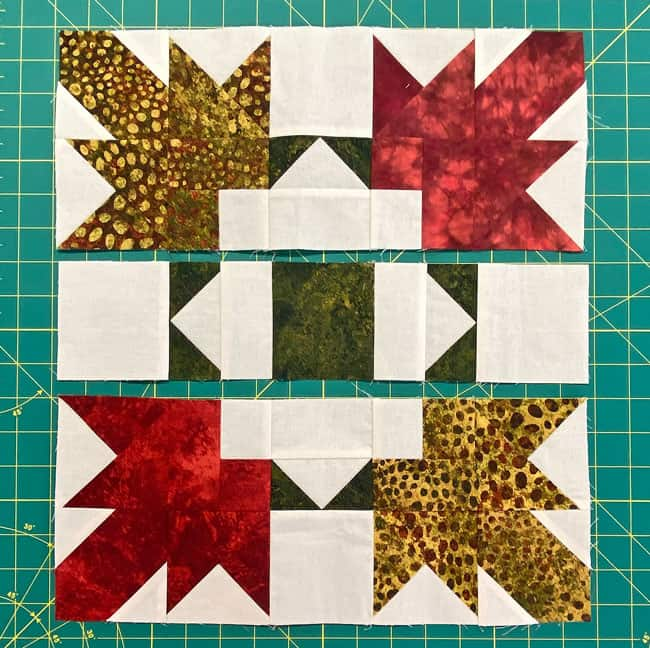
With RST, sew the rows together.
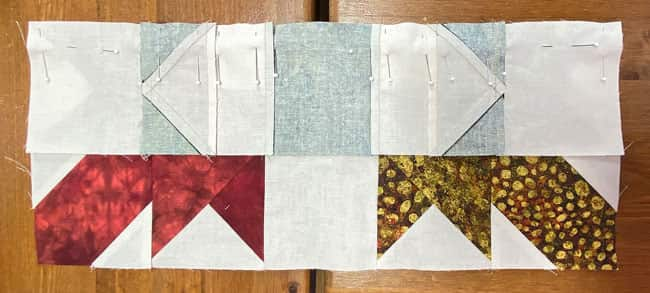
Here you can see how I've pinned two rows to hold the edges and match points even and together.
A final turn at your pressing station and our Autumn Leaves quilt block is finished.
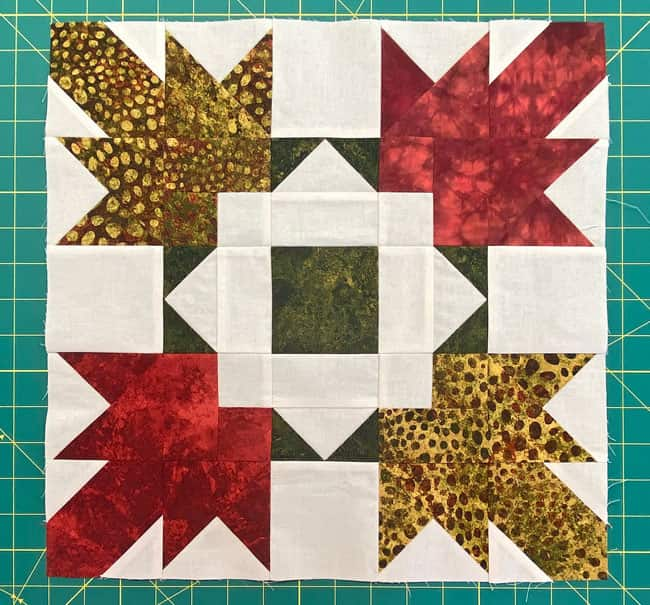 The last 2 seams are pressed in towards the center.
From the backside, you can see how all the seams are pressed. You can also see that the leaf in the lower right is a hand dye, while the other three are commercial prints.
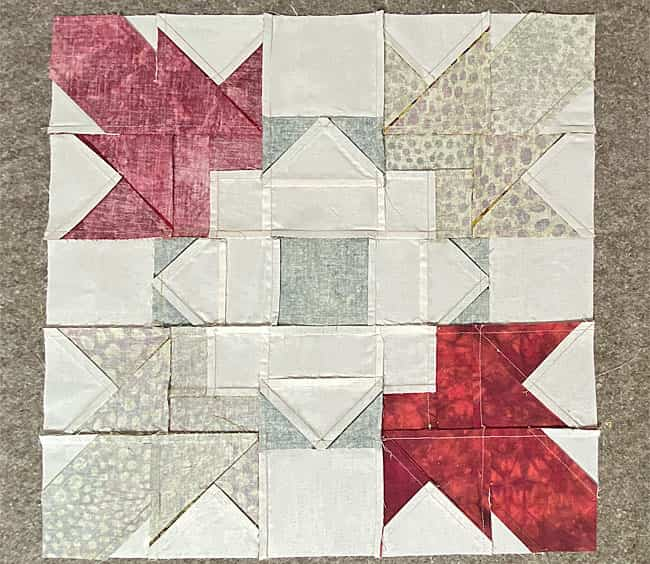
Until next time, may your seams stay true, and your blocks look un-be-leaf-able! 🍁
You did it! 🎊
From simple squares to this gorgeous Autumn Leaves block—and all with tools you already own! This is what smart quilting looks like: beautiful results through clever techniques, not expensive gadgets.
Your skills are growing with every stitch, so don't let that momentum stop here. The best quilters are the ones who keep practicing! 🍁🔥
🍁 Don't Leaf It Behind 📌
Pin this tutorial now because you know you'll want to make these gorgeous blocks later! 📌✨ Your Pinterest board needs this yummy, Autumn-y goodness!
🍁 Fall for More Leaf Blocks
Can't get enough autumn vibes? I've got a collection of leaf blocks just waiting to fill your quilting queue! 🍂✨
While the following blocks look nothing like a leaf, some of their names contain 'leaf' or 'leaves'. (filed under 'you could have knocked me over with a feather'!) 😏
For even MORE blocks to make… 🧩🎨

...visit our Free Quilt Block Pattern Library, with over 260+ blocks to choose from in multiple sizes.
Free downloads are included in all sizes for any blocks require paper piecing patterns or templates.
- Home
- Free Quilt Block Patterns
- Autumn Leaves Quilt Block
