- Home
- Free Quilt Block Patterns
- Diamond Rectangle Quilt Block
Diamond Rectangle Quilt Block Tutorial in 5 Sizes
From our Free Quilt Block Patterns Library
This post contains affiliate links, for which I receive compensation.
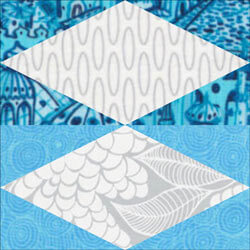
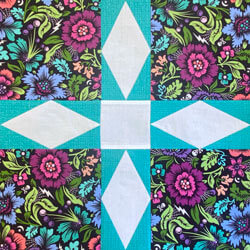
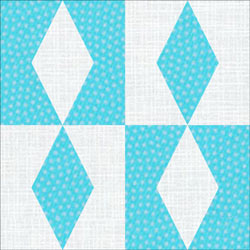
The Diamond Rectangle quilt block is a timeless, graphic design that packs a punch.
With its bold diagonal lines contrasted against the sturdy rectangle frame, this block makes a statement in any quilt design. The best part is that it's simple to sew but looks complicated and striking.

I'll share my handy tips for paper piecing success as we go. With the free printable pattern and cutting guide, you'll have everything you need to start sewing stunning Diamond Rectangle blocks.
Follow along as we assemble the unit, sew the block together, and press. You’ll see how easy it is to get perfect results...EVERY TIME!
🧭 Find just what you're looking for
As always, beginner-friendly, illustrated instructions are the backbone of the tutorial. Use these links to find just what you're after:
- No time to quilt? Pin or bookmark this for later
Cut. Sew. Press. Turn your fabric into MAGIC!
General Instructions
A few abbreviations are used on this page:
- SA - seam allowance
- RST - right sides together
- DR - Diamond Rectangle unit
When paper piecing, starched fabric (IMHO) is the only way to go. It cuts and sews more accurately, AND you can fingerpress in between patches. That shaves some extra time from hopping back and forth from the iron.
A 50/50 mix of liquid starch concentrate to water is my go-to recipe.
Download and print paper piecing pattern and template
To download the pattern, use the most current version of Adobe.
For accurate results, on Adobe's Print Menu page, under 'Page Size and Handling' set 'Custom Scale' to 100%. Then print.
Click here to see what it looks like on the Print Menu page.
Find your finished block size from the chart below. The number of blocks on each page is also listed for your convenience. Print only one copy of the template page that goes with your chosen block size.
Download and Print | |||
|---|---|---|---|
| Sizes | Patterns per copy | Templates | |
| Finished | Unfinished | ||
| 1" x 2" | 1½" x 2½" | 8 | 1 |
| 1½" x 3" | 2" x 3½" | 6 | |
| 2" x 4" | 2½" x 4½" | 4 | |
| 2½" x 5" | 3" x 5½" | 2 | |
| 3" x 6" | 3½" x 6½" | 2 | |
After printing, use the 1" square graphic on the printed page(s) to double-check that your pattern is printed at the correct size.
Then cut out the required number of patterns from your copies. A rough cut is good enough—an 1/8"-1/4"-ish away from the outside dashed square.

Not sure which paper to use?
Take a look at my review of several of the most popular brands available to us quilters on the market.
You want a super-easy paper to tear away—less stress on the stitches.
New quilt fabrics to tickle your fancy...
Click the images below to see the full collection. We share any commercial and/or free patterns that showcase them, too. (For inspiration, of course!)
Step 1: Cutting patches for a Diamond Rectangle quilt block
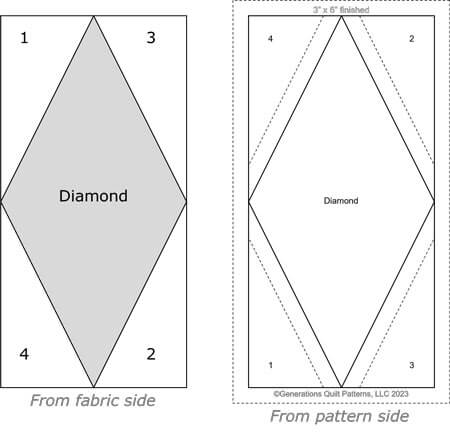
Sample Block Size: 3" x 6" finished / 3½" x 6½" unfinished
Grid: 1x2
Design Type: Paper piecing, Basic quilt unit
Please label your patches. We use their numbers throughout this tutorial.
To print a copy of the block design and cutting chart to use at your cutting table, click here.
 | Cutting Chart for a~ Paper Piecing ~ | ||||||
|---|---|---|---|---|---|---|---|
| Patch | Fabric | Qty | Finished Block Size | ||||
| 1" x 2" | 1½" x 3" | 2" x 4" | 2½" x 5" | 3" x 6" | |||
| Diamond | A | 1 | 1½'' x 2½'' | 2'' x 3½'' | 2½'' x 4½'' | 3'' x 5½'' | 3½'' x 6½'' |
| 1, 2, 3, 4 | B | 2 | 2⅜'' x 2¼'' | 2⅝'' x 2¾'' | 2⅞'' x 3¼'' | 3⅛'' x 3¾'' | 3⅜'' x 4¼'' |
| Unfinished Block Size | 1½" x 2½" | 2" x 3½" | 2½" x 4½" | 3" x 5½" | 3½" x 6½" | ||
| Grid Size | 1'' | 1½'' | 2'' | 2½'' | 3'' | ||
Subcutting the patches
Cut out the template that corresponds to your finished size. Cut on the lines for the short top, bottom, and side edges. Close is good enough for the long diagonal sides.
Position this template on top of the Diamond patches matching all four short sides with the edges of the patch.
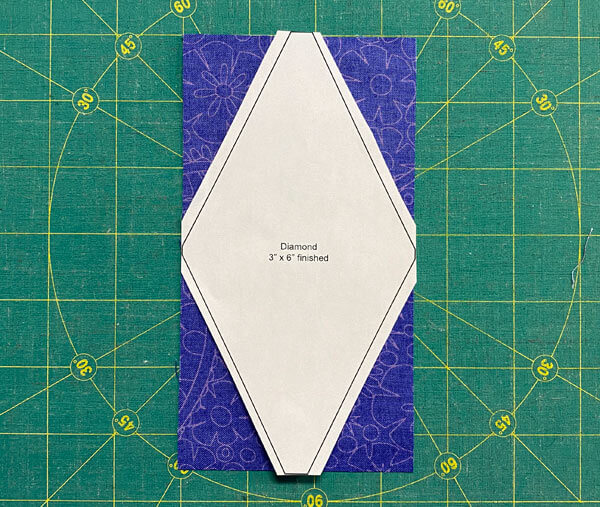
Trim away the excess.
If you find that the template wants to slip a bit too much for your liking, use a few pieces of Magic Tape&#reg; at your cutting mat to hold it in place. You'll cut right through it. Peel off the excess from your mat.
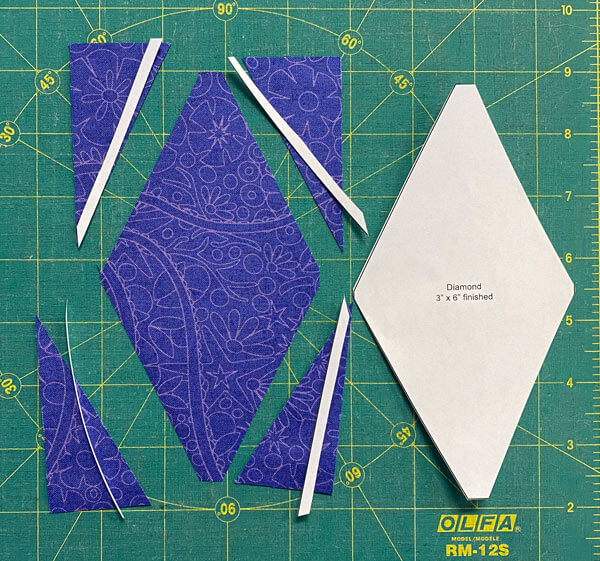
Position your two 1, 2, 3, 4 rectangles RST (and right sides together is IMPORTANT).
With a pencil, make a mark on the top edge 5/8" in from the left, and on the bottom edge 5/8" in from the right. This gives use the proper angle for our Diamond Rectangles.
Align your ruler with the marks and cut. This give you the four mirror-image patches you'll need to stitch the unit.
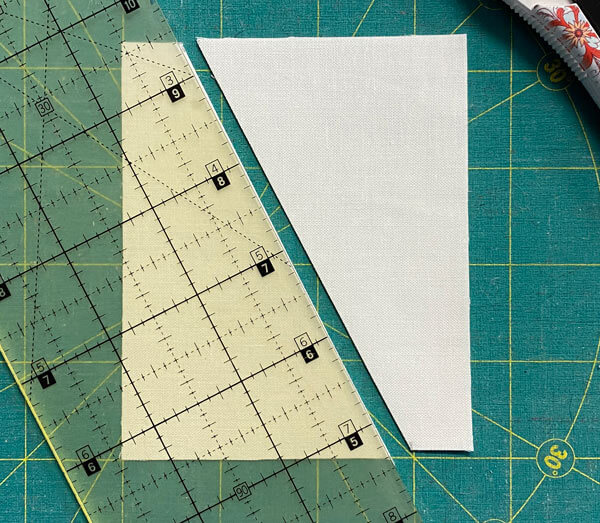
Word to the wise...
Don't layer these rectangles both right sides up or both wrong sides up. You end up with four identical long triangles. You'll have to cut the patches again.
Step 2: Assemble the Diamond Rectangle quilt block
General Sewing Machine Setup for Paperpiecing
- Reduce your stitch length to 16–20 stitches per inch (1.3-1.6 mm). This perforates the paper and stabilizes the seam when you remove the pattern. [Learn more about stitch length here.]
- Reduce your machine's speed or just plain slow down. Sew only as fast as you can stay on the stitching lines.
- Install an open toe appliqué foot (sometimes called an 'embroidery' or 'satin stitch' foot) if you have one (it's easier to see where you're stitching with one installed).
- Use a larger needle (90/14) if you have problems removing the pattern.
- If your machine has a needle stop up, use it. The stitching goes faster when you don't have to lift the presser foot with every seam.
- As you stitch each seam, start and stop a generous 1/4” before and after the solid stitching lines. ALWAYS. Future lines of stitching secure the ends.
After adding each patch, press the unit as it was sewn to set the seam and then open. The SA is automatically pressed towards the last patch added.
Before adding the next patch, take a look to make sure the one you just added covers the space plus seam allowance that it is supposed to.
Steam is optional and usually curls the pattern.
If that bothers you, don't use steam. Sometimes I do. Sometimes I don't.
It truly depends on my mood.
Remember, as you follow this paper piecing tutorial, the printed and the fabric sides of this block are mirror-images of each other.
At last!
Let's sew!
Use a dab of Elmer's Washable Glue Stick to hold the Diamond patch in position between the guidelines on the unprinted side of the pattern.
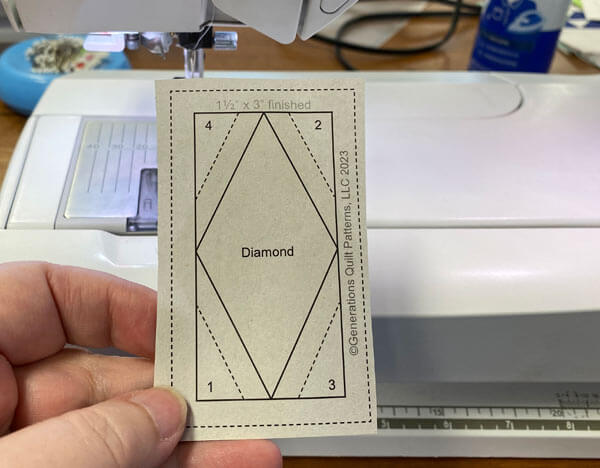 You can just make out the patch stuck in place on the backside of the pattern
With RST, position the #1 patch with one edge of the Diamond patch.
Since our diamond is darker than our background fabric, I've nudged the edge of the lighter side patch a few threads past the edge (red arrow). This prevents the darker fabric from shadowing through the quilt block and saves the effort of having to trim back a SA.
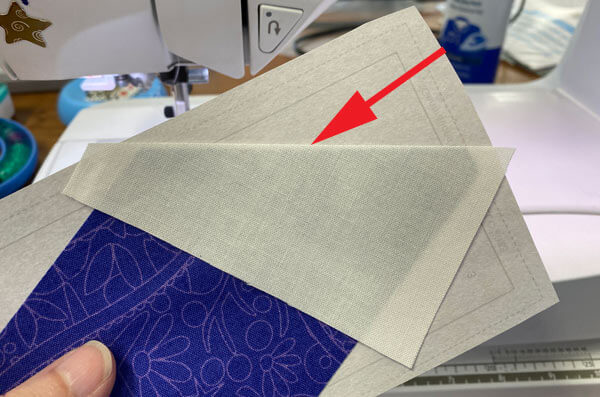
From the printed side, sew on the solid line between the two patches, starting and stopping past the outside dashed edges of the block.
Helpful Tip
If you find yourself missing the solid line as you stitch, the cure is to slow down. It's that simple.
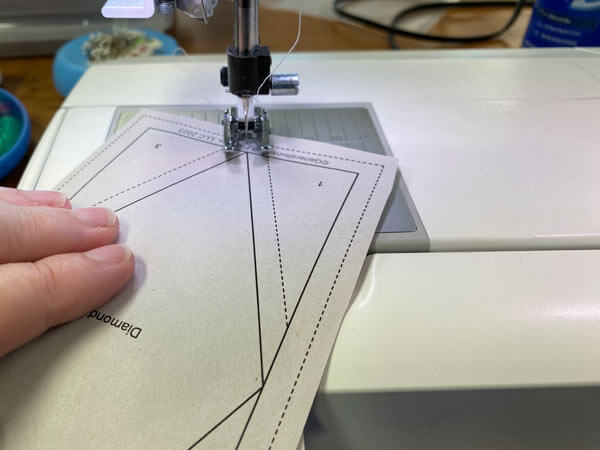
Press. Particularly for the smaller sizes, it's easier to do after adding each patch. There's not enough room between #1 and #2 to do it every two patches. Once the DR gets big enough, add #1 and #2, press, add #3 and #4, press.
With RST, add #2 the same way as #1.
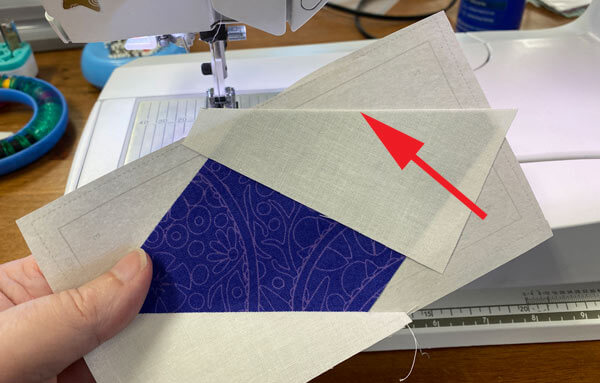 Again I've nudged the #2 patch to prevent shadowing
Repeat for #3.
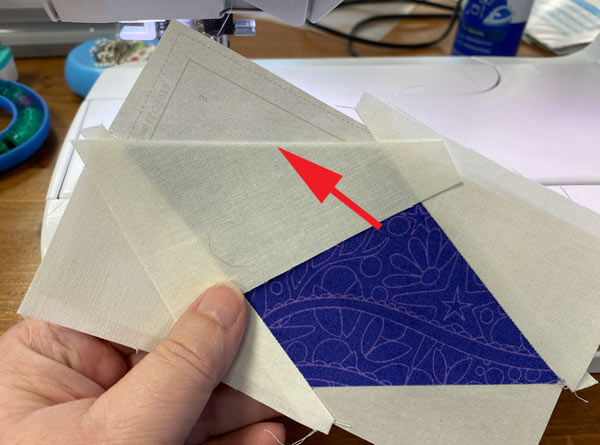
Add #4.
Give it a good press—we want those seams nice and flat!
Below are two different size DRs.
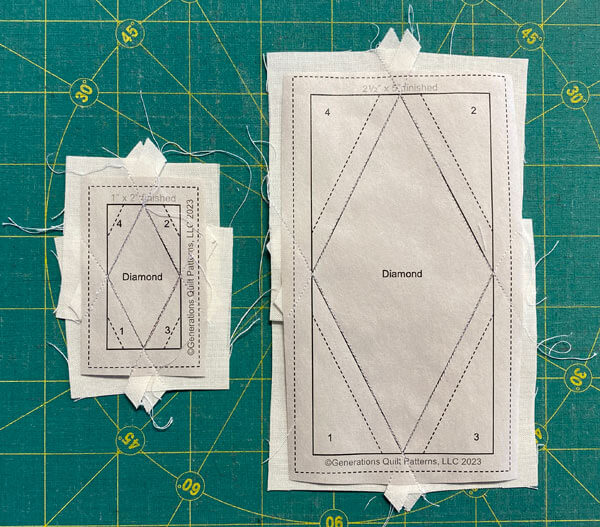 Check out how every seam extends past the outside dashed edges. This is EXACTLY what you want.
There's roughly the same amount of excess fabric around the outside edges regardless of the block size you choose.
And now from the front before trimming to perfection.
Yeah. It's kind of a hot mess right now.
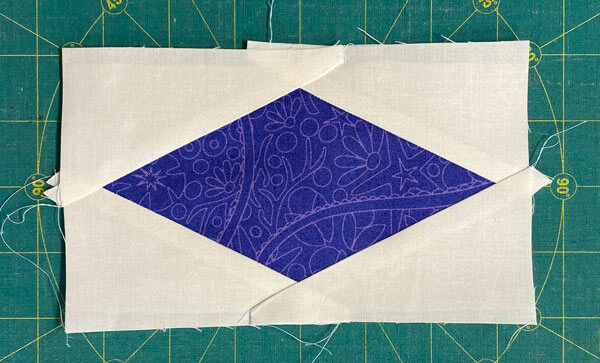 Notice how none of the thread tails were trimmed particularly close as we stitched the patches. No need to waste a single movement. We'll give them as we trim to perfection.
At your cutting mat, pattern side up, line up the 1/4" marks on your ruler with one of the sides of the solid rectangle line (red arrow) and trim away the excess.
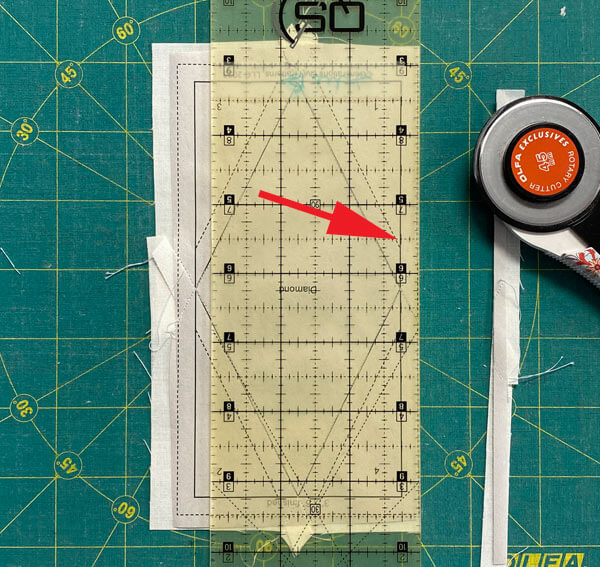
Repeat for all the edges of your Diamond Rectangle quilt block.
These are the 5 finished blocks.
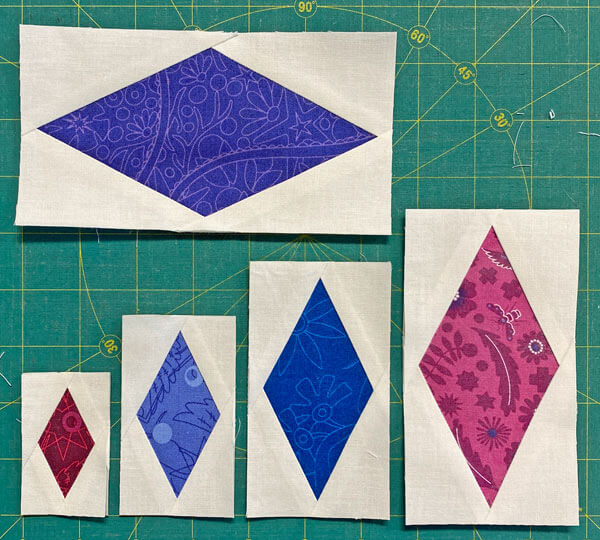
Remove the paper now. It no longer serves a purpose.
Since we deliberately cut our patches on the straight of grain, all the outside edges are also on straight of grain. They are as stable as any block you'd piece using traditional methods.
Return your sewing machine to its regular settings.
🔍 Where do we find Diamond Rectangle quilt blocks?
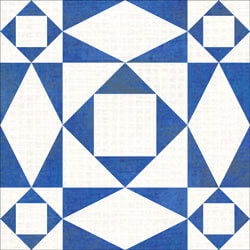
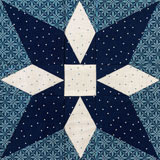
I wish I could promise that you'll use this block a lot, but after going through Maggie Malone's 5500 Quilt Block Designs, I only found a handful of blocks:
You'll find lots more on the Storm at Sea quilt block here on this website.
Commercial quilt patterns that use the Diamond Rectangle unit, usually contain some variation of the Storm at Sea block.
I ABSOLUTELY prefer to paper piece block. There's no specialty ruler to buy, store, or learn how to use. No instructions to keep track of.
AND...
As long as you stitch on the line, all those points end up exactly where you need them to be.
It's time for you to try your own Diamond Rectangle quilt block
With the free printable patterns, cutting charts, and illustrated instructions, you have everything you need to start stitching striking Diamond Rectangle blocks. Paper piecing takes the guesswork out of getting perfect points.
Follow the steps to cut, sew, and press. Soon you’ll be trimming your blocks to perfection.
The bold graphic design packs a punch in any quilt. Give this timeless classic a try—you’ll love the results!
The Basic Building Blocks of Quilting
Click here for instructions for more beginner-friendly quilt blocks and units in our basic building blocks of quilting series.
You'll find multiple methods for all of these basic units:
Rail Fence, Half Square Triangles, Quarter Square Triangles, 4-Patch, 9-Patch, Square in a Square, Triangle in a Square, Corner Beams, Half Rectangle Triangles, and Flying Geese.
Choose the technique that works best for your skill set and your project.
For even MORE blocks to make… 🧩🎨

...visit our Free Quilt Block Pattern Library, with over 260+ blocks to choose from in multiple sizes.
Free downloads are included in all sizes for any blocks require paper piecing patterns or templates.
- Home
- Free Quilt Block Patterns
- Diamond Rectangle Quilt Block
