- Home
- Free Quilt Block Patterns
- Birds in the Air Quilt Block Pattern
Birds in the Air Quilt Block Pattern
(Traditional Piecing)
This post contains affiliate links, for which I receive compensation.
Skill Level: Confident Beginner
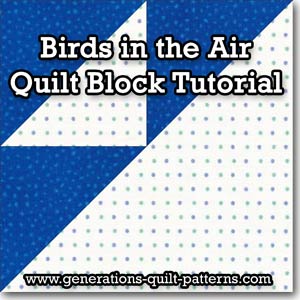
A Birds in the Air quilt block pattern can be easily pieced using rotary cut patches.
On this page are instructions to do so for four different block sizes.
There's also a list of blocks with the same name but look different.
🧭 Quick Navigation
On this page, you'll find:
- A cutting chart for 7 different block sizes that you can print
- Beginner-friendly, step-by-step illustrated instructions to make the block pattern
- Other blocks that go by the same name, but look entirely different
Let's get started!
Prefer to paper piece this block?
Click here to go to paper piecing instructions for the Birds in the Air quilt block pattern.
📥 General Instructions
These abbreviations are used in this tutorial:
- RST - right sides together
- HST - half square triangle
- SA - seam allowance
All SA are 1/4".
When you are instructed to press, first press the pieced unit flat to set the seam. Then open the patch, pressing from the front to prevent any tucks from occurring in the seam.
Pressing instructions are highlighted in yellow.
Especially when I'm working with bias edges, as in this quilt block pattern, I like to starch my fabrics...heavily.
The starch provides stability and reduces the possibility of stretching those bias cut edges as I work with the block.
The newest quilt fabrics to tickle your fancy...
Click the images below to see the full collection. We share any commercial and/or free patterns that showcase them, too. (For inspiration, of course!)
✂️ Cut patches for your Birds in the Air block
📢Updated Tutorial Note:
Since first publishing this pattern, I've now updated the paper piecing patterns and added the prefix of BitA to the numbering. This helps identify the patches for this unit in the cutting chart. For consistency's sake, the numbering for the traditionally pieced block has the same numbering.
Other than that, everything else is the same.
If you see a tutorial on this site where the BitA is missing, I missed it. Regardless, the piecing order does not change,
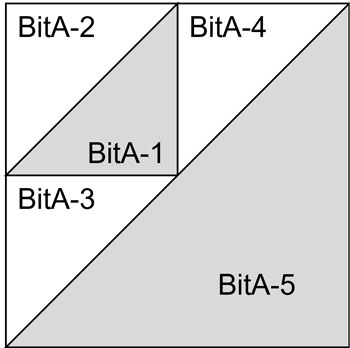 Birds in the Air design
Sample Block Size: 4" finished / 4½" unfinished
Grid size: 1-1/4"
Technique: Paperpiecing
Design Type: Basic quilt block | 4-patch
The chart below provides cutting dimensions in 7 sizes. For this sample block, we're cutting the patches to make a 4" finished block.
To print a copy of the block design and cutting chart to use at your cutting table, click here.
 | Cutting Chart for a~ Traditional Piecing ~ | |||||||||
|---|---|---|---|---|---|---|---|---|---|---|
| Patch | Fabric | Qty | Finished Block Size | Sub Cut | ||||||
| 1½'' | 2'' | 2½'' | 3'' | 4'' | 5" | 6" | ||||
| BitA-1 | A | 1 | 1⅝'' x 1⅝'' | 1⅞'' x 1⅞'' | 2⅛'' x 2⅛'' | 2⅜'' x 2⅜'' | 2⅞'' x 2⅞'' | 3⅜'' x 3⅜'' | 3⅞'' x 3⅞'' | |
| BitA-2, BitA-3, BitA-4 | Bac | 2 | 1⅝'' x 1⅝'' | 1⅞'' x 1⅞'' | 2⅛'' x 2⅛'' | 2⅜'' x 2⅜'' | 2⅞'' x 2⅞'' | 3⅜'' x 3⅜'' | 3⅞'' x 3⅞'' | |
| BitA-5 | A | 1 | 2⅜'' x 2⅜'' | 2⅞'' x 2⅞'' | 3⅜'' x 3⅜'' | 3⅞'' x 3⅞'' | 4⅞'' x 4⅞'' | 5⅞'' x 5⅞'' | 6⅞'' x 6⅞'' | |
| Unfinished Block Size | 2" | 2½" | 3" | 3½" | 4½" | 5½" | 6½" | na | ||
| Grid Size | ¾" | 1" | 1¼'' | 1½" | 2" | 2½" | 3" | na | ||
After subcutting
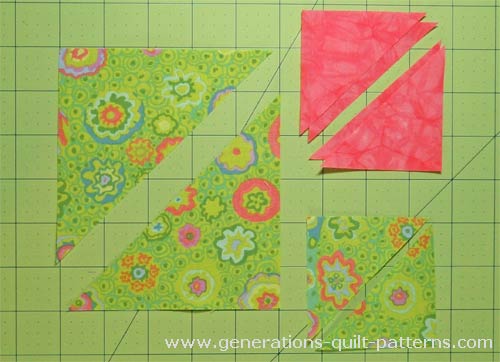
These are the cut patches. One pink and both a large and small green triangle will be left over at the end.
🪡 Assemble the Birds in the Air
For best results, take the time to take a Sewing Test to check the accuracy of your 1/4" seam. [Learn how to do this here.]
With RST, sew a #1 and #2 triangle together along the long bias edge to create a half square triangle unit. (Upper left in the photo below.)
Press, with the SA to the darker fabric (green).
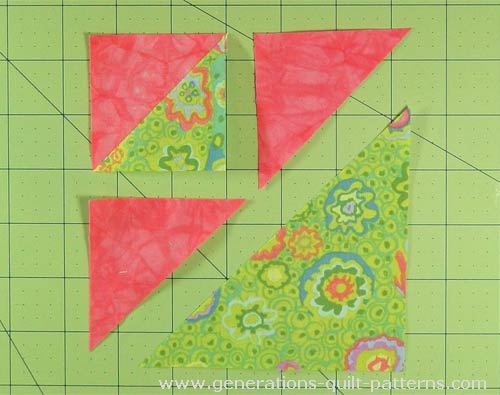 For our 4" finished sample, this HST (upper left) measures 2-1/2" edge to edge. Trim it to size if needed.
Use the chart below to find your block's Finished Size, and it's corresponding HST measurement.
HST Dimensions | |
|---|---|
| Finished Block Size | Trim HST to... |
| 1½" | 1¼" |
| 2" | 1½" |
| 2½" | 1¾" |
| 3" | 2" |
| 4" | 2½" |
| 5" | 3" |
| 6" | 3½" |
Lay out your patches as shown in the photo above.
With RST, match the short side of a BitA-3 (pink) triangle to the BitA-1/2 HST. Stitch as shown below.
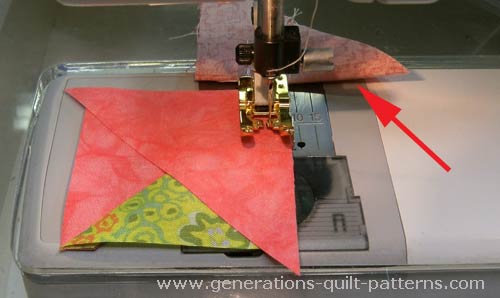
Press with the seam allowance away from the HST unit and towards the BitA-3 triangle.
The triangle you just added overhangs the HST unit by a smidge (see red arrow). This is correct. That excess disappears after the next line of stitching.
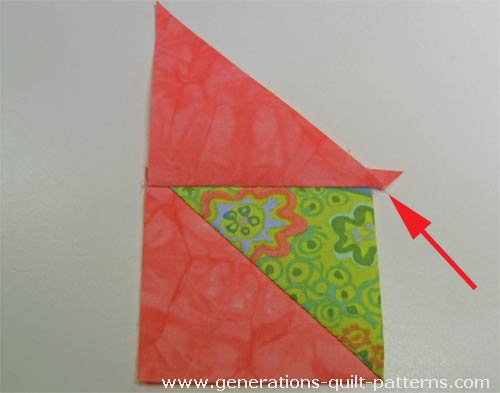
Repeat to add the BitA-4 triangle. Press, with the SA toward the BitA-4 triangle.
Trim the dog ears clean away (red arrow) with your scissor.
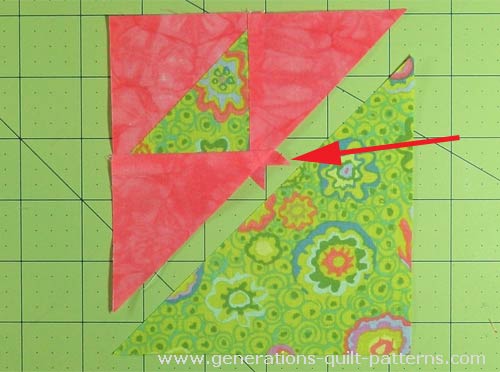
With RST, align the long edge of BitA-5 (green) with the long edge of the pieced unit and stitch.
Press, with the SA towards the BitA-5.
Trim away any remaining dog ears or thread tails.
Use the chart below to check the accuracy of your Birds in the Air quilt block. Our 4" finished block measures 4-1/2" x 4-1/2" from edge-to-edge.
Birds in the Air edge-to-edge dimensions after stitching | |
|---|---|
| Finished Block Size | Edge-to-edge Measurement |
| 1½" | 2" x 2" |
| 2" | 2½" x 2½" |
| 2½" | 3" x 3" |
| 3" | 3½" x 3½" |
| 4" | 4½" x 4½" |
| 5" | 5½" x 5½" |
| 6" | 6½" x 6½" |
This is your finished Birds in the Air quilt block pattern (below, left) with leftover patches (below, right).
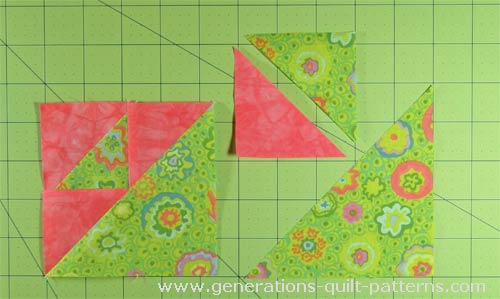 A finished Birds in the Air and the leftovers
If you came to these instructions from another quilt block tutorial...
...click the 'Back' button in your browser to return to that tutorial now.
To learn how to paper piece a Birds in the Air quilt block pattern, click here.
Make a Birds in the Air block variation
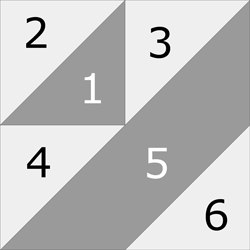 Birds in the Air variation
This simple variation is used in a handful of quilt block patterns and takes just a connector corner unit to complete.
You'll have the same leftovers as before, one each of #1, #2 and #5.
This is the cutting chart for this variation—all that's different is the addition of Patch #6.
If you prefer to paperpiece this unit, click here for that pattern and its instructions.
To print a copy of this cutting chart and design, click here.
 | Cutting Chart for a~Traditional Piecing ~ | ||||||
|---|---|---|---|---|---|---|---|
| Patch | Fabric | Qty | Finished Block Size | Sub Cut | |||
| 2" | 2 1/2" | 3" | 4" | ||||
| 1 | A | 1 | 1⅞" x 1⅞" | 2⅛" x 2⅛" | 2⅜" x 2⅜" | 2⅞" x 2⅞" | |
| 2, 3, 4 | Bac | 2 | 1⅞" x 1⅞" | 2⅛" x 2⅛" | 2⅜" x 2⅜" | 2⅞" x 2⅞" | |
| 5 | A | 1 | 2⅞" x 2⅞" | 3⅜" x 3⅜" | 3⅞" x 3⅞" | 4⅞" x 4⅞" | |
| 6 | Bac | 1 | 1½" x 1½" | 1¾" x 1¾" | 2" x 2" | 2½" x 2½" | --- |
| Unfinished Block Size | 2½" | 3" | 3½" | 4½" | --- | ||
| Grid Size | 1" | 1¼" | 1½" | 2" | --- | ||
Instructions to assemble the variation
Make this Birds in the Air using the same steps for Patches #1-#5 as shown above.
On the backside of #6 draw a diagonal line from corner to corner.
With RST, layer the marked #6, RST with the unit #1-#5.
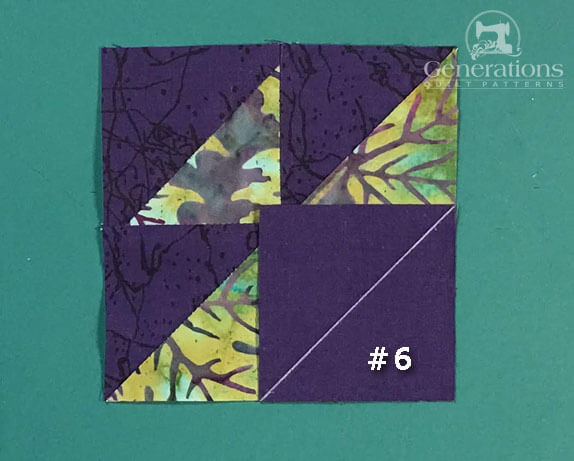
Stitch on the line.
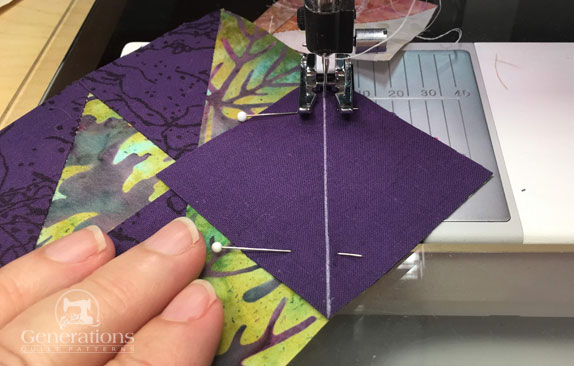 Pin to hold things in place if needed
Give it a quick press to set the seam.
Trim the excess fabric away leaving behind a 1/4" seam allowance.
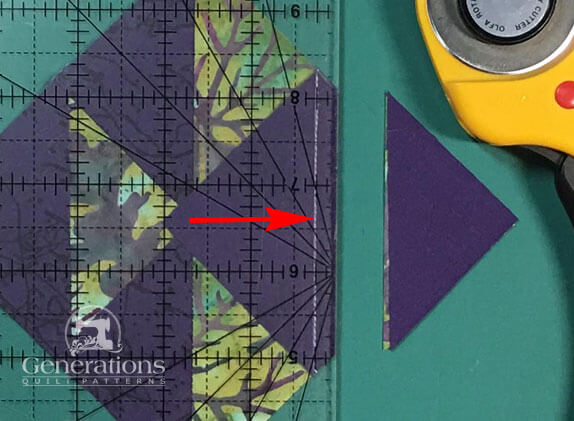
Press your Birds in the Air variation on last time with the last SA toward the darker fabric.
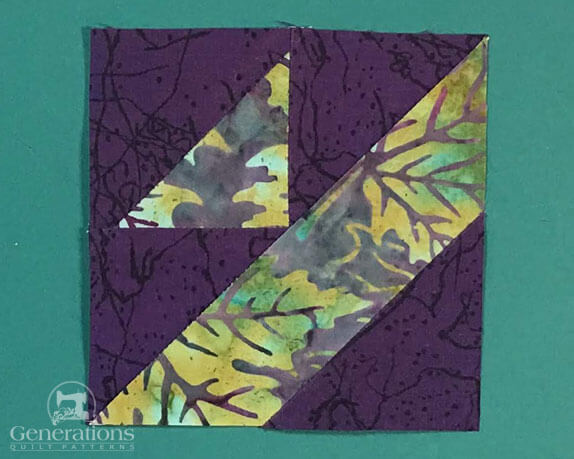 This Birds in the Air variation is complete!
Same name, different block...
It happens.
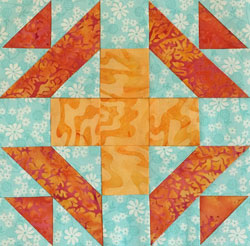
Blocks designed in different places may use the same geometric shapes and have different names. Or different shapes but the same name. These are all known as a Birds in the Air quilt block.

The patches are the same, but a third fabric is added.
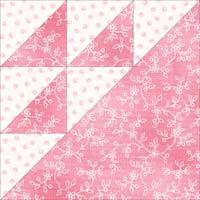
Same basic idea now drawn on a 3x3 grid. 3 complete HSTs instead of one.
This block is also called 'Flock of Geese'. And you guessed it!
We've got a tutorial for it here. :)
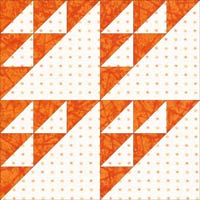
Simply a group of 4 of the previous design.
Its other names include: Flying Birds, Flock of Geese and Flight of Swallows.
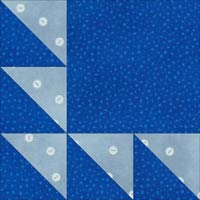
This variation looks more like a portion of the Bear Paw quilt block.
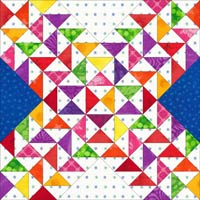
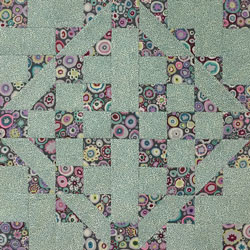
This Birds in the Air is a completely different looking block and significantly more complex to piece.
It's also called 'Ocean Waves'.
The Basic Building Blocks of Quilting
Click here for instructions for more beginner-friendly quilt blocks and units in our basic building blocks of quilting series.
You'll find multiple methods for all of these basic units:
Rail Fence, Half Square Triangles, Quarter Square Triangles, 4-Patch, 9-Patch, Square in a Square, Triangle in a Square, Corner Beams, Half Rectangle Triangles, and Flying Geese.
Choose the technique that works best for your skill set and your project.
For even MORE blocks to make… 🧩🎨

...visit our Free Quilt Block Pattern Library, with over 260+ blocks to choose from in multiple sizes.
Free downloads are included in all sizes for any blocks require paper piecing patterns or templates.
- Home
- Free Quilt Block Patterns
- Birds in the Air Quilt Block Pattern
