- Home
- Free Quilt Block Patterns
- Flying Squares Quilt Block
Flying Squares Quilt Block
From our Free Quilt Block Patterns Library
This post contains affiliate links, for which I receive compensation.
A Flying Squares quilt block is a little bit of whimsy that's easy to stitch.
Just squares and rectangles.
Fast. Easy.
Beginner friendly.
On this page you'll find instructions to make it in four different sizes.
There are also links to different blocks using the same partial seams technique.
Ready?
Let's cut up and sew!

📋 General Instructions

The following abbreviations are used in this tutorial:
- SA - seam allowance
- RST - right sides together
- BAC - background fabric
SA are 1/4" and pressed towards the darker fabric unless noted otherwise.
I like to starch my quilt fabric before cutting—even with a block as simple as this. I believe both the cutting and stitching is more accurate with starched fabric.
New quilt fabrics to tickle your fancy...
Click the images below to see the full collection. We share any commercial and/or free patterns that showcase them, too. (For inspiration, of course!)


Step 1: Cut patches for your Flying Squares block
 Flying Squares design
Sample Size: 5" finished / 5½" unfinished
Grid: 5x5
Attribution: Ladies Art Company
This design requires only two fabrics (as in our 5" sample block). It can also be pieced all in scraps.
If you choose a scrappy fabric pull make sure your backgrounds are close in value. Darks should also be close in value. But there should be high contrast between light and dark.
If you are a lover of 'leaders and enders' quilting, you'll recognize this as a perfect block for the technique.
Not sure what leaders and enders are?
Check out any of Bonnie Hunter's books to learn more—either Adventures with Leaders and Enders or More Adventures with Leaders and Enders.
 | Cutting Chart for a~Traditional Piecing ~ | |||||
|---|---|---|---|---|---|---|
| Patch | Fabric | Qty | Finished Block Size | |||
| 5" | 7½" | 10" | 15" | |||
| 1 | BAC | 5 | 1½" x 1½" | 2" x 2" | 2½" x 2½" | 3½" x 3½" |
| 2 | Dark | 8 | 1½" x 1½" | 2" x 2" | 2½" x 2½" | 3½" x 3½" |
| 3 | BAC | 4 | 1½" x 3½" | 2" x 5" | 2½" x 6½" | 3½" x 9½" |
| Unfinished Block Size | 5½" | 8" | 10½" | 15½" | ||
| Grid Size | 1" | 1½" | 2" | 3" | ||

Step 2: Assemble the units

Center
Make 1
Arrange five #1 and four #2 patches into a checkerboard design. #1s are in the corners.

With RST, stitch a #1 to a #2 in each row, pressing afterwards toward the #2 (pink in our sample).
Add the remaining patch to each pair so that you have two #1/#2/#1 units and one #2/#1/#2 unit, pressing the SAs again toward the #2 (pink) patch.

With RST, join the rows together, pressing after the addition of each row. Press SA toward the center row(the one with two #2s).
After stitching this unit measures 3-1/2" for a 5" finished block. 5" for a 7-1/2" one. 6-1/2" for a 10". Or 9-1/2" for a 15" block.
Sides
Make 4
With RST, sew a #2 square to a #3 rectangle. Press SA toward the #2.

Step 3: Assemble your Flying Squares quilt block
Arrange the units into the Flying square design.
 Nothing seems to line up here, but it'll work out as we sew.
To stitch the units together, we use the 'partial seams' or puzzle piecing technique. In this technique the first and last seam are sewn approximately half way.
With RST position a #3/#2 patch on top of the center unit. Start your stitching at the top white arrow (shown below) and end at the edge of the #2 square.

This is what it looks like as you sew.
 The #3/#2 unit is too long for the center. That's exactly how it should be for now.
With RST, add another #3/#2 unit to the side of your center that has four squares.
Below you can see that I've chosen to stitch this step with the center unit on top. Pins to help keep match points and edges aligned as I stitch.

Press this SA toward
Continue adding a #3/#2 to the side with four squares, pressing SA toward the outside edge each time.
After adding a #3/#2 to all four sides, our sample block looks like this. From the white arrow to the left edge of the block is all that's left to stitch.

Pin the last half of the first seam and stitch. I like to overlap my stitches a bit for security.
One final press with the SAs toward the outside edge. Our Flying Squares quilt block is ready for a quilt.
 Voila!
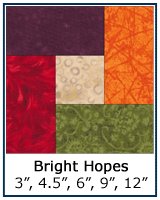
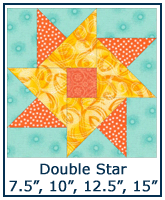
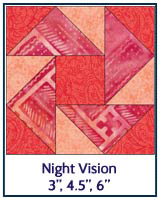
More blocks made with 'partial seams'
Several blocks on this site use this technique. Click any image below to go to that tutorial.

What about a different quilt block?
For a list of all the 220+ quilt block patterns on this site, start here.
If you know the name of the block, shorten your search by using these links:
Click here if you're looking for blocks with at least some paper piecing.
Click here if you're looking for the basic building blocks of quilting, i.e., Flying Geese, half square triangles, quarter square triangles, etc., along with several techniques to make each.
And finally, use these links to find blocks in these finished sizes:


Yummy fabrics
to drool over
Click any image below to see the full collection and find pricing and ordering information.


By Julie Baird
Copyright © 2008-2026 Generation Quilt Patterns, LLC
All Rights Reserved
Generations-quilt-patterns.com does not sell any personal information. (See Privacy Policy)