- Home
- Free Quilt Block Patterns
- Double Star Quilt Block
Star-Crossed Stitches: Mastering the Double Star Quilt Block
Where partial seams lead to total success! 🌟✂️
This post contains affiliate links, for which I receive compensation.
Skill Level: Confident beginner
The Double Star quilt block pattern is made from a hybrid of a half and quarter square triangles, and rectangles and a square. It uses four fabrics.
To piece the unit, we'll use a technique known as 'partial seams' or 'puzzle piecing'. No special tools, rulers, or templates are required. The patches are all rotary cut.
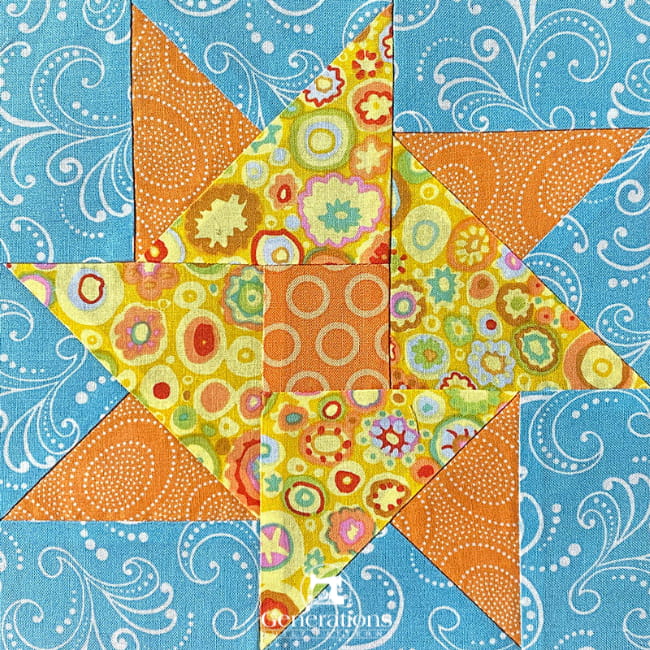
It's a fun little block to make that looks more complicated than it is. A couple of pins makes everything easy.
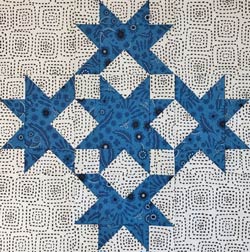
Not the Double Star pattern you were looking for?
'Double Star' is a common block name. There are many others.
Check out the instructions to make the variation shown here.
🧭Ready to navigate the quilting cosmos?
Use these warp-speed links to jump to any part of our Double Star adventure. No need for a Star Trek transporter—just click and zoom! 🚀🖱️
- A cutting chart in 5 sizes with a download of the chart and block design
Cut. Sew. Press. Beam your fabric into a stellar creation!
📋 General Instructions
All seam allowances (SA) are 1/4".
Several common abbreviations are used on this page. They are:
- SA - seam allowance
- QST - quarter square triangle
- RST - right sides together
- BAC - Background fabric
When you are instructed to press, first press the pieced unit flat to set the seams.
Then open the patch, pressing from the front.
The direction to press the SA is included at each step in this tutorial.
The fabric used in this tutorial was starched with a 50/50 mix of liquid starch liquid concentrate and water before cutting. Stiff fabric is easier to cut accurately and finger presses beautifully. For small batches of fabric, I'll use heavyweight spray starch in a can.
Best Press is a nice alternative; however, the resulting fabric is 'crisp' rather than 'stiff'.
The newest quilt fabrics to tickle your fancy...
Click the images below to see the full collection. We share any commercial and/or free patterns that showcase them, too. (For inspiration, of course!)
✂️Cut the Double Star patches
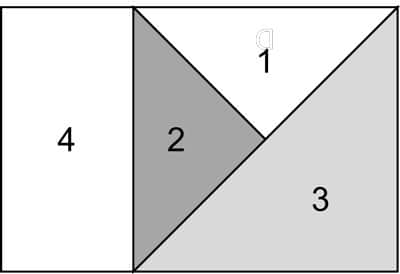
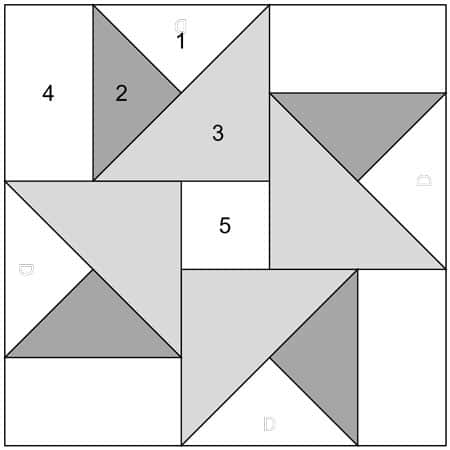 Double Star design
Sample Size: 7½" finished / 8" unfinished
Grid: 5x5
Attributed to: Nancy Cabot
AKA: Hope of Hartford (Farm Journal)
Design Type: Partial Seams/Puzzle Piecing | Star
For QST units, I like to start with over-sized patches and trim to actual size after stitching.
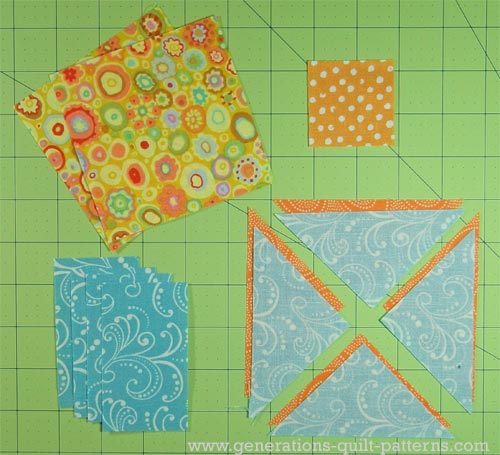
For the patches marked with an asterisk (*) in the chart below, I added an extra 3/8" to the listed dimensions before cutting.
After stitching, I cut them down to the perfect size (there's a chart in the instructions right where you need this information.)
While the block design is colored with a light (white) background above, in the sample I chose a medium blue value for the effect that I wanted.
Choose fabrics in the colors that work best for you. You want fabrics with enough contrast so that your piecing handiwork shows!
Set yourself up for success by labeling each patch. This simple step will make following the tutorial a breeze.
To print a copy of the block design and cutting chart to use at your cutting table, click here.
 | Cutting Chart for a~ Traditional Piecing ~ | |||||||
|---|---|---|---|---|---|---|---|---|
| Patch | Fabric | Qty | Finished Block Size | Sub Cut | ||||
| 5'' | 7½'' | 10'' | 12½'' | 15'' | ||||
| 1* | Bac | 1 | 3¼'' x 3¼'' | 4¼'' x 4¼'' | 5¼'' x 5¼'' | 6¼'' x 6¼'' | 7¼'' x 7¼'' | |
| 2* | Med | 1 | 3¼'' x 3¼'' | 4¼'' x 4¼'' | 5¼'' x 5¼'' | 6¼'' x 6¼'' | 7¼'' x 7¼'' | |
| 3* | Light | 2 | 2⅞'' x 2⅞'' | 3⅞'' x 3⅞'' | 4⅞'' x 4⅞'' | 5⅞'' x 5⅞'' | 6⅞'' x 6⅞'' | |
| 4 | Bac | 4 | 1½'' x 2½'' | 2 '' x 3½'' | 2½'' x 4½'' | 3 '' x 5½'' | 3½'' x 6½'' | --- |
| 5 | Bac | 1 | 1½'' x 1½'' | 2'' x 2'' | 2½'' x 2½'' | 3'' x 3'' | 3½'' x 3½'' | --- |
| Unfinished Block Size | 5½'' | 8'' | 10½'' | 13'' | 15½'' | |||
| Grid Size | 1'' | 1½'' | 2'' | 2½'' | 3'' | |||
In the photo below, I have not yet sub-cut the Large Star Points (yellow print) squares.
🪡Stitch the Double Star units
QST units
Make 4
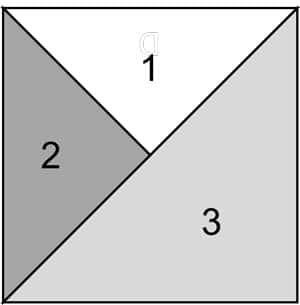
The QST units in this block are pieced from individually cut patches. The units are identical. There is no mirror imaging.
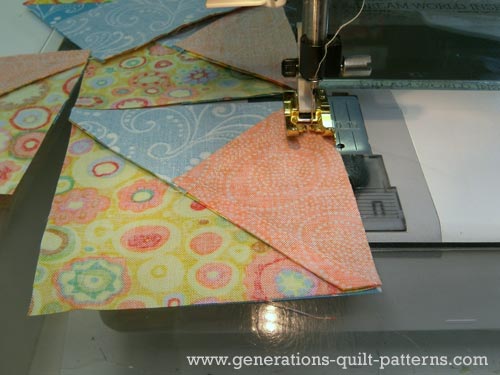
With RST, align the edges of one background triangle (#1) to one Small Petal triangle (#2). Double check the position of the patches to insure they are in the right position. Stitch.
Repeat for the three remaining pairs. To prevent sewing errors, keep the patches in the same order—the blue background fabric is always on top in the photo.
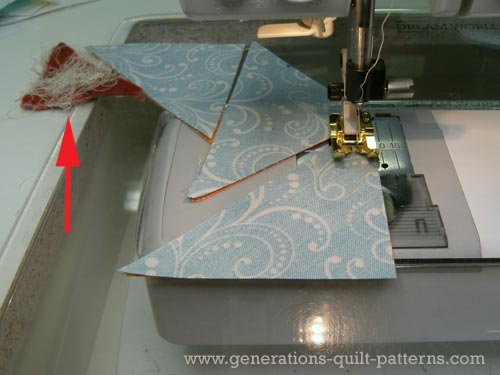 The red arrow points to my anchor cloth
Press SA toward the darker patch. In this sample block it's toward the blue #1. If you use a lighter background fabric this may be toward #2 instead.
You're ready for the next seam.

Align the long edge of this pieced #1/#2 unit with the long edge of the Large Petal triangle (#3). Stitch.
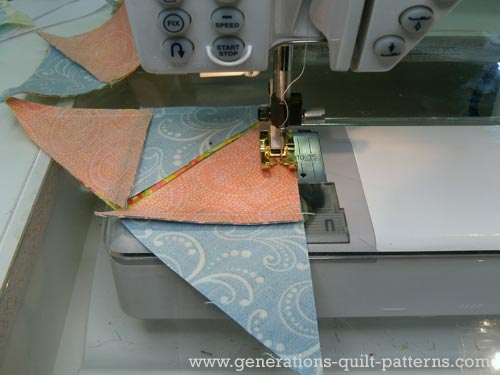
Press SAs toward the larger triangle(#3) to reduce bulk.
If you cut your QST patches larger, like I did, you'll need to trim them to size. Use the chart below to find the needed measurements.
If you cut them exactly to size, use the chart to check your accuracy, using the far-right column. Make any adjustments needed.
For a refresher on trimming QST units to size, click here to review this technique in Quarter Square Triangle, Technique #1, Steps 6-7.
The Center measurement for this QST in our 7-1/2" finished Double Star quilt block is 1-3/4".
| Finished Block Size | The center of the QST unit is at… | Trim QST unit to... |
|---|---|---|
| 7 1/2" | 1 3/4" | 3 1/2" |
| 10" | 2 1/4" | 4 1/2" |
| 12 1/2" | 2 3/4" | 5 1/2" |
| 15" | 3 1/4" | 6 1/2" |
After trimming/checking for accuracy and pressing, with RST add the #5 background rectangle to the #2 side of each QST unit as shown below.
 Add a #4 to the #2 side of each QST
 The units are stitched together with the pieced QST on top. That way, I can ensure that the seam allowances don't flip over and twist during stitching.
Press. SA toward the background fabric. Repeat for the 3 remaining pairs.
🧩Sewing it all together
To construct this Double Star quilt block, the first seam is a partial one. This is done to create an edge equal in length to the remaining units.
With RST, align the center square (#5) with the corner of the Large Petal fabric. Pin if needed. You will stitch along the long side of the QST unit for a little more than half the length of the center square.
Our stitching is between the black lines.
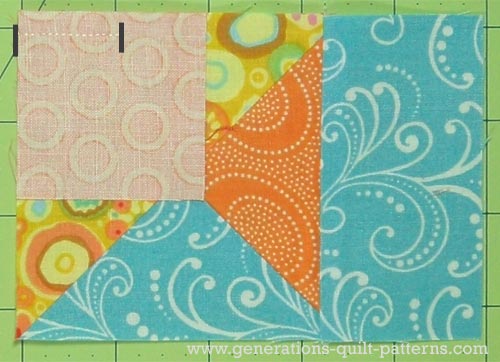 Sew a bit more than half the seam to attach the center
square to the first quarter square triangle unit
Press with SA towards the center square.
With RST, align the next QST unit with the edge of the Center/QST unit. Stitch.
Press.
Seam allowance towards the QST.
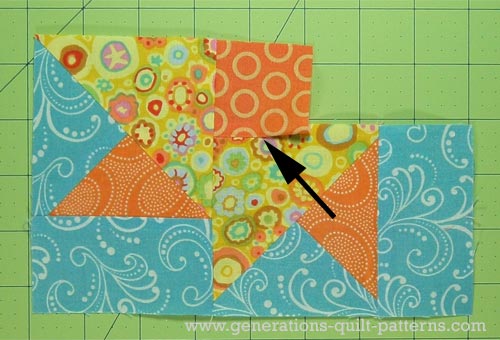
Repeat for the third unit, pressing towards the center square.
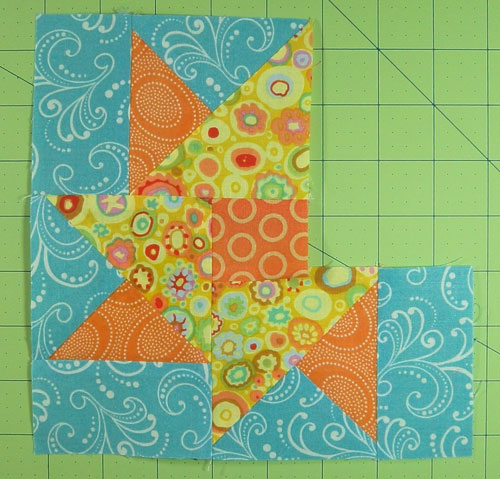
Add the fourth. Pins were helpful to keep the layers evenly together during sewing. Press the sewn SA away from the center.
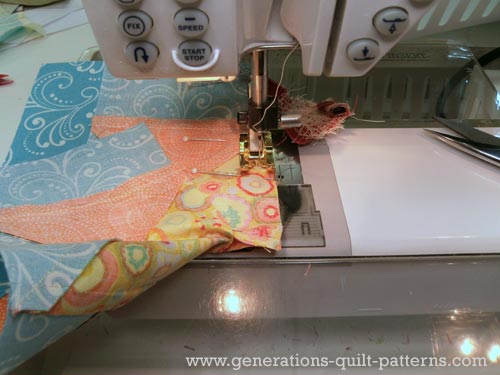
This is how the block looks from the front before pinning the last, partial seam line.
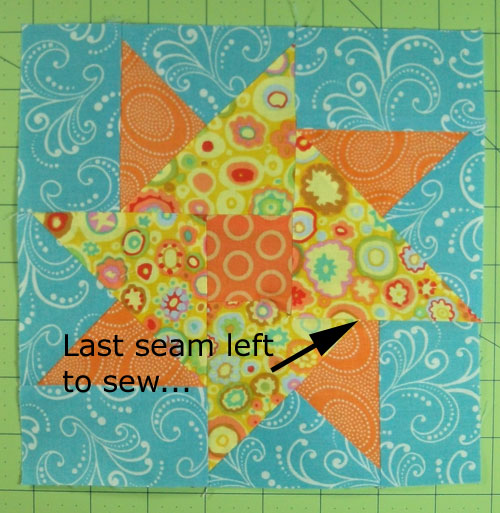
Now things can get a bit lumpy. Nothing that a few pins can't tame.
In the photo below, you can see how I've pinned to align and hold the edges. The far-right pin is inserted past the original stitching line. This is to help hold things flat and out of the way.
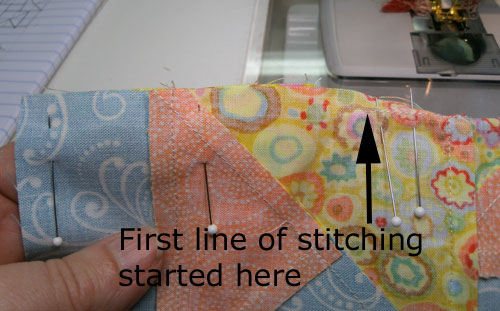
Stitch this final bit.
Press, SA towards the center square.
This is how the block looks from the back.
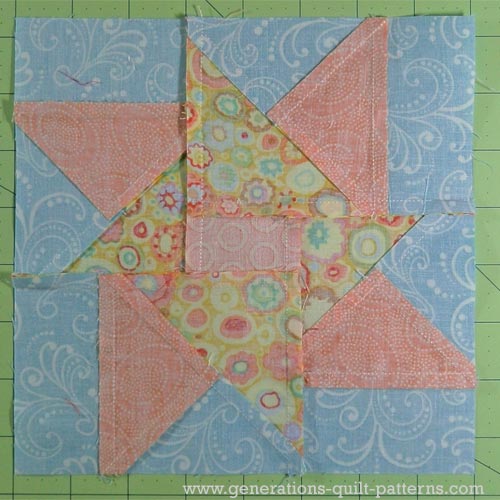
Your finished Double Star Quilt Block from the front.
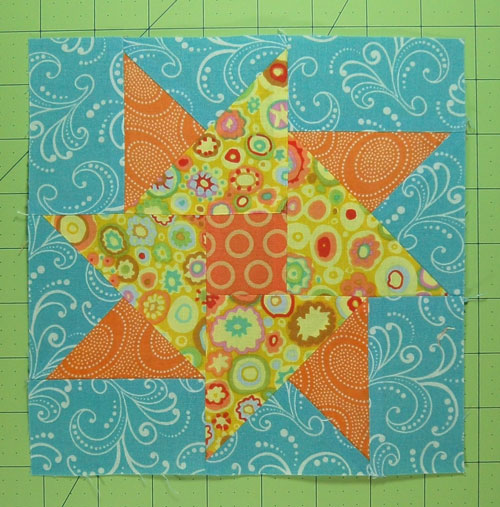
Seam-ingly Impossible: Your Double Star Triumph" 🌟
You've mastered the Double Star block like a true Jedi.
From partial seams to precise trimming, you've conquered it all 💪✂️. Now go forth and create quilts that are out of this world! 🚀🌠 Remember: in the game of quilts, you're now a star player! 🏆
Keep calm and Double Star on! 👑
📌 Don't let this stellar tutorial get lost in space!
Pin it faster than the Millennium Falcon on the Kessel Run! 🚀
🔭 Looking for something truly stellar?
You've finished your star quilt block, and you're ready for more!
Browse our collection of 70 stellar star quilt block patterns. All have instructions and cutting charts in multiple sizes. If templates or paper piecing is used in the tutorial, there's a free download for you of those materials.

Eeny. Meenie. Miney. Moe.
Which star quilt block will you sew?
For a star-studded quilting experience, choose from 100+ bedazzling star quilt patterns—for beginners and beyond—click here.
For even MORE blocks to make… 🧩🎨

...visit our Free Quilt Block Pattern Library, with over 260+ blocks to choose from in multiple sizes.
Free downloads are included in all sizes for any blocks require paper piecing patterns or templates.
- Home
- Free Quilt Block Patterns
- Double Star Quilt Block

