- Home
- Free Quilt Block Patterns
- Double Pinwheel Quilt Block
Double Pinwheel Quilt Block Pattern
From our Free Quilt Block Patterns Library
This post contains affiliate links, for which I receive compensation.
Skill Level: Confident beginner
The Double Pinwheel quilt
block is made completely of quarter square triangle units in three
fabrics.
The QSTs form a small pinwheel and the HSTs a large one, hence the name.
 Pin It to enjoy later!
This same block can be colored in several other ways using two or three fabrics to create a number of variations in look of this block. Those variations and their cutting instructions are below. There are 5 different block sizes included here.
This block would make an adorable baby quilt.
In the larger block sizes, it'd be quick to whip up. As smaller blocks they'd be great for a block exchange with your quilting bee or guild.
General Instructions
All seams are 1/4".
Several abbreviations are used:
- SA - seam allowance
- QST - quarter square triangle
- RST - right sides together
When instructed to press, first press the pieced unit flat to set the seam. Then open the patch, pressing from the front.
Seam allowances are pressed to the dark fabric unless otherwise noted.
The instructions that follow are for a traditionally pieced block, though your Double Pinwheel could easily and efficiently be paper pieced. (Click here for those instructions and the free downloadable paper piecing patterns.)
New quilt fabrics to tickle your fancy...
Click the images below to see the full collection. We share any commercial and/or free patterns that showcase them, too. (For inspiration, of course!)


Step 1: Cut the fabric patches for a Double Pinwheel
 Double Pinwheel block design
Sample Size: 6" finished / 6½" unfinished
Grid: 2x2
Design type: Pinwheel
AKA: Old Windmill (Nancy Cabot), Windmill (Farm Journal, Ruby McKim)
The measurements in the chart below are exact. If your quarter inch seam allowance is reliably accurate, use these measurements.
All the numbers in the chart below represent squares (to make the chart easier to read).
Personally, I prefer to make quarter square triangles (QST) with oversized patches, sew them, and then trim to the perfect size.
So if a patch for #1 is 4-1/4", I added a quarter inch and cut it 4-1/2" x 4-1/2". Necessary subcuts are at the end of each row for #1-#3.
Stitch as directed in the instructions.
After sewing the QSTs, there's a chart so that you can check that they are accurate, trimming if needed.
 | Cutting Chart for a~Traditional Piecing ~ | |||||||
|---|---|---|---|---|---|---|---|---|
| Patch | Fabric | Qty | Finished Block Size | Sub Cut | ||||
| 3" | 4" | 5" | 6" | 8" | ||||
| 1 | A | 1 | 2¾" | 3¼" | 3¾" | 4¼" | 5¼" | |
| 2 | B | 1 | 2¾" | 3¼" | 3¾" | 4¼" | 5¼" | |
| 3 | C | 2 | 2⅜" | 2⅞" | 3⅜" | 3⅞" | 4⅞" | |
| Unfinished Block Size | 3½" | 4½" | 5½" | 6½" | 8½" | na | ||
| Grid Size | 1½" | 2" | 2½" | 3" | 4" | na | ||
After the sub-cutting they look like this.

Step 2: Assemble the units for your Double Pinwheel
With RST, align the edges of one #1/white dot and #2/blue dot patch. So that the patches end up in the proper position, stitch with #2/blue on top and feed the blunt edge into your sewing machine first.
 That red arrow is pointing towards my anchor cloth.
I always use one.
Press the unit flat. Then press it open with the seam allowance towards #2/blue dot.
The edges of this stitched pair should be straight and even.
 This edge is nice and straight
With RST, align the long edge of this pieced unit with the long edge of the #3/yellow triangle.
Stitch.
The red arrow below points to my anchor cloth.

Press the unit flat to set the seam. Then press open with the seam allowance towards the #3/yellow patch.
Repeat for the three remaining units.
The QSTs look like this before trimming.
 This unit measures 3½" for our 6" sample, trim as needed.
Check for Accuracy
If you used the exact size for cutting the original squares, measure your block to confirm it is the correct size (see 'Size, edge-to-edge' in the chart below).
Check for Accuracy ~ Whirlwind QST units | |||||
|---|---|---|---|---|---|
| Finished Block Size | |||||
| 3" | 4" | 5" | 6" | 8" | |
| Center (Midpoint) | 1" | 1¼" | 1½" | 1¾" | 2¼" |
| Size, edge-to-edge | 2" | 2½" | 3" | 3½" | 4½" |
If you added a 1/4" to the dimensions to create generous squares, it's time to trim our patches to 3-1/2" for our 6" finished sample. Use the 'Center (Midpoint)' measurement from the chart above.
Click here for a review on trimming quarter square triangles if needed. (This link opens in a new page to make it easier to come back to this spot.)

Step 3: Assemble your Double Pinwheel quilt block
Arrange your Double Pinwheel quilt units so that there is one #1/white dot triangle on the outside edge of each side.
The diagonal seams will nest for each two block row. Pin them if needed. Stitch. Press flat and then open with the seam allowance towards Fabric C/blue dot.
Your rows look like this.

Again, the seams in the center of the block will nest which makes matching the center seam allowances so much easier. Pin if needed. Stitch the rows together.

Press flat to set the seam. Then twirl the center seam allowance to distribute the bulk.
When the seam is twirled or pinwheeled it forms a 'mini-pinwheel'. In this block, all the seams are pressed counterclockwise.
This is how your Double Pinwheel quilt block looks from the back.
 The twirled seam allowances form a pinwheel on the back
And this is the finished Double Pinwheel quilt block from the front.

Common Variations
 QST fabric key
For such a simple design, there are many variations on the Double Pinwheel quilt block.
The QST.1-3 fabrics are identified for all the blocks below.
Simply choose your block and a size, make your fabric choices and you're ready to make any block on this page!
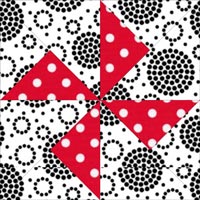
Turnstile
QST.1:White
QST.2:Red
QST3:White
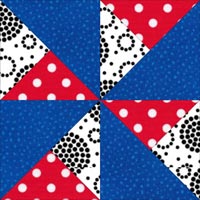
Whirlwind
QST.1:Blue
QST.2:Red
QST3:White
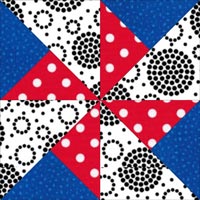
Whirligig
QST.1:2)Red and 2)white
QST.2:2)White and 2)red
QST3:Blue
Cut the patches for your block size. Stitch the QST pairs together, two with Fabric B on top—two with C on top—to position the fabrics correctly.
🌀More playful pinwheel quilt blocks to stitch!

You've finished your pinwheel quilt block, and you're ready for more!
Our pinwheel quilt blocks are a delightful blend of playful interlocking patterns and vivid, eye-catching color. The interlocking patterns dazzle your eyes and inspire your creativity, while our step-by-step instruction ensures that you can create these stunning blocks with ease.
Click here to dive in and turn your fabric into MAGIC!
For even MORE blocks to make… 🧩🎨

...visit our Free Quilt Block Pattern Library, with over 260+ blocks to choose from in multiple sizes.
Free downloads are included in all sizes for any blocks require paper piecing patterns or templates.
- Home
- Free Quilt Block Patterns
- Double Pinwheel Quilt Block


Yummy fabrics
to drool over
Click any image below to see the full collection and find pricing and ordering information.


By Julie Baird
Copyright © 2008-2026 Generation Quilt Patterns, LLC
All Rights Reserved
Generations-quilt-patterns.com does not sell any personal information. (See Privacy Policy)