- Home
- Free Quilt Block Patterns
- Churn Dasher Quilt Block
Master the Churn Dasher Quilt Block: 8 HSTs in One Dash!
Where HSTs take the fast lane! 🏃♀️✂️
This post contains affiliate links, for which I receive compensation.
Skill Level: Beginner
The Churn Dasher quilt block is racing into our hearts faster than a quilter at a fabric sale! This speedster of a block combines quick-cutting magic with the satisfaction of creating eight half-square triangles in one fantastic dash.
It's a good block for the beginning quilter to practice this method for making half square triangles. A great technique for every quilter to have in their 'piecing arsenal'!
🧭 Ready to dash through this tutorial? 💨
Ready to dash through this tutorial? 🏃♀️ Splash into any section below—we've mapped out your quilting adventure so you can navigate straight to the good stuff! 🗺️✨
- A cutting chart in 5 sizes with a download of the chart and block design
- 🎨 A coloring/fabric planning page to download and print
- The block design lends itself to numerous variations. You'll find a-whopping nine of them further down on this page.
Cut. Sew. Press. Turn your dash of fabric into a splash of amazing!
📋 General Instructions
All seam allowances (SA) are 1/4".
When you're instructed to press, first press the pieced unit flat to set the seam. Then open the patch, pressing from the front.
Seam allowances are pressed toward the darker fabric unless otherwise noted.
I use several common abbreviations on this page:
- SA - seam allowance
- RST - right sides together
- HST - half square triangle
- BAC - background fabric
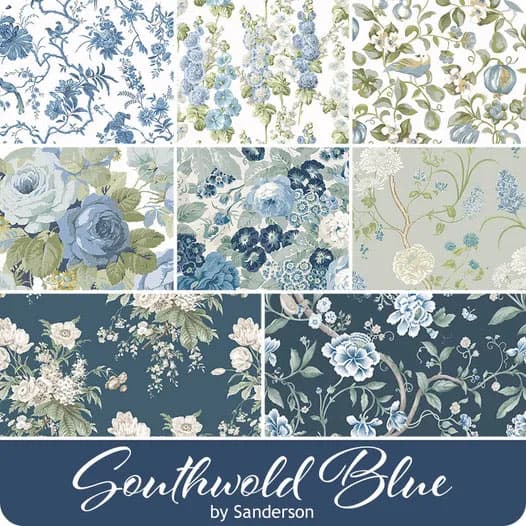
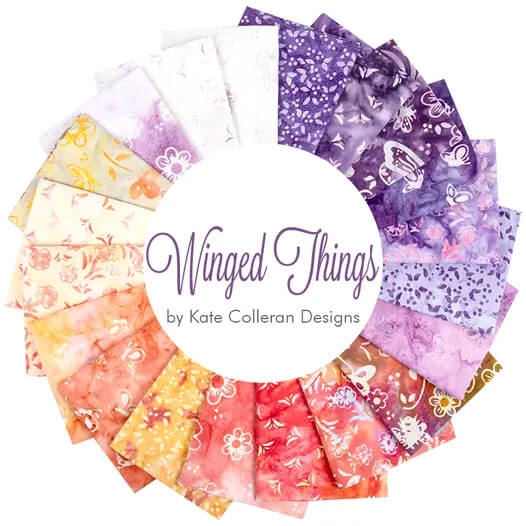
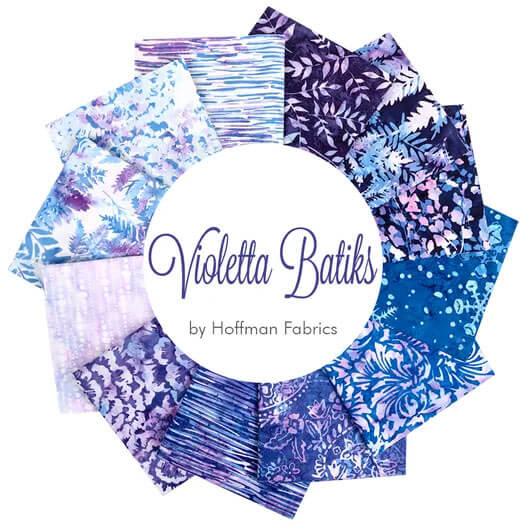
New quilt fabrics to tickle your fancy...
Click the images below to see the full collection. We share any commercial and/or free patterns that showcase them, too. (For inspiration, of course!)
✂️ Cut your Churn Dasher patches
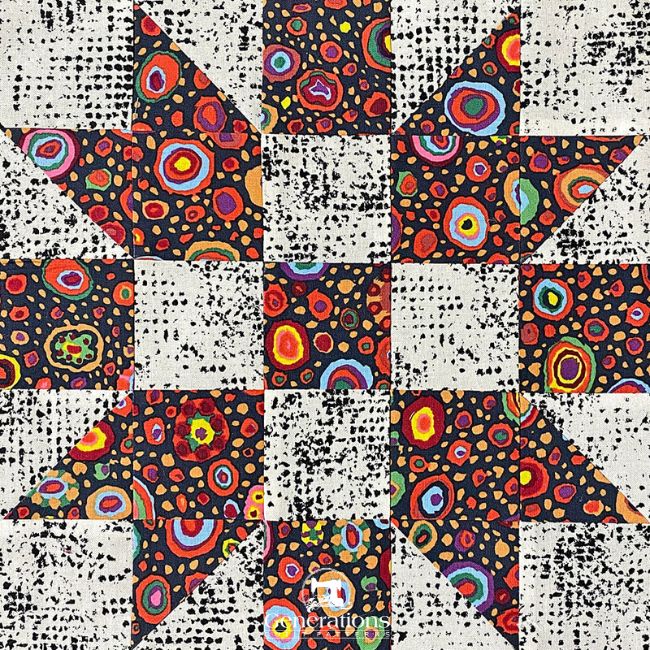
Sample Size: 10" finished / 10½" unfinished
Grid: 5x5
Attributed to: Hearth & Home
Brackman ID: 1802a
AKA: 4X Star (Ladies Art Company), Five Patch Star (Beth Gutcheon)
Design Type: 25 squares | Unequal 9-patch small center | Star
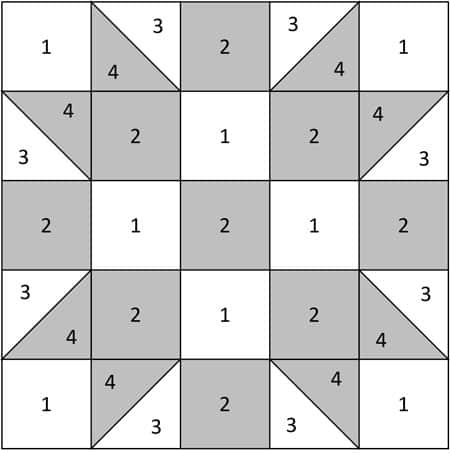
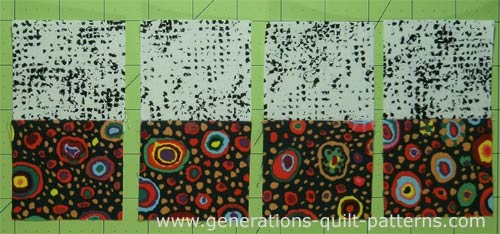
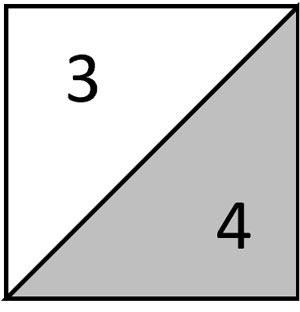
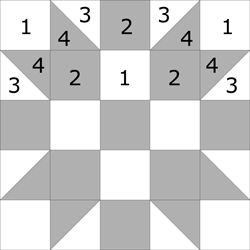
A helpful note about patches #3 and #4 (marked with **): These squares are intentionally oversized to accommodate the 8-at-once HST technique. After stitching, you'll trim them to their exact measurements for perfect results. ✨
Take a moment to label your pieces—these numbers are your trusted companions throughout the tutorial.
 | Cutting Chart for a~ Traditional Piecing ~ | ||||||
|---|---|---|---|---|---|---|---|
| Patch | Fabric | Qty | Finished Block Size | ||||
| 5'' | 7½'' | 10'' | 12½'' | 15'' | |||
| 1 | Bac | 8 | 1½'' x 1½'' | 2'' x 2'' | 2½'' x 2½'' | 3'' x 3'' | 3½'' x 3½'' |
| 2 | A | 9 | 1½'' x 1½'' | 2'' x 2'' | 2½'' x 2½'' | 3'' x 3'' | 3½'' x 3½'' |
| 3** | Bac | 1 | 4¼'' x 4¼'' | 5¼'' x 5¼'' | 6¼'' x 6¼'' | 7¼'' x 7¼'' | 8¼'' x 8¼'' |
| 4** | A | 1 | 4¼'' x 4¼'' | 5¼'' x 5¼'' | 6¼'' x 6¼'' | 7¼'' x 7¼'' | 8¼'' x 8¼'' |
| Unfinished Block Size | 5½'' | 8'' | 10½'' | 13'' | 15½'' | ||
| Grid Size | 1'' | 1½'' | 2'' | 2½'' | 3'' | ||
🪡 Assemble the units for your Churn Dasher
Two Patch Units
Make 4
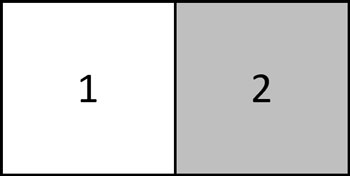
With RST, stitch one #2 square to a small background #1. Press with the SA towards the dark fabric.
Repeat for a total of 4 pairs.
Half Square Triangle Units (HST)
Make 8
Let's Create!
- Start by drawing an 'X' on the back of your background square (#3) - that's two lines going corner-to-corner.
- Here comes the fun part! Layer squares #3 and #4 with right sides together (RST), then stitch ¼" away from both sides of your drawn lines.
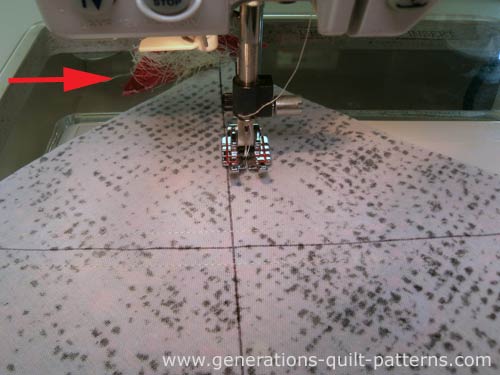 The arrow points to the anchor cloth. Start your stitching on one to stop your sewing machine from 'eating' the point of your squares.
💡 Pro Tip: Start stitching on an anchor cloth (scrap fabric) to keep your machine from snacking on those square corners!
After the stitching is complete, the squares look like this.
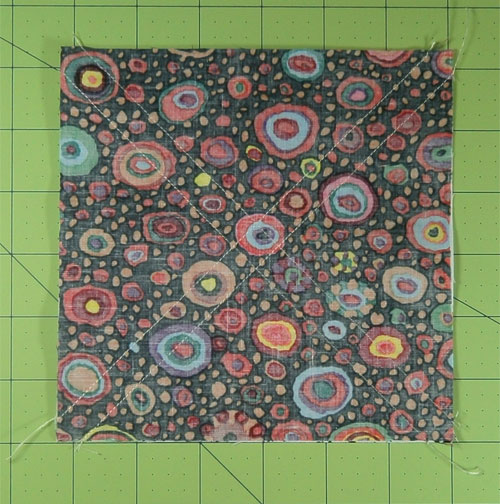 We'll use the midpoint measurement to cut this in half through the center both vertically and horizontally.
Find the center of your #3/#4 squares. It is simply the size of the cut squares divided by 2.
Use the chart below to find the Center for your chosen block size.
| Finished Block Size | #3/#4 squares measure | Center Measurement | Trim HST to... |
|---|---|---|---|
| 5" | 4¼"sq | 2⅛" | 1½" |
| 7½" | 5¼"sq | 2⅝" | 2" |
| 10" | 6¼"sq | 3⅛" | 2½" |
| 12½" | 7¼"sq | 3⅝" | 3" |
| 15" | 8¼"sq | 4⅛" | 3½" |
Cut your block in half at this center point both vertically and horizontally to create four squares. Then cut along the drawn diagonal lines.
Voila! Eight perfect HSTs ready for pressing! ✨
Press with the SA toward the darker #4.
Check your HST against the 'Trim to...' size in the chart above. Trim as needed.
🎯 Need more detailed guidance?
Have a look at our complete Half Square Triangles: Technique #4 in the Beginner Quilt Block Series.
Remember that accuracy at this stage means beautiful blocks later! Take your time with measuring and trimming—your future self will thank you! ✨
Corners
Make 4

Layout the patches for a corner unit. (Photo 1)
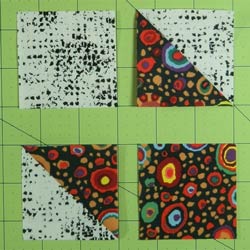 Photo 1
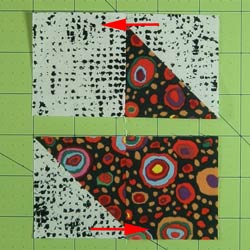 Photo 2
With RST, align the edges of a HST with a #1 background square. Stitch and press with SA towards the light fabric. (Photo 2, top) This is the only time in this block where you press towards the light—this is so the seams will nest and to reduce bulk.
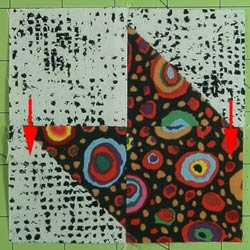 Photo 3
Take a quick check from the front of the sewn unit to make sure the darker fabric isn't shadowing through to the front. If it is, trim the seam allowance of the dark so that it is shorter than the light one.
Repeat for the HST and #2 patch. This time press with SA towards the dark. (Photo 2, bottom)
Sew the to sub-units together, nesting the seam allowances and pinning if needed.
Press this seam towards the #2 square. (Photo 3)
🧩 Assemble your Churn Dasher block
Let's turn those beautiful units into your finished Churn Dasher block! Here's your roadmap to success:
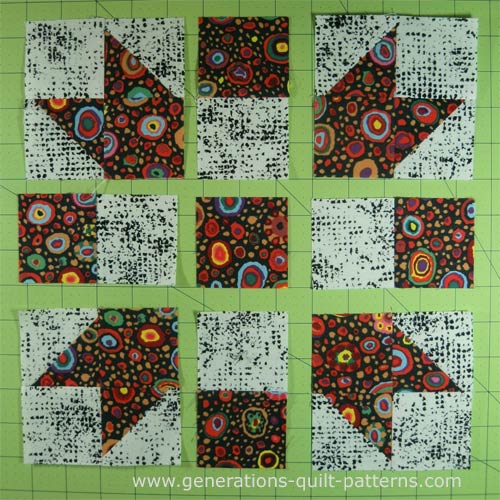
First, let's get organized! Lay out all your pieced units just like the picture below.
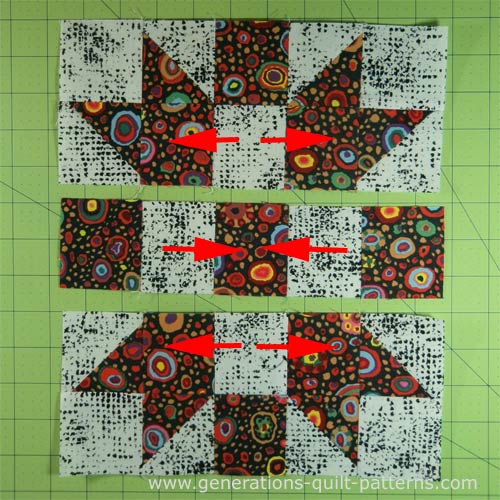
Now for the fun part. Join those rows together. Follow the red arrows for pressing your SAs. Remember, pressing directions matter here. They help your seams nest perfectly. ⚡
Time for the grand finale.
Stitch your rows together, nesting those seams for perfect matches. Take it one seam at a time, and you'll be amazed at how quickly it comes together! ✨
🌟 Congratulations! 🌟
Your Churn Dasher block is complete and ready to make a splash in your next quilting project!
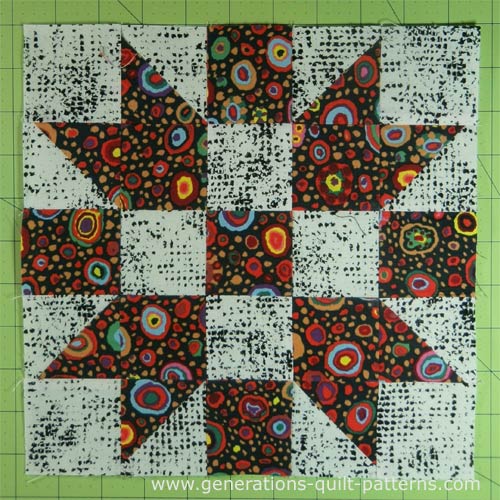 Your Churn Dasher is finished!
💡 Pro Tip: Before you move on, give your block a final press and check that it measures correctly. A well-pressed block is a happy block!
From Dash to Done: Your Churn Dasher Journey ⚡🎨
Your Churn Dasher block is ready to make waves 🌊 Remember, we all started somewhere, and now you're churning out HSTs like a pro! ⚡💨
Keep dashing, keep splashing, keep creating! 🏃♀️💫
Until we meet again, may your seams be straight and true, and your creativity be even more boundless than your stash! 🧵✨
📌 Quick! Pin this before it dashes off!
Your future self will thank you! 💫
Variations on a Churn Dasher design
Holy
Guacamole!
No one was more surprised than me to see all the variations on this simple Churn Dasher quilt block drawing.
You will be, too!
And here they are...
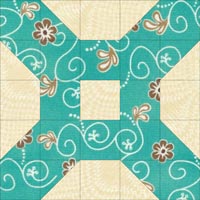
Domino
A two fabric version that looks entirely different from the Churn Dasher quilt block, simply because of the color placement.
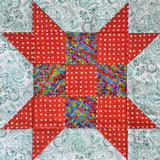
Three fabrics—a dark, a medium and a light—come together to create a star design.
Also known as: Two Crosses
Click her e for the instructions to make it.
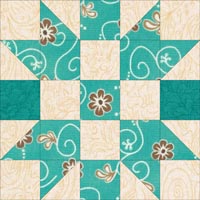
Sister's Choice
Another three fabric block, with the addition of the dark squares on the sides it looks more like a bow, don't you think?
You may know it by one of its other common names: Churn Dasher quilt block, Five Patch Star, Four & Star, 4X Star, Star and Cross
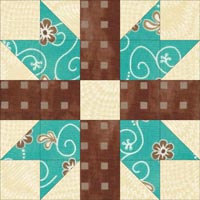
E-Z Quilt
In this variation, I'd choose to piece the brown fabrics as rectangles instead of 2 squares to simplify the piecing.
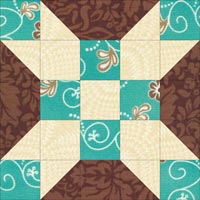
Rolling Star
The star theme continues with a reverse nine patch (the lighter patches are in the corners) in the center.
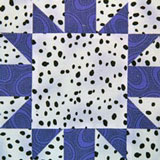
Souvenir
Piece the center as one unit, and you've got the perfect place to display machine embroidery collections.
Click here for instructions to make this block.
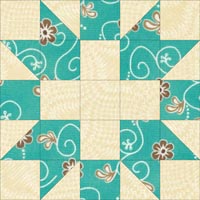
Star and Cross
Simplify the piecing by using a rectangle instead of 3 patches in the very center.
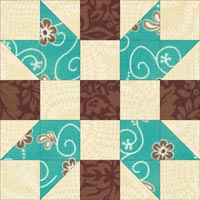
Father's Choice
The star almost disappears, with the turquoise creating almost a 'tulip' design.
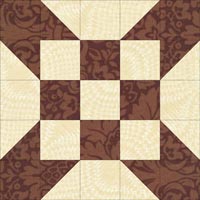
Nine Patch Star
It completely transforms with this two color placement.
All those variations from the simple Churn Dasher quilt block—who knew!
🔭 Looking for something truly stellar?
You've finished your star quilt block, and you're ready for more!
Browse our collection of 70 stellar star quilt block patterns. All have instructions and cutting charts in multiple sizes. If templates or paper piecing is used in the tutorial, there's a free download for you of those materials.

Eeny. Meenie. Miney. Moe.
Which star quilt block will you sew?
For a star-studded quilting experience, choose from 100+ bedazzling star quilt patterns—for beginners and beyond—click here.
For even MORE blocks to make… 🧩🎨

...visit our Free Quilt Block Pattern Library, with over 260+ blocks to choose from in multiple sizes.
Free downloads are included in all sizes for any blocks require paper piecing patterns or templates.
- Home
- Free Quilt Block Patterns
- Churn Dasher Quilt Block
