- Home
- Free Quilt Block Patterns
- Double-star-block-2
Double Star Block Instructions, continued...
Star-crossed stitches? Not with this tutorial! 💕🌟
This post contains affiliate links, for which I receive compensation.
The basic patches for our Double Star block are complete. It's on to stitching up the main units.
And finally, assembling the block.
To complete the tutorial, you'll find variations on this design that are more complicated to construct.
While y-seams aren't that big a deal to piece, they do take more time.
I don't know about you, but there's more quilts in my head than I'll ever have time to finish.
To provide a bit of inspiration ten sample layouts are shared so you can get a feel for what a quilt made with Double Stars will look like!
Let's get 'er done!

Looking for another Double Star design?
It's a popular name—there's several blocks called 'Double Star'. Check out this version of the block.
📋 General Instructions
 Double Star design
Several abbreviations are used on this page. They are:
- SA - seam allowance
- RST - right sides together
- FG - Flying Geese
- 3P-QST - 3 patch quarter square triangle
1/4" SA are used through this tutorial.
When instructed to press, first press the patches in the closed position just as they came off your sewing machine.
This sets the seam, melding the fibers of the threads into the fibers of the fabric.
Then press the SA to the dark unless otherwise noted.
Try my favorite pressing technique if you feel your patches are lumpy. It's simple. No special tools. Your blocks will be hollering 'Uncle!' in no time. :D
🪡Assemble the Double Star units
Center
Make 1

Arrange two long borders, two FG and #6 center square as shown below.

With RST, stitch a FG to opposite sides of #6.
Press with SA toward the center.

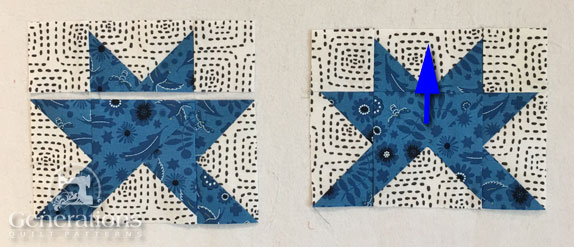
With RST, stitch the rows together. Follow the pressing directions indicated by the arrows below.

Use the table below to check the accuracy of your stitching. Make any needed adjustments.
| Finished Block is... | Center measures... (from edge-to-edge) |
|---|---|
| 10" | 4½" x 4½" |
| 15" | 6½" x 6½" |
| 20" | 8½" x 8½" |
| 25" | 10½" x 10½" |
Set aside for Step 4.
Partial Stars
Make 4

Each partial star requires a long border, two FG units and a 3P-QST.
To begin, with RST sew a FG to the opposite, non-background sides of the 3P-QST.
 Repeat 4 times
With RST and seams nesting, add a long border to the non-background side of the 3P-QST. Pin as needed.
Press in the direction of the blue arrow.
Check for accuracy using the table below.
| Finished Block is... | Partial Stars measure... (from edge-to-edge) |
|---|---|
| 10" | 4½" x 3½" |
| 15" | 6½" x 5" |
| 20" | 8½" x 6½" |
| 25" | 10½" x 8" |
🧩Assemble the Double Star block
Arrange your sewn units and cut patches into the Double Star design shown below. The background side of the 3P-QST is toward the center.


With RST, sew the units in each row together.
There's one particularly great benefit to paperpiecing.
If you stayed on the sewing line, there's little worry about chopping off the points of the Flying Geese with your stitching line in either the top and/or bottom rows.
I encourage you to pin match the points in the middle row where the FG and 3P-QST points meet using this technique.
My favorite pins for this technique are here.
After stitching the patches into rows, press the SA in the direction of the arrows in the photo below.

Finally, with RST, stitch the rows together using the same pin-matching technique.
One final session at the ironing board and our Double Star block looks like this...
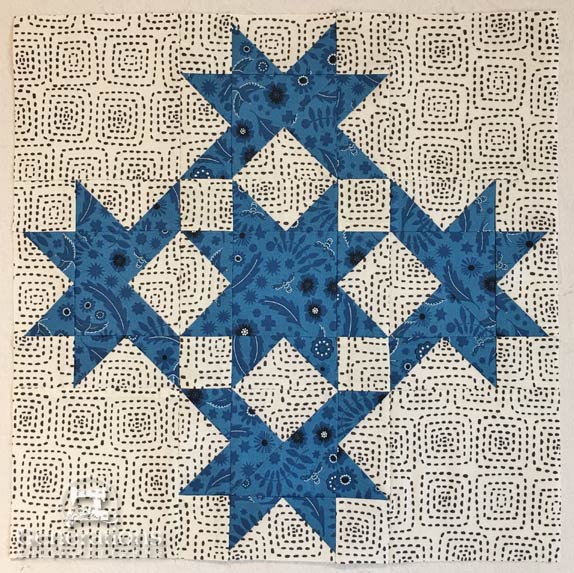 Perfect. Pointy. Perfection.
Variations on a Double Star design
You can never have too much of a good thing, right?
Other quilters thought so, too, because you'll find other patchwork designs similar to our Double Star.
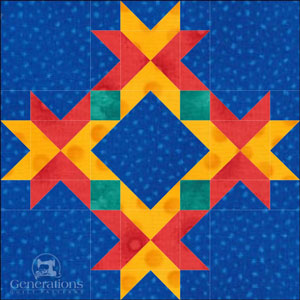
County Fair or County Farm
In this first variation, two-fabric quarter square triangles have been used in place of our 3P-QST. The center Sawtooth Star is gone.
A nice design with lots of movement.
Comparable piecing time.
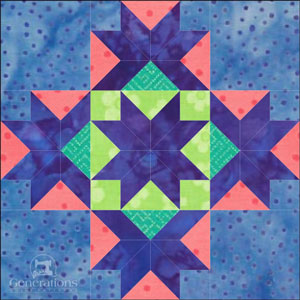
Stars and Cube
This patchwork designs ups the piecing time.
Y-seams are not my favorite. Not because they're hard, but because I don't make them regularly (i.e. I don't practice them).
Lack of practice slows down the sewing.
That's a Wrap, Cosmic Quilters! 🌌✂️
You've made the Double Star block your own. 🚀🌌 What looked tricky was actually a fun creative journey. 🎨✨
Until next time, may your fabric be plentiful and your inspiration endless. 🧵💡
What's next?
Why turning your Double Star blocks into a quilt, that's what!
Click here to see TEN different ways to set your blocks.
Which will you choose?
📌Catch this falling star!
🌠 Pin this tutorial before it disappears into the quilting cosmos.

🔭 Looking for something truly stellar?
You've finished your star quilt block, and you're ready for more!
Browse our collection of 70 stellar star quilt block patterns. All have instructions and cutting charts in multiple sizes. If templates or paper piecing is used in the tutorial, there's a free download for you of those materials.

Eeny. Meenie. Miney. Moe.
Which star quilt block will you sew?
For a star-studded quilting experience, choose from 100+ bedazzling star quilt patterns—for beginners and beyond—click here.
For even MORE blocks to make… 🧩🎨

...visit our Free Quilt Block Pattern Library, with over 260+ blocks to choose from in multiple sizes.
Free downloads are included in all sizes for any blocks require paper piecing patterns or templates.


Yummy fabrics
to drool over
Click any image below to see the full collection and find pricing and ordering information.


By Julie Baird
Copyright © 2008-2026 Generation Quilt Patterns, LLC
All Rights Reserved
Generations-quilt-patterns.com does not sell any personal information. (See Privacy Policy)