- Home
- Free Quilt Block Patterns
- Diamond Rays Star Quilt Block
Diamond Rays Star Quilt Block Tutorial: 6", 9", 12", 15", and 18" Finished Blocks
Oh so pointy, and every point lands exactly where it needs to be.
This post contains affiliate links, for which I receive compensation.
The Diamond Rays Star quilt block is what happens when a Sun Rays block has a baby with a Doris’ Delight. And what a baby! Corner Beams in the corners and a diamond tucked into each Triangle in a Square. A couple of extra seams for a whole lotta pizzazz.
All those points? I’ve got your back. The units are simple and every seam has a line to sew on. Sew only as fast as you can stay on it, and you’ve got this.
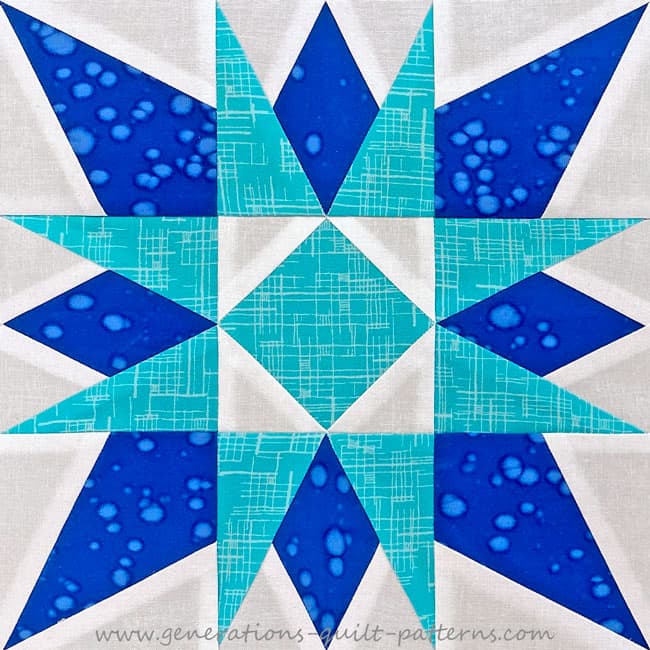
The bulkiest seams are in the center row, where the Diamond points meet the Square in a Square. We don’t run from bulk. We handle it. It’s what we’ve got pins and brains for.
Then comes the fun part. When you sew your blocks into a quilt, every point is exactly where it needs to be. Pin, trust your seam allowance and simply sew. No fudging.
🔍 Find Your Spot
Jump straight to what you need — especially handy if you're back for a different size or just need one section again.
📋General Instructions
Several abbreviations are used on this page. They are:
- SA - seam allowance
- RST - right sides together
- SiaS - Square in a Square
- CB - Corner Beam
- TiaS-D - Triangle in a Square with Diamond
Use a 1/4" seam allowance (SA) throughout this tutorial unless directed otherwise.
Pressing
To press, first press the patches in the closed position as they came off your sewing machine. This sets the seam, melding the fibers of the threads into the fibers of the fabric. It also warms up the fabric, making it more willing to play nice when you press the SA to one side.
Then press the SA to the dark unless otherwise noted.
Holding patches in position to sew
For years I held my patches in position with my fingers.
Recently I began experimenting with glue basting and found it is the perfect technique for paper piecing projects. [Learn the ins and outs of glue basting here.]
Choose whichever way works best for you.
📥Download and print the paper piecing pattern

To download the pattern, use the most current version of Adobe.
For accurate results, on Adobe's Print Menu page, under 'Page Size and Handling' set 'Custom Scale' to 100%. Then print.
Click here to see what it looks like on the Print Menu page.
Find your finished block size from the chart below. For each block you want to make, print the corresponding number of copies for a total of:
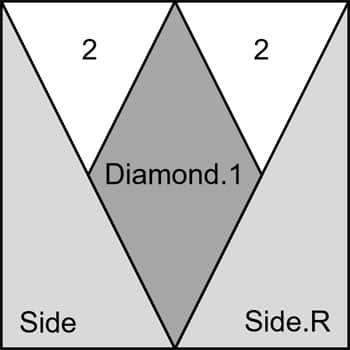
- 4 Triangle in a Square with Diamond
- 4 Corner Beam
- 1 Square in a Square
You'll be printing both patterns and templates. I prefer to print my templates on regular copy paper (or 67lb card stock) and save my paper piecing paper for the patterns.
Download and Print PATTERNS & TEMPLATES | |||||||
|---|---|---|---|---|---|---|---|
| Finished Block Size | Triangle in a Square w/Diamond | Corner Beam | Square in a Square | ||||
| Template (Print 1) | Copies to Print | Download Link | Template (Print 1) | Copies to Print | Download Link | Download Link (Print 1) | |
| 6'' | All Sizes (2 pages) | 1 | 2" | 2" & 3" | 1 | 2" | 2" |
| 9'' | 1 | 3" | 1 | 3" | 3" | ||
| 12'' | 2 | 4" | 4" & 5" | 2 | 4" | 4" | |
| 15'' | 4 | 5" | 4 | 5" | 5" | ||
| 18'' | 4 | 6" | 6" | 4 | 6" | 6" | |
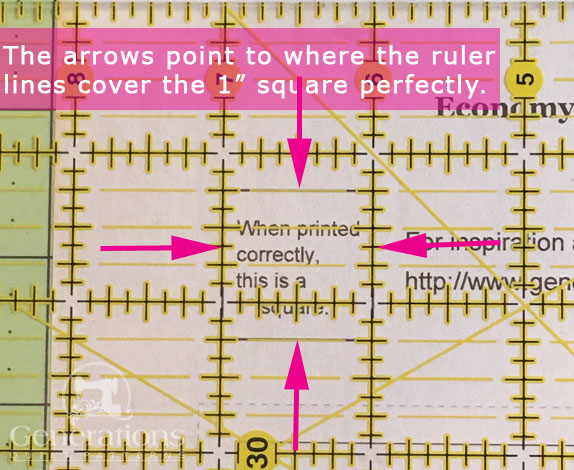
After printing, use the 1" square graphic on the printed page(s) to double check that your patterns printed at the correct size.
Then cut out the required number of patterns from your copies. A rough cut is good enough, an 1/8" to a 1/4"-ish away from the outside dashed square.
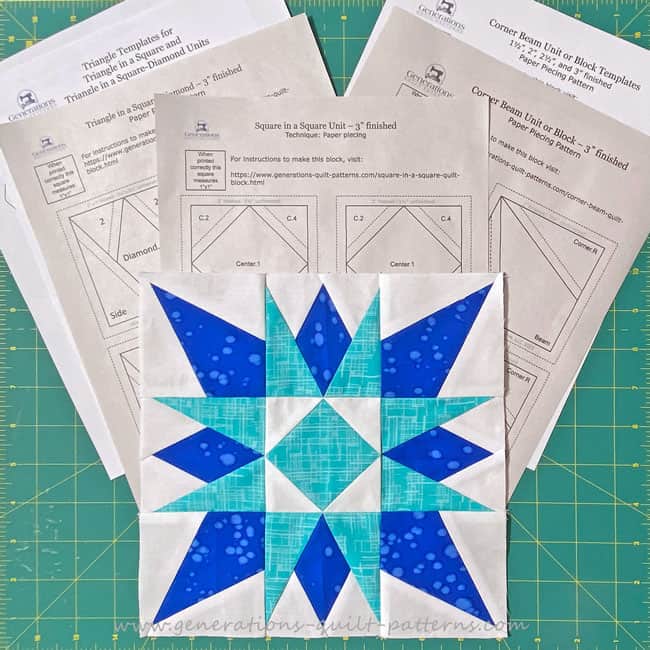
These are the free downloads for our sample Diamond Rays Star quilt block. (The templates are printed on white copy paper, the patterns on newsprint.)
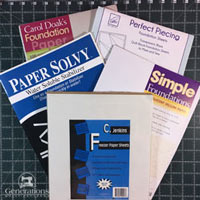
Not sure which paper to use?
Take a look at my review of several of the most popular brands available to us quilters on the market.
You want a super-easy-to-tear-away paper. It puts less stress on the stitches.
✂️ Cutting patches for a Diamond Rays Star block
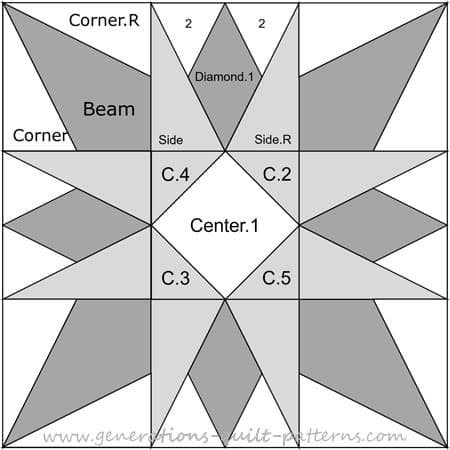
Sample Block Size: 9" finished / 9½" unfinished
Grid: 6x6
Design Type: Star | Paper piecing
Please label all your patches. We use their numbers throughout this tutorial.

 | Cutting Chart for a~ Includes Paper Piecing ~ | |||||||
|---|---|---|---|---|---|---|---|---|
| Patch | Fabric | Qty | Finished Block Size | Sub Cut | ||||
| 6'' | 9'' | 12'' | 15'' | 18'' | ||||
| Center.1 | Med | 1 | 1⅞'' x 1⅞'' | 2⅝'' x 2⅝'' | 3⅜'' x 3⅜'' | 4⅛'' x 4⅛'' | 4¾'' x 4¾'' | --- |
| C.2, C.3, C.4, C.5 | Bac | 2 | 2⅜'' x 2⅜'' | 2⅞'' x 2⅞'' | 3⅜'' x 3⅜'' | 3⅞'' x 3⅞'' | 4⅜'' x 4⅜'' |  |
| Beam | Dark | 4 | 2¾'' x 2¾'' | 3¾'' x 3¾'' | 4¾'' x 4¾'' | 5¾'' x 5¾'' | 6¾'' x 6¾'' | Template |
| Corner, Corner.R | Bac | 4 | 2⅞'' x 3¼'' | 3⅜'' x 4¼'' | 3⅞'' x 5¼'' | 4⅜'' x 6¼'' | 4⅞'' x 7¼'' |  |
| Diamond.1 | Dark | 4 | 1½'' x 2½'' | 2'' x 3½'' | 2½'' x 4½'' | 3'' x 5½'' | 3½'' x 6½'' | Template |
| 2 | Bac | 8 | 2'' x 1¾'' | 2½'' x 2¼'' | 3'' x 2¾'' | 3½'' x 3¼'' | 4'' x 3¾'' | Template |
| Side, Side.R | Med | 4 | 2⅞'' x 3¼'' | 3⅜'' x 4¼'' | 3⅞'' x 5¼'' | 4⅜'' x 6¼'' | 4⅞'' x 7¼'' | |
| Unfinished Block Size | 6½'' | 9½'' | 12½'' | 15½'' | 18½'' | na | ||
| Grid Size | 1'' | 1½'' | 2'' | 2½'' | 3'' | na | ||
Subcutting
We'll be subcutting with both templates and with just our ruler. Let's get those templates out of the way first.
Layer your Diamond rectangles all right sides up, edges even. Cut out the template exactly on the top and sides lines so you can easily match the edges with the sides of the patches. I like to use tape to hold everything in place as I cut.
Line up your ruler with the edges of the template and cut away the excess.
Repeat for all sides. Precision isn't required here, close is good.
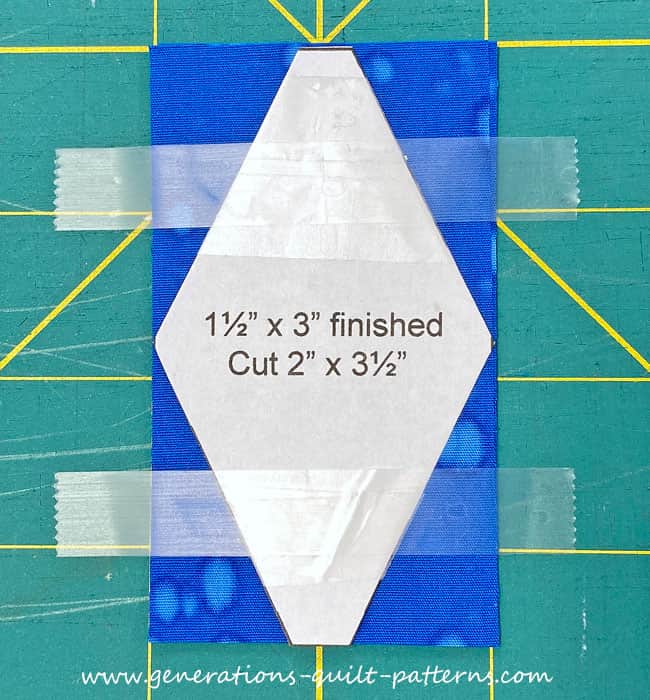 I've used this template before for a Diamond in a Rectangle...that's why the diagonal edges were already trimmed.
Here's what it looks like after the cutting is done.
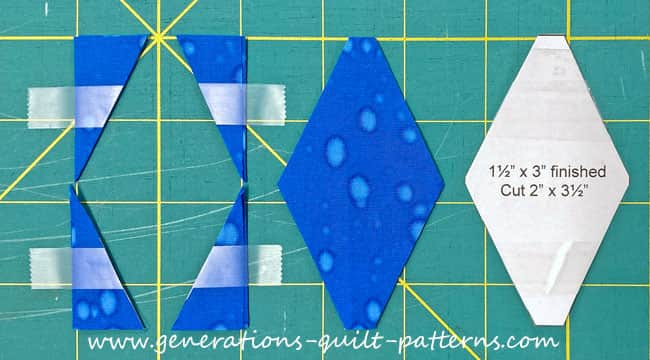 The tape can stay stuck to the template, it won't hurt anything.
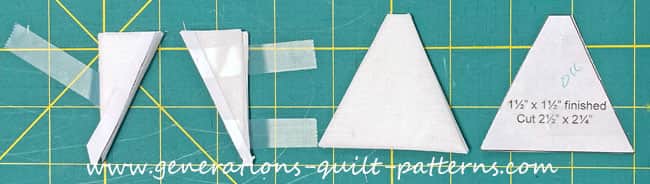
Repeat for the triangles for the TiaS-D. There's 8 of them.
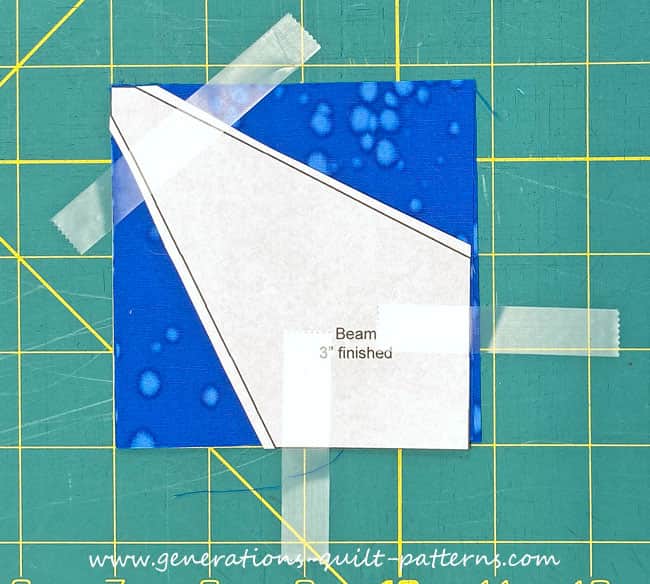
The Beam template is in position and ready to be subcut. Taping this makes for the least shifting while cutting.
For the Side/Side.R and Corner/Corner.R shapes we need mirror image patches. Since they are exactly the same shape...same size, same angles, we use the same technique to subcut them.
This time layer your rectangles in PAIRS of RST patches. Then align all the edges. This is the most efficient way to get the mirror image triangles.
Make a mark 5/8" in from the left side on the top edge. Make another 5/8" mark, this time in from the right on the bottom edge. Line up the edge of your ruler with those marks at the edge of the patches and cut in half.
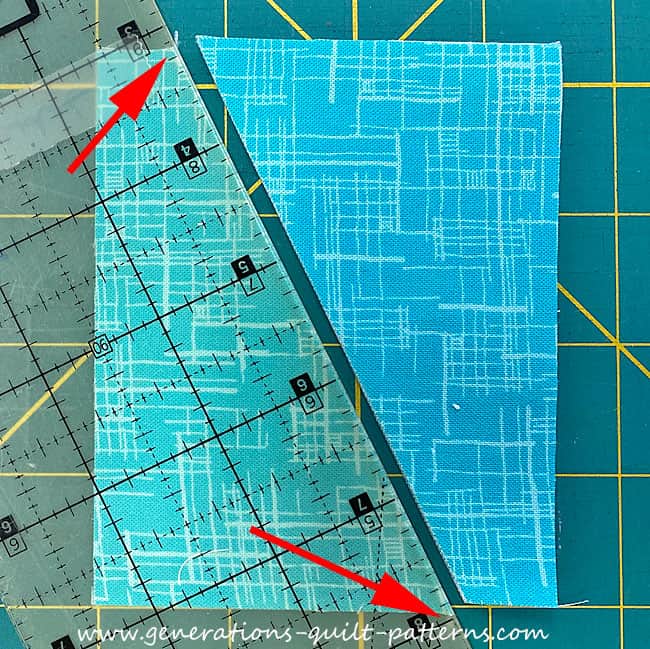
I've repeated the process for the Corner/Corner.R patches. These are also in PAIRS of RST, then stacked with edges aligned.
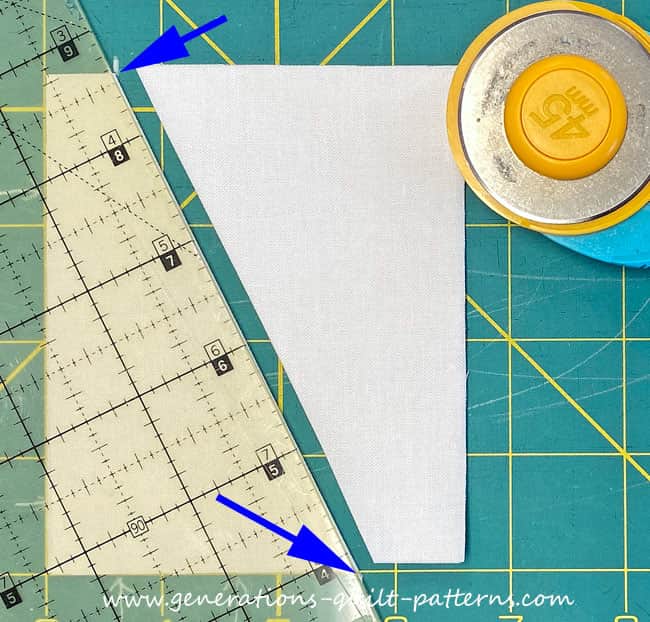
Finally, cut the small squares for C.2, C.3, C.4 and C.5 in half once on the diagonal to create right triangles.
That's it! The subcutting is finished.
🧵Create the units for your Diamond Rays Star
For efficiency's sake, we position the first patch for all the units, sticking it to the unprinted side of the pattern with a tiny dab of Elmer's Washable Glue Stick. It only needs to hold until another patch is stitched to it. Less is more.
Use the dashed guidelines around the first patch for quick and accurate positioning.
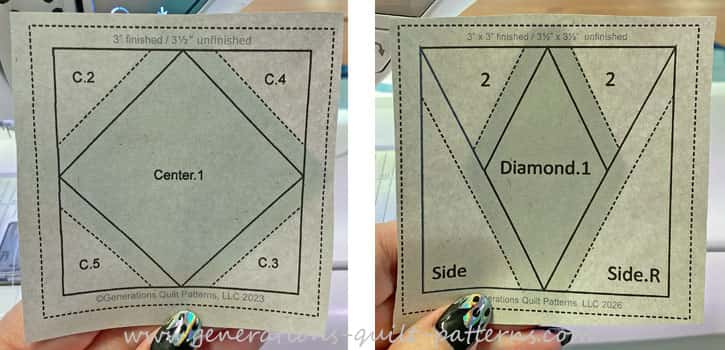
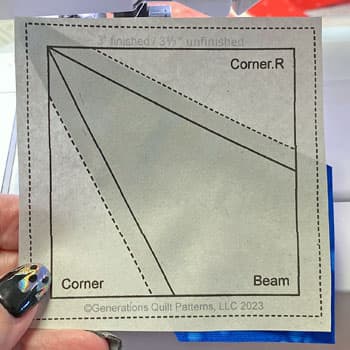
You'll notice that the patches for the Beams stick out past the outside dashed lines and those for the Diamond and Center do not. That's because the Diamond and Center are surrounded by other patches that create all the outside edges.
That's it for the glue stick. It can be put away until your next paper piecing project.
We need to make a few adjustments to our sewing machine settings to paper piece.
- Reduce your stitch length to 16–20 stitches per inch (1.3-1.6 mm). This perforates the paper and stabilizes the seam when you remove the pattern. [Learn more about stitch length here.]
- Reduce your machine's speed or just plain slow down. Sew only as fast as you can AND stay on the solid stitching line.
- Install an open toe appliqué foot (sometimes called an 'embroidery' or 'satin stitch' foot) if you have one (it makes it easier to see where you're stitching).
- Use a larger needle (90/14) IF you have problems removing the pattern. Personally, I use an 80/12 Microtex Sharp for paper piecing without any issues.
Triangle in a Square with Diamond (TiaS-D)
Make 4
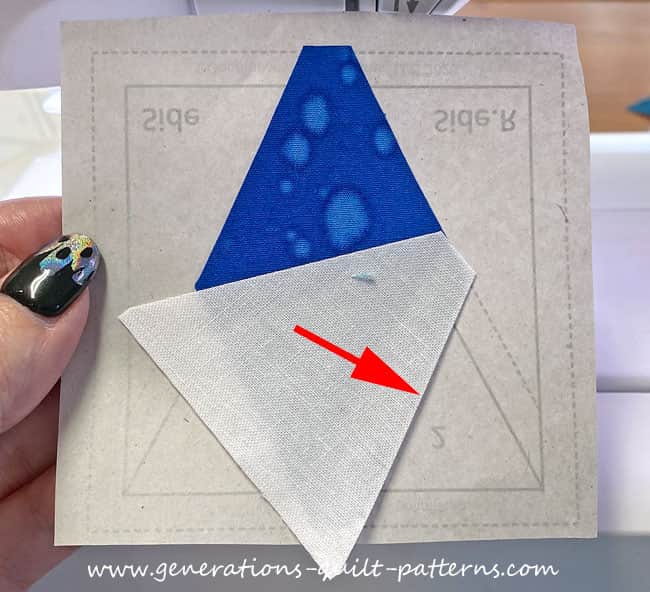
With RST, match one diagonal edge of a #2 triangle to the edge of the Diamond as shown below.
✅ KEY TECHNIQUE: When you're adding a lighter patch to a darker one and are concerned about the darker fabric shadowing through the finished quilt top, nudge the light patch over the edge a couple of threads. (arrow)
That's all it takes to prevent this problem.
✅ KEY TECHNIQUE: ALL PAPER PIECED SEAMS
ALL the seams in paper piecing are stitched by starting a generous 1/4" before the solid line between patches and ending a generous 1/4" after that line ends. The next line of stitches that cross this seam secures the ends—just like in traditional piecing.
If the seam begins/ends at the outside edge of the block, start and stop your stitches past the outside dashed line surrounding the block.
Use this technique every time you sew a seam.
The only time I might use backstitches is at the outside edges, but never inside the block or unit. I find the shorter stitch length with good thread tension holds my stitches quite well.
Press.
Repeat for the second #2. Again, it's been nudged over to prevent the blue from shadowing through the white fabric.
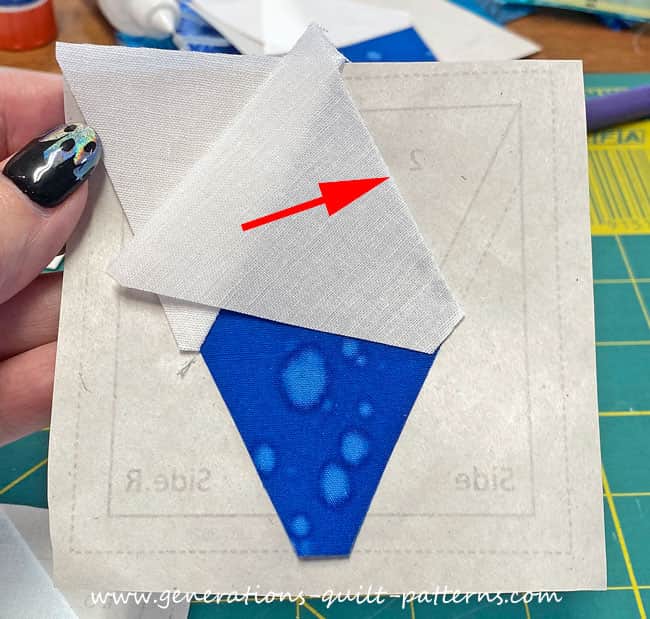
Press. Trim away any fabric that extends past the dashed line. That line represents the 1/4" seam allowance and is the positioning line for the first Side patch below (arrow).
It doesn't matter which Side you add first. However, since the stitches run from outside edge to outside edge, you CAN chain piece all the units. If the Side is added to the same side on all of them, it's much easier.
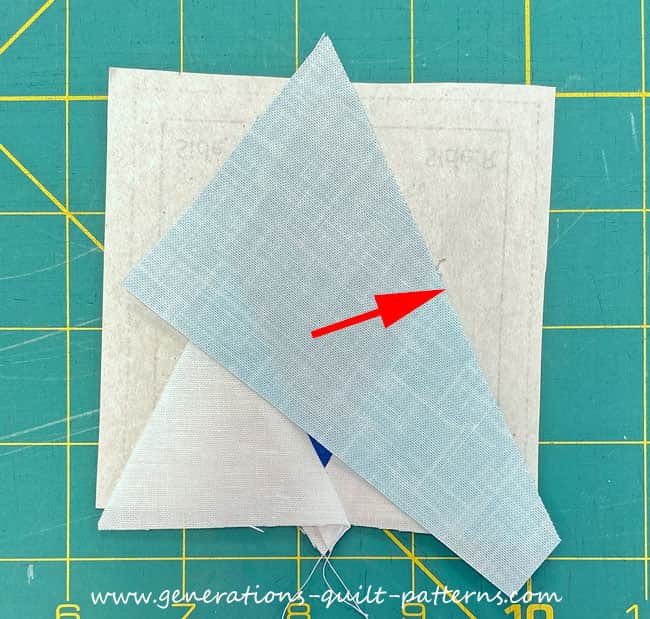 No nudging this time. We're adding a darker fabric over a lighter one.
Repeat for the second Side patch.
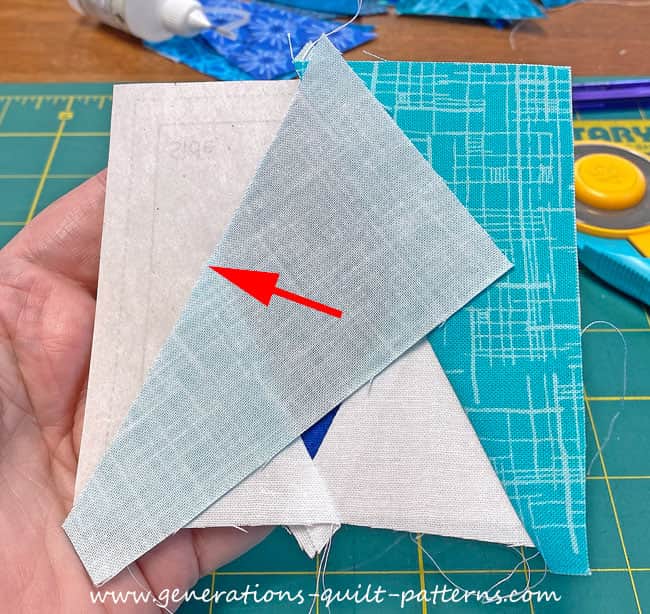
Repeat for all 4 TiaS-D units. Set them aside.
Corner Beams (CB)
Make 4
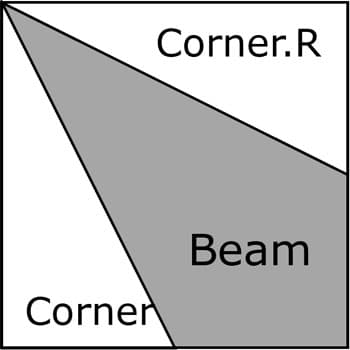
With RST, align the long diagonal edge of a Corner with the Beam. The wide ends of both patches are at the same end. If you're new to this unit, this is one of those times to hold the edges of the patches between your fingertips and flip them open to make sure they're positioned correctly.
Sew this seam on the solid line, starting and stopping past the outside dashed line. (arrows)
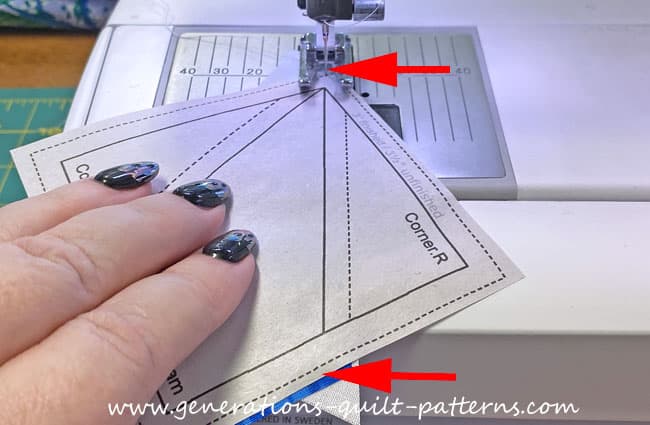
You can see this stitching below.
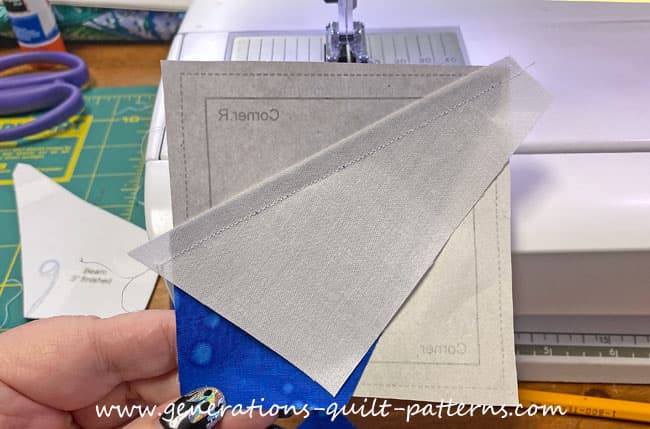 Adding a lighter patch to a darker one. You can see where we've nudged the Corner a few threads over the edge.
Press.
Repeat for the second Corner patch.
Once all 4 units are complete, set them aside.
Square in a Square (SiaS)
Make 1
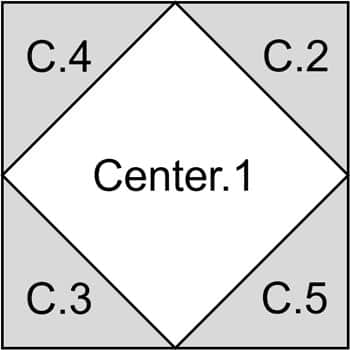
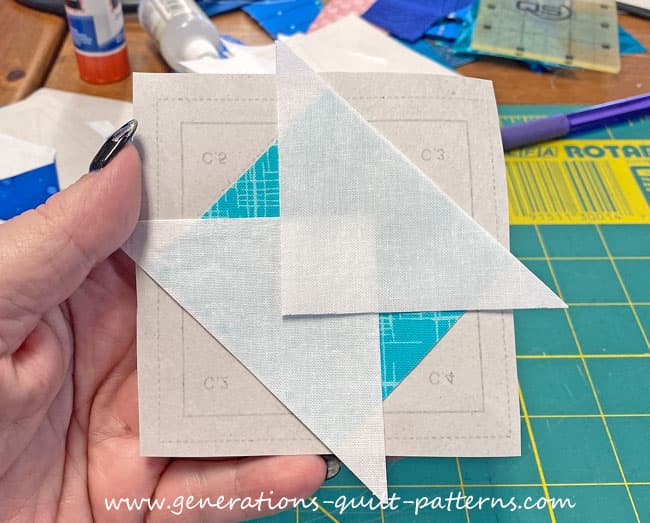
With RST, match the long bias edge of C.2 with the side of the Center square.
If the unit is large enough you can repeat this step for the C.3. I've glue basted these patches to hold them in position.
Sew on the solid line between C.2 and Center, starting and stopping past the outside edge. Repeat for C.3.
Again, below you can see the stitching.
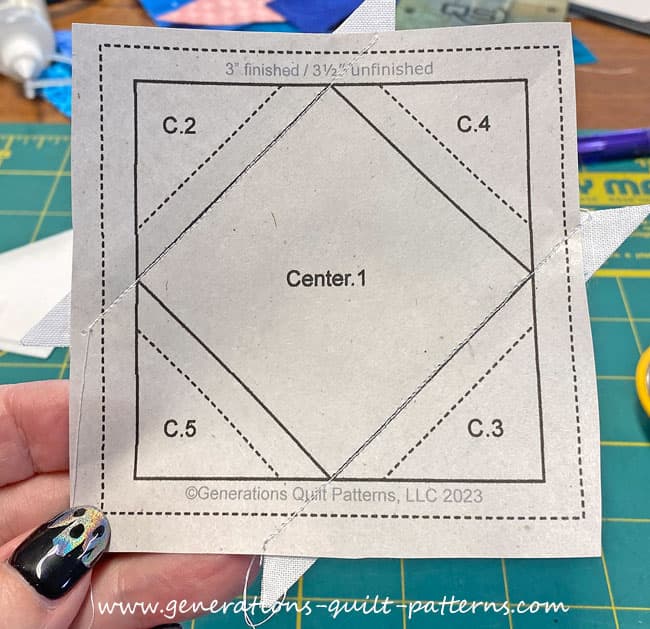
Press.
Position the C.4 and C.5 patches.
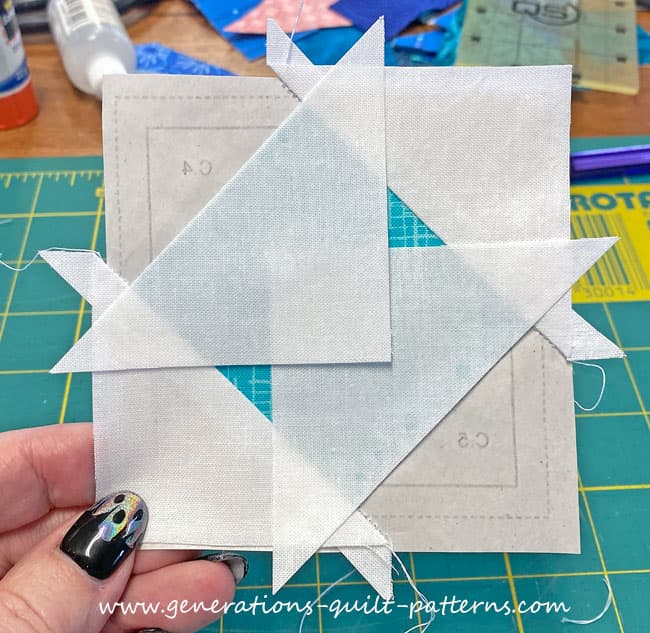 I don't bother to trim away the white dog ears here because they fall outside the seam allowances and won't create any excess bulk.
Sew the final two seams and press.
Trimming the Units to Size
I prefer to do all the trimming at one time. It's more efficient.
With one of the units, pattern side up on your cutting mat, match the 1/4" line on your ruler with one side of the solid square that surrounds your unit. (arrow)
Trim away the excess.
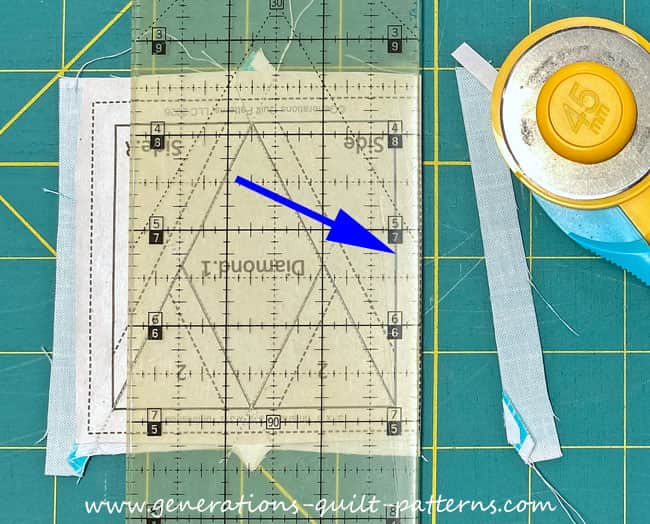
Turn the unit a 1/4 turn and repeat. Continue in this fashion until all sides of all the units are trimmed.
We've just finished all four sides of the SiaS.
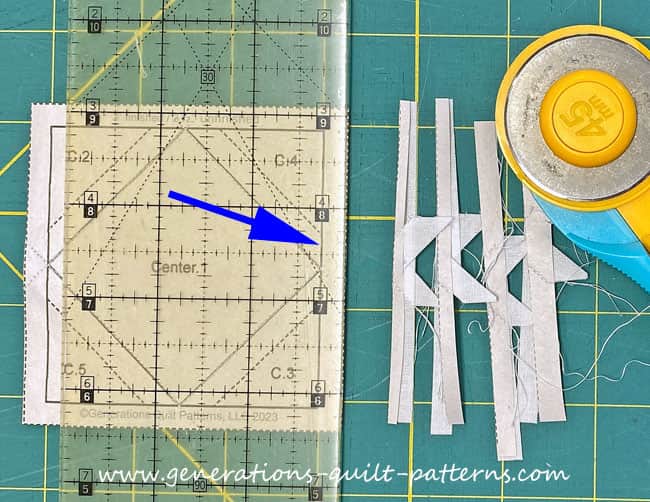
This is so satisfying. From hot mess to perfection with four swipes of the rotary cutter and no worry getting there!
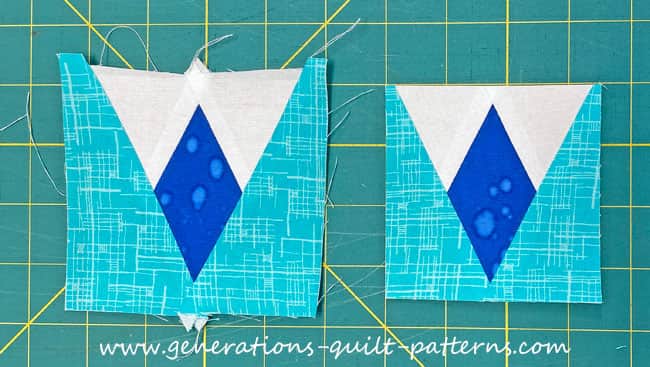 Triangle in a Square with Diamond unit
Points and seams right where they need to be, without any stress.
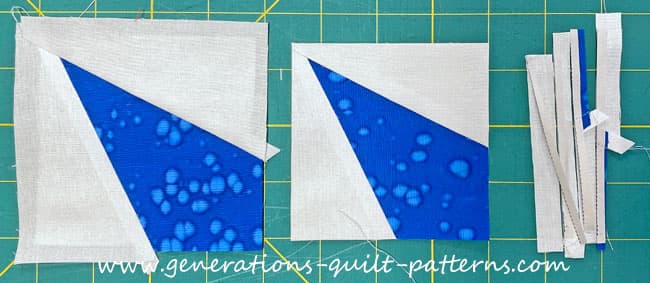 Corner Beam unit
Finally, our SiaS with all those points landing exactly at the 1/4" seam line.
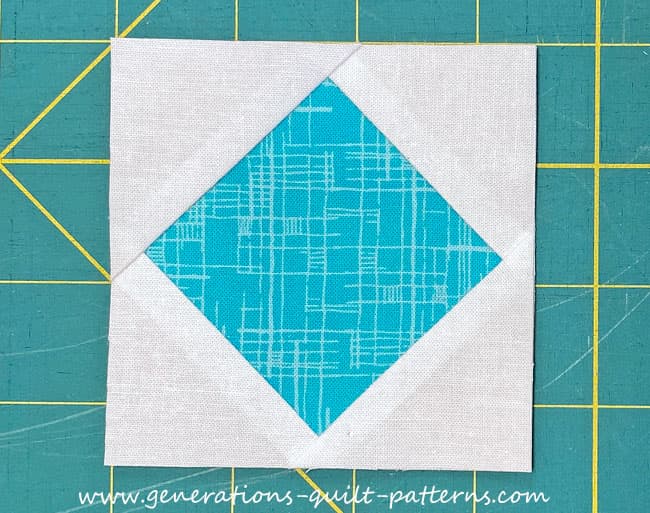 Square in a Square unit
All for the low price of sewing slowly enough to stitch on a line. Bravo!
Remove the paper
All the outside edges of our units are on the straight of grain, just like any traditionally pieced block you make. The paper has done its job and can be removed.

The paper piecing is complete. From this point forward, return your stitch length to the one you regularly use for piecing and install your favorite 1/4" presser foot.
🧩 Final Assembly
Arrange your units into the Diamond Rays Star design, CBs in the corners with their Beams pointing out, TiaS-Ds on the sides with their Diamonds pointing out, and our SiaS nestled in the center.
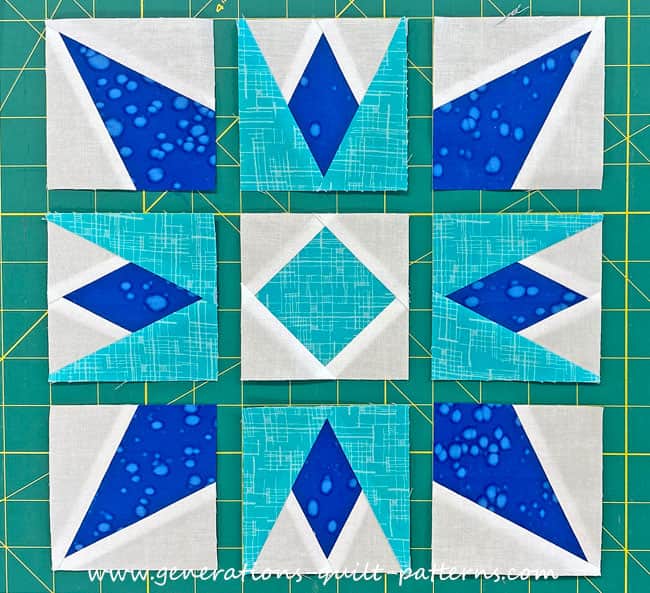
Stitch the units in each row together, pinning as needed. Use the Pinning for Perfect Points technique in the center row where the Diamond tips meet the SiaS points. Breathe and take your time. If the pin doesn’t land in the tip of the patch, do it again before sewing. It’s worth the effort.
Seams are pressed away from the TiaS-Ds in all the rows. That’s toward the CBs in the top and bottom rows and toward the SiaS in the center.
The center row has the bulkiest SAs in the block. After pressing them flat, I did a little finger pressing for encouragement before bringing in the iron.
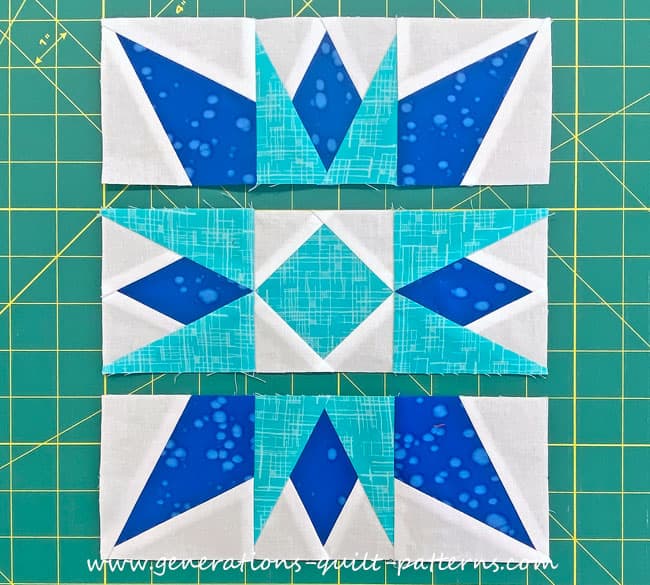
Sew the rows together. I pin to ensure a good match between the SiaS and TiaS-Ds, along with keeping those nested seams and edges even.
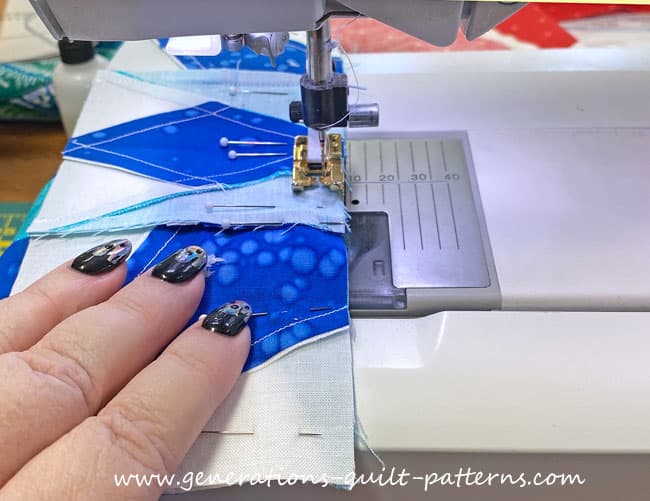
Press these last two seams away from the center.
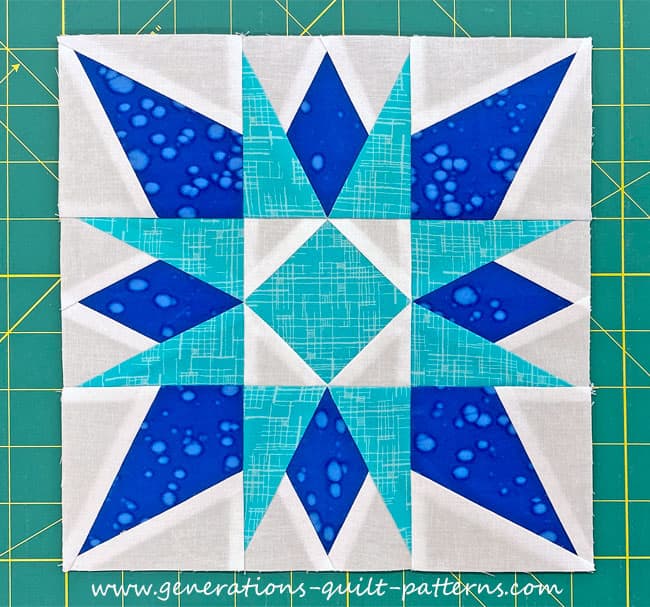
Ta-DAH! Time
Crisp. Sharp. Gorgeous.
I make a lot of different blocks, and this one still stops me in my tracks. My eyes go back and forth between the points and the colors, and I can’t pick a favorite.
Now look at yours. Every point is right where it belongs, and you put it there with a line to sew on, a few pins and your own good brain. Go ahead and stare.
You’ve earned it!
📌 No time to quilt right now? Pin it for later.
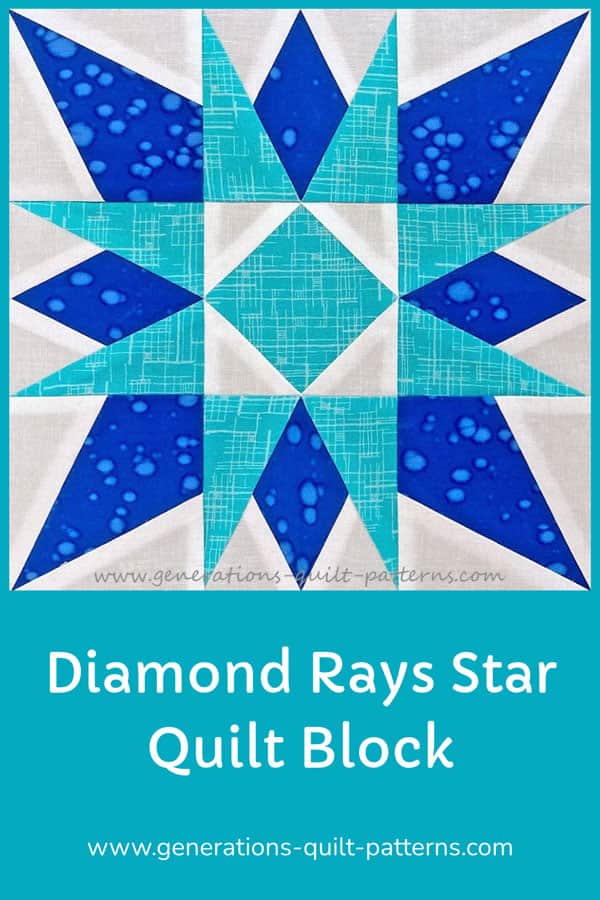
Life got in the way of your sewing time? Rude. Pin this Diamond Rays Star quilt block tutorial now, and all those oh so pointy points will be waiting when you finally escape to your machine.
🔭 Looking for something truly stellar?
You've finished your star quilt block, and you're ready for more!
Browse our collection of 70 stellar star quilt block patterns. All have instructions and cutting charts in multiple sizes. If templates or paper piecing is used in the tutorial, there's a free download for you of those materials.
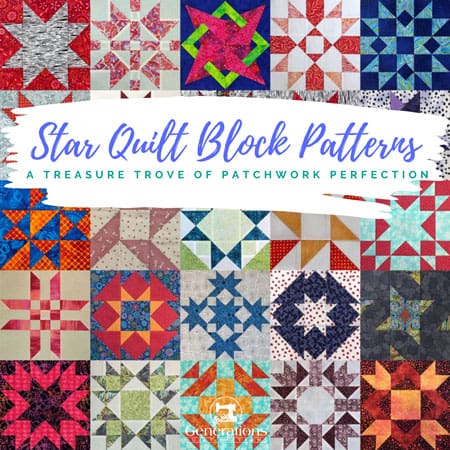
Eeny. Meenie. Miney. Moe.
Which star quilt block will you sew?
For a star-studded quilting experience, choose from 100+ bedazzling star quilt patterns—for beginners and beyond—click here.
For even MORE blocks to make… 🧩🎨
...visit our Free Quilt Block Pattern Library, with over 260+ blocks to choose from in multiple sizes.
Free downloads are included in all sizes for any blocks require paper piecing patterns or templates.
- Home
- Free Quilt Block Patterns
- Diamond Rays Star Quilt Block







Nifty Notions


By Julie Baird
Copyright © 2008-2026 Generation Quilt Patterns, LLC
All Rights Reserved
Generations-quilt-patterns.com does not sell any personal information. (See Privacy Policy)