- Home
- Free Quilt Block Patterns
- Glue Basting Quilt Seams
Glue Basting for Piecing: An Honest Look at the Technique
This post contains affiliate links, for which I receive compensation.
Wait, which Glue Basting?
Before we go any further, let's make sure you're in the right place. This page is about glue basting the patches of a quilt block or top together while you piece by replacing pins with tiny dots of glue.
It is not about basting the layers of a quilt sandwich together before quilting. That's a completely different technique, with a completely different glue application and a completely different goal. It deserves its own page rather than a confusing mash up with this one.
And if you've come from English Paper Piecing, you may already know a third version: gluing fabric around a paper template to hold it in place before hand stitching. Also not what this page covers, though it's a cousin of the technique below.
🔍Quick Navigation
Is Glue in Quilting Really a Thing?
Glue basting, for piecing, means using tiny dots of washable glue in place of pins to hold two patches together before you sew them. Heat set it (or don't, more on that in a bit), then sew the seam as usual. No pins to remove.
I'll be honest with you. I came to this technique as about as skeptical a quilter as you'll find.
I've been a pinner from the beginning, holding pins in my mouth since I was about five... just like Mom and Grandma. Both seamstresses. Both put pins in their mouths, too. It's a family thing at this point, and I still get warned/teased about it by the lovely ladies I sew with.
So the idea of gluing my quilts instead of pinning them? Not for this quilter, thank you very much.
I first ran across glue basting years ago in a class on Piec-lique, taught by Sharon Schamber, an award winning quilter who I have mucho respect for. (I bought and watched the video, read the materials, but never actually tried the technique. 'Naturally.)
Life was busy. My kids were small. ‘Just never happened.
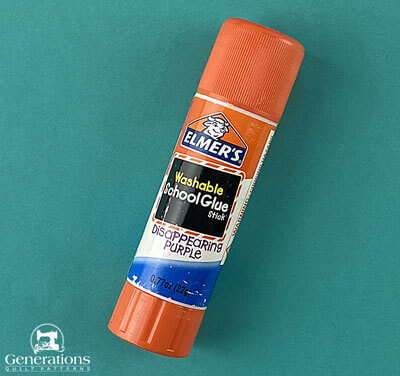
What changed my mind wasn't glue basting itself. It was Elmer's Washable Glue Stick, the purple kind that dries clear.
I was already using it for a few other things:
- Tacking the first patch of a paper pieced unit to the pattern
- Holding turned edges for my invisible machine appliqué technique, and
- Holding those prepared shapes in position for a tiny zigzag stitch onto a background.
Somewhere in there, without really noticing, it happened. My ‘glue-in-quilts’ phobia evaporated.

Eventually, I decided it was worth testing properly. Not because I needed it, but because I couldn't very well recommend or warn you about a technique I hadn't actually tried myself.
I ordered fine-tip bottles online, picked up my first bottle of Elmer's Washable School Glue from the corner Walgreen’s, and waited (not very patiently) for the tips to arrive.
What You Need
Our supply list here is genuinely short.
- Washable white school glue. Elmer's Washable School Glue is my go-to. It’s inexpensive and always at my corner drugstore. The glue needs to be washable so you can wash it out. A different washable glue should work. I just haven't had a reason to try one.
- A fine-tip bottle. That tip makes this technique really sing. The one that comes on an Elmer's bottle poops out way more glue than you need. A fine-tip bottle equals control.
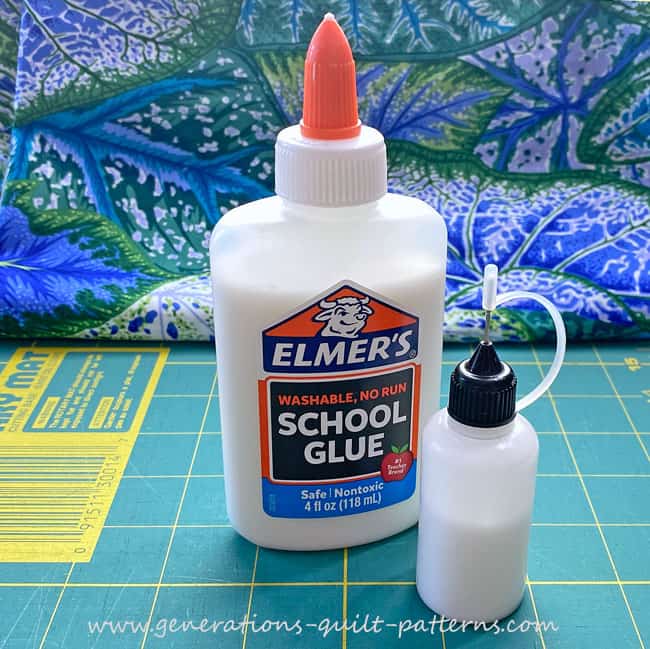
A 4 ounce bottle of Elmer’s at the drug store cost me $2.29. Add a fine-tip package
(12 tips/4 1 ounce bottles) for $8.39 (from Amazon) for a total of $10.68. More
than enough for many quilts full of glue basting.
I tried two glue basting specific products while testing this for you. And you
know what that means.
Any every-day thing labeled specifically for quilters carries a wicked premium. It’s no different here.
- Acorn’s SeamAlign Glue™. A clear glue. Nice fine-tip. The glue performed no better than Elmer’s. Also currently $16.79 for a ONE OUNCE bottle (on Amazon). Seriously?! A 4 ounce refill bottle is $19.99.
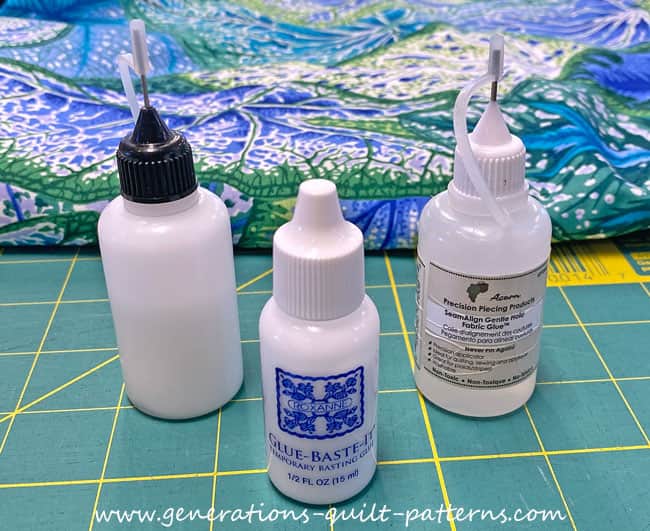 The 3 glues I've tried. My favorite Elmer's (left), Roxanne's Glue Baste It (center), and Acorn's SeamAlign (right)
- Roxanne Glue Baste-It EZ-Squeezie Bottle. I'd had a bottle of this for years, originally for appliqué, not for glue basting seams. Again, a good product, but I've never been convinced it's anything more than nicely repackaged Elmer's. Call me cynical. A 1 ounce bottle with a fine-tip is currently $13.38. A 6 ounce refill runs you $31.41.
Hmmmm…no thank you! I’ll stick with Elmer’s.
💡Quick Tip: Filling Your Fine-Tip Bottle
Getting glue out of a big Elmer's bottle and into a tiny fine-tip bottle is far messier than you'd think.
If you just try to pour it, the glue covers the hole and runs down the sides of the bottle.
Here's what actually works: clean out the hole in the small bottle completely first (a Q-tip does the job), then push the tip of the Elmer's bottle into that hole and squeeze steadily, releasing the pressure now and then so you don't force in an air bubble.
A fuller bottle is also easier to squeeze than a nearly empty one, so it's worth refilling before you're down to fumes.
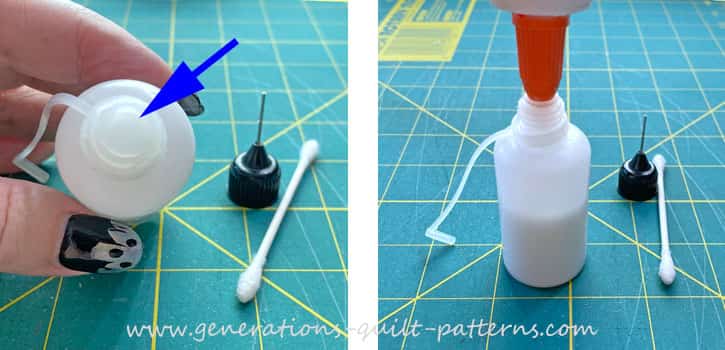
How to Glue Baste a Seam
The technique itself is simple.
- Lay the first patch right side up.
- Place a tiny dot of glue at the very beginning of the seam and at the very end, then add a few more dots along the seam allowance (roughly a quarter to a half inch apart, depending on the size of the patch).
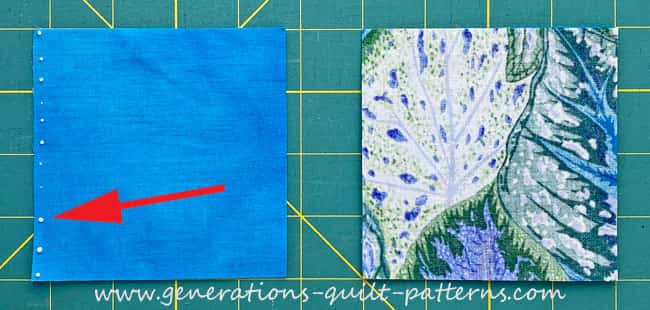
- Keep every dot within a scant quarter inch of the cut edge, well inside your seam allowance, so your needle never sews through glue. (above, left)
- Layer the second patch right sides together with the first, and align the edges. You do have a bit of time to work. (above, right)
- Heat set with a hot, dry iron, no steam. You're trying to dry the glue out, and steam does the opposite. (See the batching note below for when this step is genuinely optional for you.)
- Sew the seam as usual...not a pin in sight!
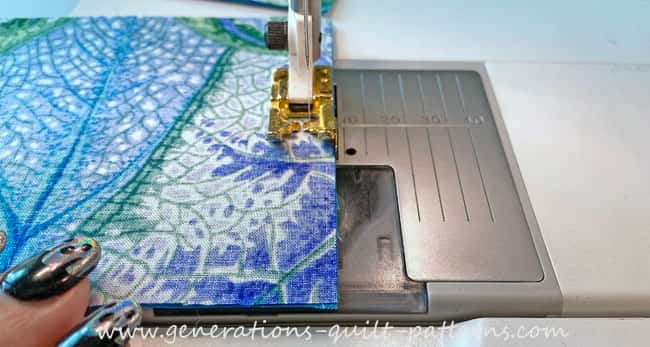 Sewing a glue basted seam...look, no pins!
That's the whole technique. The dots are meant to be TINY. TINY! TINY!
It really IS that simple, at least for a seam where both pieces already match.
Don't like the way you lined up the edges?
No problem. Simply pull the patches apart and try again.
Remember, this glue only needs to hold long enough to stitch the seam.
Where Glue Basting Shines...
Here's something I didn’t expect going in.
I have never heat set a glue basted seam. Not.A.Single.One.
To be fair, that comes with a condition.
I'm a batcher. I don't glue baste one pair of patches, sew it, then glue baste the next pair. I'll sit down and glue baste a whole stack (40 patches in a row is nothing for the type of quilting I like to do).
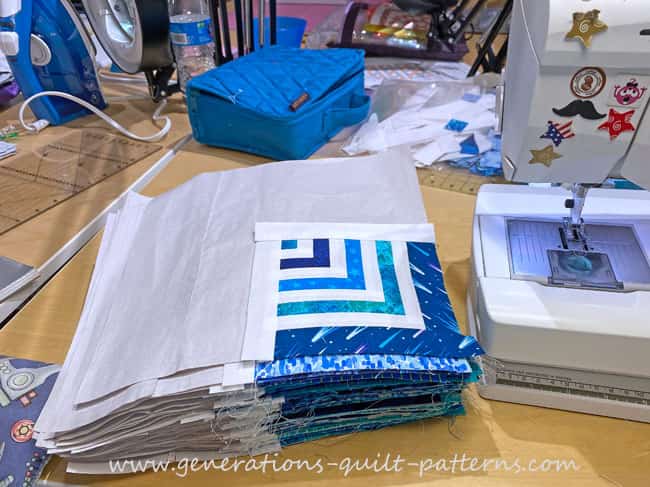
By the time I work my way through that stack, the first ones have had plenty of time to air dry on their own.
💡Quick Tip
If you're batching a handful of pairs, flip your stack before sewing so the pairs glued first are on top. That way every pair gets a little extra drying time before it reaches the machine.
If you're gluing and sewing one pair at a time, I'd actually expect you to need that heat setting step.
A single dotted line of glue doesn't get the setting time my stack of 40 does. And if a patch of mine doesn't hold for whatever reason, heat setting is always there as a fallback. It dries the glue almost instantly. Again, no steam needed.
A few other places where glue basting has genuinely earned its keep for me:
- No sewing over pins, which, if you ask the people I sew with, I belong in 'Quilt Jail' for all the pins I sew over.
- No pins to remove once the seam is sewn. That's a whole step gone-o.
- Paper piecing. This one surprised me the most. I don't like pinning paper pieced patches. Pins distort the pattern and make everything lumpy. My go-to was holding the patch in place with my fingers while sewing. Glue basting solves this beautifully. The glue sits in the seam allowance where it will never be sewn over, and it holds the fabric patches together without any distortion. No finger contortions either. The only real problem I've had is a patch flipping over if I sewed it before the glue had a chance to set. If that happens, no harm done. Just peel the patches apart and reposition.
- Holding binding in place for hand stitching. No pins, no clips needed.
- And I'll admit. This one's a bit silly. For two simple square patches where I just want the ends to come out perfectly even, I glue baste <hangs head in shame>. It feels like overkill, but every time I glue baste, it comes out perfect. Even edges makes turning units into blocks easier. So I keep doing it.
...And Where it Doesn't
This is the part most glue basting tutorials skip.
AND it's the part I think matters most.
Patches of different lengths
Every demonstration I've seen starts with two units that already match in length exactly.
Nobody tells you what happens when they don't, and in everyday quilting, they often don't. (Mine don’t always either.)
Blocks frequently need to be eased to fit sashing or to fit other blocks/units. Borders, even cut exactly to the pattern's measurement, don't always match the length of the finished quilt top they're sewn to.
When two pieces need to be eased together, fixed dots of glue simply don't give you the control pins do.
I need pins to feel confident easing fabric into place. Even
careful piecing still needs the occasional easing.
SOLUTION: Use pins to hold patches in position when you need to ease. Glue basting just isn't the right tool for that job.
Seams you intend to press open
Pressing a 1/4" seam allowance open is fiddly enough without having to pull the fabrics apart. It can be done, but takes more time than simply pinning before and removing them after sewing.
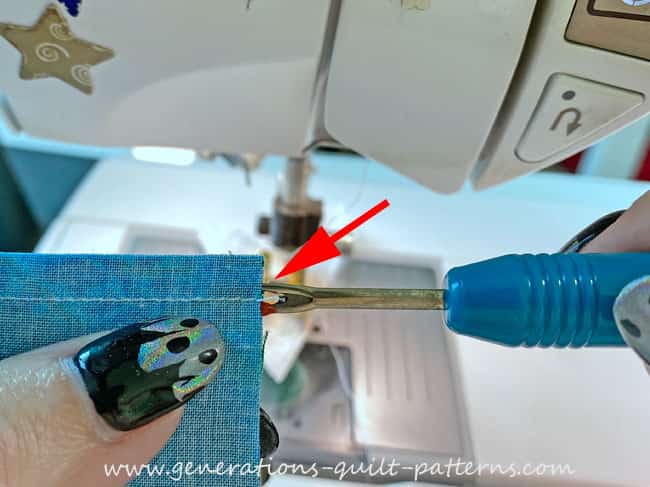
Insert the tip of your seam ripper in the seam allowance close to the stitches. The dull edge of the blade (outside edge, see arrow) up against the dot of glue.
Pull the seam ripper against the dot and it should open with little effort. (Small dots, right?!!)
Twirled or fanned seam allowances
A second spot where glueing is a hindrance rather than a help are twirled (or fanned) seam allowances—the technique used at a center intersection (like in a four patch), to reduce bulk by releasing a few stitches and spreading the seam allowances around the center point instead of pressing them flat to one side.
If you've glued too close to that intersection, the glue can make those seam allowances stubborn to release when it's time to twirl them.
Nothing disastrous, just more time and fuss than it should take.
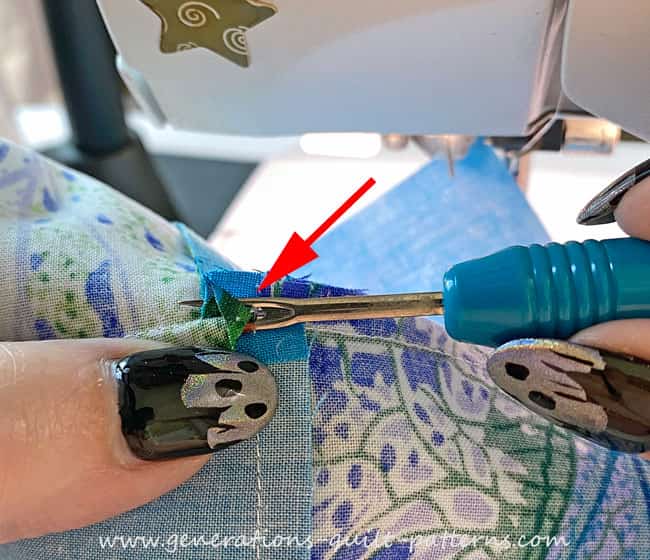 Use the outside edge (non-blade) edge of the seam ripper (arrow), insert between the stitches and the dot of glue in the seam allowance. Pull away from the seam to release the dot.
Here's what the twirled (fanned) seam looks like.
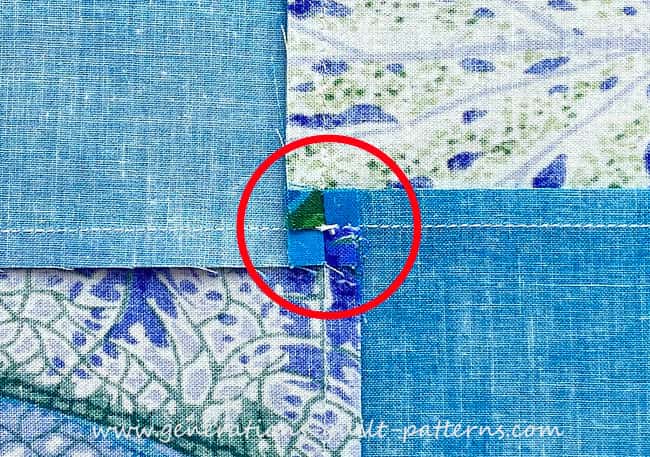 A twirled seam on a 4-patch, looks like a miniature 4-patch when done correctly. Don't cut away the thread tails at the center, simply loosen them enough to manipulate the seam allowances.
SOLUTION: Write it on your pattern sheet, something like, "Don't glue the end of a seam that's going to be twirled." If it's a paper pieced pattern, mark the spot on your pattern. And don’t backstitch that seam either while you’re at it.
Dots. Not blobs. Not lines.
The third lesson came from trying to shortcut the process. I squeezed drops straight from the Elmer's bottle, using its stock, orange tip, instead of switching over to my fine-tip.
Big mistake.
That orange tip is nearly impossible to control. Dots became blobs. Lines? Don’t even go there.
Once a line of glue gets thick and dries, pushing a pin through is hard. Too hard.
That’s a real problem if you discover part way through piecing that you need to ease something after all.
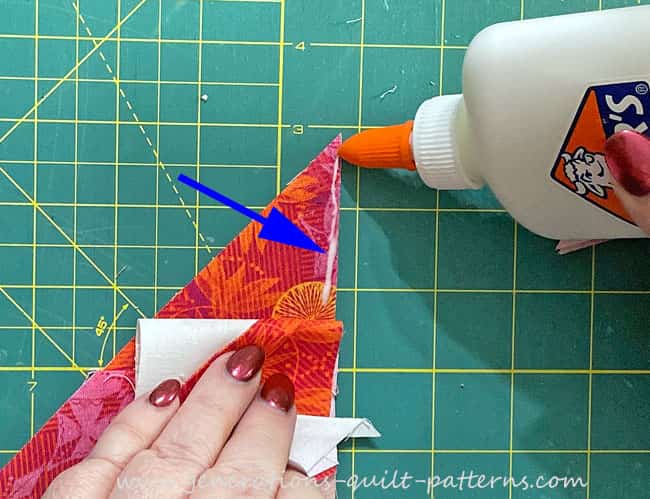 Never again!
SOLUTION: Always switch to the fine-tip before you start, and keep your dots genuinely tiny. No lines.
Troubleshooting and Tips
- If you leave the tip uncapped for too long, it will clog. A fine quilting pin, poked in and swirled around, clears it right out. (Ask me how I know!)
- Low bottle: as your bottle gets low, glue retreats away from the tip opening between uses. You end up re-squeezing glue all the way back down before your next dot. Setting the bottle at an angle, tip down, in a shallow dish keeps the glue right where you need it.
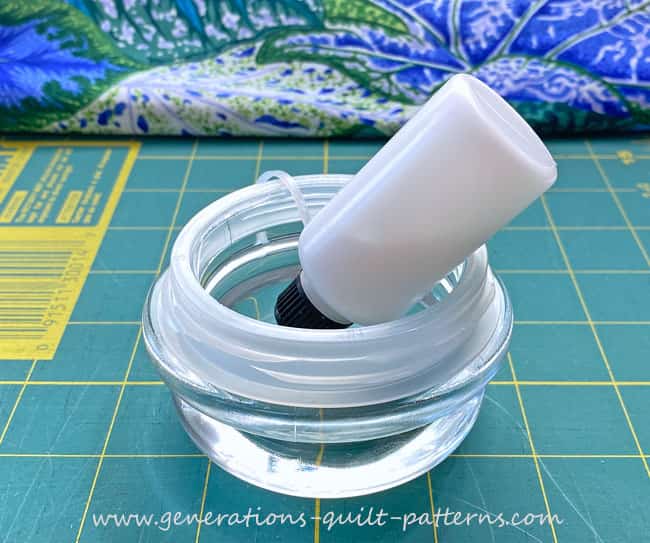 Using a re-purposed a Yankee Candle lid for a dish...heavy so it doesn't accidentally get tipped over.
- Don't buy a tip with a long pin-style insert. I tried one meant to prevent clogging, and while it seemed clever, it meant re-priming the entire length of the tip with glue every single time I recapped it. More work, not less. I went back to the plain fine-tip and never looked back.
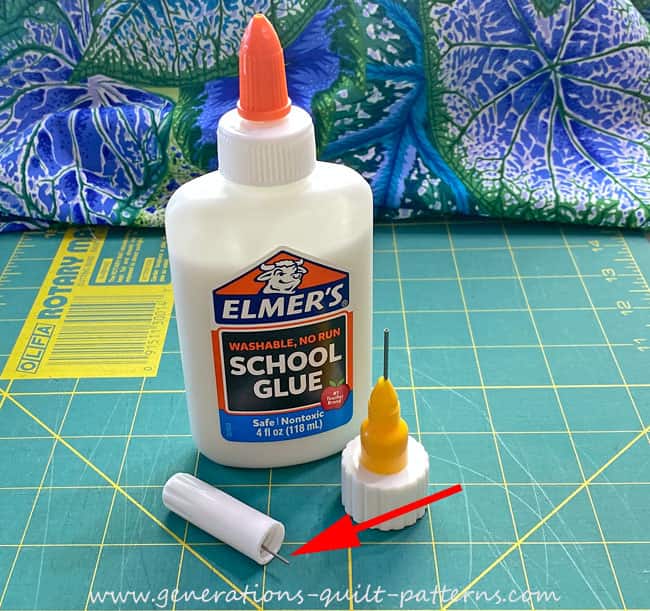 You can see the insert that goes into the tip when you cap the bottle (arrow). Way more work than it was worth.
The Bottom Line
Remember that skeptical quilter from a few paragraphs back? Pins in her mouth since kindergarten, convinced that gluing a quilt was not for her...thank you very much?
Never say never.
I warmed to this technique almost by accident, and these days it's a standard go-to for very specific things.
Right now I'm paper piecing log cabin blocks with long, skinny strips cut 1" wide. I glue baste every single one without a second thought.
Glue basting's earned a permanent place in my paper piecing workflow.
Less ripping.
More enjoying the process.
Glue and paper piecing have become the Dynamic Duo of my sewing room.
The choice is yours
I'm not here to convince you that you must use glue basting. In quilting, there's always more than one way to get something done: pins, thread basting, glue basting, will all hold two patches together for sewing.
What I do want is for you to actually understand the technique, well enough to use it without checking instructions, before you decide whether it belongs in your own toolkit.
And once you do, expect to reach for the glue for some things and set it aside for others.
That's not a failure of the technique. That's just what it means to use the right tool for the job.
YOU get to choose what works best for you.







Nifty Notions

By Julie Baird
Copyright © 2008-2026 Generation Quilt Patterns, LLC
All Rights Reserved
Generations-quilt-patterns.com does not sell any personal information. (See Privacy Policy)