- Home
- Free Quilt Block Patterns
- Rocky Mountain Chain Quilt Block
🏔️
Conquer the Rocky Mountain Chain Quilt Block: A Peak Quilting Experience! 🧵
From our Free Quilt Block Patterns Library
This post contains affiliate links for which I receive compensation
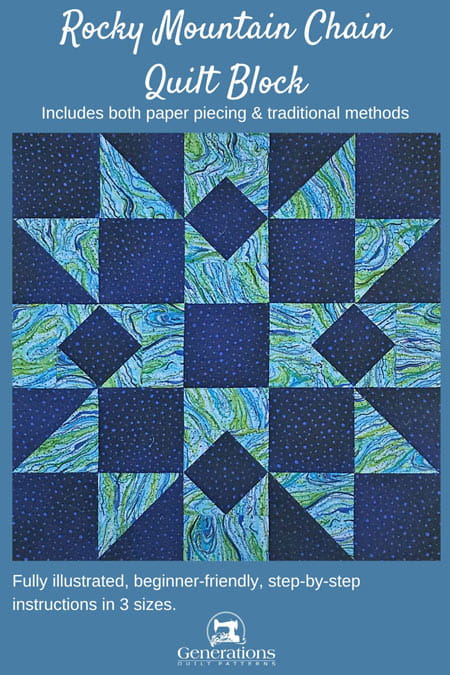
Calling all mountain-loving quilters! Get ready to scale new heights of creativity with the Rocky Mountain Chain quilt block.
This stunning star design will have you yodeling with joy as you piece together a masterpiece that's as majestic as the Rockies themselves.
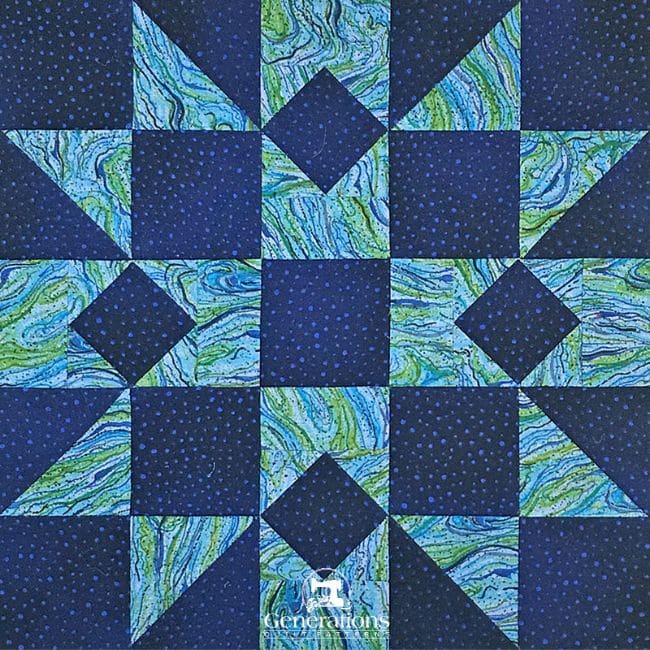
Whether you're a confident beginner or a seasoned pro, our easy-to-follow tutorial will guide you to the summit of quilting success. So grab your fabric Sherpa and let's conquer this quilting peak together!
Use these links to quickly find what you're looking for:
Cut. Sew. Press. Elevate your fabric to peak perfection!
New quilt fabrics to tickle your fancy...
Click the images below to see the full collection. We share any commercial and/or free patterns that showcase them, too. (For inspiration, of course!)
📋General Instructions
Several abbreviations are used throughout this tutorial (and website):
- HST - half square triangle(s)
- SiaS - Square in a Square unit(s)
- SA - seam allowance
- RST - right sides together
Quarter inch seam allowances (SA) are used throughout. Press seams to the dark unless otherwise instructed.
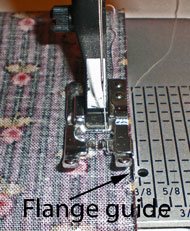 My favorite 1/4" foot
You'll see me switch back and forth between presser feet. An open toe applique foot for the HST and paper piecing the SiaS is 'Da Bomb'—making it so easy to see where you're stitching.
For sewing the patches together it's back to your favorite 1/4" presser foot.
My favorite has a rigid guide on the right-hand side.
It's particularly helpful when I'm suffering through a serious case of brain-fart-itis-maximus. (No amount of Excedrin can cure that!)
And I most certainly was during the construction of the sample.
✂️Cutting and optional paper piecing pattern download
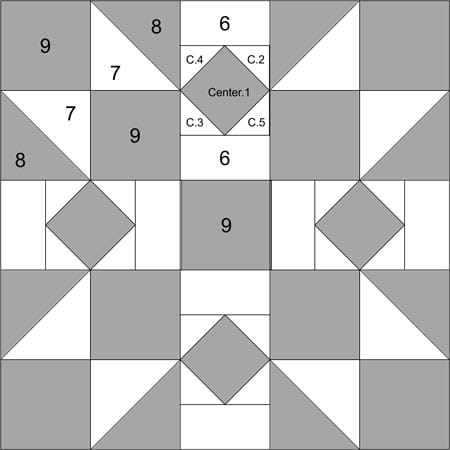 Rocky Mountain Chain design
Sample Size: 10" finished / 10½" unfinished
Grid: 10x10
Attributed to: Hearth & Home
AKA: Tumbling Blocks (Comfort Magazine)
Design Type: Uneven 9-patch, small center | Star
As they say, there's more than one way to skin a cat—and there's always more than one way to make a quilt block.
Two different cutting charts are shared below:
- The green one uses traditional piecing methods and folded corners.
- The blue one uses traditional techniques plus some paper piecing for the SiaS units.
Choose whichever method works best for you. Or try a new one and grow your piecing skills.
In both charts, the measurements for the HST units are generous. Those units will be trimmed to perfection after stitching.
All the fabrics used were starched before cutting. Starch makes finger pressing easier, and in my humble opinion, cutting and sewing more accurate.
To try starching for yourself, click here for helpful tips and instructions.
Pick either Option #1 or #2 below.
Option #1: Traditional piecing w/Folded Corners
Select your block size, fabrics, and cut. There is no pattern to download.
Click here to download a copy of this cutting chart and block design.
 | Cutting Chart for a~ Traditional Piecing ~ | ||||
|---|---|---|---|---|---|
| Patch | Fabric | Qty | Finished Block Size | ||
| 10'' | 15" | 20'' | |||
| Center.1** | A | 4 | 2½'' x 2½'' | 3½'' x 3½'' | 4½'' x 4½'' |
| C.2, C.3, C.4, C.5** | Bac | 16 | 1½'' x 1½'' | 2" x 2" | 2½'' x 2½'' |
| 6 | Bac | 8 | 2½'' x 1½'' | 3½'' x 2'' | 4½'' x 2½'' |
| 7 | Bac | 1 | 6½'' x 6½'' | 8½'' x 8½'' | 10½'' x 10½'' |
| 8 | A | 1 | 6½'' x 6½'' | 8½'' x 8½'' | 10½'' x 10½'' |
| 9 | A | 9 | 2½'' x 2½'' | 3½'' x 3½'' | 4½'' x 4½'' |
| Unfinished Block Size | 10½'' | 15½'' | 20½'' | ||
| Grid Size | 1'' | 1½'' | 2'' | ||
Option #2: Traditional & paper piecing
You'll need the most current version of Adobe installed on your computer to download the pattern.
On the Adobe Print Menu page, under 'Page Size and Handling' set 'Custom Scale' to 100% before printing for accurate results. Click here to see what it looks like on the Print Menu page.
After printing, use the 1" square graphic on the printed pages to confirm they are printed accurately.
Choose your finished Rocky Mountain Chain block size from the list below. Download and print the copies needed to make a block.
DOWNLOAD and PRINT Paper Piecing Patterns | ||
|---|---|---|
| Finished Block Size | # of copies to print | Click link below for PDF Pattern |
| 10" | 1 | 2" |
| 15" | 1 | 3" |
| 20" | 2 | 4" |
Now cut the patches for the block.
Click here to download a copy of this cutting chart and block design.
 | Cutting Chart for a~ Paper PLUS Traditional Piecing ~ | |||||
|---|---|---|---|---|---|---|
| Patch | Fabric | Qty | Finished Block Size | Sub Cut | ||
| 10'' | 15" | 20'' | ||||
| Center.1 | A | 4 | 1⅞'' x 1⅞'' | 2⅝'' x 2⅝'' | 3⅜'' x 3⅜'' | --- |
| C.2, C.3, C.4, C.5 | Bac | 8 | 2⅜'' x 2⅜'' | 2⅞'' x 2⅞'' | 3⅜'' x 3⅜'' | |
| 6 | Bac | 8 | 2½'' x 1½'' | 3½'' x 2'' | 4½'' x 2½'' | --- |
| 7 | Bac | 1 | 6½'' x 6½'' | 8½'' x 8½'' | 10½'' x 10½'' | --- |
| 8 | A | 1 | 6½'' x 6½'' | 8½'' x 8½'' | 10¼'' x 10¼'' | --- |
| 9 | A | 9 | 2½'' x 2½'' | 3½'' x 3½'' | 4½'' x 4½'' | --- |
| Unfinished Block Size | 10½'' | 15½'' | 20½'' | na | ||
| Grid Size | 1" | 1½'' | 2" | na | ||
NOTE: If you were wondering, under the patch dimensions for the 20" block, both the #1 and the #2-#5 patches are cut 3-3/8" x3-3/8". That is correct—not a typo.
🪡Constructing the Rocky Mountain Chain units
SiaS for Side Units
Make 4
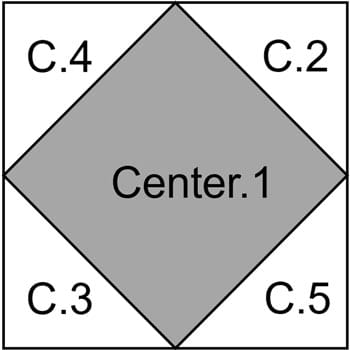 SiaS unit
You chose your preferred method to make the Square in a Square (SiaS) units and then cut those patches in Step 1.
Now select the corresponding instructions below to make these units.
If you cut from the Green Chart: Folded Corners Method...
Click here for instructions to make this unit with the folded corner technique.
When finished, click the back button on your browser bar to return here.
If you cut from the Blue Chart: Paper Piecing...
For more detailed instructions using this method, click here.
From the paper pattern you downloaded in Step 1, cut out the four units. Don't bother to trim exactly on the dashed line—a rough cut just outside the dashes is good enough for now.
Reduce your stitch length to 1.2 mm to 1.5 mm, or 15-20 stitched per inch. An open toe appliqué foot is perfect for this stitching because you can see the sewing line.
Use an Elmer's Washable Glue Stick (goes on purple, dries clear) to glue the wrong side of a Center.1 in place on the unprinted side of the pattern. (A little dab'll do ya!)
Its edges should extend approximately 1/4" past the solid stitching line (below).
Update: As of 7/24 your pattern includes dashed guidelines to make positioning this first patch foolproof.
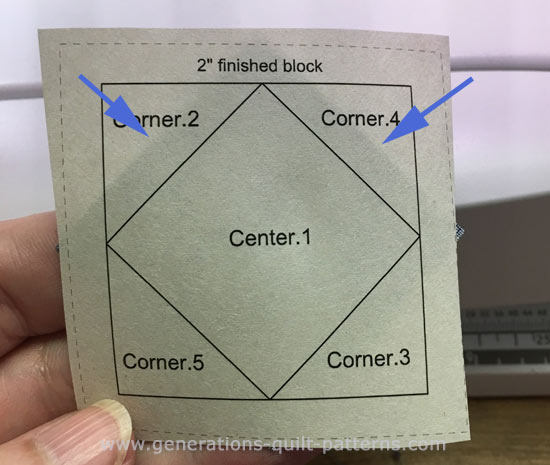 Notice how I didn't bother to cut the pattern exactly on the dashed lines. Everything gets trimmed neatly at the end—even the thread tails!
With right sides together (RST) add the corner patches (C.2, C.3, C.4 and C.5) in numerical order. For the larger size blocks, you may be able to a pair of opposite corners before pressing.
Align the long edge of a corner patch with the cut edge of #1. Stitch—starting and stopping past the outside dashed line of the unit.
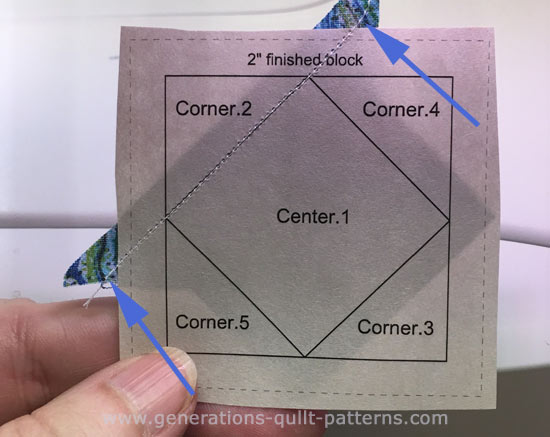 It's important to start and end your stitching past the outside edges of your block.
Because my fabric is heavily starched before cutting, the seams can be finger-pressed instead of jumping up and down to the iron between patches.
The image below on the left, shows how the C.4 patch is positioned before stitching.
On the right after stitching C.5, you can see where the dog ear is trimmed away (blue arrow). Trim away all the dog ears to reduce bulk and neaten up your patchwork. Don't worry about thread tails—they'll removed in the final trim.
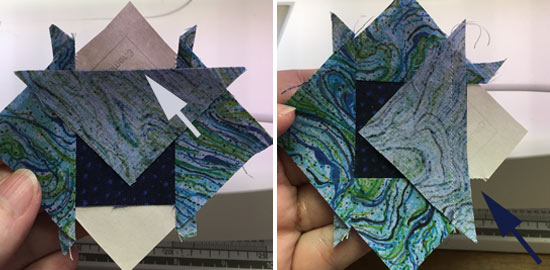
Now give your unit a quick press, checking that there are no tucks at the seam lines.
Trim to size with your rotary cutter and ruler.
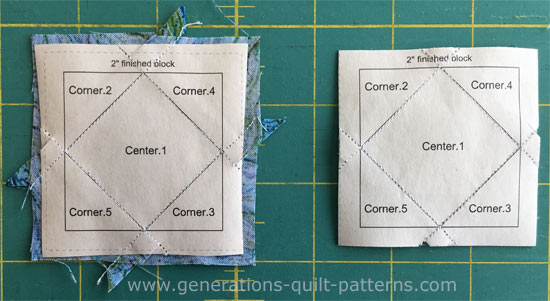 Any straggly thread tails are removed with this trimming.
The paper piecing is complete. From this point forward, return your stitch length to the one you regularly use for piecing and install your favorite 1/4" presser foot.
******************
From this point forward the directions are the same
regardless of which cutting chart you used.
******************
Dreaming of scaling new patchwork heights but short on time?
Pin this Rocky Mountain Chain quilt block guide now, and you'll have a trusty trail map when you're ready to embark on your quilting expedition!
- Home
- Free Quilt Block Patterns
- Rocky Mountain Chain Quilt Block

