- Home
- Quilt Design Inspiration
- Quilt Designs
Patch Size Matters for Your Quilt Designs
How much time/money/fabric can you spend?
This post contains affiliate links, for which I receive compensation.
Before shooting the lock off your wallet for fabrics for your new quilt designs, you need to consider the size of the patches you'll use and the techniques to make them.
If you've quilted for any length of time, you know different techniques take different amounts of material. Some are more fun to stitch. Some are more accurate. Some are faster.
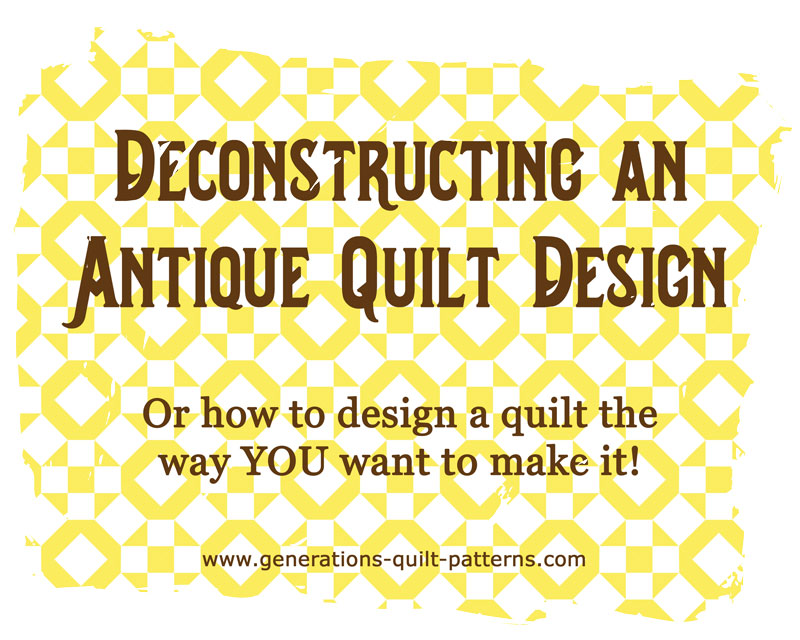
Taking the time to construct sample blocks is the best way to determine if your choices are ones that you'll enjoy.
Because let's face it.
A quilt that isn't any fun to work on...
Is one that doesn't get finished.
That's a waste of your precious time, patience, money and stash.
On this page you'll learn how to choose the best block size for your quilt designs.
Let's get started.
Where's YOUR quilting happy place?
If you examine your stash of completed quilts, you'll likely find you gravitate towards blocks with units of similar dimension. Perhaps 1" to 1-/2" triangle squares. Or 2-1/2" cut strips.
These sizes are personal to YOU and are particularly useful in determining what things you WON'T like. Won't finish.
In Part 1, we touched on knowing yourself as a quilter...this is a big part of it.
Consider a Log Cabin design...
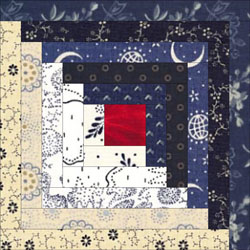
I prefer one with logs no wider than 1" finished. If my quilting time isn't limited, 3/4" wide appeals even more.
When the logs shrink to 1/2" or less, I change techniques—switching from traditional to paper piecing.
 Paperpiecing logs that finish 1/2" or less.
That's because of the accuracy of the technique and the fact that my mind wanders when doing the same thing over and over again. I get sloppy with my seam allowance. <hangs head in shame!>
Also, as an Electric Quilt user, it's easy for me to draft and print the patterns for blocks of any dimension. Quickly. Cheaply. Precisely.
If I saw a quilt design that I really liked but the pattern called for logs cut 2-1/2", I'd re-draft the design in Electric Quilt or pass on it. Those logs are way too big for MY personal preference.
Now a quilter who loves the convenience of pre-cut Jelly Roll strips or who can crank out the strips like nobody's business with her new-fangled fabric cutting machine may go ga-ga over the same pattern.
She'll CHOOSE to use her pre-cut stash. That's her prerogative.
Her choice is right for HER.
And that's the only thing that really matters.
The choice that's right for YOU. Period.
No apologies.
Ever.
How does this apply to your quilt designs?
Designs with units that you're comfortable with—that you enjoy making—get finished. Your fabrics, your time, and your money aren't stored in a forgotten box on the top shelf of a musty old closet.
 Quilt pieced and quilted by Julie Baird
Pattern by Ruth B. McDowell
You have something to show for your efforts—that's part of the joy of quilting. Blocks stay finished. Unlike laundry. And cooking. And cleaning.
Bigger patches mean bigger blocks. That means fewer blocks to make. Less time to finish.
Stitch a smaller version of the same block?
You need more of them for the same size quilt.
Say you start with a 12" block, then choose to scale it down to 6". It takes four 6" blocks to replace a 12" one. With four times as many seams to sew (though shorter). Four times as many patches to cut.
If you reduce the block size by 2/3s (i.e. 12" to 4") the increase is 9 times; reduce by 3/4s (i.e. 12" to 3") it increases 16 times.
Then there's a few more seams to join all the units together.
 20 seams
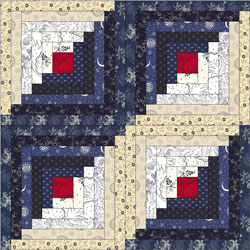 80 seams plus 3 to join
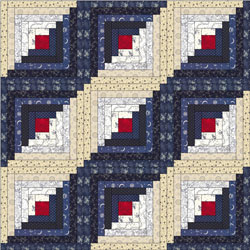 180 seams plus 8 to join
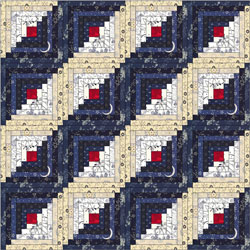 320 seams plus 15 to join
Those are huge differences in time spent, both cutting AND stitching.
The skill level hasn't changed. You just need to decide if the increased visual complexity of the design is justified by the use of your resources to achieve it.
Now, the same block design made with smaller patches can take significantly more material, too. Let's look at another example.
Consider a simple nine-patch...
A quilt top finishing 9" by 9"—well that's really more like a large potholder—has 81"sq/inches of fabric showing. 9" times 9" equals 81", no matter how many patches are used.
Let's figure out how much it takes as we vary their size and number.
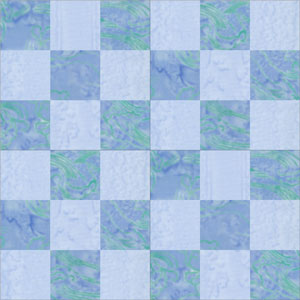
Option 1
3" finished squares
One nine-patch
Cut:
- Four light 3-1/2"x3-1/2"
- Five dark 3-1/2"x3-1/2"
Total stash used: 110.25sq/in (9 x 3.5" x 3.5")
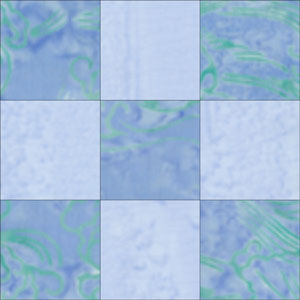 Option 1
 Option 2
Option 2
1-1/2" finished squares
Four nine-patches
Cut:
18 dark 2"x2"
18 light 2"x2"
Total stash used: 144sq/in (36 x 2" x 2")
Option 3
1/2" finished squares
36 nine-patches
Cut:
162 dark 1"x1"
162 light 1"x1"
Total stash used: 324sq/in (324 x 1" x 1")
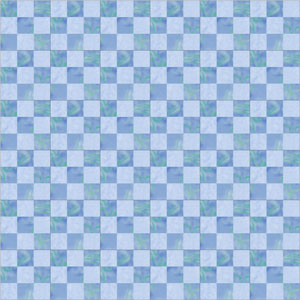 Holy Guacamole! That's a lot of fabric to use up!
Almost 3 times as much material is needed for Option 3 as Option 1—324" versus 110".
Where is it all?
In the seam allowances—naturally!
The trade-off for using all the extra fabric and time is a more intricate looking design. But is it really any harder?
It's still just simple nine-patches. Just more of them.
Click here if you think a quilter would be crazy to make 9-patches with 1/2" finished squares.
Choose what's best for YOU!
Consider the 'Omigosh' quilt design.
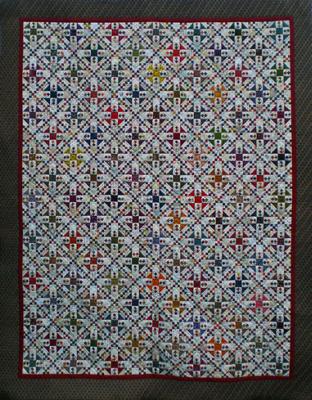
This version was made according to the pattern with 1" cut strips (like Option 3 above) for both the nine- and four-patches. [Click here to read more about it.]
In this next quilt submitted by one of our readers, the quilter chose to make the pattern with 1-1/2" strips for the nine- and four-patches.
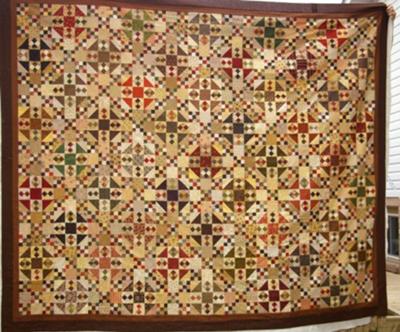
You can read more about her story here.
Each quilter knew herself.
And she certainly didn't need to justify her preferences to anyone. Neither do you. Because each quilter chose well for herself, each has a FINISHED quilt she's proud of.
IT.GOT.DONE!
And it's beautiful!
Using the information in your quilt designs
As you create your own quilt designs start with your personal preferences for patch sizes.
Next identify if any of your resources are scarce—your time, your money or your fabric.
Without changing the finished dimensions of your designs:
- To conserve any of your resources, increase your block size
- If you're determined to put a dent in your existing stash, choose smaller blocks
- To increase the probability of a finished quilt, work with your favorite sized blocks
Moving on...
In Part 4 (coming) of our 'Deconstructing Antique Quilt Designs' series, we'll apply these ideas and choose the sizes and techniques for the different block options (discovered in Part 2) to recreate our patchwork designs.


