- Home
- Free Quilt Block Patterns
- Calgary Stampede Quilt Block
Patchwork Rodeo: Tame the Calgary Stampede Quilt Block
Sew-deo skills for fabric wranglers! 🎪✂️
This post contains affiliate links, for which I receive compensation.
The Calgary Stampede quilt block is riding into town, and it's bringing more excitement than a rodeo clown at a bull fight.
We've got all the tricks of the trade to turn you into a quilting legend—from HSTs 4-at-a-time to Flying Geese that'll make your heart soar.
So dust off your sewing machine and get ready to wrangle some fabric! 🐎🧵
🧭Lasso the section you need and giddy-up to quilting glory! 🔍
Whoa there, partner! Before we hit the quilting trail, here's your map to navigate this rodeo of stitching.🤠🧵
- A cutting chart in three sizes with a download of the chart and block design
- A coloring/fabric planning page to download and print
Cut. Sew. Press. Yeehaw your way to quilt-tastic brilliance!
📋 General Instructions
When instructed to press, press the patches in the closed position first—just as they came off your sewing machine. This sets the seam, melding the fibers of the threads into the fibers of the fabric.
SA are pressed to the dark unless otherwise noted.
Pressing instructions are highlighted in yellow throughout this tutorial.
Several abbreviations are used on this page. They are:
- SA - seam allowance
- RST - right sides together
- HST - half square triangles
- CC - connector corner
- FG - Flying Geese
1/4" SA are used through this tutorial.
New quilt fabrics to tickle your fancy...
Click the images below to see the full collection. We share any commercial and/or free patterns that showcase them, too. (For inspiration, of course!)


✂️ Cutting for a Calgary Stampede block
 Calgary Stampede design
Sample Block Size:
- 10" finished
- 10 1/2" unfinished
Grid: 7x7
Design Type: Uneven 9-patch-large center | Star
Be sure to label your patches. We refer to their numbers throughout the steps.
I've used batiks for the medium and dark fabric choices. Batiks are fabulous to work with because they fold and press so well.
YOU are always in charge of the fabrics you choose for your own blocks.
In that spirit, I decided to swap lights and darks in the design, which is why the fabrics are labelled 'A' and 'B' to avoid confusion. I selected a variegated batik and a Bella Solid to work with.
If you're interested in using batiks, check out some new ones from our favorite fabric brands here.
The background is a Moda 'Grunge'. A solid, but not solid-solid with nice depth. I wish they photographed better.
You can find a variety of Grunge fabrics (yardage and precuts) here and here. (These links open in new windows to make it easier to come back to this spot in the tutorial.)
To print a copy of the block design and cutting chart to use at your cutting table, click here.
A word about directional prints...
In this tutorial, I've used a directional print for my medium fabric intending the fabric design to run all in one direction in the finished block.
Yeah. Kind of anal, but that's how I roll. ;)
I've highlighted in turquoise the steps needed to make this happen. The turquoise should make those notes easy to find if you need them and easy to ignore if you don't.
For cutting, the only adjustment required for the directional print is for Patch #8—two should be cut on the lengthwise grain and two on the crosswise.
Click here to see what those cut patches look like.
 | Cutting Chart for a~ Traditional Piecing ~ | ||||
|---|---|---|---|---|---|
| Patch | Fabric | Qty | Finished Block Size | ||
| 7'' | 10 1/2'' | 14'' | |||
| 1 | Light | 4 | 1 1/2'' x 1 1/2'' | 2'' x 2" | 2 1/2'' x 2 1/2'' |
| 2 | Med | 1 | 4 1/4'' x 4 1/4'' | 5 1/4'' x 5 1/4'' | 6 1/4'' x 6 1/4'' |
| 3 | Light | 1 | 4 1/4'' x 4 1/4'' | 5 1/4'' x 5 1/4'' | 6 1/4'' x 6 1/4'' |
| 4 | Med | 4 | 1 1/2'' x 1 1/2'' | 2'' x 2'' | 2 1/2'' x 2 1/2'' |
| 5 | Dark | 2 | 3 1/2'' x 3 1/2" | 4 1/2" x 4 1/2" | 5 1/2'' x 5 1/2" |
| 6, 7 | Light | 8 | 2 1/4'' x 2 1/4'' | 2 3/4" x 2 3/4" | 3 1/4" x 3 1/4" |
| 8 | Med | 4 | 1 1/2'' x 2 1/2'' | 2'' x 3 1/2'' | 2 1/2'' x 4 1/2'' |
| 9 | Light | 1 | 3 1/2'' x 3 1/2'' | 5'' x 5'' | 6 1/2'' x 6 1/2'' |
| 10, 11 12, 13 | Med | 4 | 1 1/2'' x 1 1/2'' | 2'' x 2'' | 2 1/2'' x 2 1/2'' |
| Unfinished Block Size | 7 1/2'' | 11'' | 14 1/2'' | ||
| Grid Size | 1'' | 1 1/2'' | 2'' | ||
🪡 Assemble the units for a Calgary Stampede
HST - 8-at-a-time technique
Make 8
 Make 8
Mark the backside of the lighter #3 patch.
Option 1: Draw two diagonal lines between each pair of diagonal corners. Each line is 1/4" away from the center diagonal. (Shown below) Use an open toe appliqué presser foot to stitch on all four lines. I prefer it for this method.
Option 2: Draw a single diagonal line from corner to corner. Stitch 1/4" away from both sides of each line. Use your favorite 1/4" foot for stitching.
 The marking should be just dark enough for you to easily see at your sewing machine. I used Option 1 this time.
An admission...
Clearly I must have been on drugs the day I made this block. Shown in the sewing below, I've marked the DARKER #2 patch. I could still see the markings, but it'd been so much easier if I'd marker the lighter, cream-grunge #3. 'Guess my ol'blonde Norwegian genes are showing again!
With RST, layer the #2 and #3 patches with marked #3 on top.
You may find it helpful to pin the layers together avoiding the drawn lines sp you don't have to remove any pins as you sew.
Stitch as instructed to create four lines of stitching.
 Using an open toe applique foot makes it sew much easier to see where you're sewing.
Press the unit flat.
At your cutting mat, find the Center using the chart below.
| ||
|---|---|---|
| Finished Calgary Stampede Block Size | Center Measurement | Trim HST to… |
| 7" | 2 1/8" | 1 1/2" x 1 1/2" |
| 10 1/2" | 2 5/8" | 2" x 2" |
| 14" | 3 1/8" | 2 1/2" x 2 1/2" |
Cut the sewn unit in half through the center.
 For our 10 1/2" sample block, the midpoint is 2 5/8" (red arrow) in from the side.
Rotate your mat a 1/4" turn and cut again. You now have 4 equal squares.
 The blue arrow points to the first cut. The second cut is 2⅝" from the edge.
Cut each in half along the marking.

Trim to the size in the chart above that corresponds with the finished size of your Calgary Stampede block.
 This is where I use my rotating rotary mat. So much easier to spin the mat than move the HSTs.
Your 8 HST are perfect. Put them aside for now.
Corner Units
Make 4
 Make 4
Choose the HSTs and #4 squares so that the directional print runs from top to bottom.
It's simply a matter of turning the patches to position the design. Double check right before sewing to avoid having to rip anything out.

Join the light #1 to a #2/3 HST and another #2/3 HST to a #4.
Press with the SA towards #1 and #4 to reduce bulk.

Stitch the two units together.
Press the SA toward the #4 patches.

Repeat the process for a total of four 'tulips' (shown above).
I've laid them out how they'll appear in the block to double check that the print in the fabric is all going in the same direction as I intended.
Flying Geese - 4-at-a-time technique
Make 8
 Make 8
Since we need eight FG for our Calgary Stampede, we'll use the 4-at-a-time method to quickly piece them.
For more detailed instructions in this 4-at-a-time technique, click here. This link opens in a new page to make it easier to come back to the spot in the tutorial.
With RST, layer #6/#7 squares in opposite diagonal corners of the larger #5.
I pin to hold everything in place, with the pins far enough outside the stitching area so they needn't be removed as I sew.
Draw a line 1/4" away from both sides of the center diagonal (shown below). I like to use the Quick Quarter ruler for this and prefer to mark this after the #6s are layered with the larger square.
Helpful Tip
To reduce bulk at the point of our Geese, I mark the opposite diagonal on just the small squares (red arrow below), the cut on that marking through the two #6s to remove their overlapping points (blue arrow below).

At the machine, stitched on the marked lines.

Press to set the seams.
Cut in half on the marking with either your scissor or rotary cutter.
Press again with the SA toward the #6 squares (the sky). You'll have a faux heart shape (left).
Add another #7 square, mark 1/4" away from the center diagonal of the #7 on both sides. Pin to hold in place (right).

Press flat after sewing on the lines. Repeat for the second 'heart'.
Cut the 'hearts' apart between these last two lines of stitching.
Press the #7 open with the SA towards the corner.
Trim the Flying Geese to perfection. Here I'm using the Wing Clipper Ruler by Studio 180 for the trimming. This is a new addition to my toolbox and I LOVE it!
Read my review of it here along with a quick tutorial how to use it.
If you don't have this specialty ruler, don't worry.
 A Wing Clipper Ruler is my go-to tool from trimming FG.
Just use this chart below and a standard square rotary ruler—it must have a 45° diagonal line through the corner and trim your Flying Geese to size.
Flying Geese Dimensions | ||
|---|---|---|
| Finished Calgary Stampede Block Size | Center Measurement | Trim Flying Geese to… |
| 7" | 1 1/4" | 1 1/2" x 2 1/2" |
| 10 1/2" | 1 3/4" | 2" x 3 1/2" |
| 14" | 2 1/4" | 2 1/2" x 4 1/2" |
Click here for a quick refresher—Trim the Finished Block: Steps 1-3—on how to do it. (This link opens in a new window. After completing Step 3, close that window to return here.)
After trimming, these little beauties are PERFECT!

Sides
Make 4
 Make 4
Using the Flying Geese we just made, sew one to each long side of a #8 rectangle, point in.
SA are pressed toward the #8 rectangle.
Repeat for a total of four.
Center - Connector Corners (AKA Sew and Flip technique)
Make 1
 Make 1
On the wrong side of the 10, 11, 12 and 13 squares, mark the diagonal between one pair of opposite corners. It should only be as dark as you need to see it.
With RST, position a marked square in each corner of #9, aligning the raw edges. The marking touches two adjacent edges.
For a directional print: The 'top' of the print on the top two corners is toward the middle. For the lower two corners, the 'top' of the print is at the edges of the bigger #9 square.
 If you're using a directional print like I'm using in the sample, note the positioning of the #9 corner patches.
To hold the patches in place, I've used a pin inserted parallel to the drawn line.
Stitch just on the right side of the line closest to the corner to make up for the turn of the cloth.

Trim away the excess #10, #11, #12, #13 in the corners, leaving behind a 1/4" SA.
Press the triangle left behind towards the closest corner.
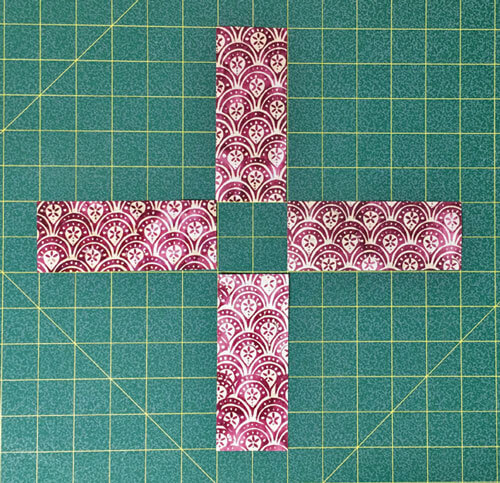
🧩Time to put all the the pieces together
Time to arrange all our patches into the Calgary Stampede quilt block design. The little 'tulips' in the corners point out toward the corners.
The remaining 5 units are foolproof to position.

Sew the units into rows. Pin, if it helps you—it does for me—match the 'bars' in the center of the side units with the connector corners in the center.
SA are pressed toward the FG units in each row. That means towards the center for the top and bottom rows and out from the center for the middle row.

This means your seams nest when you stitch the rows together.
Stitch the rows together matching seams and points as you go. For a refresher on pinning for perfect points, click here.
The finished Calgary Stampede quilt block is all it's pointy-glory.
To be honest I was surprised just how much I like this block.
 A surprisingly cool finish!
What do you think?
Does it make a difference taking the extra time to position the design in our directional print all the same way?
📌Whoa, Nelly! Don't let this tutorial ride off into the sunset 🐎
Lasso it to your Pinterest board for later! 🤠

🔭 Looking for something truly stellar?
You've finished your star quilt block, and you're ready for more!
Browse our collection of 70 stellar star quilt block patterns. All have instructions and cutting charts in multiple sizes. If templates or paper piecing is used in the tutorial, there's a free download for you of those materials.

Eeny. Meenie. Miney. Moe.
Which star quilt block will you sew?
For a star-studded quilting experience, choose from 100+ bedazzling star quilt patterns—for beginners and beyond—click here.
For even MORE blocks to make… 🧩🎨

...visit our Free Quilt Block Pattern Library, with over 260+ blocks to choose from in multiple sizes.
Free downloads are included in all sizes for any blocks require paper piecing patterns or templates.
- Home
- Free Quilt Block Patterns
- Calgary Stampede Quilt Block


Yummy fabrics
to drool over
Click any image below to see the full collection and find pricing and ordering information.


By Julie Baird
Copyright © 2008-2026 Generation Quilt Patterns, LLC
All Rights Reserved
Generations-quilt-patterns.com does not sell any personal information. (See Privacy Policy)