- Home
- Free Quilt Block Patterns
- Harmony Square Quilt Block
Harmony Square Quilt Block, Part 2
Our tutorial continues with the traditional piecing
This post contains affiliate links, for which I receive compensation.
Our Harmony Square quilt block tutorial continues with traditionally pieced corner units and sides.
If you missed printing anything, use these links:
- A cutting chart in four sizes and a place to download the charts and block design for both traditional and paper piecing
- A Harmony Square coloring page to print
- No time to quilt? Pin this tutorial for later.
Now back to our block construction!
🧵 Corners - Traditional Piecing Method
Make 4

We use the same Patch numbers as for the paper pieced version of this Harmony Square unit.
To fine-tune your seam allowance, take a Sewing Test. It's simple to do, takes just a couple minutes and helps you avoid ripping.
After adding each patch, press flat to set the seam and then open with the seam allowance toward the one you just added, i.e. sew #1 to #2, pressing toward #2, etc.
It's easy to get the #4s, #5s, and #6s confused—I was a clueless numpty and mixed them up making the sample—so I strongly recommend that you lay out the patches for each corner like this.
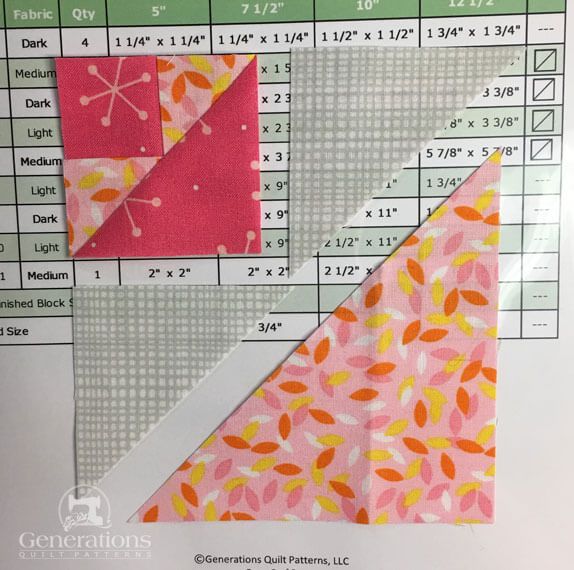
 What's the paper thingy behind the patches? Why the downloadable cutting chart for traditional piecing, of course!
With RST, align a short side of a #2 to #1.
Stitch from the flat end of the patches and not the point. You get a much better seam that way.
 That gnarly patch of fabric behind the presser foot is my 'spider' or 'bunny tail'. I like to start my stitching on it and then chain piece onto my patches. The first stitch is so much better that way.
SA are pressed to #2. (blue arrow)

#2 extends just a wee bit past the bottom end of #1. That's how it should look.
With RST, add the short side of a #3 to the adjacent side of #1.
Take a second and check that when you open the patches, the dark #1 is the corner and the #2, #3 forms a long straight line.
Sew from the flat edges again starting at the blue arrow.

At your ironing board (this is on the absolute best pressing mat called The Magic Pressing Mat), the long edges of #2 and #3 should form a long straight line after pressing. :)
If they don't make a straight line, check your 1/4" seam allowance for wiggles.

If your seam allowance is spot-on, then when you align #4 to this #1/#2/#3 unit, they will be exactly the same size.
Here's how they line up from the #1/#2/#3 side.
This is the side we'll stitch from. That's because we can see where the seams all intersect at the corner of #1 (dark pink).
 Those dog ears should go at some point
This time we have no choice BUT to sew starting at a point.
To keep your sewing machine from chewing it up, start your stitching on a scrap of fabric. (You can see a bit of orange and white fabric behind my presser foot...that's my scrap. A different one this time. I keep several at my machine.)

Just past the halfway point in our piecing.
It's a good idea to check your accuracy at this point. Use the chart below to find the size this #1/#2/#3/#4 unit should measure from edge-to-edge.
Dimensions after Joining #1-#4 | ||
|---|---|---|
| Finished Block Size | Edge-to-Edge Measurement | |
| 5" | 1-1/2" x 1-1/2" | |
| 7-1/2" | 2" x 2" | |
| 10" | 2-1/2" x 2-1/2" | |
| 12-1/2" | 3" x 3" | |
Make any necessary adjustments now. Trim away the dog ears with a scissor.
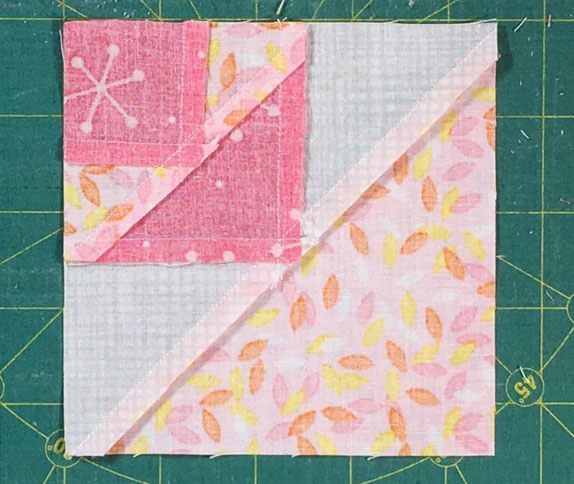
Remember our original fabric layout? Here the trimmed #1/#2/#3/#4 is put back in position.
Add the #5 and #6 patches to the sewn unit, just as you added the #2 and #3—short side of each to the #4.
Here it is after adding #5 which is a bit longer than #4—just like the #2 was. It's normal. Don't worry.

After sewing #6 but before removing my friends, "The Pins".
You can see how the stitching cuts right through the middle of the valley formed by the gray #5 and #6 at the bottom edges.

At the iron, the #5 and #6 form a straight line just like our #2, #3 triangles did earlier.
 Yep! That's my Magic Pressing Mat again. :)
And just like #4, #7 should line up exactly with the stitched patches.
Here from the #7 side...
 Nope...nothing peaking out here.
Here on the other side, the one to stitch on.
 Nothing peaking out here either!
Pin as needed to hold the pieces together as you stitch.
Check to see that your unit is the correct dimension. Line up the diagonal line on your ruler with the center diagonal seam—just like you would for half square triangles.
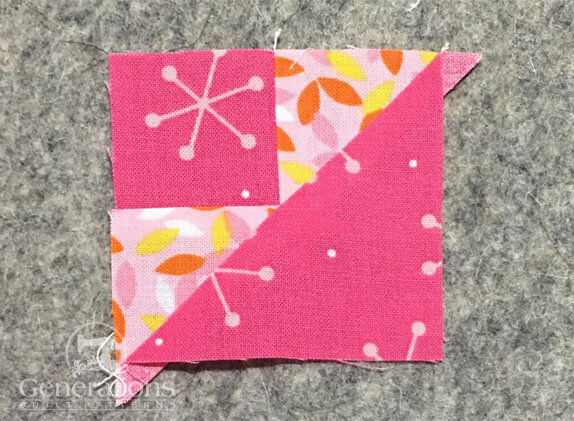
 This Harmony Square corner is not too shabby
Make any adjustments and trim away the dog ears.
My sample's corner needed just a slight haircut.

Here's a quick look at the backside. You can see how all the SAs are pressed towards the last patch added.
Repeat these steps for a total of four units.
Now you're ready to make the sides for your Harmony Square.
Sides
Make 4

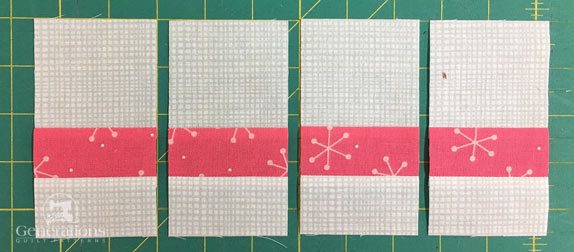
Simple strip piecing is used to construct these units—quickly and accurately.
With RST, sew #8 to #9 along the long edge.
 My favorite 1/4" foot has a guide on the right-hand side (pink arrow)
Press the SA towards #8.
With RST sew the #10 to the opposite side of #9.
SA are pressed away from #10.
Use the chart below to check that your #8/#9/#10 strip set is the correct width. It should be the same width as your stitched Corner unit.
StripSet Widths | ||
|---|---|---|
| Finished Block Sizes | Stripset Width after stitching | SubCut Width |
| 5" | 2 1/2" | 1 1/2" |
| 7 1/2" | 3 1/2" | 2" |
| 10" | 4 1/2" | 2 1/2" |
| 12 1/2" | 5 1/2" | 3" |
Make any necessary adjustments.
At your cutting mat, straighten the short edge of the strip set with your rotary cutter and ruler.
 Line up the straight lines on your ruler with the seamlines in your stripset, then trim off just enough to get a perfectly straight edge.
Referring to the chart, find the SubCut Width that corresponds with your Finished Block Size. For our 10" sample block the this is 2-1/2" .
Cut four patches.
After cutting...
🧩 Assemble your Harmony Square quilt block
Lay out your sewn patches and cut center square to form the Harmony Square patchwork design.
The largest HSTs are in the outside corners. The largest patch in the sides is also on the outside edge.
With RST, sew the patches in each row together. If you've followed the highlighted pressing instructions, the seams all nest. Use pins to hold things in place if you need them—I sure do! :D
Press these seams toward the #8/#9/#10 sides in each row.
Stitch the rows together, again pinning as needed to hold the units in position.
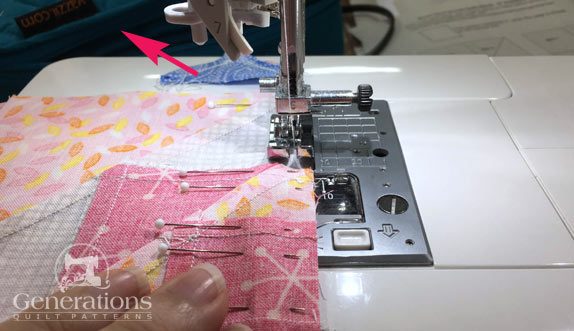 That's my favorite Yazzii bag behind my machine (pink arrow)
This is the finished Harmony Square quilt block, still hot from a final pressing.
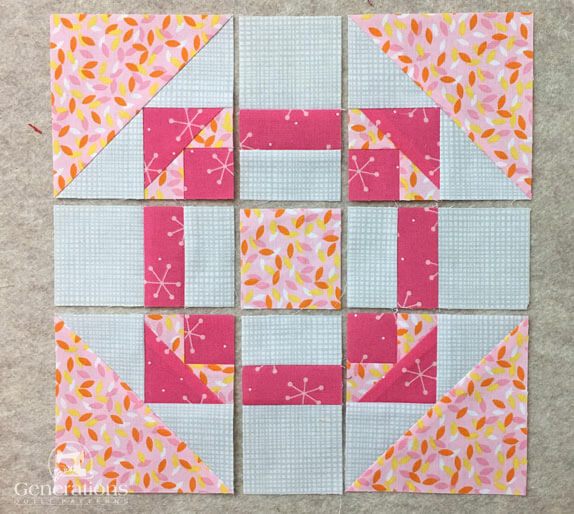
 Harmony Square in all its glory! It turned out so much better than I thought it would based on the drawing of the design. What do you think?
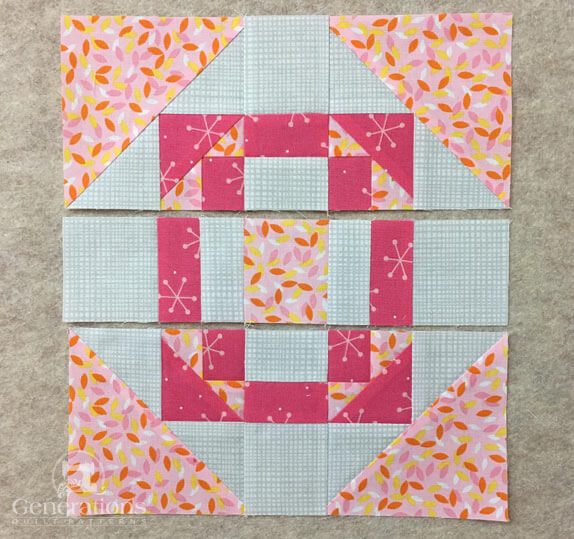
Here is our Harmony Square from the back. You can see how the SAs are all pressed away from the first #1 square, regardless of which technique you used.
Nice and neat, isn't it!

Seam-ingly Impossible? Not for You, Quilter! 💪🧵
Your Harmony Square is a ticket to patchwork paradise.
Whether you paper pieced or went old school, you've stitched up some serious zen. 🧘♀️🔲
Remember, it's not just about perfect points—it's about finding peace in your fabric chaos. Now go quilt the world a little calmer, one square at a time! 🌍🧵✌️
📌 Pin it to win it! 🏆
Keep this tutorial handy for when you need a dose of quilting zen.
It's cheaper than therapy and way more fun!

For even MORE blocks to make… 🧩🎨

...visit our Free Quilt Block Pattern Library, with over 260+ blocks to choose from in multiple sizes.
Free downloads are included in all sizes for any blocks require paper piecing patterns or templates.


Yummy fabrics
to drool over
Click any image below to see the full collection and find pricing and ordering information.


By Julie Baird
Copyright © 2008-2026 Generation Quilt Patterns, LLC
All Rights Reserved
Generations-quilt-patterns.com does not sell any personal information. (See Privacy Policy)