- Home
- Free Quilt Block Patterns
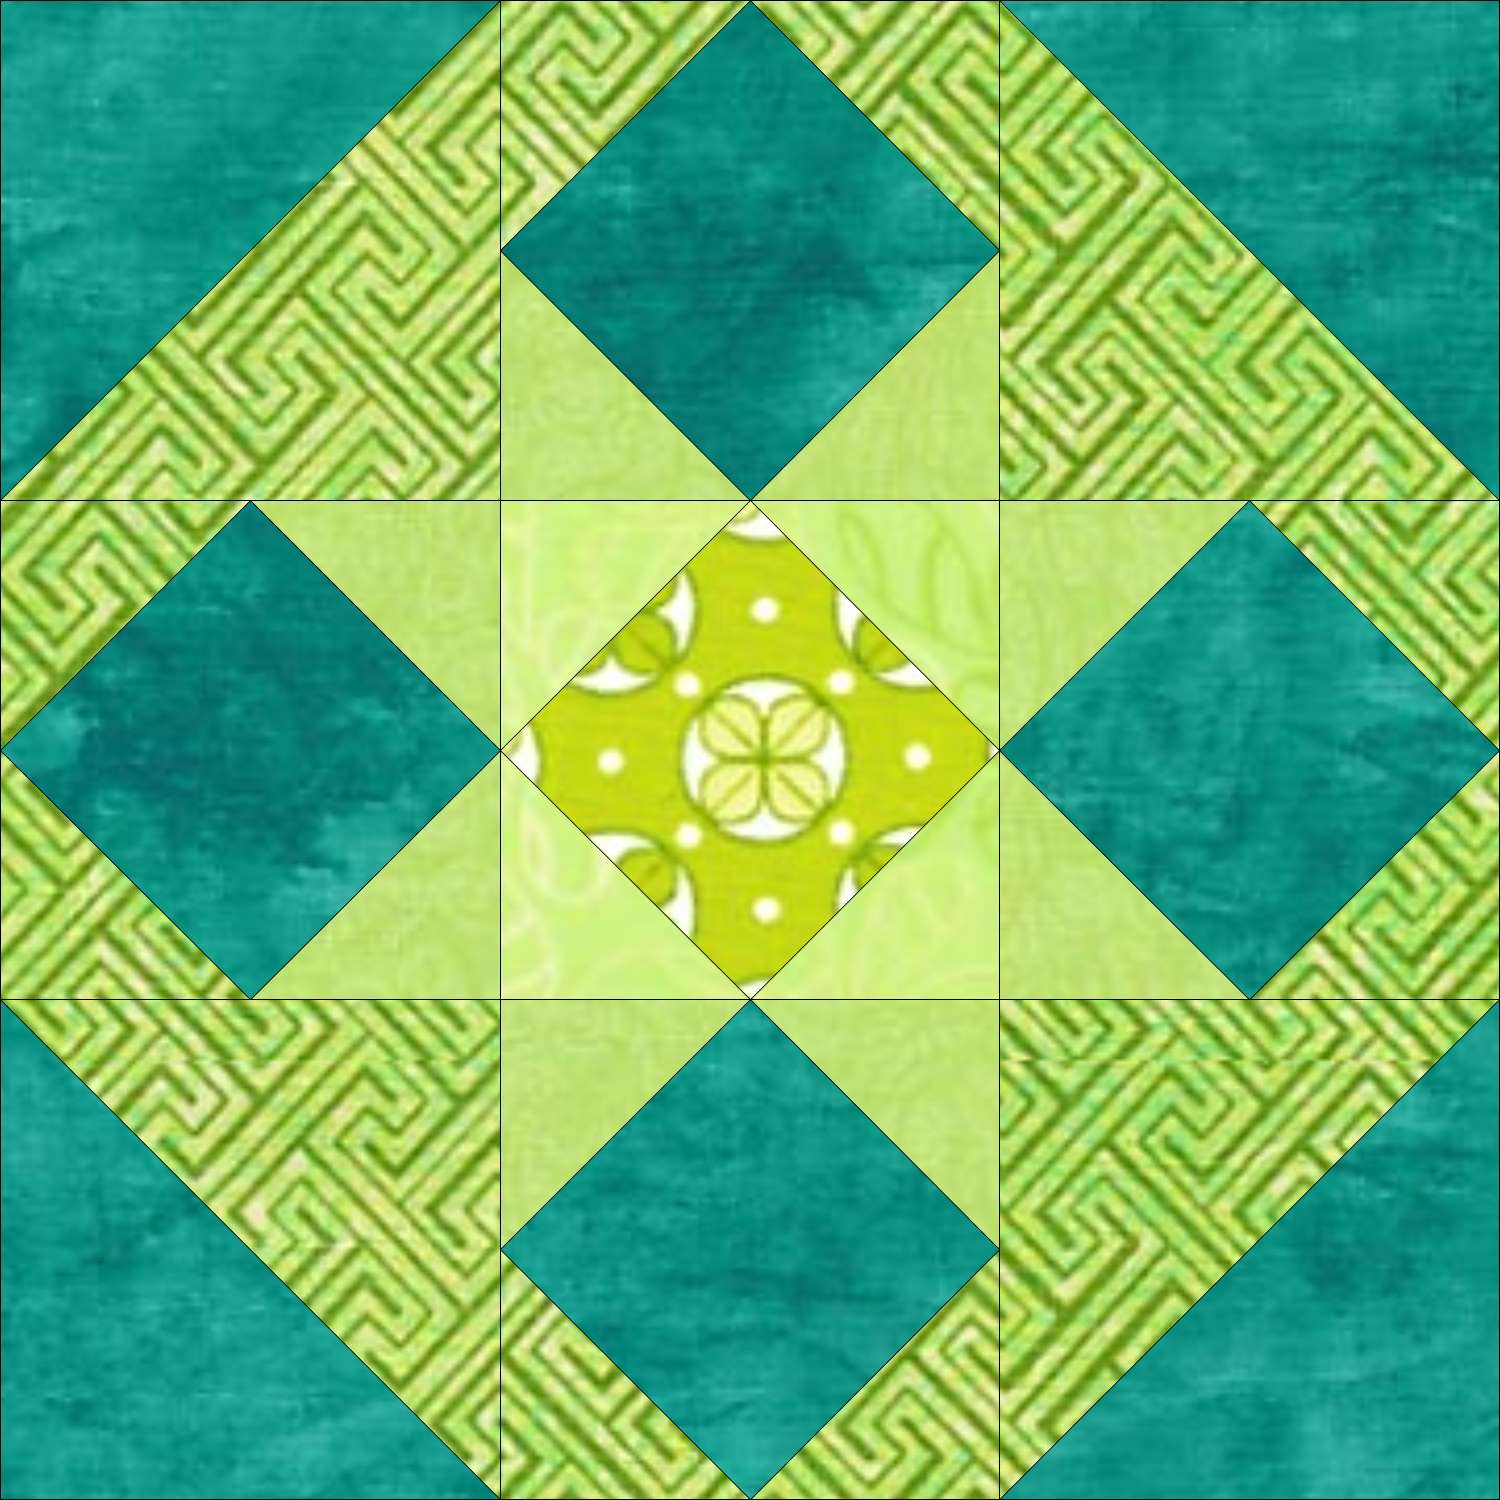
- Mrs Browns Choice Quilt Block
Mrs. Brown's Choice Quilt Block
From our Free Quilt Block Patterns Library
This post contains affiliate links, for which I receive compensation.
Skill Level: Beginner
Design type: Even 9-patch
Sample Size: 9" finished / 9½" unfinished
The Mrs. Brown's Choice quilt block, while complex looking, is made from basic quilting units: the half square triangle, a square in a square and a solid center patch.
It is constructed from two fabrics and classified as a 3x3 grid or nine patch design.

You may know it by an alternate name, either 'Saw Tooth Patchwork' or 'Another Sawtooth' are common.
On this page you'll find:
- Instructions for making this block
- Free downloads of the paper pieced units in the block
- A short video pairing this with an alternate block to create a stunning quilt.
- And finally, links to more blocks to make
Let's get started.
📋 General Instructions

These abbreviations are used in this tutorial:
- SA - seam allowance
- RST - right sides together
- HST - half square triangle
- SiaS - Square in a Square unit
Step 1: Cut the patches for a Mrs. Brown's Choice
 Mrs. Brown's Choice
Hand dyed fabrics are used in the sample block: a blue stripe and a mottled orange.
The stripe is cut so that all the stripes run in the same direction throughout the block.
The SiaS units are paper pieced in the example block for accuracy.
A folded corner method is also included should you prefer not to paper piece.
Center
- Orange; Cut one 3-1/2" x 3-1/2"
HST
- Blue Stripe: Cut two 3-7/8" x 3-7/8" squares**
- Orange: Cut two 3-7/8" x 3-7/8"**
**NOTE: I prefer to cut over-sized squares and then cut the triangles down to size after stitching. I cut these squares each 3/8" bigger or 4-1/4" square.
SiaS
Cutting instructions for both paper piecing and connector corner methods is listed below. Choose one or the other.
Paper Piecing Technique
- Orange: Cut one 2-5/8" x 2-5/8"
- Blue Stripe: Cut two 2-7/8" x2-7/8", subcut once on the diagonal
OR for...
Connector or Folded Corners Technique
- Orange: Cut one 3-1/2" x 3-1/2"
- Blue stripe: Cut four 2" x 2"

Step 2: Assemble the HST and SiaS
Half Square Triangles (HST
Make 4

Draw a line diagonally from corner to corner on one set of squares (I chose the blue ones).
With directional fabrics, like this stripe, if you want the design running all in the same direction, draw one line with the stripes vertical and one with them horizontal.

Now layer a marked blue square with an orange one, right sides together and stitch 1/4" inch away from the drawn line on both sides.
Helpful Hint
Once you've layered your squares, give them a quick press. This helps keep them from slipping while you sew.

Cut along the drawn line to create two units. Press flat to set the seams. Then press the unit open with the seam allowance towards the dark side (blue stripe).
Lay the 45° line of your ruler along the seam line and trim to size. This trim removes the dog ears, too.

Repeat with the other pair of squares to create a total of four 3-1/2" HST units.
SiaS

Make 4
You'll need the most current version of Adobe installed on your computer to download the pattern.
On the Adobe Print Menu page, under 'Page Size and Handling' set 'Custom Scale' to 100% before printing for accurate results. Click here to see what it looks like on the Print Menu page.
Click here for our free downloadable pattern for the 3" finished unit.
Use the links below, for instructions on how to make a SiaS unit:
Step 3: Assemble Mrs. Brown's Choice
Using the picture below as a guide, arrange the units into the Mrs. Brown's Choice design.
Note that the first and third row are exactly the same—just flipped.
Press the seam allowances away from the SiaS units in all the rows as indicated by the arrows.

Join the rows together. Press these two seams toward the center of the block.
And this is the finished Mrs. Brown's Choice quilt block...

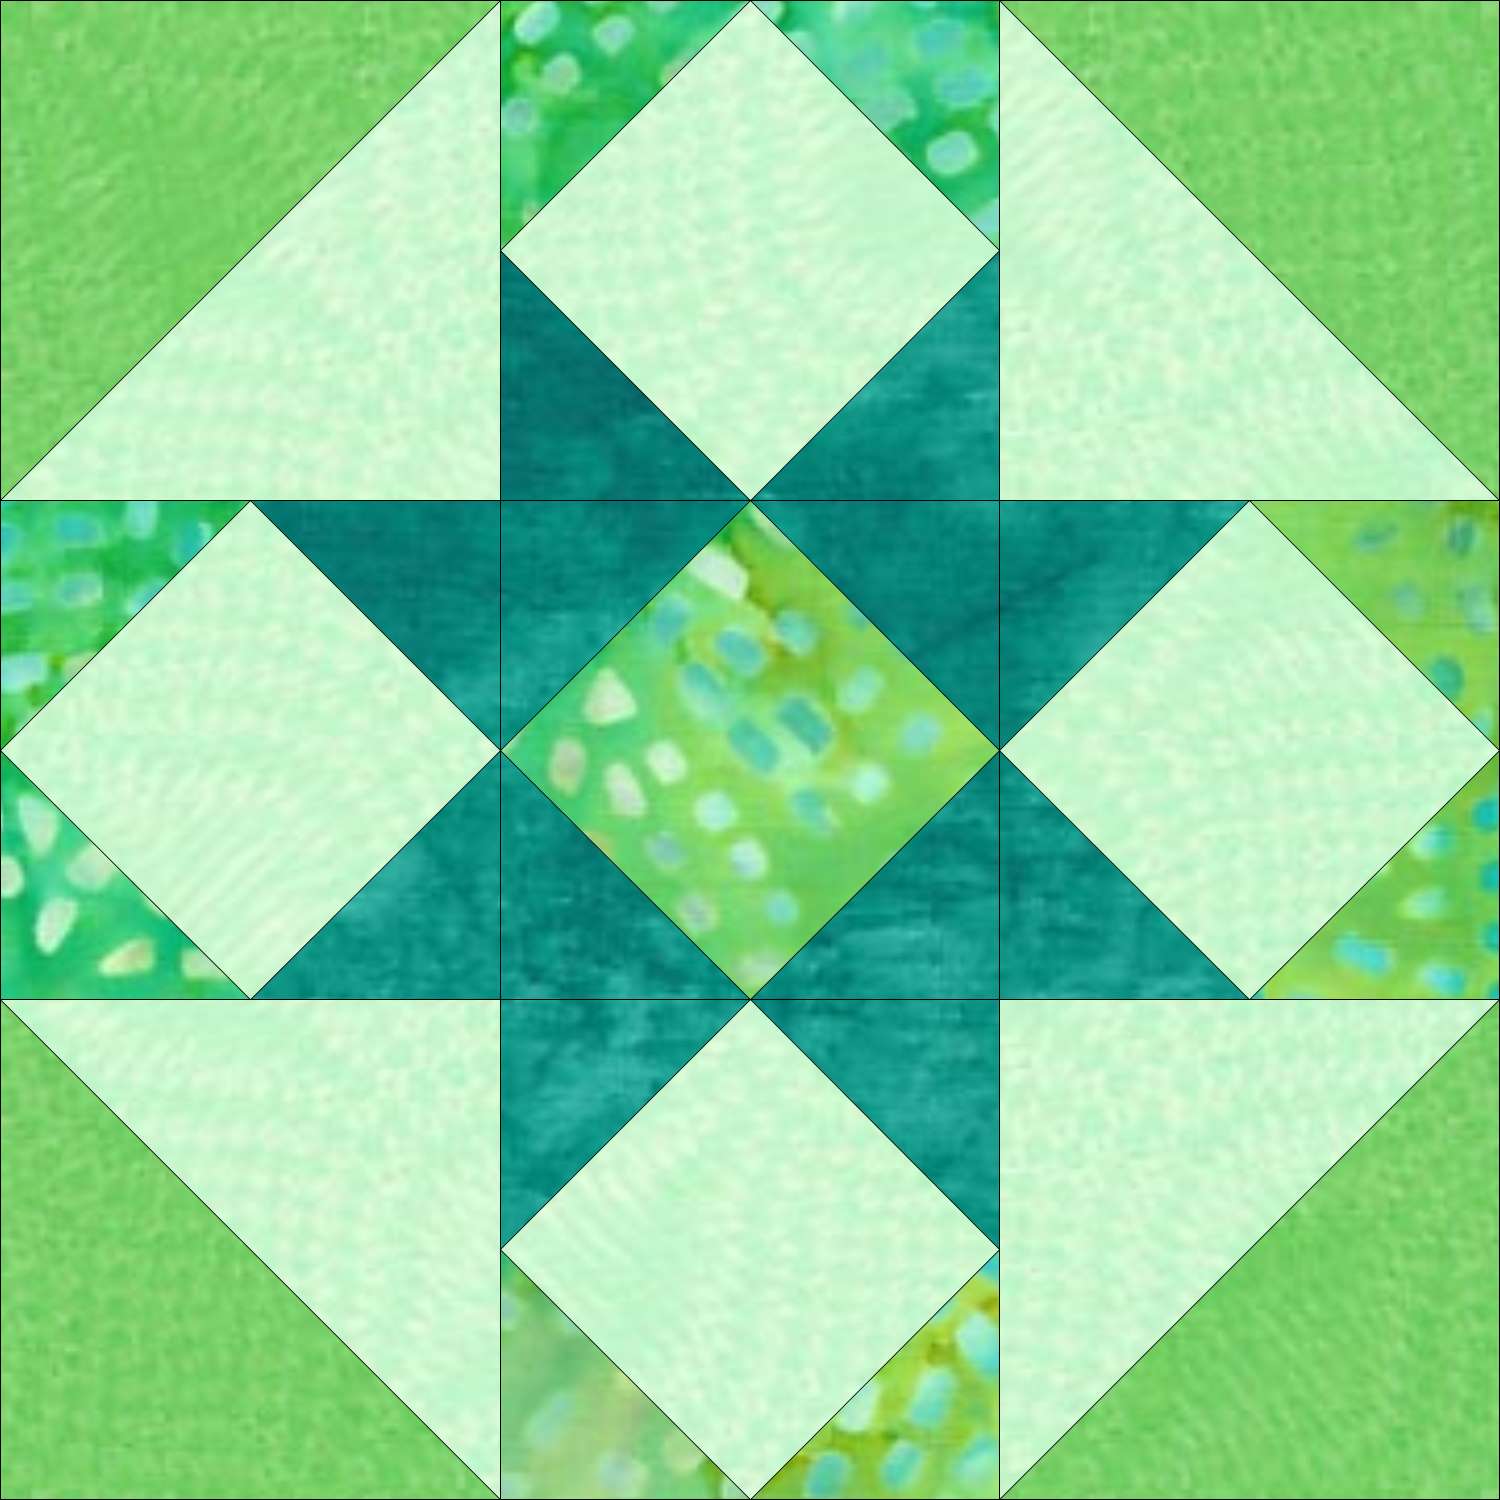
Variations on a Mrs. Brown's Choice pattern
Several others share the same basic construction as the Mrs. Brown's Choice quilt block—with slight changes to the units:

Five Spot
This three fabric quilt block design adds a square to each corner.

Cross and Chains
Four patches are added to the center of the diamond in a square unit. The squares radiate out from the center.
A scrappy version of this block is found in the Oh My Gosh quilt. In that quilt, the HSTs finish at 1½". (Not a typo! :D )

Richmond
In this final variation, we swap the medium for a dark in the four patch units and then rotate them a quarter turn so the four patches create a ring.
This variation is also known as: Aunt Vina's Favorite, Pin Wheel, Butterfly or Lucy's Four and Nine.
And now a little color play...
And finally, it's just plain fun to play with color placements to come up with your own version of the Mrs. Brown's Choice quilt block.
 |
 |
 |
Add some Pizazz!
In the short video below, I've paired this Mrs. Brown's Choice quilt block with a 54-40 or Fight block with spectacular results. Take a look!
Need another block choice?
Visit our Free Quilt Block Patterns Library to find more patchwork pretties to tempt you!
What about a different quilt block?
For a list of all the 260+ quilt block patterns on this site, start here.
If you know the name of the block, shorten your search by using these links:
Click here if you're looking for blocks with at least some paper piecing.
Click here if you're looking for the basic building blocks of quilting, i.e., Flying Geese, half square triangles, quarter square triangles, etc., along with several techniques to make each.
And finally, use these links to find blocks in these finished sizes:


By Julie Baird
Copyright © 2008-2026 Generation Quilt Patterns, LLC
All Rights Reserved
Generations-quilt-patterns.com does not sell any personal information. (See Privacy Policy)