- Home
- Quilt Design Inspiration
- Storm At Sea Quilt
Storm at Sea Quilt Pattern
Part 1: Block Basics
This post contains affiliate links, for which I receive compensation.
The Storm at Sea quilt pattern makes for an exciting quilt—full of movement—all due to the juxtaposition of square and rectangular blocks.
Your eyes try to tell you there's curved piecing, but there's not a curved seam in the quilt, not anywhere!
Simple enough for the confident beginning quilter. Just download our free paper piecing quilt block patterns. (The link is near the bottom of this page with a little printer by it.)
Feeling more adventurous?
Download coloring pages of straight and/or on point layouts of the quilt and design to your heart's content!
My Favorite Quilt Design Software
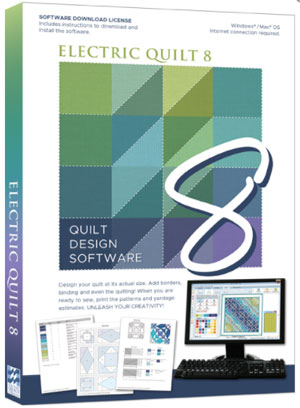
All the free patterns and block/quilt illustrations on this site were created in either EQ7 or EQ8—my favorite quilt design software.
This program makes it so easy to audition different
colors and values with just a few mouse clicks.
Rotate and flip the blocks with another series of clicks.
I can't imagine going back to graph paper and colored pencils.
Or worse yet—simply keeping my fingers crossed. Fabric is much too expensive!
The box contains a software download license—License ID and Password—and a booklet to get you through installation and get you started. There is no disk as in the past.
Download the software onto your computer from the EQ website using the ID and password as directed. At the time of download you can choose either PC or MAC.
I LOVE Electric Quilt!
I hope you do to.
The Storm at Sea Building Blocks
The Storm at Sea quilt block itself is composed of two separate block units, an Economy block (in two sizes) and a Diamond in a Rectangle. It is shown below in one of two ways, each drawn on a different grid.
We've kept the first illustrations simple by using just two colors. But as you'll see later, you needn't limit your design efforts to just two.
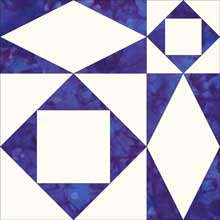 Block A: 3x3 grid
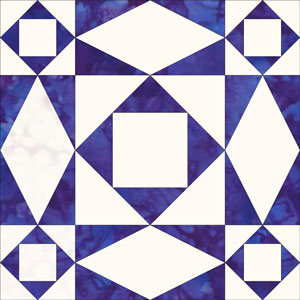 Block B: 4x4 grid
Storm at Sea Quilts made with Block A
This first quilt layout is a straight set using Block A. Note how the lines of the quilt pattern fool your eye into thinking there are pieced curves. Extra 'Diamond in a Rectangle' and 'Economy' quilt blocks are needed to complete the design.
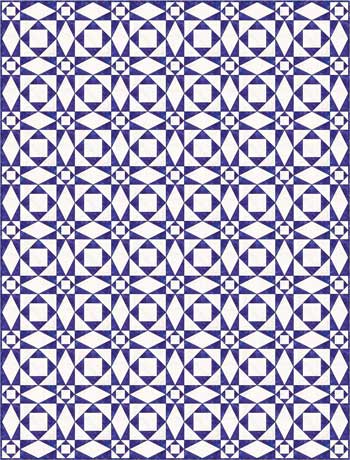 6 x 8 blocks
This next quilt is the same layout as the first, except that the
colors have been swapped—what was blue is now white and what was white
is blue.
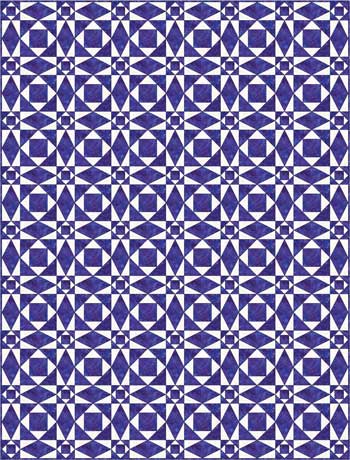 6 x 8 blocks
Now take our first coloring of Block A and set it in an on point quilt layout. The piecing immediately seems more complicated, the curved illusion more prominent, but it's still the same straight line seams in simple blocks.
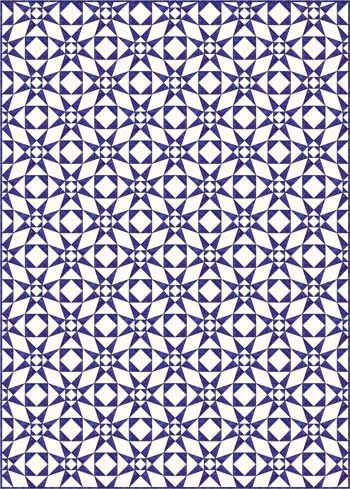 5 x 7 blocks
Storm at Sea Quilts made with Block B
As with Block A, this block also creates the illusion of curved pieced where none exists. The designs look more intricate than the previous quilts due to the additional pieces in each block.
Our first example is laid out in a straight set.
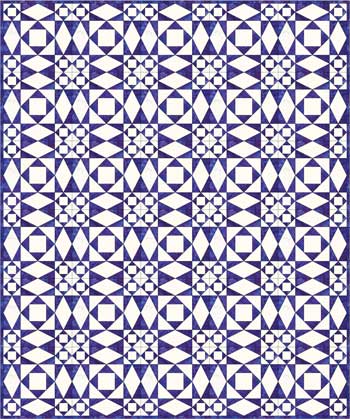 5 x 6 blocks
And now showing the same block, same setting with the two colors reversed. A simple change, quite different results.
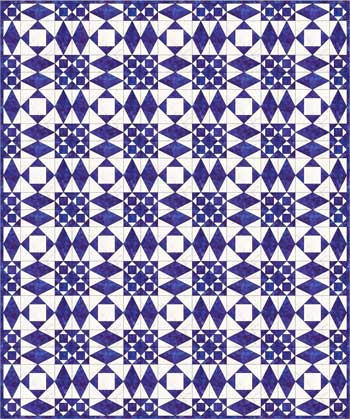 5 x 6 blocks
Finally showing our Block B set on point in the second block coloring.
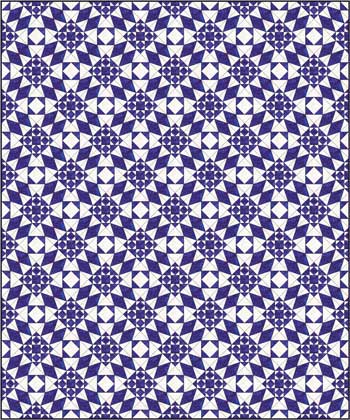 5 x 6 blocks
When set as a two-color quilt, the colors are placed exactly the same for all the Diamond in a Rectangle blocks. The same goes for the Economy blocks, regardless of which size it is. That's a nice simplification to the piecing.
Dial up the Drama!
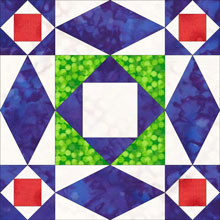 Storm at Sea quilt block
3 color
Now let's have some fun with the color.
We now add red and green to our previously colored blue and white Block B. The result is the block shown to the right.
The basic Diamond in a Rectangle and Economy quilt blocks are the same in every other way.
Now let's lay it out in straight rows...
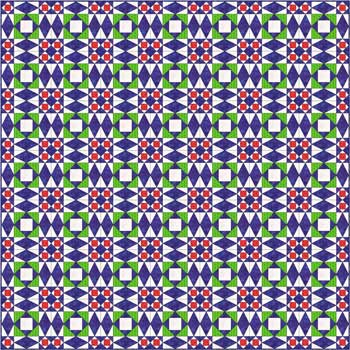 7 x 7 blocks
...and now set on point. Note we've reduced the number of rows and columns so that you can see the design better.
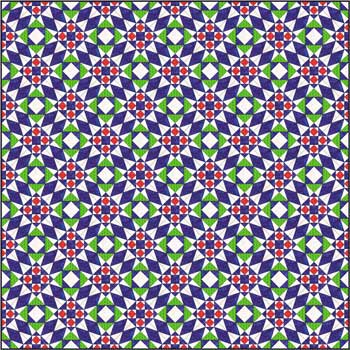 5 x 5
5 x 5The additional colors really change the 'feel' of the quilt. It almost looks like the knitting patterns called 'intarsia' or a woven tapestry.
And to think, all this is from simple paper pieced quilt blocks!
If you're ready for your Storm at Sea Quilt…
…we have several free goodies for planning and stitching your next Storm at Sea quilt.
Storm at Sea paper piecing blocks
You'll need the most current version of Adobe installed on your computer to download the pattern.
On the Adobe Print Menu page, under 'Page Size and Handling' set 'Custom Scale' to 100% before printing for accurate results. Click here to see what it looks like on the Print Menu page.
Use the Finished Size printed in the seam allowance to confirm the blocks printed correctly. Measure the solid line surrounding the block. That is the Finished Size.
Click here to download your own copies to stitch.
For quilts based on Block A, you need to print one set of these two pages for each block in your quilt. To complete the quilt, print an extra 'Page 2 of 2'. You will end up with one extra 3"x6" Diamond in a Rectangle block pattern.
For quilts based on Block B, print one copy of 'Page 1 of 2' and 2 copies of 'Page 2 of 2' for each block
📢Updated Tutorial Note: Since first writing the page over a dozen years ago, I've now written quilt block tutorials for bother the Economy and Diamond in a Rectangle blocks.
Click on those underlined block names to go to those tutorials where you'll find more block sizes, a coloring/fabric planning page, cutting chart to download and step-by-step instructions to make each.
Storm at Sea Coloring Pages
To help design your Storm at Sea Quilt, print one, some or all of our coloring pages.
For even MORE blocks to make… 🧩🎨

...visit our Free Quilt Block Pattern Library, with over 260+ blocks to choose from in multiple sizes.
Free downloads are included in all sizes for any blocks require paper piecing patterns or templates.
- Home
- Quilt Design Inspiration
- Storm At Sea Quilt
