Essential Paper Piecing Skills for Beginning Quilters
Part 2: Sewing machine setup and fabric prep
Practical Paper Piecing Techniques for the Savvy Quilter!
This post contains affiliate links, for which I receive compensation.
Getting ready to paper piece is pretty much like setting up for traditional piecing at your sewing machine—with a few simple exceptions.
Prewashing, checking for bleeding fabric and starching are all customizable to your personal preferences—time and willingness.
You probably have everything you need to setup your sewing machine with one possible exception—an open toe presser foot that can make all the difference in the world to the accuracy of your blocks.
Nevertheless, having everything 'just right' ensures the best result for your time investment.
Let's begin.
Fabric Preparation
Since you're stitching onto a foundation, almost any fabric can be used in paper piecing.
The thing to remember is cotton is pressed with a particularly hot iron—mine's usually set at nuclear fusion levels.
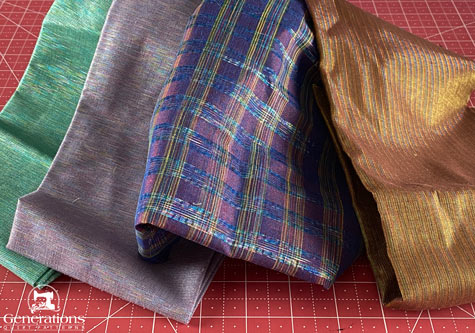 These cotton metallics are just so yummy, but take a bit of extra care in your paper piecing.
Lamé and other glitzy fabrics can melt or 'warp' at those temperatures. They may also have different washing instructions.
Even in these 'cotton metallics' above, though mostly cotton, the metallic threads are sensitive to heat and must be pressed at a lower temperature.
However, they add instant pizzazz with a bit of gentle care.
Use my 'secret' pressing technique to help you create wonderfully flat blocks even at reduced iron temperatures.
As long as you're mindful of the differences and the fabrics are about the same thickness as your quilting cotton, you'll be just fine.
Prewashing and bleeding fabrics
There's no special rule for fabric preparation for paper piecing apart from pressing your fabric first—and that's pretty standard—to remove any wrinkles or creases.
Beautifully pressed fabrics means no tuck accidentally sewn into the middle of a patch or wobbly cut patches.
If you prewash (I do!—to learn why, click here), then prewash.
If you don't, then don't.
Remember that prewashing removes the shrinkage and cleans the fabric. It does not guarantee it won't bleed.
To ensure that you don't have a bleeder, test your fabrics for bleeding before you cut them.
Learn how to easily check for bleeders, if you're unfamiliar with the process.
It's pretty simple. Doesn't take a lot of time. And averts the heartache when a fabric bleeds in your finished quilt.
If you do none of the above, then just be prepared to use Color Catchers when you wash your quilts. :)
Starching quilt fabric
NOTE: Since originally writing this page, StaFlo has been discontinued. I'm currently making my own liquid starch with Argo and water or using the canned Faultless, both shown below.
Personally, I like a heavily starched fabric for paper piecing.
It's much easier to finger press and the press 'holds' much better. (There'll be more on finger pressing later in this these articles.)
Because starched fabric is stiff, there's less tendency for the patch to fold back on itself when it's stitched to the foundation—that means less ripping.
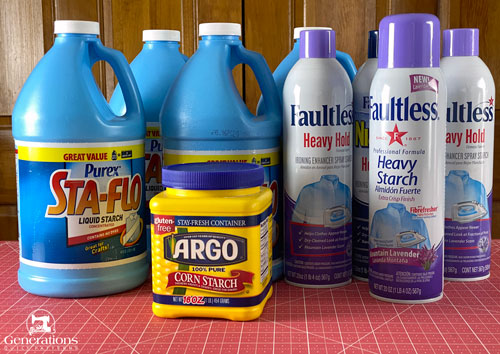 A starch stash...who knew it was a thing???
A mixture of equal parts Liquid Starch Concentrate to water works beautifully.
I prefer it over Best Press. Because if you mix your own, it's a simple thing to vary the 1:1 ratio to make your fabric more or less stiff. It's also cheaper. :)
Yes, I do resort to a heavy spray starch from a can, but due to the cost, usually use it for small pieces of fabric that didn't make it to the soak in my homemade 1:1 mixture.
You're in charge.
Choose which, if any, product works best for you.
Starched fabric is easier to cut (it doesn't shift as much) and stitches up more accurately (less tendency to fold over on itself), in my humble opinion.
An added benefit is the starch helps hold and stabilize any bias edges—preventing them from stretching out of shape as you sew and work with the patches.
Just remember, if you decide to use starch, plan to wash your finished quilt at the end to remove it.
Click here to learn more about starching your fabric.
Sewing Machine Setup
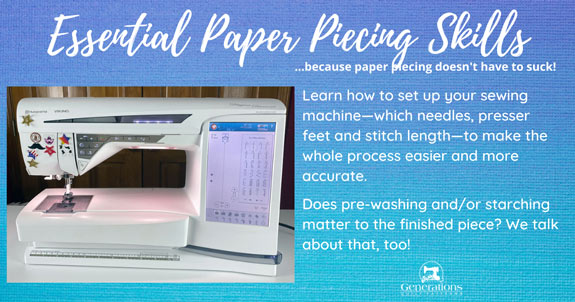
There are a few simple adjustments to make to your sewing machine when you plan to paper piece.
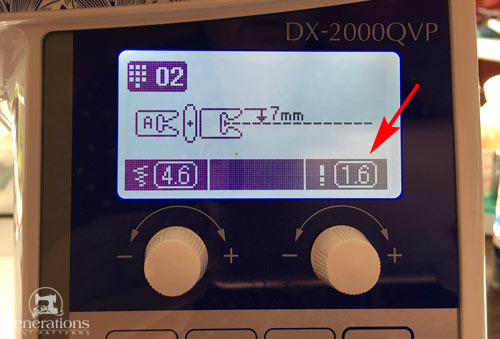 Paper piecing requires a shorter stitch length
Shorten your stitch length to 1.3-1.6mm or 16-20 stitches per inch.
This puts more holes in the paper, perforating it to make it easier to remove.
Learn more about stitch length here. There's printable reference charts for you, too!
Increase your top or needle thread tension just a wee bit
Just by 0.1 to 0.2—stitch a bit on a sample using the fabrics and paper in your project.
Check and adjust as needed for balanced tension. When it's perfect, you won't see any bobbin thread on the top side nor needle thread on the bottom side.
A balanced tension strengthens your stitches when you remove the paper.
Consider using a 90/14 needle if you are having difficulty removing the paper.
Many quilters recommend a large needle size., but for my own work, I don't use a larger one.
I find that when I use Carol Doak's Foundation Paper (it's about the same weight as newsprint) the smaller stitch length and my everyday Schmetz Microtex Sharp 80/12 needle (or even the 70/10 Microtex Sharp that's usually installed on my machine) works just fine.
If you are using a thicker paper (like from a copier), definitely use the larger needle size. That paper is heavier. It takes more effort to remove it after sewing.
If you are having problems removing the paper—any paper—move to the larger needle size.
Again, what works best for YOU is what is best for YOU!
Start a new project with a new needle.
It's a good habit to build. (The extra layer of paper in the technique has a dulling effect over time.)
Needles, while they are the cheapest part of your sewing machine, are the cause of so many of its problems.
If you have an open toe appliqué foot, install it.
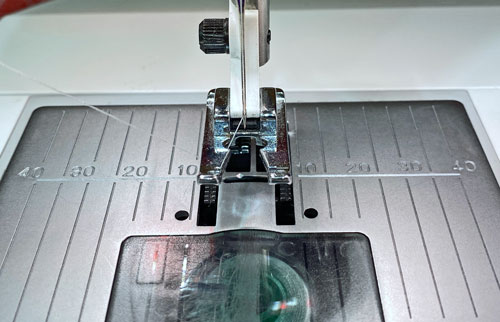 Using an open toe applique foot makes it easiest to see the stitching line—there's nothing between your eyes and the line.
It provides an unobstructed view of your needle, so you can easily hit the line as you stitch. (You'll see it in use in all the free paper pieced quilt block tutorials on this website.)
If you don't have an open toe foot, try a clear plastic one if one came with your machine.
The easier it is to see the needle, the less un-sewing you'll have to do.
And finally, if you can...
Reduce your sewing machine's speed.
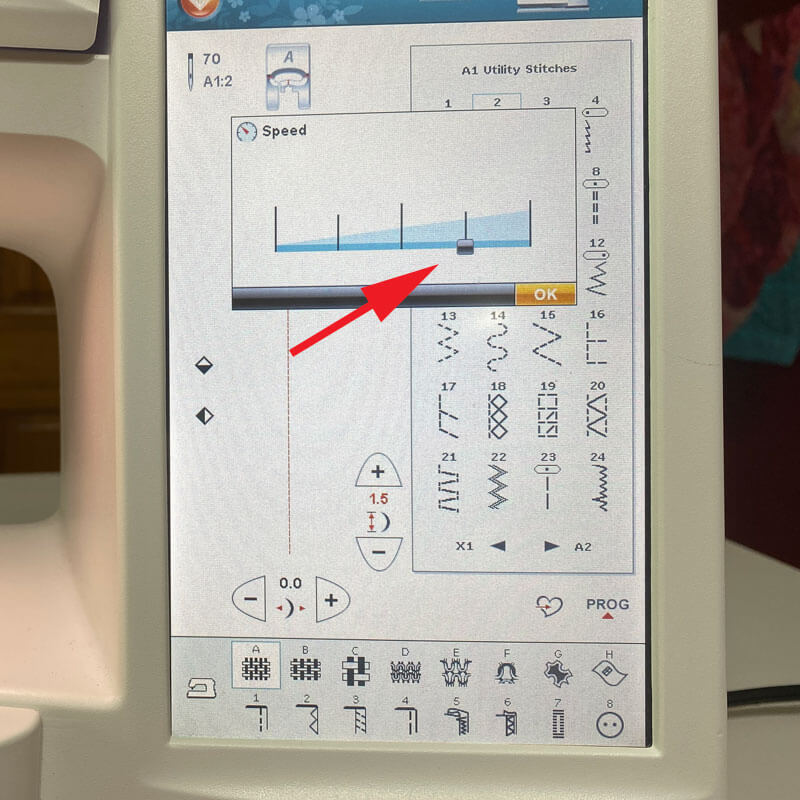 Setting a slower maximum speed is helpful. Many machines have this labeled as a tortoise and a hare. (Silly machine manufacturers!)
There is ZERO benefit to stitching at full speed for paper piecing.
NONE!
NADDA!!
ZIPPO!!!
The line is there to stitch on. If you're missing it, you're sewing too fast.
And you're missing the biggest benefit of the technique—accuracy.
It's so much faster to sew slower—once—and not have to rip out your patches and sew again.
Return to the Essential Paper Piecing Skills for Beginning Quilters Table of Contents to choose your next topic.
OR
For blocks to try paper piecing, check out for Free Paper Piecing Block Library where each design is at least partially paper pieced.
